
Hood emblem: how to remove the nuts/studs?
 05-20-2012, 04:53 PM
#1
Rennlist Member
Thread Starter
Have done a search on this and was not (yet) able to find anybody having my current problem. Hopefully some Rennlister's can help me with "what next"/guidance/tips, and perhaps it will make a few of you smile and/or laugh while reading this - then this thread served it's purpose already! 
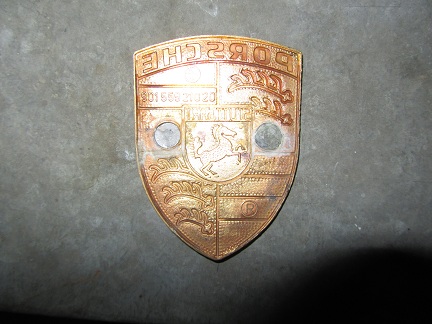
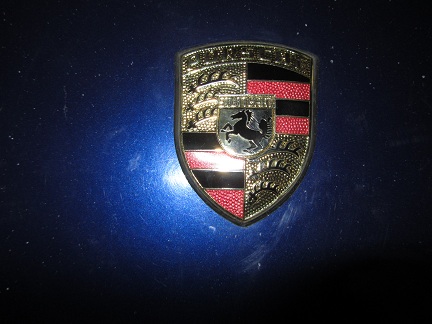
Decided to change my hood emblem this evening, as the original one has some cracks on the red & black parts:

So I read up on Rennlist about how to soak the new gasket in warm water so to be able to stretch it around the new emblem, as the new emblem gasket is on the small side which is also the case with mine - all good so far.
So I try to get the nuts off from underneath, using an 8mm deep socket:
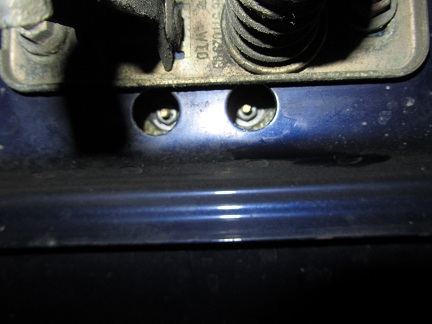
Mmm...those (some sort of plastic ?) nuts just turn and turn, and will not move up or down. Tried a lot of my other tools: nada. OK: time to pry the emblem of carefully from above, so I go to work according...and suddenly SNAP and SNAP:
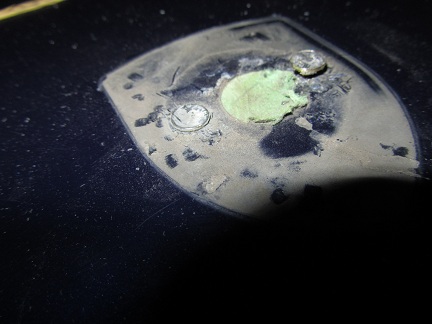
Yep: my old hood emblem is now removed alright and NO scratches on the paint. But the nuts and studs are still there!
After a bit of very carefull prying with a very small screwdriver, both studs are finally turning also when turning the nuts from underneath. But no way are either coming out...
What should I do next so to get these two (2) old hood emblem studs and nuts removed, and where did I go wrong (so that other Rennlister's who want to replace their hood emblem will be spared this embarresment )?
)?
Decided to change my hood emblem this evening, as the original one has some cracks on the red & black parts:
So I read up on Rennlist about how to soak the new gasket in warm water so to be able to stretch it around the new emblem, as the new emblem gasket is on the small side which is also the case with mine - all good so far.
So I try to get the nuts off from underneath, using an 8mm deep socket:
Mmm...those (some sort of plastic ?) nuts just turn and turn, and will not move up or down. Tried a lot of my other tools: nada. OK: time to pry the emblem of carefully from above, so I go to work according...and suddenly SNAP and SNAP:
Yep: my old hood emblem is now removed alright and NO scratches on the paint. But the nuts and studs are still there!
After a bit of very carefull prying with a very small screwdriver, both studs are finally turning also when turning the nuts from underneath. But no way are either coming out...
What should I do next so to get these two (2) old hood emblem studs and nuts removed, and where did I go wrong (so that other Rennlister's who want to replace their hood emblem will be spared this embarresment
)?
 05-20-2012, 05:01 PM
#2
Drifting
If I remember right the studs are not threaded. The nuts cut as they turn on. I would grab the stud head with a pair of vise grips, pull as you turn the nut. It should come off. Them breaking off like yours is common.
The real fun starts when you try to reinstall with a new seal. I trimmed mine more than stock to make it more ply able. I also let it sit in HOT water for awhile before install.
The real fun starts when you try to reinstall with a new seal. I trimmed mine more than stock to make it more ply able. I also let it sit in HOT water for awhile before install.
05-20-2012, 05:19 PM
#3
Rennlist Member
Thread Starter
Hi Dean,
Thanks for your immediate reply, I'll try some vice grips on the studs (during tomorrow, it's getting late here in Finland) and see how that goes and report back.
And I'm looking forward wresting with the new seal, because that means that the old studs & nuts are out then.
By the way: great restore and amazing paint job you did on your car, I have read that thread from A-Z - keep it up!
If I remember right the studs are not threaded. The nuts cut as they turn on. I would grab the stud head with a pair of vise grips, pull as you turn the nut. It should come off. Them breaking off like yours is common.
The real fun starts when you try to reinstall with a new seal. I trimmed mine more than stock to make it more ply able. I also let it sit in HOT water for awhile before install.
The real fun starts when you try to reinstall with a new seal. I trimmed mine more than stock to make it more ply able. I also let it sit in HOT water for awhile before install.
05-21-2012, 04:36 PM
#4
Rennlist Member
Thread Starter
Followed Dean's advise and got to work with my vice grip, and a piece of very thick carton around it so to make sure no accidental paint scratches could happen (and yes: only for this photo I let go of the vice grip after making sure it was as tight as it could possible be. No hood was hurt in making this photo  ):
):
And it works: by turning the nut from underneath and pulling the vice grip the nut was slowly and surely getting off:
Right one done:

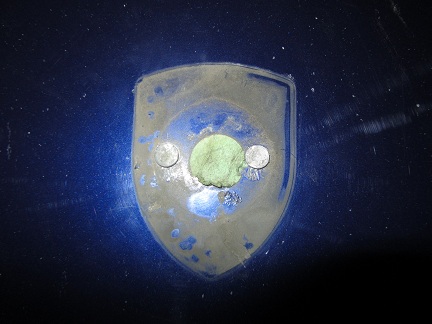
Same procedure on the left hand side, and done too (the green round "thing" is a sticker, no idea why that was there as all paint was fine underneath):
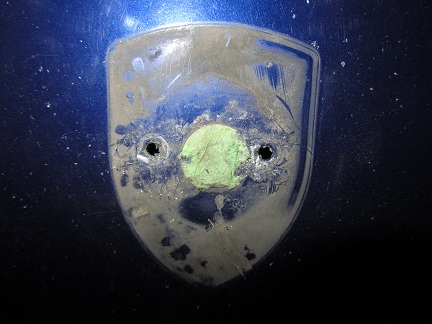
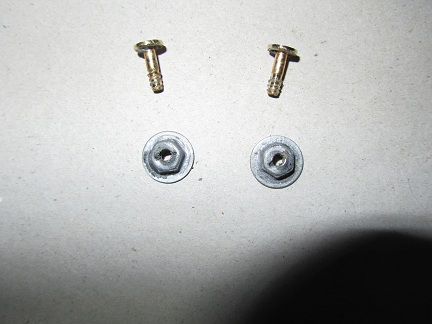
And yes: those are indeed self cutting nuts:
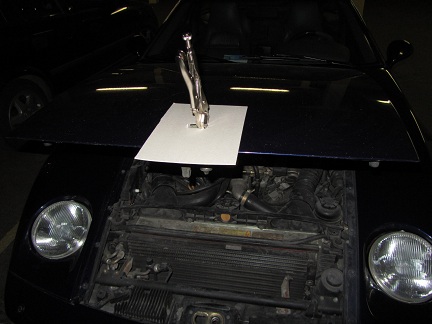
And finally followed other Rennlister's earlier instructions as per this thread: https://rennlist.com/forums/928-foru...ood-badge.html as per Mrmerlin and 77tony advices (soak the gasket in hot water for 5 minutes and use a wooden toothpick to stretch the warm rubber around the badge) and done:
So all in all rather easy once you know how, don't rush however and do be patience with that gasket. Thanks a lot to Dean, Mrmerlin and 77tony: another job done!
):And it works: by turning the nut from underneath and pulling the vice grip the nut was slowly and surely getting off:
Right one done:
Same procedure on the left hand side, and done too (the green round "thing" is a sticker, no idea why that was there as all paint was fine underneath):
And yes: those are indeed self cutting nuts:
And finally followed other Rennlister's earlier instructions as per this thread: https://rennlist.com/forums/928-foru...ood-badge.html as per Mrmerlin and 77tony advices (soak the gasket in hot water for 5 minutes and use a wooden toothpick to stretch the warm rubber around the badge) and done:
So all in all rather easy once you know how, don't rush however and do be patience with that gasket. Thanks a lot to Dean, Mrmerlin and 77tony: another job done!