
4 Speed B3 piston and disks refresh-need info
 04-12-2012, 11:12 PM
#1
Rennlist Member
Thread Starter
Well, after getting the fluid pressures right with a new modulator my B3 clutches finally gave out. I have had intermittent slip and late engagement of R for 6 months or so. I was planning to start a TT/TC and rear suspension refresh next month anyway so the timing couldn't be better.
I have been reading up on the B3 piston and disks and am wondering:
a) does the B1 piston have to come out to remove the B1 band or will removing the B1 pressure unit under the protection switch allow the B1 band to come out of the case?
b) does the valve body have to come out to free up the B1 band/piston/pressure unit?
I hope the procedure is basically to remove the B1 pressure unit, remove the primary pump/B3 piston assembly, remove the B1 band and K1 clutch, R&R the B3 steels and disks, measure and adjust the B3 piston-B3 disk clearance, re-install the B1 band/pressure unit/K1 clutch then install the primary pump/B3 piston assembly after r&r of all the seals. If it's much more complex than that I'll either look for a shop skilled with 722.3 transmissions to do the work or get Steve C. to rebuild this unit.
Thanks
Mike
Last edited by ammonman; 07-09-2012 at 09:04 AM.
 04-13-2012, 02:46 AM
#2
Former Sponsor

Well, after getting the fluid pressures right with a new modulator my B3 clutches finally gave out. I have had intermittent slip and late engagement of R for 6 months or so. I was planning to start a TT/TC and rear suspension refresh next month anyway so the timing couldn't be better.
I have been reading up on the B3 piston and disks and am wondering:
a) does the B1 piston have to come out to remove the B1 band or will removing the B1 pressure unit under the protection switch allow the B1 band to come out of the case?
b) does the valve body have to come out to free up the B1 band/piston/pressure unit?
I hope the procedure is basically to remove the B1 pressure unit, remove the primary pump/B3 piston assembly, remove the B1 band and K1 clutch, R&R the B3 steels and disks, measure and adjust the B3 piston-B3 disk clearance, re-install the B1 band/pressure unit/K1 clutch then install the primary pump/B3 piston assembly after r&r of all the seals. If it's much more complex than that I'll either look for a shop skilled with 722.3 transmissions to do the work or get Steve C. to rebuild this unit.
Thanks
Mike
I have been reading up on the B3 piston and disks and am wondering:
a) does the B1 piston have to come out to remove the B1 band or will removing the B1 pressure unit under the protection switch allow the B1 band to come out of the case?
b) does the valve body have to come out to free up the B1 band/piston/pressure unit?
I hope the procedure is basically to remove the B1 pressure unit, remove the primary pump/B3 piston assembly, remove the B1 band and K1 clutch, R&R the B3 steels and disks, measure and adjust the B3 piston-B3 disk clearance, re-install the B1 band/pressure unit/K1 clutch then install the primary pump/B3 piston assembly after r&r of all the seals. If it's much more complex than that I'll either look for a shop skilled with 722.3 transmissions to do the work or get Steve C. to rebuild this unit.
Thanks
Mike
I don't think that you need to remove the valve body to get the B1 band out of the case...although I've never tried to do this.
I'm not sure why you are concerned about removing the B1 piston or the valve body....those things are certainly not the most "technical" part of this job.
04-13-2012, 05:13 AM
#3
Instructor

Join Date: Jun 2010
Location: Leeuwarden,Netherlands
Posts: 215
Likes: 0
Received 0 Likes
on
0 Posts
I think it can be done removing de B1 band without removing the piston
I think i did it. Take a look at the picture. You can see the brake band guide.
The B1 piston has a lot of spring force.
I think i did it. Take a look at the picture. You can see the brake band guide.
The B1 piston has a lot of spring force.
04-13-2012, 07:31 AM
#5
Rennlist Member
Thread Starter
Thanks for the feedback guys. Not concerned about removing either part if it is necessary for the job, just looking for clear understanding of what's involved. Do all the relevant clearances need reset after installation of the new wear parts or just checked and verified in most cases? I only consider farming the work out for the sake of speed. Having the necessary shims/pins/etc. in hand to adjust the clearances and such would allow the unit to get closed up much quicker. On the other hand, I will have plenty to keep me busy while I wait for the correct parts.
Mike
Mike
05-19-2012, 07:17 PM
#6
Rennlist Member
Thread Starter
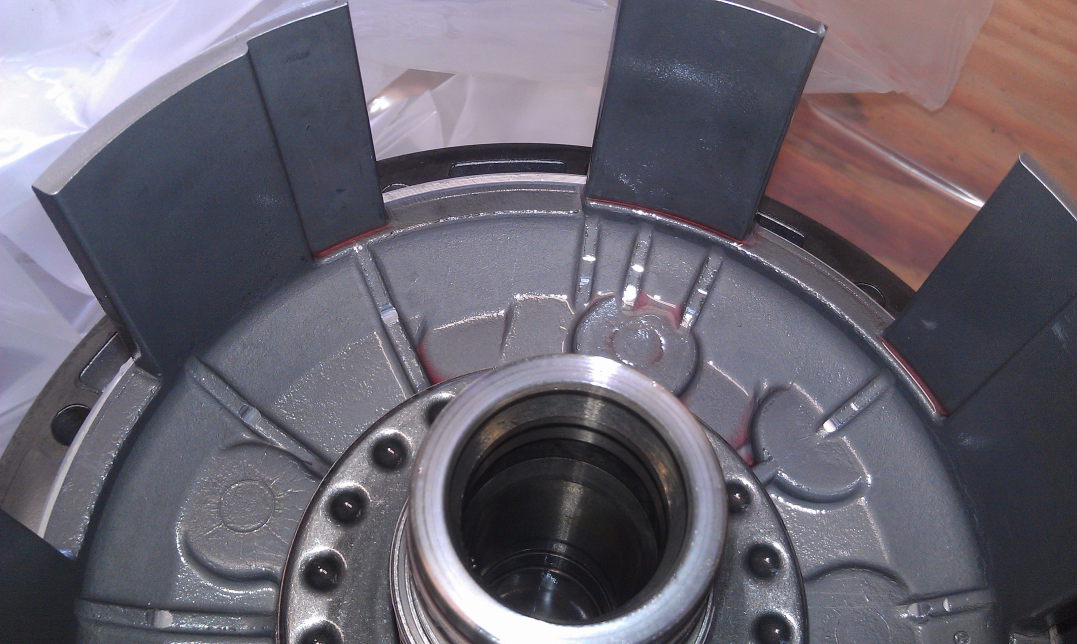
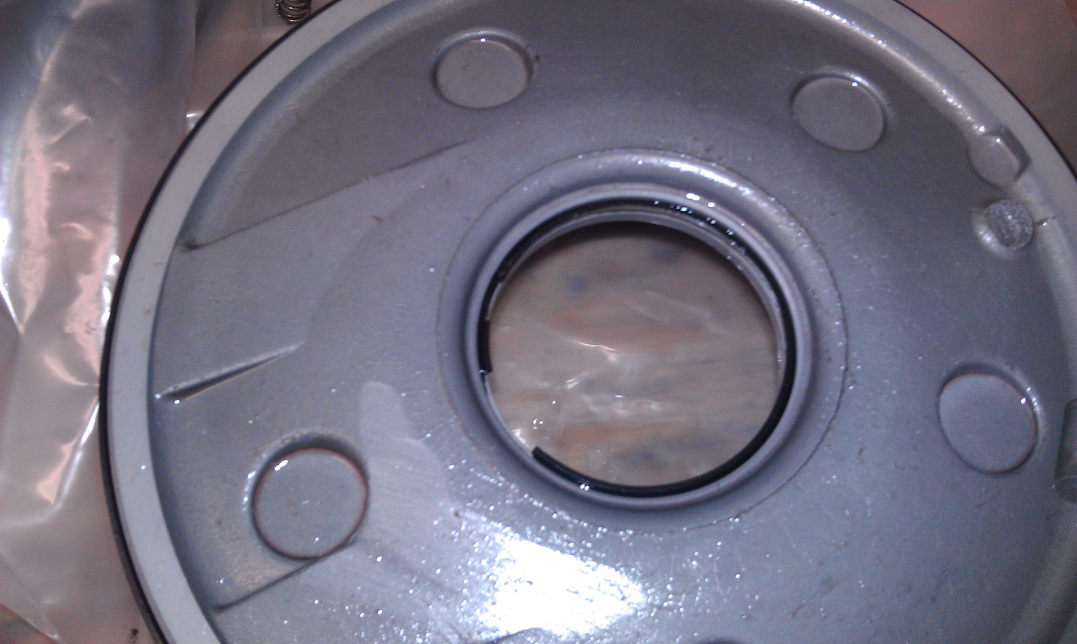
I did the dis-assembly of my trans today. I didn't find any metal shavings in the pan or anywhere in the internals. The B3 frictions are definitely worn out as they measured .90 to .93 mm. New spec is 2.1mm. You can see the classic B3 wear marks in the pictures.

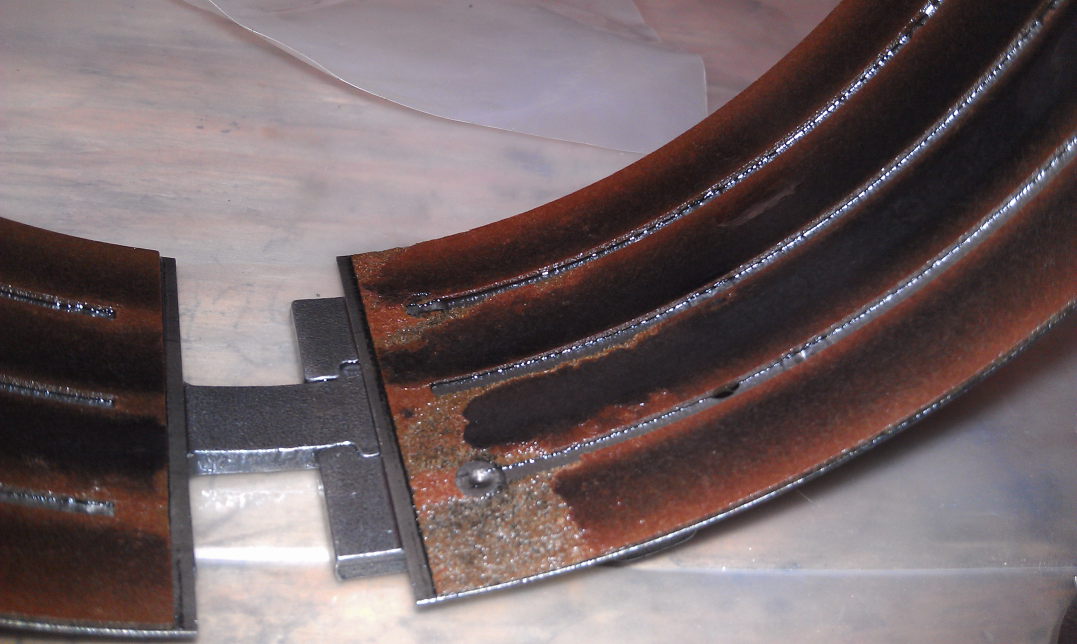
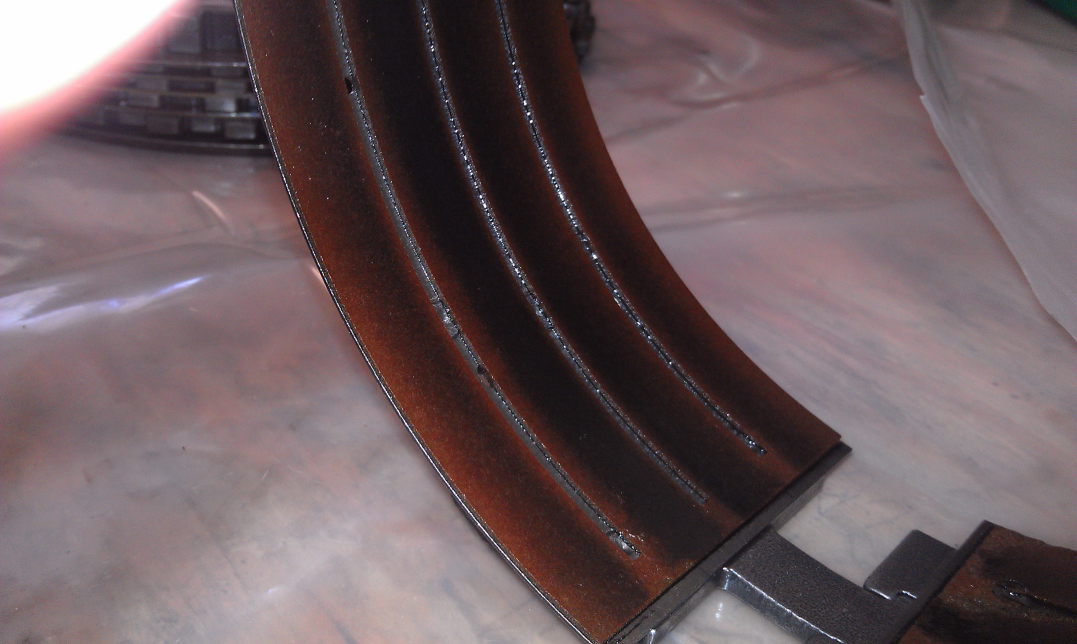
The B1 band has some wear on the reaction piston side but no cracks and the rest of the band looks fine. Opinions on replacement?
It appears the B2 piston has already been updated to the newer unit. The guide sleeve behind the lip seal in the trans is the plastic version.
Now for the bonehead move of the day. When I was taking the B1 piston out my rigged compression tool slipped and everything came flying out. Nothing broke but I only found two shims for the B1 piston plunger.
Guess I'm gonna have to build a better compression tool and buy a new cover that i can turn in to the B1 Band clearance checking/setting tool. If anyone has a B1 piston cover they care to donate I'll turn it into the tool and make it freely available to the community. Pelican lists the cover for $25 plus shipping if no one has a spare laying around. I have plenty of 1.0 mm pitch bolts to make the tool with.
Mike
05-20-2012, 01:46 AM
#7
Three Wheelin'
Join Date: Sep 2003
Location: SF Bay Area
Posts: 1,526
Likes: 0
Received 0 Likes
on
0 Posts
I have been through this but am more confused than before I began. I guess I should have learned all the terms while I was doing the rebuild. As far as the compression tool I just use a building clamp. For assembling the pump I made a special tool out of PVC and a threaded rod.
With 100K on the trans I did not find any excess wear on the steels and even the clutches were in spec.
There are a lot of o-rings in the rebuild kit. I could not find a Porsche 928 kit even though those advertized said for the 928 they were all Mercedes kits.
The failure in my trans was the O-ring on the main pump. It started to leak in a very few miles and totally disabled the transmission in a few miles. When I took the pump apart it was scored - I assume from the lack of oil pressure.
To use all the seals in the kit I had to take apart most all of the transmission. Reassembly was a bit tricky to get the tolerances correct. In the end I figured it out and used the same shims and got the correct offset.
Good luck
Trending Topics
05-20-2012, 03:07 AM
#8
Former Sponsor
The "B3" discs (reverse) are always the first to go bad. The 928 version of this transmission hits reverse really hard...and is always worse with the new design discs. I make a restrictor, so that reverse doesn't hit so hard (Mercedes used to make a restrictor for some of the versions of this transmission, but it is NLA....apparently for quite some time....I've never actually seen one.) Obvious signs that these clutches hit hard can usually be found on the big "spacer" ring that the B3 piston actually contacts. It's really supposed to be flat....not the "C" shape that they almost always are.
You should carefully check the spring locator/stop piece on the B3 piston. When the discs wear out enough for the piston to travel far enough to have wear on the piston, the little return springs are jambed into coil bind and try to push that locator/stop over the top of the snap ring. That locator/stop piece usually will have the area where the circlip sits "mushroomed" out and can/will "blow" right over the top of the circlip. That makes a real mess out of things, BTW.
Unfortunately, I can't tell you how long that B1 band will last, with the amount of wear that is on it. I replace anything/everything that shows or has wear that I can see or measure....so I have no experience in figuring out how long worn pieces will "survive". These things take so much effort to get in and out of the vehicle, plus take me so long to clean and rebuild, that I simply don't "mess around" with worn pieces.
Indeed that is the "updated" B2 piston. Make sure that the "shock absorber" on the other side of the band got upgraded also....most people miss the fact that all three pieces (band, piston, and shock absorber) got updated at the same time.
I stock virtually every piece that is available to rebuild these transmissions. That's a really interesting story, BTW. A huge percentage of the parts required to properly shim and set-up these transmissions are only available in Germany. Originally, when I put all these pieces into inventory, this made me wonder.....how do the rest of the people that rebuild these transmissions "function" without being able to obtain these pieces? Think about it....
Anyway, if you need anything, let me know.
05-20-2012, 09:27 AM
#9
Rennlist Member
Thread Starter
Thanks for the tip about the B3 piston circlip and locator/stop. I am headed to the hardware store today to get the parts to make a spring compressor to take B3 apart. When I get it separated I'll pay extra attention to that area.
05-20-2012, 04:46 PM
#10
Rennlist Member
Thread Starter
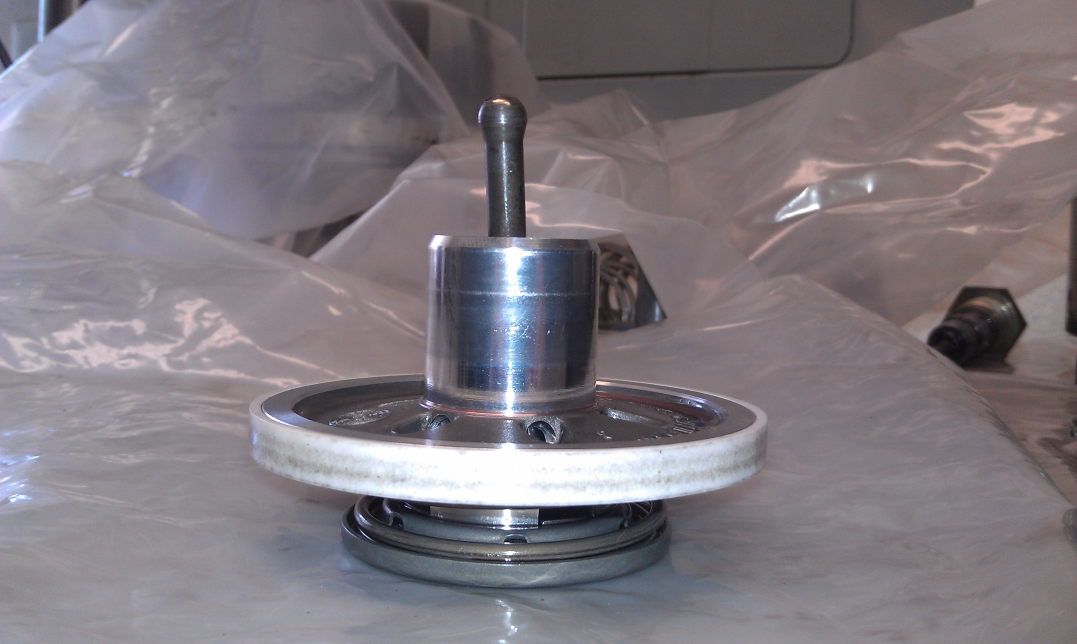
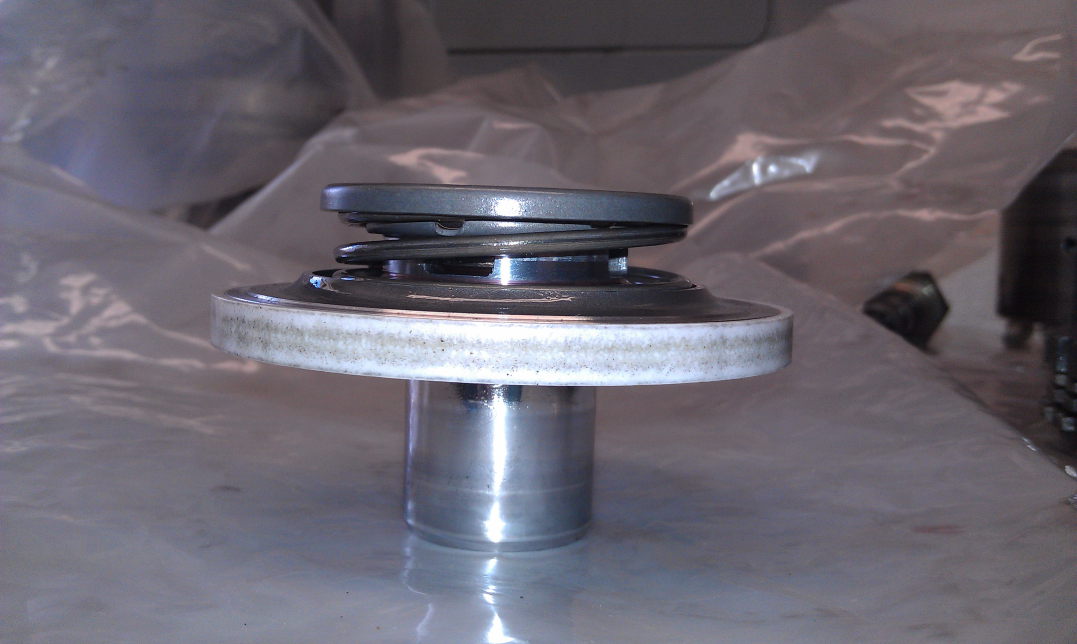
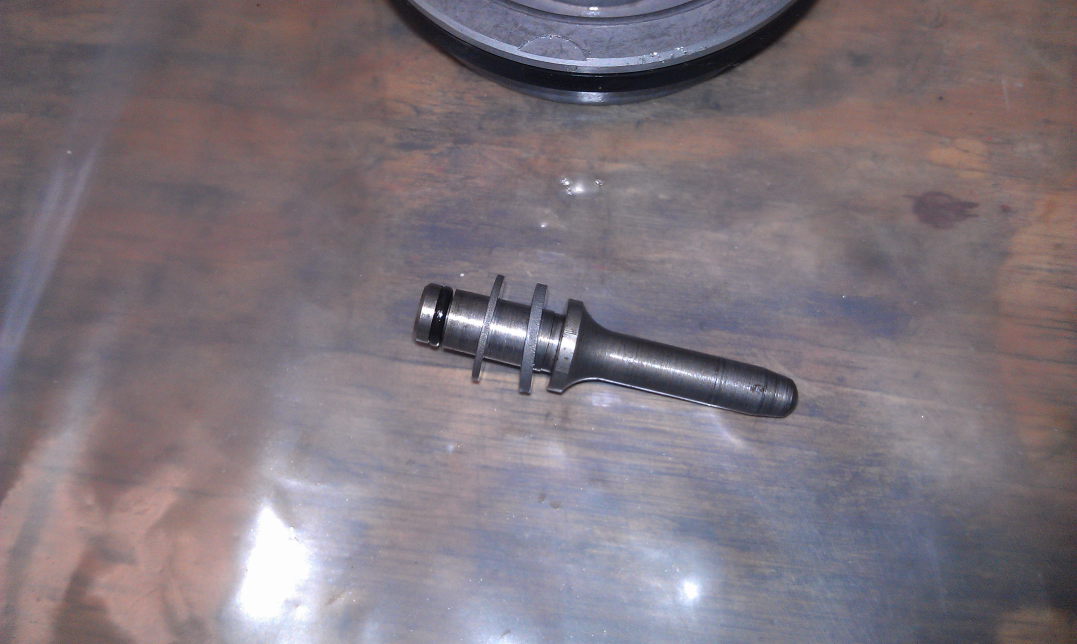
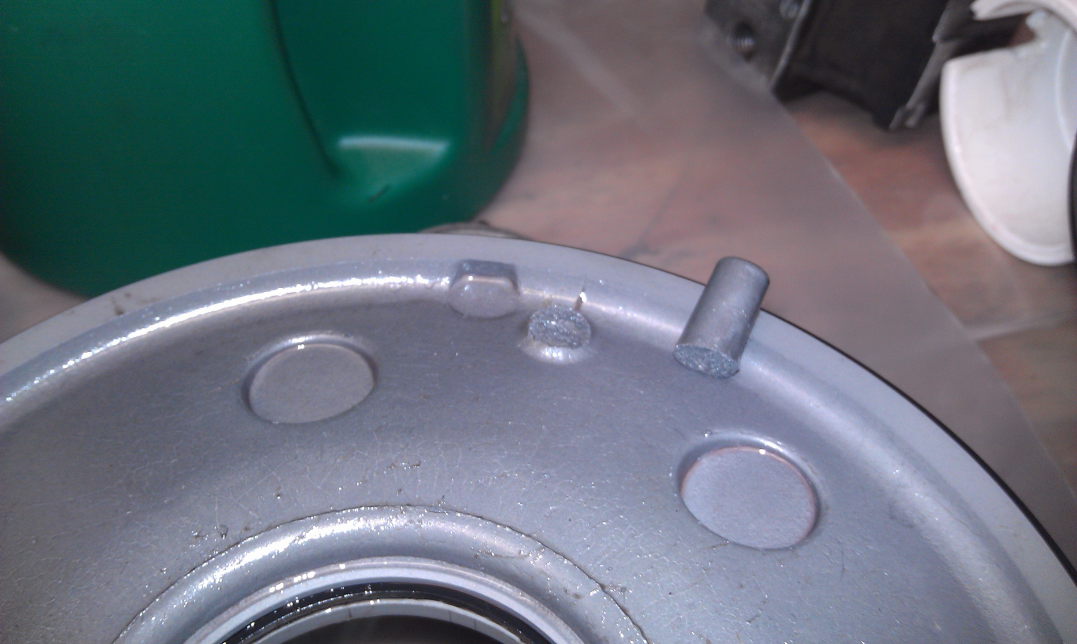
I dis-assembled the B3 piston and primary pump today after a trip to the hardware store for supplies to make the necessary compression tool. As you can see in the next photo, the guide pin has sheared off similar to what Bill Ball experienced with his trans. My guess is that when the B3 starts over-stroking due to the worn frictions the pin can actually slightly clear the end of the recess in the front cover. If the B3 rotates a little before the piston is allowed to return the guide pin is jammed into the side of the guide bore and the stress breaks it off when the piston does return. The pin itself was sitting in the guide bore when I removed the B3 from the cover.
In this shot you can see the damage to the inner boot on the B3 piston. I didn't find the pieces so no telling when or how this happened.
All hail Greg for his willingness to share tips and experience. I looked at the return spring retaining plate (PET calls it "concave washer) groove that contacts the circlip. Under magnification you can see a slight raised area that corresponds to the gap in the circlip indicating the groove in the "concave washer" has deformed slightly. I am going to take a couple more pics and see if I can blow the magnification up to show it.
Now to fab a flywheel holding bar to allow removal of the bolts and replacement of the rear main seal.
Mike
In this shot you can see the damage to the inner boot on the B3 piston. I didn't find the pieces so no telling when or how this happened.
All hail Greg
for his willingness to share tips and experience. I looked at the return spring retaining plate (PET calls it "concave washer) groove that contacts the circlip. Under magnification you can see a slight raised area that corresponds to the gap in the circlip indicating the groove in the "concave washer" has deformed slightly. I am going to take a couple more pics and see if I can blow the magnification up to show it.Now to fab a flywheel holding bar to allow removal of the bolts and replacement of the rear main seal.
Mike
06-17-2012, 03:13 PM
#11
Rennlist Member
Thread Starter
A big shout out to Greg Brown for sending a used B1 piston cover for making the B1 band clearance tool. The WSM calls for a M10 x 1.0 screw but I used an M8 since that's what I had. No real difference since the thread pitch is what's important. Fab-ed up a compression tool to fit the cover to the case and measured the clearance using the WSM procedure. With both the 1.5 and 1.0mm existing shims I had about 2mm clearance, which is too little. Spec is 3 to 4mm. With the 1.0mm shim I had about 5.5mm clearance. Swapping in the 1.5mm shim gets me in to the high side of the range at about 3.8 or3.9mm. Think I'll get a 0.5mm shim and move the clearance down lower in the range. My Super Bearings are in transit and should arrive next week. Hopefully next week I can get an answer out of Bilstien service as to when my shocks will be done and get it all back together in time to bring it to the 928OCIC.
Mike
Mike
07-08-2012, 11:16 PM
#12
Rennlist Member
Thread Starter
Well I spent All day July 4th and all this weekend getting my 928 Super bearings installed in my torque tube, the tube and trans back in the car, and everything buttoned up in time for 928 OCIC next weekend. I just got back from the maiden test run and everything works as it should. I am so excited. This is the first time I have delved into a Roger box beyond fluid and filter. With the amount of work involved in getting the 928 box out I was so worried that something would have been wrong and I'd have to do the whole thing over. I also got my rebuilt shocks back from Bilstein and mounted them in the Eibach progressive springs that have been waiting. Now to get some miles on her to settle the suspension, set the rear ride height and get an alignment before heading out to Wichita on Thursday.
Even if something goes wrong between now and Thursday I'll still see everyone, just won't be in my shark.
Mike
I am so excited. This is the first time I have delved into a Roger box beyond fluid and filter. With the amount of work involved in getting the 928 box out I was so worried that something would have been wrong and I'd have to do the whole thing over. I also got my rebuilt shocks back from Bilstein and mounted them in the Eibach progressive springs that have been waiting. Now to get some miles on her to settle the suspension, set the rear ride height and get an alignment before heading out to Wichita on Thursday.Even if something goes wrong between now and Thursday I'll still see everyone, just won't be in my shark.
Mike
07-09-2012, 07:38 AM
#15
Rennlist Member
Thread Starter
It went more quickly because of all the experience and help here on Rennlist. Not having to re-invent the wheel to figure out how to get it done was a huge time saver. Someone else used a hand truck (aka moving dolly) as a holder/stand to get the trans vertical to remove the pump and other bits. This works great. There was no problem getting the trans on and off and it made keeping the trans stable a snap. The low profile 400lb trans jack from Harbor Freight also worked like a charm.
The transmission work just takes patience and attention to detail. I used a lot of disposable neoprene gloves, lint free disposable towels, and plastic sheet to keep things as clean as possible while the case was open. I even made sure to keep my garage closed to minimize wind blown dust while working on it. The other key is to make plugs or covers for all openings and lines to keep dirt out. I had the trans opened up for a couple of weeks between getting it opened up and waiting for parts. When not working on it I kept all the openings closed up to keep out dirt.
When it comes time to do a full rebuild I'll most likely send the unit to Greg Brown or Steve C. unless I get a bigger garage or a full blown shop. I just don't have the garage space to leave an entire disassembled unit sitting while waiting for the parts and last minute shims/spacers necessary to set all the clearances.
Mike