
1982...stereo install pics
 03-15-2012, 08:52 PM
#1
Rennlist Member
Thread Starter
Join Date: Dec 2011
Location: Sunny South Florida
Posts: 374
Likes: 0
Received 0 Likes
on
0 Posts
Hi all
Any pics can be posted for different aftermarket head unit installs using the 1 piece console frame similar to a 82?
I know I would have to trim to make it fit for a normal single DIN frame, but any pics of clean installs out there?
When I searched seems to be more for the later 2 piece console trims..
thanks
 03-16-2012, 01:42 PM
#3
Instructor
Join Date: Jul 2010
Location: San Diego, CA
Posts: 107
Likes: 0
Received 0 Likes
on
0 Posts
I recently swapped out an old Sony 1-DIN unit for a new Pioneer 1-DIN on my 1981 Euro S.
The edges of the console frame were already cut all the way back to the metal wire that run up the sides of the frame at the location of the radio, so I did not modify this further. The metallic retaining frames (that the head unit slides into) were, as expected, the exact same size for old and new units. Since it's a very tight fit, I found it easiest to first remove the console frame entirely and put the metallic cage through it first, positioning it onto the two metal wires at the sides of the console frame for support, then easing the assembly into the console. I thought this gave the retaining frame the most stable points of contact, but be aware that doing if you do it this way, once the retaining frame is locked into the console with its bendable metal tabs, you cannot remove the console frame again without taking the radio and its retaining frame out. I thought about filing down the lip of the retaining frame so it was independent of the console frame, but I felt the radio would get wobbly that way.
The plastic trim frame that came with the new unit was slightly larger than the old Sony frame and was riding up on the console frame when I tried to install it, so I had to file down the rear edges of the trim ring along the sides to get it to snap in flat without flexing. I probably could have cut more off the console frame, but I didn't want to compromise the material further so I decided to file down the trim ring instead.
Also, I had to move the bracket along the floor of the console that the rear of the head unit slides into a bit to the right because the wires of the connector for the new unit would have been squashed inside that bracket in its factory position.
The old unit was connected through the original two-pair speaker wire and factory fader ****. I wanted to bypass the factory fader, but also wanted to minimally disturb the factory wiring, so I found the three Molex connectors for the front and rear speakers and the fader input running under a cover beneath the front of the driver's seat. I unplugged these and reconnected the "in" connecter from the console to the "out" connector to the front speakers and reused the factory speaker wires at the console for the front speaker outputs at the new head unit. For the rear speakers, I ran a new two-pair 16-gauge wire from the head unit to the original rear speaker wires in the same location under the driver's seat.
I can take pictures of the finished install if you like, but everything is back together now so the rest is hidden and the cut and filed areas cannot be seen.

 03-16-2012, 06:35 PM
#5
Rennlist Member
Thread Starter
Join Date: Dec 2011
Location: Sunny South Florida
Posts: 374
Likes: 0
Received 0 Likes
on
0 Posts
Thanks, I understand how your is installed, no need for a pic.
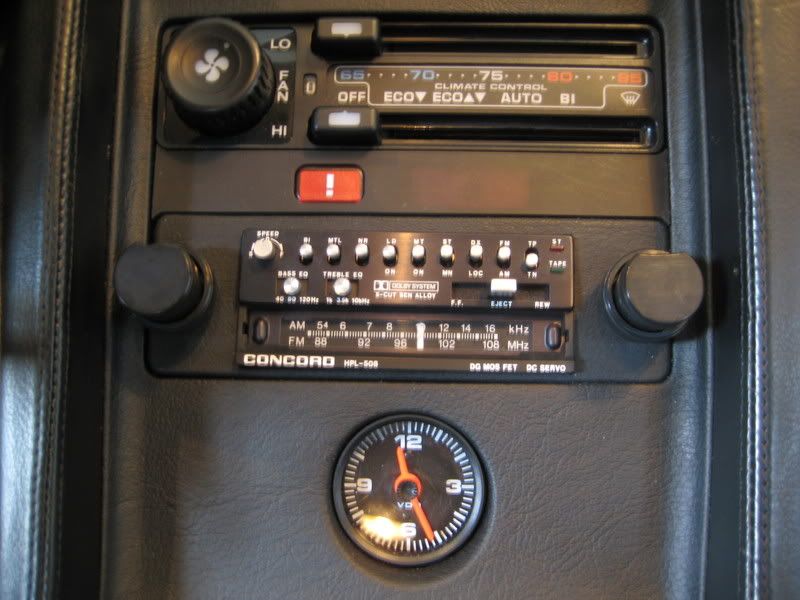
I had an old Panasonic cassette player which fit perfectly in the factory opening, minus the trim piece, nothing was cut.
I'll have to open up the trim I suppose to make my new head unit fit.
I had an old Panasonic cassette player which fit perfectly in the factory opening, minus the trim piece, nothing was cut.
I'll have to open up the trim I suppose to make my new head unit fit.
I recently swapped out an old Sony 1-DIN unit for a new Pioneer 1-DIN on my 1981 Euro S.
The edges of the console frame were already cut all the way back to the metal wire that run up the sides of the frame at the location of the radio, so I did not modify this further. The metallic retaining frames (that the head unit slides into) were, as expected, the exact same size for old and new units. Since it's a very tight fit, I found it easiest to first remove the console frame entirely and put the metallic cage through it first, positioning it onto the two metal wires at the sides of the console frame for support, then easing the assembly into the console. I thought this gave the retaining frame the most stable points of contact, but be aware that doing if you do it this way, once the retaining frame is locked into the console with its bendable metal tabs, you cannot remove the console frame again without taking the radio and its retaining frame out. I thought about filing down the lip of the retaining frame so it was independent of the console frame, but I felt the radio would get wobbly that way.
The plastic trim frame that came with the new unit was slightly larger than the old Sony frame and was riding up on the console frame when I tried to install it, so I had to file down the rear edges of the trim ring along the sides to get it to snap in flat without flexing. I probably could have cut more off the console frame, but I didn't want to compromise the material further so I decided to file down the trim ring instead.
Also, I had to move the bracket along the floor of the console that the rear of the head unit slides into a bit to the right because the wires of the connector for the new unit would have been squashed inside that bracket in its factory position.
The old unit was connected through the original two-pair speaker wire and factory fader ****. I wanted to bypass the factory fader, but also wanted to minimally disturb the factory wiring, so I found the three Molex connectors for the front and rear speakers and the fader input running under a cover beneath the front of the driver's seat. I unplugged these and reconnected the "in" connecter from the console to the "out" connector to the front speakers and reused the factory speaker wires at the console for the front speaker outputs at the new head unit. For the rear speakers, I ran a new two-pair 16-gauge wire from the head unit to the original rear speaker wires in the same location under the driver's seat.
I can take pictures of the finished install if you like, but everything is back together now so the rest is hidden and the cut and filed areas cannot be seen.
The edges of the console frame were already cut all the way back to the metal wire that run up the sides of the frame at the location of the radio, so I did not modify this further. The metallic retaining frames (that the head unit slides into) were, as expected, the exact same size for old and new units. Since it's a very tight fit, I found it easiest to first remove the console frame entirely and put the metallic cage through it first, positioning it onto the two metal wires at the sides of the console frame for support, then easing the assembly into the console. I thought this gave the retaining frame the most stable points of contact, but be aware that doing if you do it this way, once the retaining frame is locked into the console with its bendable metal tabs, you cannot remove the console frame again without taking the radio and its retaining frame out. I thought about filing down the lip of the retaining frame so it was independent of the console frame, but I felt the radio would get wobbly that way.
The plastic trim frame that came with the new unit was slightly larger than the old Sony frame and was riding up on the console frame when I tried to install it, so I had to file down the rear edges of the trim ring along the sides to get it to snap in flat without flexing. I probably could have cut more off the console frame, but I didn't want to compromise the material further so I decided to file down the trim ring instead.
Also, I had to move the bracket along the floor of the console that the rear of the head unit slides into a bit to the right because the wires of the connector for the new unit would have been squashed inside that bracket in its factory position.
The old unit was connected through the original two-pair speaker wire and factory fader ****. I wanted to bypass the factory fader, but also wanted to minimally disturb the factory wiring, so I found the three Molex connectors for the front and rear speakers and the fader input running under a cover beneath the front of the driver's seat. I unplugged these and reconnected the "in" connecter from the console to the "out" connector to the front speakers and reused the factory speaker wires at the console for the front speaker outputs at the new head unit. For the rear speakers, I ran a new two-pair 16-gauge wire from the head unit to the original rear speaker wires in the same location under the driver's seat.
I can take pictures of the finished install if you like, but everything is back together now so the rest is hidden and the cut and filed areas cannot be seen.