

motor lift and 85 euro
 02-09-2012 | 11:26 AM
#1
Thread Starter
Instructor
Joined: Nov 2007
Posts: 213
Likes: 1
i am about to approach my motor mount replacement when i noticed the back motor lift point puts any and all hooks , bolts ,straps right into the regulator canister of the rear fuel line . am i missing something or do i have to remove this as well arrrrrgh.
 02-09-2012 | 01:34 PM
#4

Rennlist Member
Joined: Nov 2008
Posts: 1,731
Likes: 143
From: Grapevine, TX
when you lift the engine withth etorque tube attached the entire assembly rotates around the transmission mounts, so the angle of the engine is not determined by the lift point on the engine itself.
02-09-2012 | 01:45 PM
#5
Three Wheelin'
Joined: Jan 2009
Posts: 1,334
Likes: 88
From: Hampster Bays, LI
If you're talking about here, then yes you need to remove the fuel lines, etc or risk breaking something else.
https://rennlist.com/forums/members/...lift-point.jpg
https://rennlist.com/forums/members/...lift-point.jpg
02-09-2012 | 03:07 PM
#6

Chronic Tool Dropper
Lifetime Rennlist
Member
Lifetime Rennlist
Member
Joined: Oct 2001
Posts: 20,506
Likes: 549
From: Bend, Oregon
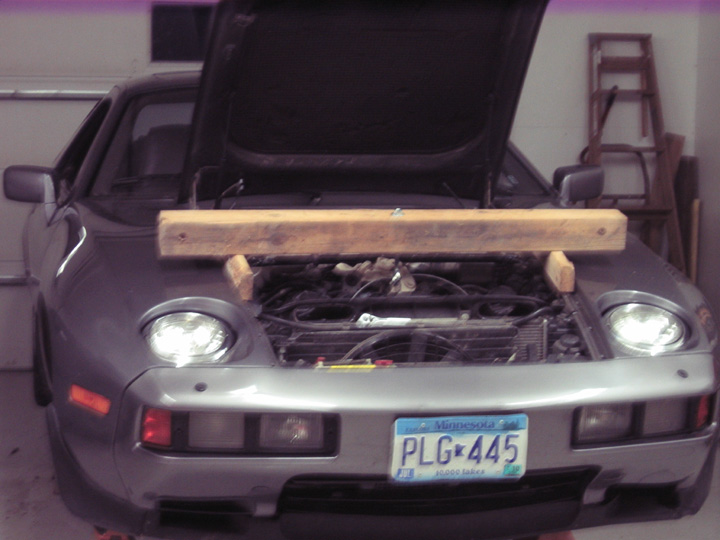
Do as Sean suggests, lifting at the front center of the engine. It will go straight up, rotating at th erear of the car at the trans mounts as stated. The torque tube keeps it all lined up. Pull the air cleaner housing before you start lifting so it doesn't get pinched at the firewall while lifting, and you'll be fine.
Before you start, spend a little time on de-sliming the bottom of the engine, oil sump and crossmember area. These are where you will be working, and coincidentally are the catch-all area for every drop of every fluid that's ever leaked out or been spilled in the engine bay or from those cars you've followed on the highway. Half of the frustration on the MM/OPG project is the slimey work environment. Some liberal use of engine cleaner and the garden hose or, better, the DIY commercial car-wash hose will pay you back handsomely for your efforts. Avoid the starter motor, alternator and the oil pressure sender, otherwise have a field day under there getting it clean.
Before you start, spend a little time on de-sliming the bottom of the engine, oil sump and crossmember area. These are where you will be working, and coincidentally are the catch-all area for every drop of every fluid that's ever leaked out or been spilled in the engine bay or from those cars you've followed on the highway. Half of the frustration on the MM/OPG project is the slimey work environment. Some liberal use of engine cleaner and the garden hose or, better, the DIY commercial car-wash hose will pay you back handsomely for your efforts. Avoid the starter motor, alternator and the oil pressure sender, otherwise have a field day under there getting it clean.
02-09-2012 | 06:53 PM
#7
Thread Starter
Instructor
Joined: Nov 2007
Posts: 213
Likes: 1
the best news is the first job i ever did was the oil pan and rear cam seals and all i had to do was tighten the bolts , a little lock nut blue and it is still completely dry underneath. thank you for the engine lift info i really did not want to mess with the fuel system. last issue will be the heater valve is very close to the fuel (cooler?) already.
Trending Topics
 02-09-2012 | 11:40 PM
#10
Thread Starter
Instructor
Joined: Nov 2007
Posts: 213
Likes: 1
i have the steering rack off and the lower motor mount bolts off . i have 2 more questions.
the fan mount can really hold the weight of the engine ? and i have seen the use of bottle jacks
underneath . do the underneath jacks and wood go where the starter motor is or more towards the front.
so far things have moved along well into 2 hours now.
the fan mount can really hold the weight of the engine ? and i have seen the use of bottle jacks
underneath . do the underneath jacks and wood go where the starter motor is or more towards the front.
so far things have moved along well into 2 hours now.
02-09-2012 | 11:48 PM
#11
Rennlist Member
Joined: Jul 2009
Posts: 2,873
Likes: 299
From: Cleveland, MN
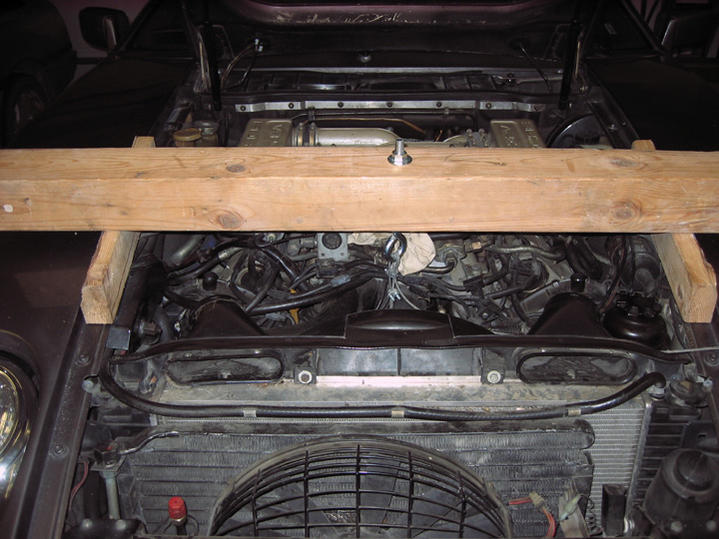
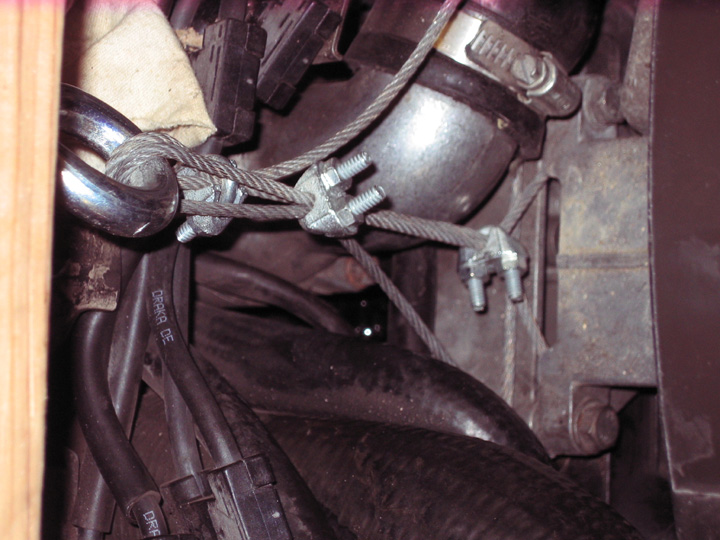
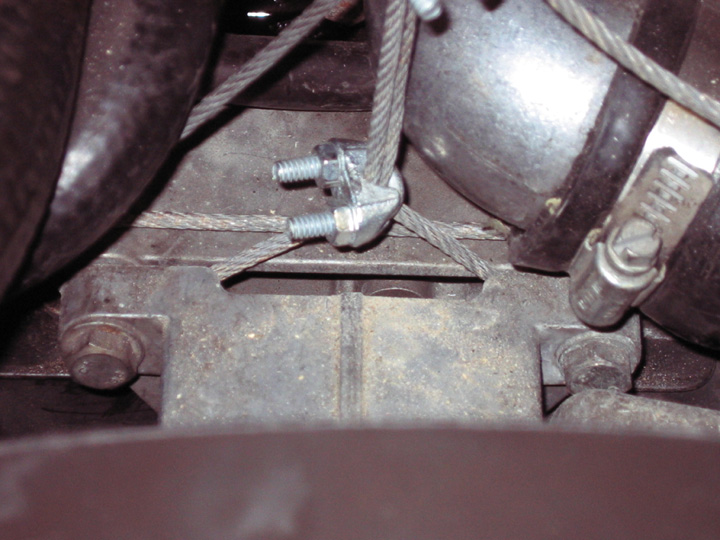
Not sure why Imo00 has a problem with my method. The cable has a break point of over 2000 pounds and where I have it placed, it is focusing the weight on the bolts. I would not want to grab too far forward and turn the fan bracket into a lever.
02-10-2012 | 02:21 AM
#12
Chronic Tool Dropper
Lifetime Rennlist
Member
Lifetime Rennlist
Member
Joined: Oct 2001
Posts: 20,506
Likes: 549
From: Bend, Oregon
Further forward is better, but... You can't change the sump gasket with the engine supported at the bottom of the same sump. Resist the urge to support the engine by the crank nose and balancer. Do it from above by the fan bracket as shown.
Last edited by dr bob; 02-10-2012 at 11:34 AM.