



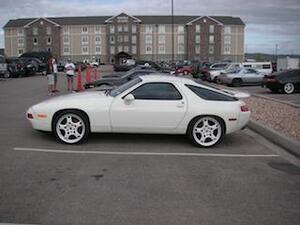

My 1982 928 Project
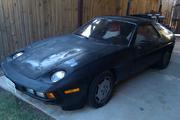
Thread Starter
Rennlist Member
Joined: Jan 2012
Posts: 1,158
Likes: 0
From: Oklahoma City, Oklahoma

And here are the interior pictures.
I was wondering... With the odo showing 83k miles I'm suspicious that it might be broken. This car looks like it has more wear than 83k miles worth. It may be correct but I'm just wondering ya know.
I was wondering... With the odo showing 83k miles I'm suspicious that it might be broken. This car looks like it has more wear than 83k miles worth. It may be correct but I'm just wondering ya know.
Thread Starter
Rennlist Member
Joined: Jan 2012
Posts: 1,158
Likes: 0
From: Oklahoma City, Oklahoma
I think it is about damn time that I post an update here. Been far too long since any real progress has been made.
I have been working really hard to get this car where she needs to be these last few weeks. I have been ordering the last few parts and seals that I need to get it all back together and I am almost done. Here is a list of everything that I have gotten done recently:
I have replaced all the vacuum lines.
Replaced the fuel hose that goes from the filter to the hard line in the passenger wheel well.
Installed my fuel tank and replaced all the vent hoses.
Replaced the fuel sender unit and the rubber hose that attaches to it.
Installed the fuel pump and filter assembly and my new in tank fuel screen with a new rubber hose to the fuel pump.
Removed oil fill tank and water bridge to replace the gaskets and so I can fix/replaced the broken port on my water bridge. Still need to get pictures of that.
And some stranger has donated all 3 oil hoses to my cause. I believe they will be here later today and will be promptly installed. Still a bit in shock over this!
And here are a bunch of pictures showing some of my progress.
Here is the fuel pump that John Curry(soontobered84) so generously donated to my cause after the pump that NoVector donated blew up on me.
9C1Ie4gl.jpg
So after taking the oil fill out I spent about 10 min cleaning it up and made it look all pretty.... this was the beginning of my next 2 days worth of work.
ogrRYmTl.jpg
WJlcQcPl.jpg
I then proceeded to unhook everything I spent the last week working on to get this out and clean.
jQPwbKql.jpg
5jag2qWl.jpg
jJDO2tNl.jpg
LH3J4q4l.jpg
LtENgbyl.jpg
sNXNyQll.jpg
bktmxVDl.jpg
UmCxCwzl.jpg
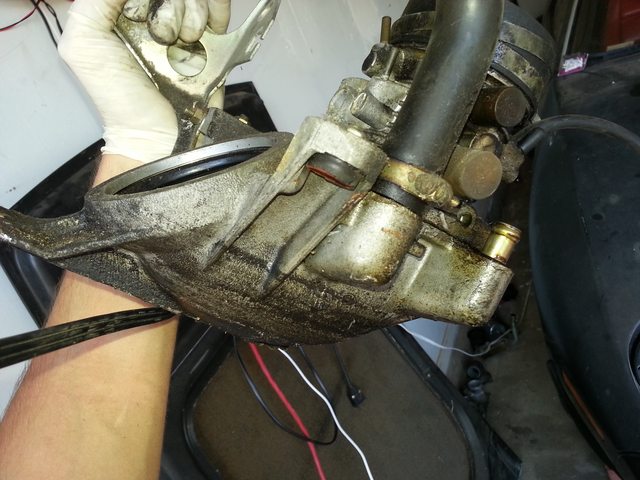
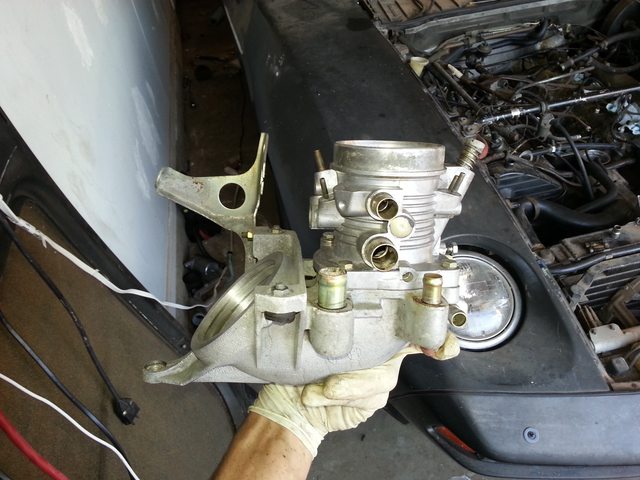
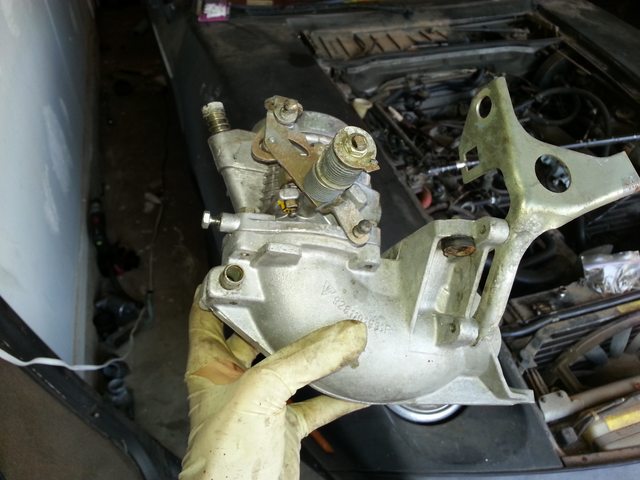
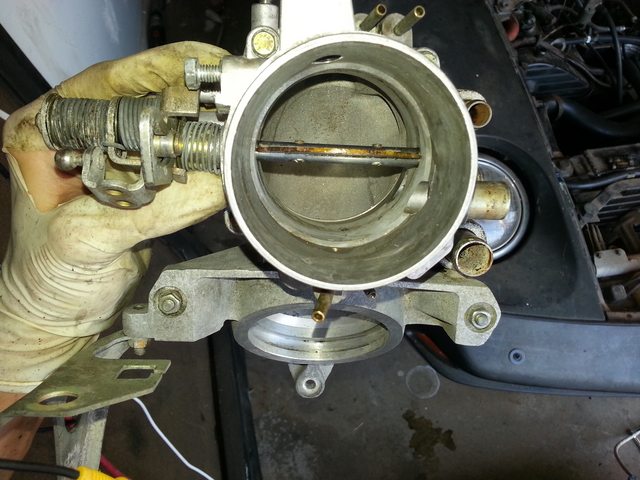
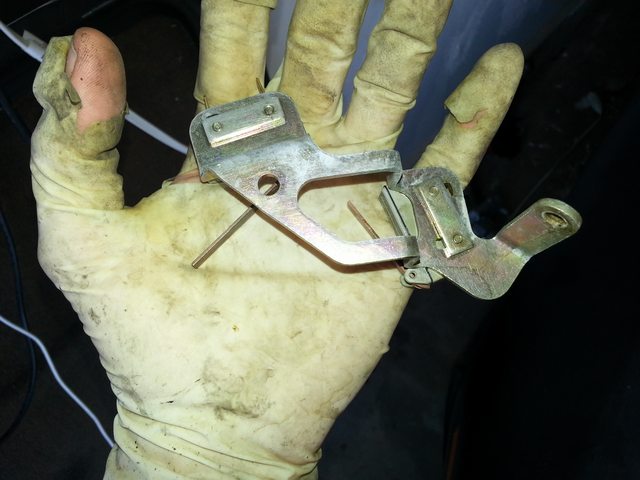
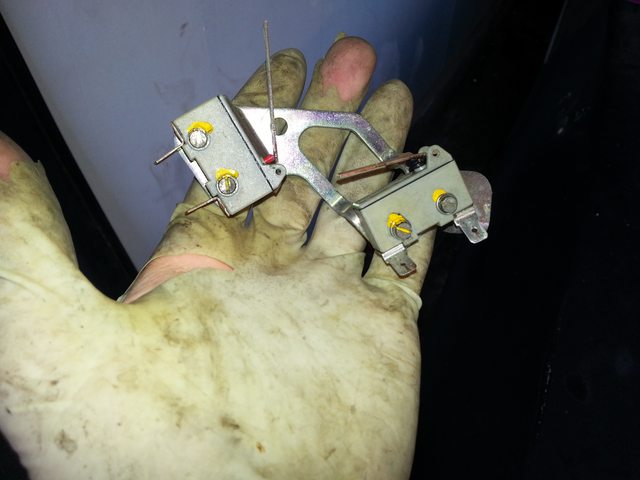
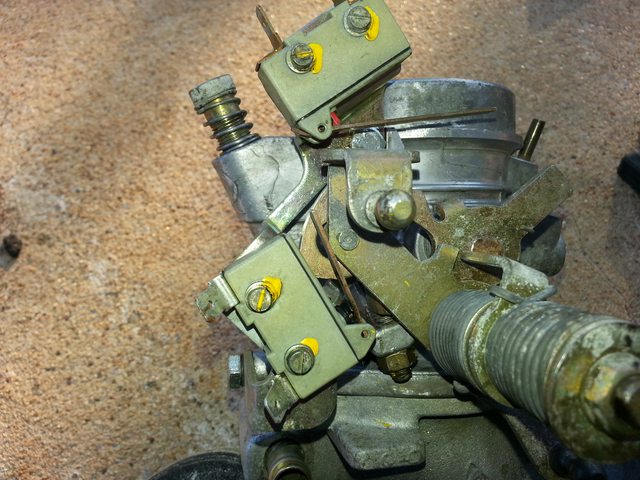
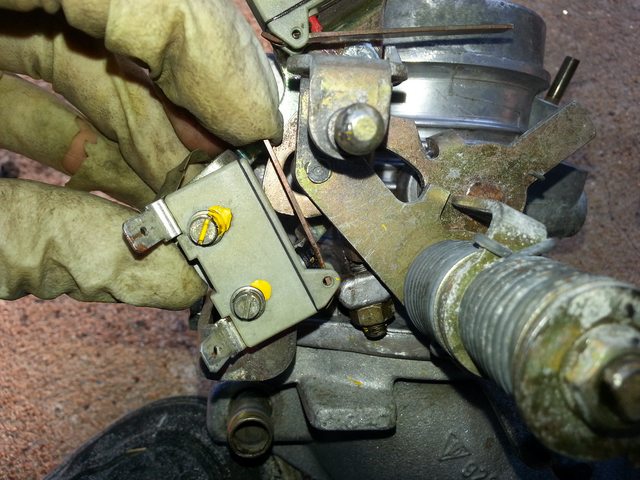
Here is something I have a question about. The bottom switch does not appear to be activating when the throttle is released. You can see the gap here. I pressed down on it slowly until I heard it click and this is the gap that was left. Is this something I need to worry about and if so how can I go about adjusting it? Or should I just wait until I have I running to see if anything needs adjusting. And more importantly what is this sensor for? I'm sure I'll end up looking it up before I get a reply on here but just for other people that may end up searching for it later on.
8nwB5tCl.jpg
So after the above items were cleaned I was left with this mess.....
56ungiIl.jpg
2 days, 2 rolls of shop towels, half a gallon of Simple Green, 3 cans of engine degreaser, 6 cans of brake cleaner, 2 plastic wire brushes, 1 stainless steel wire brush, and LOTS of scrubbing and elbow grease later....
JYa41C3l.jpg
gD2rXY3l.jpg
And starting to reassemble everything.
kVeKDy9l.jpg
zvZqWsfl.jpg
It didn't take as long as I thought it would to get the motor this clean. There are still some spots that I was unable to scrub out. Almost appears the aluminum is stained. Any tips on getting those parts clean?
I cannot begin to describe the excitement that was felt as I was cleaning and especially after I was done and took a step back to take it all in. I have a lot more pride in this project now. And as I saw someone else state the other day... Once you clean one part, it's like crack. Because there is no way in hell I was going to be putting that nice clean oil fill back on that dirty dirty motor. I will be getting the front of the motor all nice and spiffy when I tear into her to replace the timing belt, tensioner, water pump, cam gears and maybe oil pump gear too. And whatever else presents itself.
 Hope you all enjoyed the update as much as I enjoyed doing the work!
I have been working really hard to get this car where she needs to be these last few weeks. I have been ordering the last few parts and seals that I need to get it all back together and I am almost done. Here is a list of everything that I have gotten done recently:
I have replaced all the vacuum lines.
Replaced the fuel hose that goes from the filter to the hard line in the passenger wheel well.
Installed my fuel tank and replaced all the vent hoses.
Replaced the fuel sender unit and the rubber hose that attaches to it.
Installed the fuel pump and filter assembly and my new in tank fuel screen with a new rubber hose to the fuel pump.
Removed oil fill tank and water bridge to replace the gaskets and so I can fix/replaced the broken port on my water bridge. Still need to get pictures of that.
And some stranger has donated all 3 oil hoses to my cause. I believe they will be here later today and will be promptly installed. Still a bit in shock over this!
And here are a bunch of pictures showing some of my progress.
Here is the fuel pump that John Curry(soontobered84) so generously donated to my cause after the pump that NoVector donated blew up on me.
9C1Ie4gl.jpg
So after taking the oil fill out I spent about 10 min cleaning it up and made it look all pretty.... this was the beginning of my next 2 days worth of work.
ogrRYmTl.jpg
WJlcQcPl.jpg
I then proceeded to unhook everything I spent the last week working on to get this out and clean.
jQPwbKql.jpg
5jag2qWl.jpg
jJDO2tNl.jpg
LH3J4q4l.jpg
LtENgbyl.jpg
sNXNyQll.jpg
bktmxVDl.jpg
UmCxCwzl.jpg
Here is something I have a question about. The bottom switch does not appear to be activating when the throttle is released. You can see the gap here. I pressed down on it slowly until I heard it click and this is the gap that was left. Is this something I need to worry about and if so how can I go about adjusting it? Or should I just wait until I have I running to see if anything needs adjusting. And more importantly what is this sensor for? I'm sure I'll end up looking it up before I get a reply on here but just for other people that may end up searching for it later on.
8nwB5tCl.jpg
So after the above items were cleaned I was left with this mess.....
56ungiIl.jpg
2 days, 2 rolls of shop towels, half a gallon of Simple Green, 3 cans of engine degreaser, 6 cans of brake cleaner, 2 plastic wire brushes, 1 stainless steel wire brush, and LOTS of scrubbing and elbow grease later....
JYa41C3l.jpg
gD2rXY3l.jpg
And starting to reassemble everything.
kVeKDy9l.jpg
zvZqWsfl.jpg
It didn't take as long as I thought it would to get the motor this clean. There are still some spots that I was unable to scrub out. Almost appears the aluminum is stained. Any tips on getting those parts clean?
I cannot begin to describe the excitement that was felt as I was cleaning and especially after I was done and took a step back to take it all in. I have a lot more pride in this project now. And as I saw someone else state the other day... Once you clean one part, it's like crack. Because there is no way in hell I was going to be putting that nice clean oil fill back on that dirty dirty motor. I will be getting the front of the motor all nice and spiffy when I tear into her to replace the timing belt, tensioner, water pump, cam gears and maybe oil pump gear too. And whatever else presents itself.
Hope you all enjoyed the update as much as I enjoyed doing the work!
Team Owner

Joined: May 2004
Posts: 31,279
Likes: 4,248
From: Philly PA
that looks great your time to detail will be well spent.
you might like to try some blue nitrile gloves,
they wont come apart like the latex gloves do.
Thanks for posting updates of all of your hard work.
you might like to try some blue nitrile gloves,
they wont come apart like the latex gloves do.
Thanks for posting updates of all of your hard work.
Thread Starter
Rennlist Member
Joined: Jan 2012
Posts: 1,158
Likes: 0
From: Oklahoma City, Oklahoma
Well just thought I would share a bit of an update. I believe I have everything hooked back up properly. I just put the battery in and was able to pressure test my fuel system and there are no leaks. I just went to the store and bought 4 gallons of distilled water to put in her as I will be doing timing belt shortly after this and don't want to waste the coolant. But I may put 1 gallon of coolant in since winter is approachig. Going to put oil in and see if she will start. I had put some oil in each cylinder when I put in new spark plugs last week. I do not have a 27mm socket to spin the motor by hand but I will give it a few clicks with the key before turning on the fuel pump. Tonight is the night.... I can just feel it!
Thread Starter
Rennlist Member
Joined: Jan 2012
Posts: 1,158
Likes: 0
From: Oklahoma City, Oklahoma
Well the first try to start was a failure. When I turn the key I just hear a relay clicking and no crank. It was cranking before I started working on it. Was able to get it to turn over by jumping at the 14 pin connector. I tried to jump it at the relay and no go. Dont know what's going on now. Will look more in depth tomorrow. I did try to jump the fuel oump and the starter to see if she would start that way but nothing. It sounded like one cylinder was trying to fire but that was it.
Team Owner
Joined: May 2004
Posts: 31,279
Likes: 4,248
From: Philly PA
Ahh just a suggestion, but why not complete all of the repairs before trying to run the engine?
The not cranking sounds like a bad ground connection,
so you may need a new ground strap at the battery,
also the 14 pin connector may need to cleaned or the wires inspected for shedding insulation.
The not cranking sounds like a bad ground connection,
so you may need a new ground strap at the battery,
also the 14 pin connector may need to cleaned or the wires inspected for shedding insulation.
Thread Starter
Rennlist Member
Joined: Jan 2012
Posts: 1,158
Likes: 0
From: Oklahoma City, Oklahoma
Just wanting to make sure there are no other major issues before spending that money. Plus I can't afford the parts right now. Since it is a 16 valve I don't have to worry about damage if the belt breaks.
The ground strap is brand new at the batt. I will nake sure it is snug and glean at the connection to the body. The grounds on the passenger cam are connected and cleaned. Is there another one I should look for?
The 14 pin connector needs rebuilt. The insulation is crumbling and wires are corroded. But it was that way from the beginning when it was able to turn over with the key. But I know things can change.
The ground strap is brand new at the batt. I will nake sure it is snug and glean at the connection to the body. The grounds on the passenger cam are connected and cleaned. Is there another one I should look for?
The 14 pin connector needs rebuilt. The insulation is crumbling and wires are corroded. But it was that way from the beginning when it was able to turn over with the key. But I know things can change.
Rennlist Stories
The Best Porsche Posts for Porsche Enthusiasts

Porsche's Top 5 Most Questionable Naming Decisions
Verdad Gallardo
Pogea Racing's 964 Porsche 911 Reimagination Stands Out in a Crowded Field
Verdad Gallardo
6 Convertible Top MYTHS Most People Don't Understand!
Michael S. Palmer
2026 Porsche 911 Club Coupe is Spectacular, And Everything Wrong with the Porsche Market
Joe Kucinski
Talos Takes Your 991 Porsche 911 GT3 to the Next Level for a Cool $1.13 Million
Verdad Gallardo
9 Vehicles Porsche Helped Engineer that Aren't Porsches
Verdad Gallardo
9 Features and Characteristics That Only Porsche People Understand
Verdad Gallardo
I've Written 500 Rennlist Articles: Here's How Porsche Has Changed Along the Way
Joe Kucinski
10 Most Unnecessary Porsches Ever Built (And Why We Love Them)
Verdad Gallardo
Team Owner
Joined: May 2004
Posts: 31,279
Likes: 4,248
From: Philly PA
SRSLY I would disconnect the battery and fix all of the known things before you run the engine and cause other problems.
At this point there is nothing to be gained by running the engine,
and with known wiring issues at the 14 pin a short could happen and take out other systems,
thus causing more money to be spent fixing things that were not issues before.
The best way to fix your car is to go through all of the systems and inspect them,
fix anything that's not in good condition.
After all of this has been done then drive the car and note any more issues and then fix them.
I know you will feel better to know that the engine runs, and it will run well.
HOWEVER many 928s would have not had further damage caused,
from impatient owners had the above instructions been followed
At this point there is nothing to be gained by running the engine,
and with known wiring issues at the 14 pin a short could happen and take out other systems,
thus causing more money to be spent fixing things that were not issues before.
The best way to fix your car is to go through all of the systems and inspect them,
fix anything that's not in good condition.
After all of this has been done then drive the car and note any more issues and then fix them.
I know you will feel better to know that the engine runs, and it will run well.
HOWEVER many 928s would have not had further damage caused,
from impatient owners had the above instructions been followed

Thread Starter
Rennlist Member
Joined: Jan 2012
Posts: 1,158
Likes: 0
From: Oklahoma City, Oklahoma
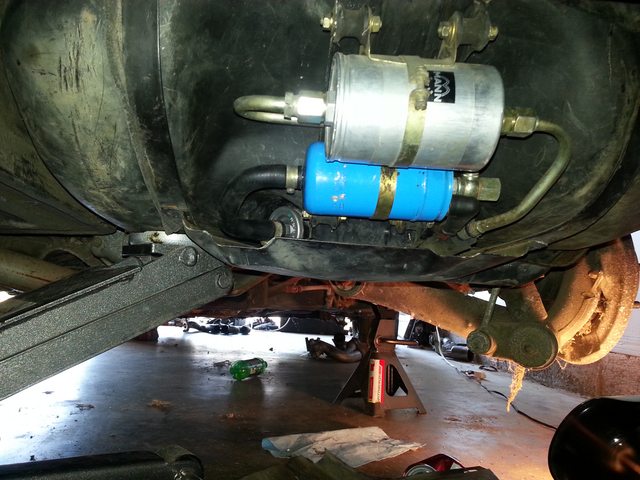
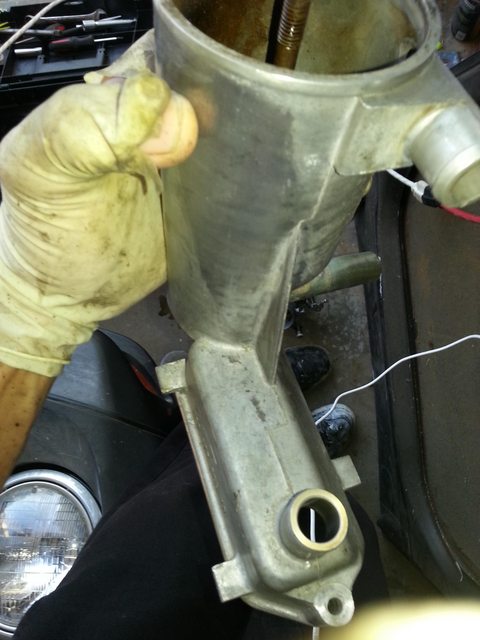
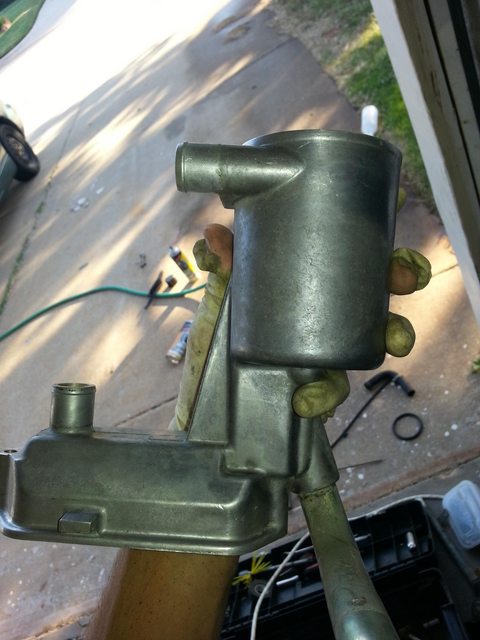
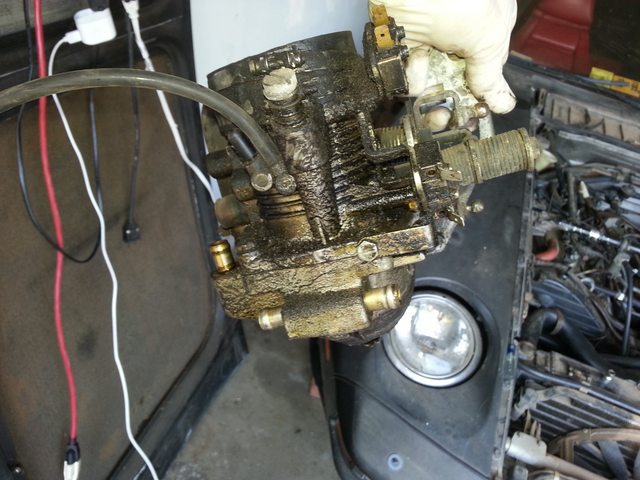
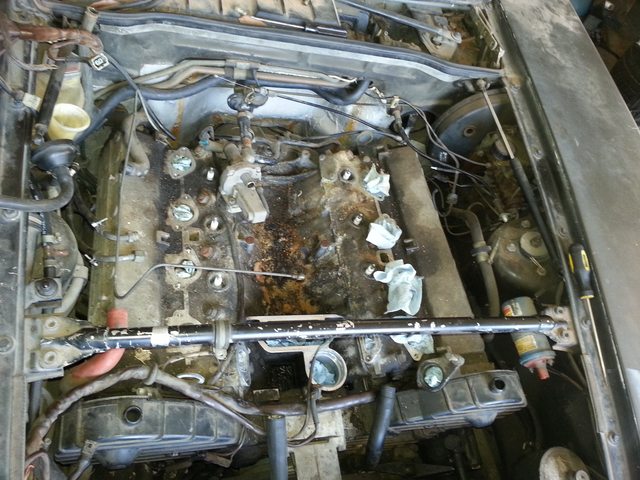
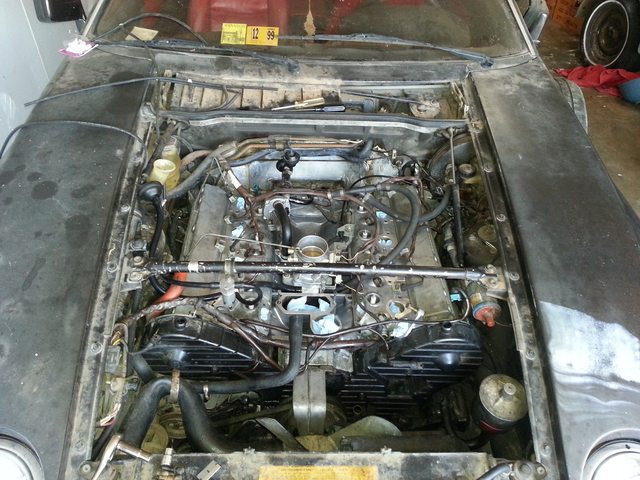
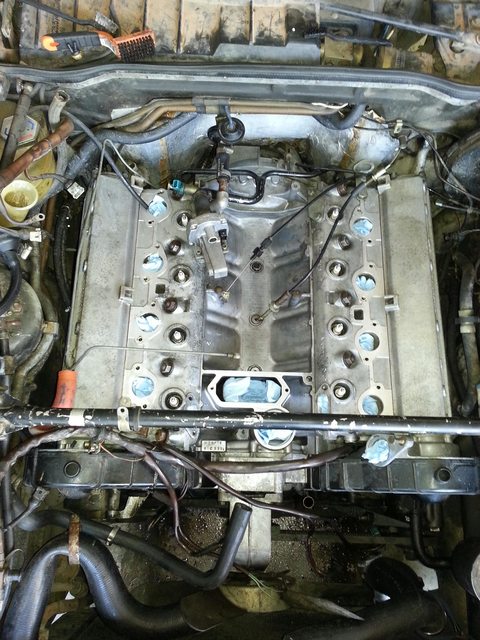
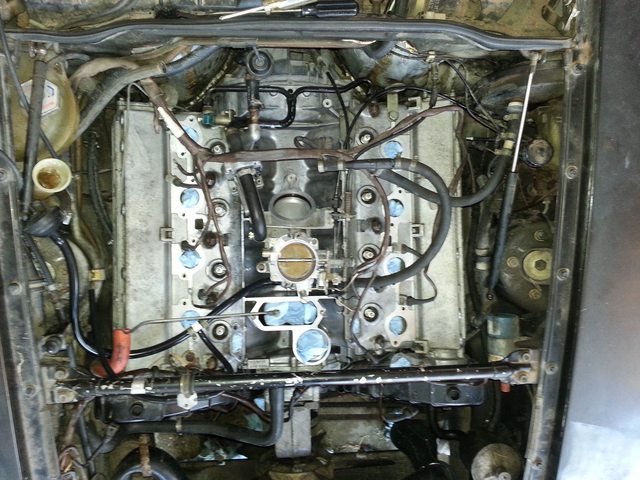
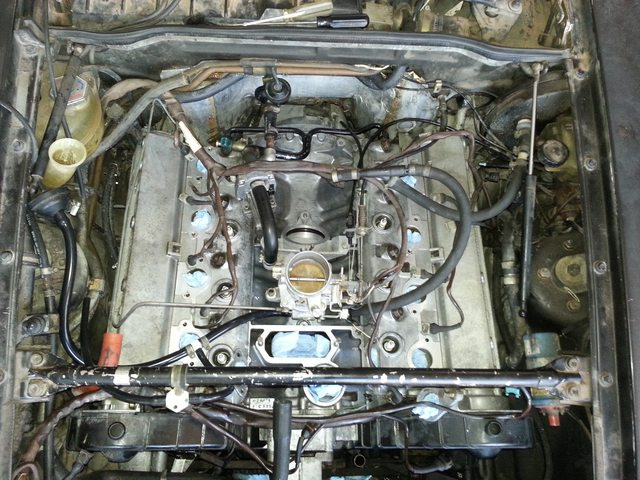
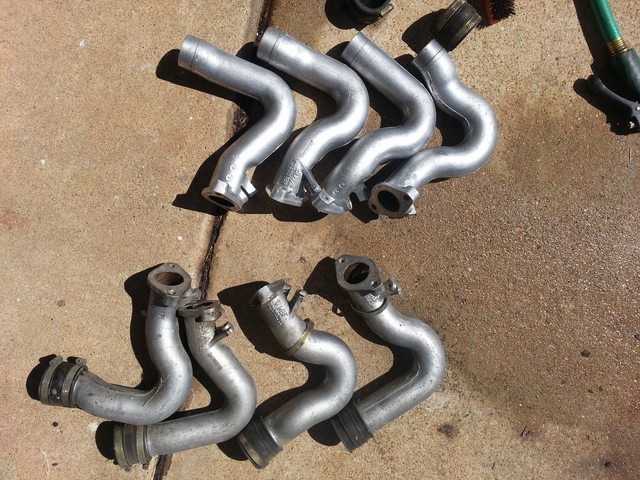
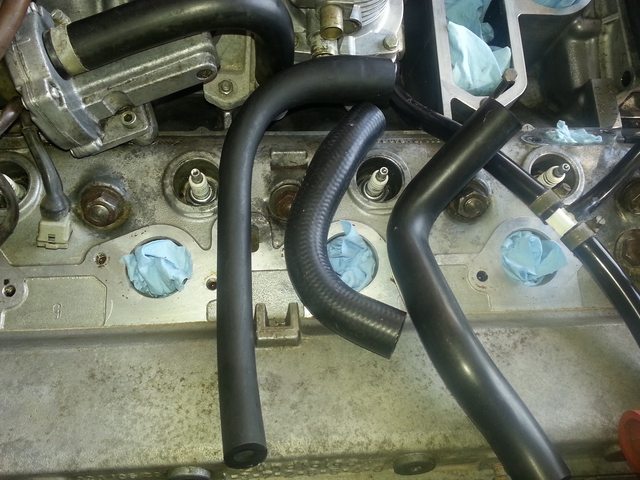
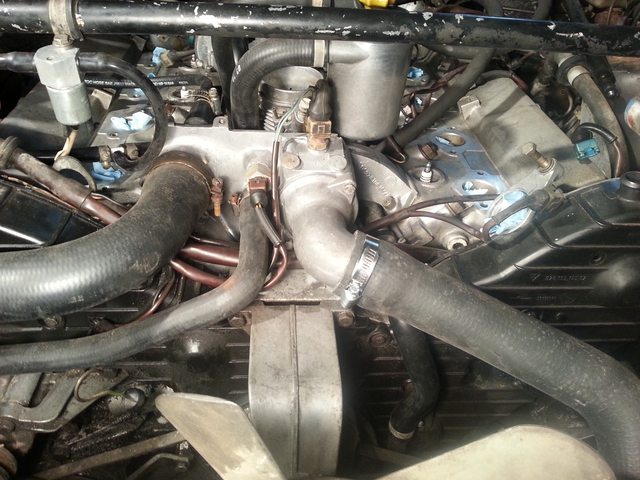
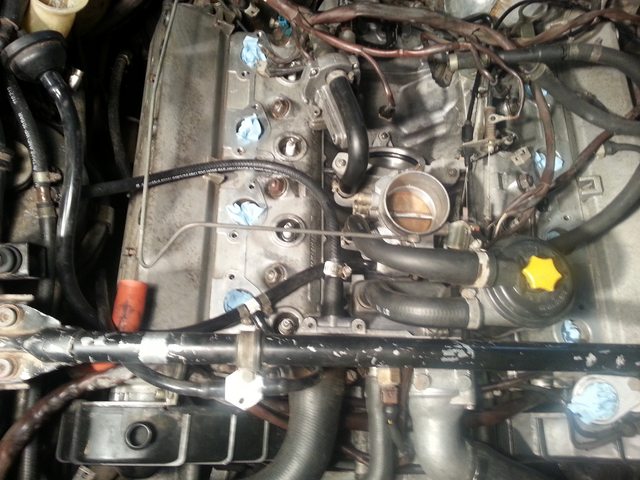
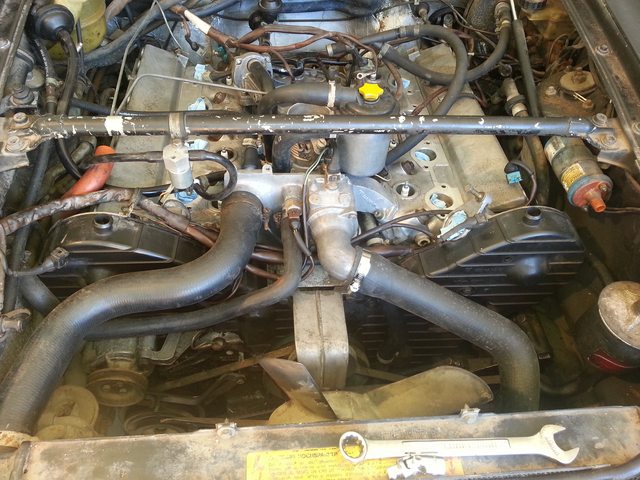
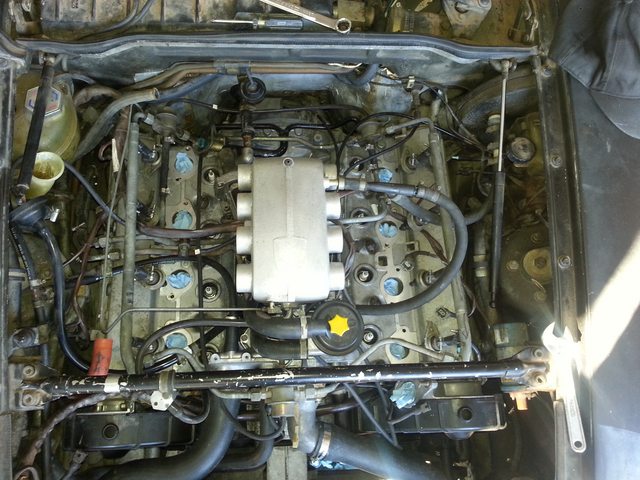
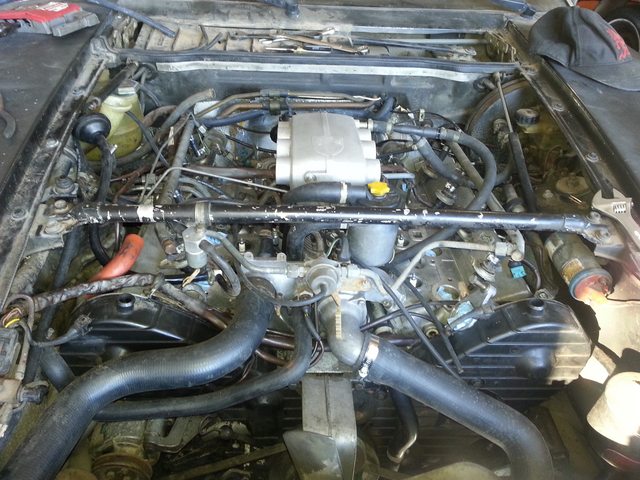
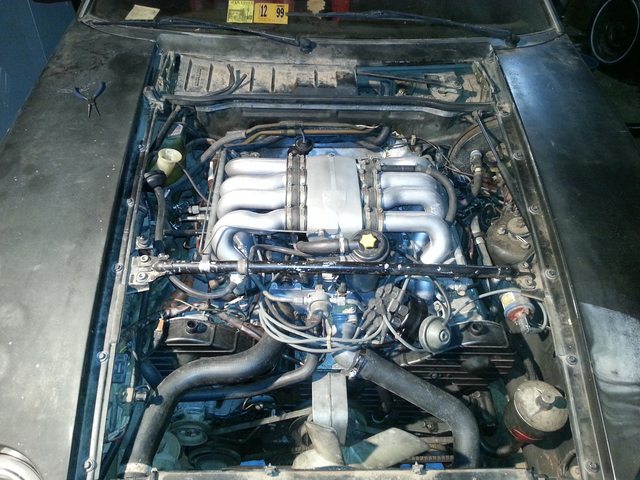
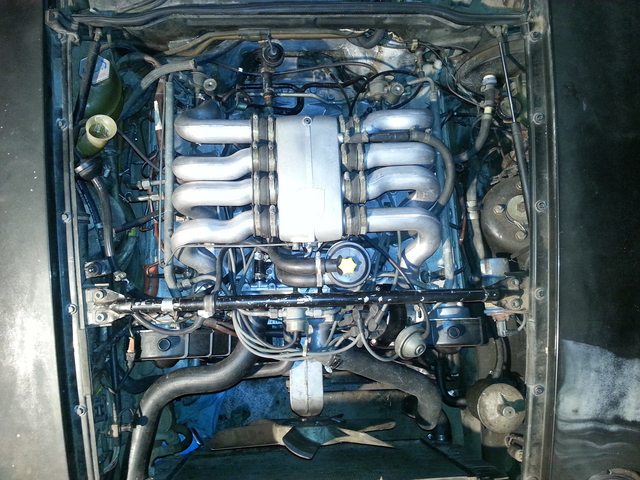
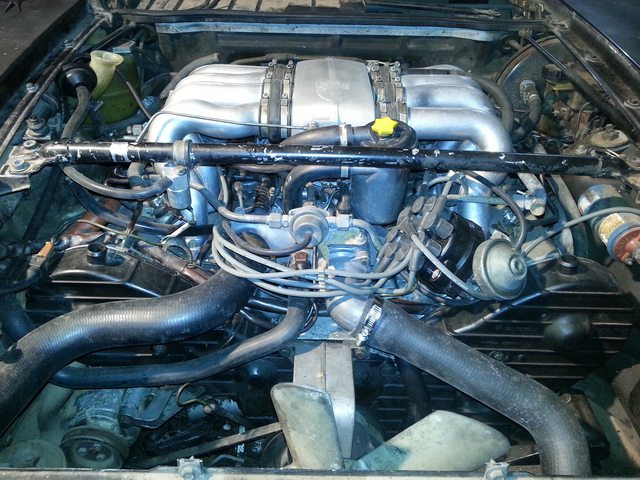
So I guess I forgot to post pictures of everything after it was finished. Here are the last few pictures I took. If you see anything incorrect please let me know. I still have not gotten around to troubleshooting the no turn over issue. Just haven't had much time to mess with her. I do want to go ahead and get the timing belt and associated parts replaced. I guess now I should be shooting for starting and driving her in the spring.
Just look at those beautiful brand new hoses... Thank you again random donor!
jOaQor7l.jpg
vUiR8usl.jpg
h5y6Nu2l.jpg
qTm7Eycl.jpg
jzirPcml.jpg
O0XEpsol.jpg
XiEl1NCl.jpg
ZzLTNqxl.jpg
gXHmJ1Hl.jpg
vKU631Ul.jpg
Just look at those beautiful brand new hoses... Thank you again random donor!
jOaQor7l.jpg
vUiR8usl.jpg
h5y6Nu2l.jpg
qTm7Eycl.jpg
jzirPcml.jpg
O0XEpsol.jpg
XiEl1NCl.jpg
ZzLTNqxl.jpg
gXHmJ1Hl.jpg
vKU631Ul.jpg

User
Joined: Jul 2001
Posts: 3,291
Likes: 2
From: Midland, Texas
Looks good so far and just cleaning/doing cosmetic stuff can lift your spirits at times .
The plenum, spider tubes, and fresh tubing alone are noticeable and help tracking leaks later on.
Same can be said for the Oil canister, A/C compressor, and the other nether parts you have cleaned.
For your sanity later on when primary and secondary warning lights start appearing and you start learning about multiple, spider grounds and there are parts that detect electrical draw/resistance imbalances between things as small as left and right stop/signal/brake bulbs you might want to get familiar with the electrical wiring schematics. By the way there are two sensors under your brake master cylinder reservoir -like two big nuts with wires, you'll need a thin 7 inch crescent- which probably will need some attention. There should also be a strap type engine/chassis ground on the passenger side to the rear of the front wheel well and some electrical connectors in the spare tire tub for the rear wiper, antenna, lights ...
We have a lot of grounds on these puppies and even though I chased all the interior/exterior light, chassis, even speaker and marker light grounds and connectors then cleaned them all as well as repairing bad splices and cut wire something is always amiss and I have disconnected the, clock, rear wiper, power antenna, and multi-metered near every wire that could possibly draw electricity in search of a parasitic draw ...no joy, so I simply disconnect the ground at end of day.
Rooting for ya' , just don't commit youyr life and all your resources continuously, plan your project give yourself money and time for enjoying life a little bit.
The plenum, spider tubes, and fresh tubing alone are noticeable and help tracking leaks later on.
Same can be said for the Oil canister, A/C compressor, and the other nether parts you have cleaned.
For your sanity later on when primary and secondary warning lights start appearing and you start learning about multiple, spider grounds and there are parts that detect electrical draw/resistance imbalances between things as small as left and right stop/signal/brake bulbs you might want to get familiar with the electrical wiring schematics. By the way there are two sensors under your brake master cylinder reservoir -like two big nuts with wires, you'll need a thin 7 inch crescent- which probably will need some attention. There should also be a strap type engine/chassis ground on the passenger side to the rear of the front wheel well and some electrical connectors in the spare tire tub for the rear wiper, antenna, lights ...
We have a lot of grounds on these puppies and even though I chased all the interior/exterior light, chassis, even speaker and marker light grounds and connectors then cleaned them all as well as repairing bad splices and cut wire something is always amiss and I have disconnected the, clock, rear wiper, power antenna, and multi-metered near every wire that could possibly draw electricity in search of a parasitic draw ...no joy, so I simply disconnect the ground at end of day.
Rooting for ya' , just don't commit youyr life and all your resources continuously, plan your project give yourself money and time for enjoying life a little bit.
Thread Starter
Rennlist Member
Joined: Jan 2012
Posts: 1,158
Likes: 0
From: Oklahoma City, Oklahoma
See I keep hearing about grounds on the spider but I see no place to ground anything to the spider nor remember removing any grounds from it.
The grounds are on my to do list when I get time to work on the car again. I plan on going through every ground. And I have an idea of why it wouldn't start but haven't had time to test it. But that idea wouldn't affect the issue with the car not turning over with the key.
The grounds are on my to do list when I get time to work on the car again. I plan on going through every ground. And I have an idea of why it wouldn't start but haven't had time to test it. But that idea wouldn't affect the issue with the car not turning over with the key.

Nordschleife Master

Joined: Jan 2013
Posts: 5,955
Likes: 331
From: Kaukauna Wisconsin
See I keep hearing about grounds on the spider but I see no place to ground anything to the spider nor remember removing any grounds from it.
The grounds are on my to do list when I get time to work on the car again. I plan on going through every ground. And I have an idea of why it wouldn't start but haven't had time to test it. But that idea wouldn't affect the issue with the car not turning over with the key.
The grounds are on my to do list when I get time to work on the car again. I plan on going through every ground. And I have an idea of why it wouldn't start but haven't had time to test it. But that idea wouldn't affect the issue with the car not turning over with the key.
They are the ones where there are a whole bunch of smaller ground wires going to one ground point (if there are 8, guess what they look like
 )
)The ones above the CE panel are a good example.
The issue with them is that there can be corrosion inside the stack of connectors.
Thread Starter
Rennlist Member
Joined: Jan 2012
Posts: 1,158
Likes: 0
From: Oklahoma City, Oklahoma
The "Spider Grounds" aren't actually grounds on the "Spider" (intake).
They are the ones where there are a whole bunch of smaller ground wires going to one ground point (if there are 8, guess what they look like)
The ones above the CE panel are a good example.
The issue with them is that there can be corrosion inside the stack of connectors.
They are the ones where there are a whole bunch of smaller ground wires going to one ground point (if there are 8, guess what they look like
)The ones above the CE panel are a good example.
The issue with them is that there can be corrosion inside the stack of connectors.
I got ya now! I will be going over them soon and will report back. I just don't get what I did to make the starter not want to turn over with the key.