
Engine coming out for Head Gaskets and WYAIT's - UPDATE: Heads back on!
 04-01-2012, 10:24 PM
#46
Rennlist Member
Thread Starter
Heads are on! It is a great feeling to be in reassembly mode.
The heads cleaned up nicely, and the chambers are now free of all carbon. We checked for level, replaced the valve stem seals, and did a valve leak test with the heads off the car by using a homemade device to pressurize the chambers (thanks to Dave C.�s ingenuity). We were able to verify that none of the valves were leaking. We also used this device to check the cylinder leak down, where we found no inconsistencies between cylinders. I also spent a lot of time cleaning the block and piston tops, removing all carbon buildup.
We also installed the water bridge today, with a new thermostat and all seals. I have a new Laso WP ready to go on, will be rebuilding the TB tensioner this week, and reassembling the cam towers with all new seals. Hopefully these will find their way to the block next weekend.
We installed a new clutch master and blue hose, have the rack ready for new delrin bushings, have a new clutch release bearing, guide tube, and release arm bushing. Also had the MAS rebuilt and the injectors cleaned. All rubber fuel lines are being replaced. New motor mounts and silicone OPG are going on, as well as a new TB, heater valve and short hose. Also, new Beru wires, caps, rotors and plugs.
Whew�that�s a lot, and I am sure I have some more odds and ends I forgot to mention. We have done quite a bit of due diligence, inspecting, double checking, etc. Now it�s down to reassembly. This has been quite a learning experience for me, and I can�t thank Dave C. enough for being a patient teacher, critical thinker, and highly skilled turner of wrenches.
Next update should show the engine happily in its proper place � maybe even running.
 04-02-2012, 12:45 AM
#47
Captain Obvious
Super User
Super User
Erik B. gave me some Berrymans Chem Dip B-9 to clean the carbon off of my pistons and it did a pretty good job after soaking for 24 hrs. The carbon was pretty thick. Erik told me he picked it up in the US. Anybody aware of something like that available in the Great White North? I have tried different solvents and nothing seems to touch the carbon like the Berrymans.
Four pistons down, now to the right side heads and do the whole process again.
Is it best to change the rod bearings all at the same time or can i do i side at a time? I just dont want to mix up the different sides when putting it back together, even though I seperated everything.
Four pistons down, now to the right side heads and do the whole process again.
Is it best to change the rod bearings all at the same time or can i do i side at a time? I just dont want to mix up the different sides when putting it back together, even though I seperated everything.
04-02-2012, 09:12 AM
#49
Rennlist Member
All I can say is, Wow!
04-02-2012, 10:15 AM
#50
Rennlist Member
Thread Starter
For cleaning the carbon off piston tops and out of the combustion chambers on the heads I used Carb Cleaner, toothbrushes, lot of patience, and a dental pick for the large chunks, being carefull not to scratch anything. For the piston tops, I rotated the engine on the stand so that the cylinder openings faced downward allowing any debris to drip off into a pan.
04-02-2012, 10:16 AM
#51
Rennlist Member
Thread Starter
04-02-2012, 10:24 AM
#52
Rennlist Member
Your attention to detail is impressive. Good work.
04-07-2012, 06:10 PM
#53
Pro
Join Date: May 2003
Location: Hamilton, Ontario, Canada
Posts: 700
Received 0 Likes
on
0 Posts
When i took my heads off, i noticed that one of the cylinders is scored. Will this type of scoring be a problem? 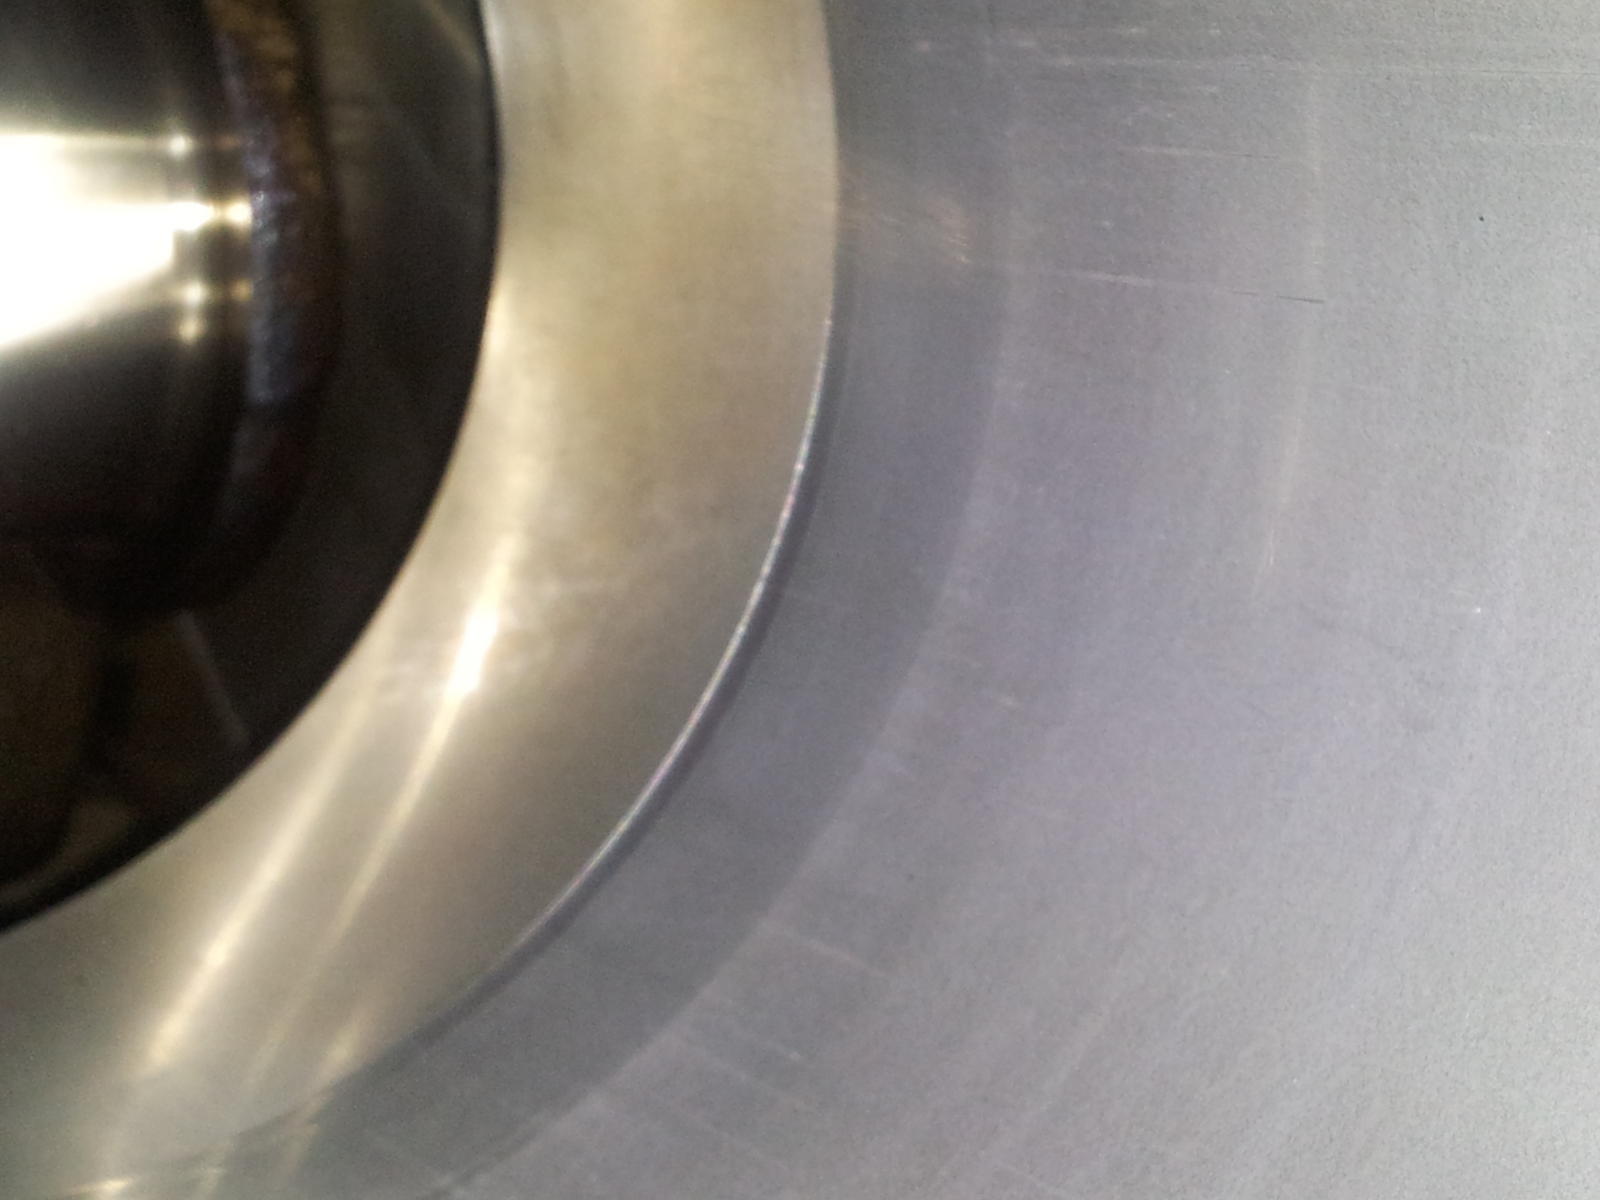
I also noticed that the head were repaired at one point. I see there is considerable pitting in the metal, but I am not sure if this will created a problem.[ATTACH][ATTACH][ATTACH]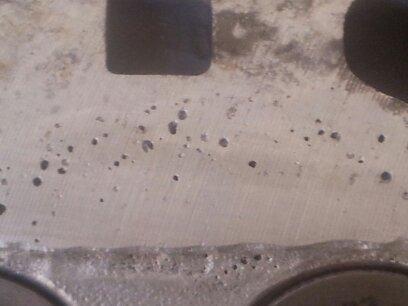 [/ATTACH][/ATTACH][/ATTACH]
I also noticed that the head were repaired at one point. I see there is considerable pitting in the metal, but I am not sure if this will created a problem.[ATTACH][ATTACH][ATTACH]
[/ATTACH][/ATTACH][/ATTACH]
04-07-2012, 09:29 PM
#54
Addict
Rennlist Member
Rennlist Member
Join Date: Oct 2003
Location: Gone. On the Open Road
Posts: 16,493
Received 1,638 Likes
on
1,069 Posts
I can't opine on the cylinder walls. But, the second picture of the head shows a chunk missing right where the fire ring of the head gasket would be. That's not good.
04-07-2012, 09:47 PM
#55
Rennlist Member
Thread Starter
Today's progress, halted by the lack of a TB tensioner gasket in the kit.
Bay is itching for it's engine back.
Taking next weekend off, then a full court press to the finish.
Bay is itching for it's engine back.
Taking next weekend off, then a full court press to the finish.
04-08-2012, 07:49 AM
#56
Rennlist Member
Looks clean as a whistle.
04-08-2012, 11:32 AM
#57
Drifting
Great Pics, thanks for posting, but where's the bling on the cam covers?
I see you are using your original cam sprockets, with all the talk about these parts lately I was wondering if the later ones are interchangeable with euro engines, I would think they would be since the belts are the same shape and all.
like this one
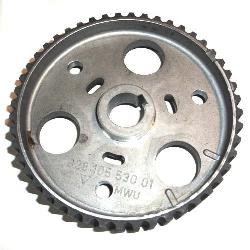
I see you are using your original cam sprockets, with all the talk about these parts lately I was wondering if the later ones are interchangeable with euro engines, I would think they would be since the belts are the same shape and all.
like this one
04-08-2012, 10:43 PM
#59
Addict
Rennlist Member
Rennlist Member
Join Date: Oct 2003
Location: Gone. On the Open Road
Posts: 16,493
Received 1,638 Likes
on
1,069 Posts
Oil pump gear is fine. There are a few spots were the coating is beginning to show wear. But, no spots show bare aluminum. It will be fine until at least the next t-belt interval.