When you click on links to various merchants on this site and make a purchase, this can result in this site earning a commission. Affiliate programs and affiliations include, but are not limited to, the eBay Partner Network.
Could the new cable be made up with one end, alternator, routed under the car in the normal fashion, brought into the battery box, cut to length and the battery connector then secured?
This is the way I did it. ^^^^
I bought 13' of #0 welding lead. $45 including the installation of the eye on the starter end. Installed and routed it under the car and then cut off the excess and installed the battery terminal. The starter turns over much more rapidly than before. Almost sounds like a high-torque starter!
The starter turns over much more rapidly than before. Almost sounds like a high-torque starter!
now I am really lost......I have replaced a number of components that have transformed my car and others that have made no difference. if this is a normal rite of passage maintenance/time replacement issue i'm all in, but not excited to delve into another project that doesn't give me a little sugar. (how flexible is #0 welding?)
Did your cable replacement effort include the new ground strap at the same time? I didn't notice any cranking improvement until the battery ground strap was updated. There was no issue with cranking speed prior to the cable and ground strap, at least for me. I didn't have a "new ground strap, old battery cable" status to compare myself.
I had some 0 AWG welding cable, and still do in fact. But it's ORANGE. Nice bright high-visibility extension-cord ORANGE. For those playing along at home, it's more flexible than the marine battery cable I used. Not as fine strands in the cable though, and not tin-plated strands. It would be fine except for the ORANGE. Getting the tin plating on the marine battery cable is a little extra insurance against the corrosion devils. I added shrink sleeve sections at both terminations to keep any corrosive elements out, but some things like that just beg to be done extra-right.
On my �83 I finally got around to looking at the original cable to evaluate how hard it�ll be to replace.
FWIW the diameter on my original cable is almost exactly .5 inches, measured with my calipers. It�s a little unclear how much bigger cable could fit in the hold downs. The 1 AWG cable I�m evaluating is about .55�. There�s a 2 AWG cable at exactly .5�. There is also a channel section just ahead of the rear wheel that will need to be pried open.
The hardest part of the job is going to be opening up the tabs on the fussy hold downs. Anyone BTDT? The lower tab on every hold down looks pretty easy to access but the UPPER tabs are right against the floorpan. I can�t even get a screwdriver in there or even see how there was space to bend the tabs at the factory. Can anyone share any how-tos on this?
Did your cable replacement effort include the new ground strap at the same time? I didn't notice any cranking improvement until the battery ground strap was updated. There was no issue with cranking speed prior to the cable and ground strap, at least for me. I didn't have a "new ground strap, old battery cable" status to compare myself.
Hi Dr. Bob,
I did not replace the ground strap at that time. Apparently someone was attempting to cook marshmallows under the car prior to my ownership and the smallish "grass" fire crisped the main power cable. Since the existing cable's performance was apparently only marginal at best, my replacement of the positive cable was a marked improvement over what i had previously. YMMV
Did your cable replacement effort include the new ground strap at the same time? I didn't notice any cranking improvement until the battery ground strap was updated. There was no issue with cranking speed prior to the cable and ground strap, at least for me. I didn't have a "new ground strap, old battery cable" status to compare myself.
I had some 0 AWG welding cable, and still do in fact. But it's ORANGE. Nice bright high-visibility extension-cord ORANGE. For those playing along at home, it's more flexible than the marine battery cable I used. Not as fine strands in the cable though, and not tin-plated strands. It would be fine except for the ORANGE. Getting the tin plating on the marine battery cable is a little extra insurance against the corrosion devils. I added shrink sleeve sections at both terminations to keep any corrosive elements out, but some things like that just beg to be done extra-right.
Updating this some as foggy memory drifts closer to shore.
My car was doing limited daily-driver duty at the point I was chasing the charging issues. "Limited" means that I was no longer commuting from the beach to Pasadena four days a week. Mostly working from a different home by then, with travel to jobsites several times a year for weeks at a time. During those travel periods, the car would have the maintainer attached, and the battery would get a full charge. The first couple starter spins after that would be brisk compared with later cranks as the battery depended more on just the alternator for charging. The lack of a full charge while driving and the deeper discharges on cranking were taking a serious toll on the battery too. The alternator was doing its part, making 14V relative to chassis ground, but the deteriorated ground strap wasn't presenting 14V to the battery terminals especially during high-current periods immediately following cranking. Those are usually cold-engine cranks, when the alternator delivers the most current it will normally need in a start-and-drive cycle. It's a slippery slope, one that finally drove the cable replacements after a near no-start.
Funny was that the DMM didn't show much in the way of voltage drop across the length of the starter cable or the ground strap with the engine running. It was only the persistent advice from those who had passed this way before that drove me to replace the ground strap and finally solve the problem. I analyzed the condition to death, rather than just taking the group advice early and replacing the easiest/cheapest/most-likely piece on the list.
On my ‘83 I finally got around to looking at the original cable to evaluate how hard it’ll be to replace.
FWIW the diameter on my original cable is almost exactly .5 inches, measured with my calipers. It’s a little unclear how much bigger cable could fit in the hold downs. The 1 AWG cable I’m evaluating is about .55”. There’s a 2 AWG cable at exactly .5”. There is also a channel section just ahead of the rear wheel that will need to be pried open.
The hardest part of the job is going to be opening up the tabs on the fussy hold downs. Anyone BTDT? The lower tab on every hold down looks pretty easy to access but the UPPER tabs are right against the floorpan. I can’t even get a screwdriver in there or even see how there was space to bend the tabs at the factory. Can anyone share any how-tos on this?
Hi Rick--
I looked again under my 1989 car, and see that there are rolled steel channels/guides with tabs, to protect the cable where it passes under the driver's seat "tub" that hangs a little lower. I was able to easily bend the little tabs enough to remove the old cable, and place the new slightly-larger 1ga Ancor cable into the channel sections, and carefully fold the tabs back so the cable is securely protected there. Others had warned me about bending and breaking those tabs and the channel. There is no easy recovery from a break there, so I moved them only enough to allow the new cable to be swapped in. The rest of the cable on mine is held by steel P-strap clamps with rubber to protect the insulation from the edges of the clamps. The cable I used is only very slightly larger OD than the original, so the factory pieces are able to wrap around without any modifications. The clamps fit over barbed studs that are welded to the tub, then the clamps are secured with plastic nuts that thread up over the barbs.
Others report and show some plastic bridge clamps holding the cable in place, and a need to enlarge those clamps when a larger cable is used. I don't know which years use those vs. the P clamps that mine came with. I might be able to go up another size (to 0 AWG) with the same insulation I have now. The P clamps can be easily replaced with slightly larger, and there's enough range in the channel and the little tabs for a little more cable. I wouldn't want to do this fit-up more than once or -maybe- twice before having worries about breaking some of the steel tabs.
----
As far as deciding a cable size, remember that the cable carries starter current forward from the battery, along with CE panel loads, while the starter is cranking. As soon as the engine starts, the starter current load goes away, and current flows the other way from the alternator. Load in that section is then battery charge current, plus injection, fuel pump, and for S4+ cars the cooling fans. CE loads are fed by the alternator via the section of KS-2 (front of engine) primary cable, then a pair of ~~12ga feeders in the KS-1 (front body) harness to the CE panel. The factory battery cable in approximately 2 gauge is more than adequate for the duty so long as the cable condition stays good and the connectors are intact and clean. The 1 gauge I used went in there because it was pretty much a direct fit and it was readily available. Don't go overboard on this particular cable, as it's adequately sized for starter cranking and wildly oversized already for all the rest of its duties when it's clean and undamaged.
Car manufacturers carefully assess the needs of the various feeders when they design the cars. Several others here have mentioned a Ford blunder in some starter cables especially in their light trucks. Porsche, thankfully, supplied the ~~ 2 gauge cable where Ford was using 6 and 8 gauge for a short section from a separate solenoid relay to the solenoid on the starter itself. The Ford cables suffered mechanical failure even though they were, at least on paper, sufficient electrically. The flex point on the 928 cable is where it loops around and back to the starter terminals at the crossmember. That flex is managed as twist in a cable loop section that's almost a foot in total length. Total vertical displacement there is very small in normal driving so is not of real concern. Use the marine or welding cable with the much finer copper stranding, and that concern goes to zero. Bottom line though is that there's virtually no additional benefit available with a 0 gauge cable there over the direct-fit 1 gauge marine cable that's the same OD as the original.
Thanks Dr. Bob! I decided to follow your lead and go with Ancor 1 AWG black battery cable. After doing the research, Ancor has the advantage of being just a little slimmer in diameter than most of the other 1 AWG cables, coming in at .518 inches (https://powerwerx.com/ancor-115002-b...cable-25-black) even though it has a .08-inch insulation thickness which is in line with what virtually all other cables I looked at use as well. I was able to find it sold by the foot pretty cheap at https://www.marineelectricsystems.ne...ld-by-the-foot.
I really appreciate your explanation of the loads and directions of flow. I'm doing this exercise primarily as preventative maintenance and not because there's a problem (and/or the fact that like most of us here I'm some kind of masochist lol!) Assuming that my current battery cable is still "good enough", I can't bring myself to go through all the work of replacing it with 2 AWG which is slightly smaller than the stock cable. But it seems worthwhile to go with a nonstock cable that has a little more capacity and still fits with no other modifications. Of course, I've gone crazy with WYAIT syndrome and am also replacing the injection harness, the engine front harness (to alternator and starter), and the engine main harness that feeds the 14-pin and loops around the entire engine bay, so the battery cable is the last remaining logical link in that system.
And yes, it's those plastic clamps -- square on the outside and held in place with bendable tabs -- which are problematic. They don't appear able to accept a cable much larger than .5" without being hollowed out (as documented elsewhere in this thread) and those tabs up next to the floorpan are going to be super hard to unbend.
That's why I went with Ancor. My "evil plan" is that, because the cable is just barely above .5" in diameter, I can avoid having to modify the plastic clamps AND, with some luck, get away with merely unbending one of the two tabs, lifting up just the one edge of the clamp slightly, and feeding the cable through each clamp (without having to actually remove the clamp)!!! This is just for the three or four clamps more or less under the driver's seat; for the clamps around the rear wheel there seems to be enough clearance for both tabs on all clamps. We'll see if my plan works! Mwu-ha-ha!!
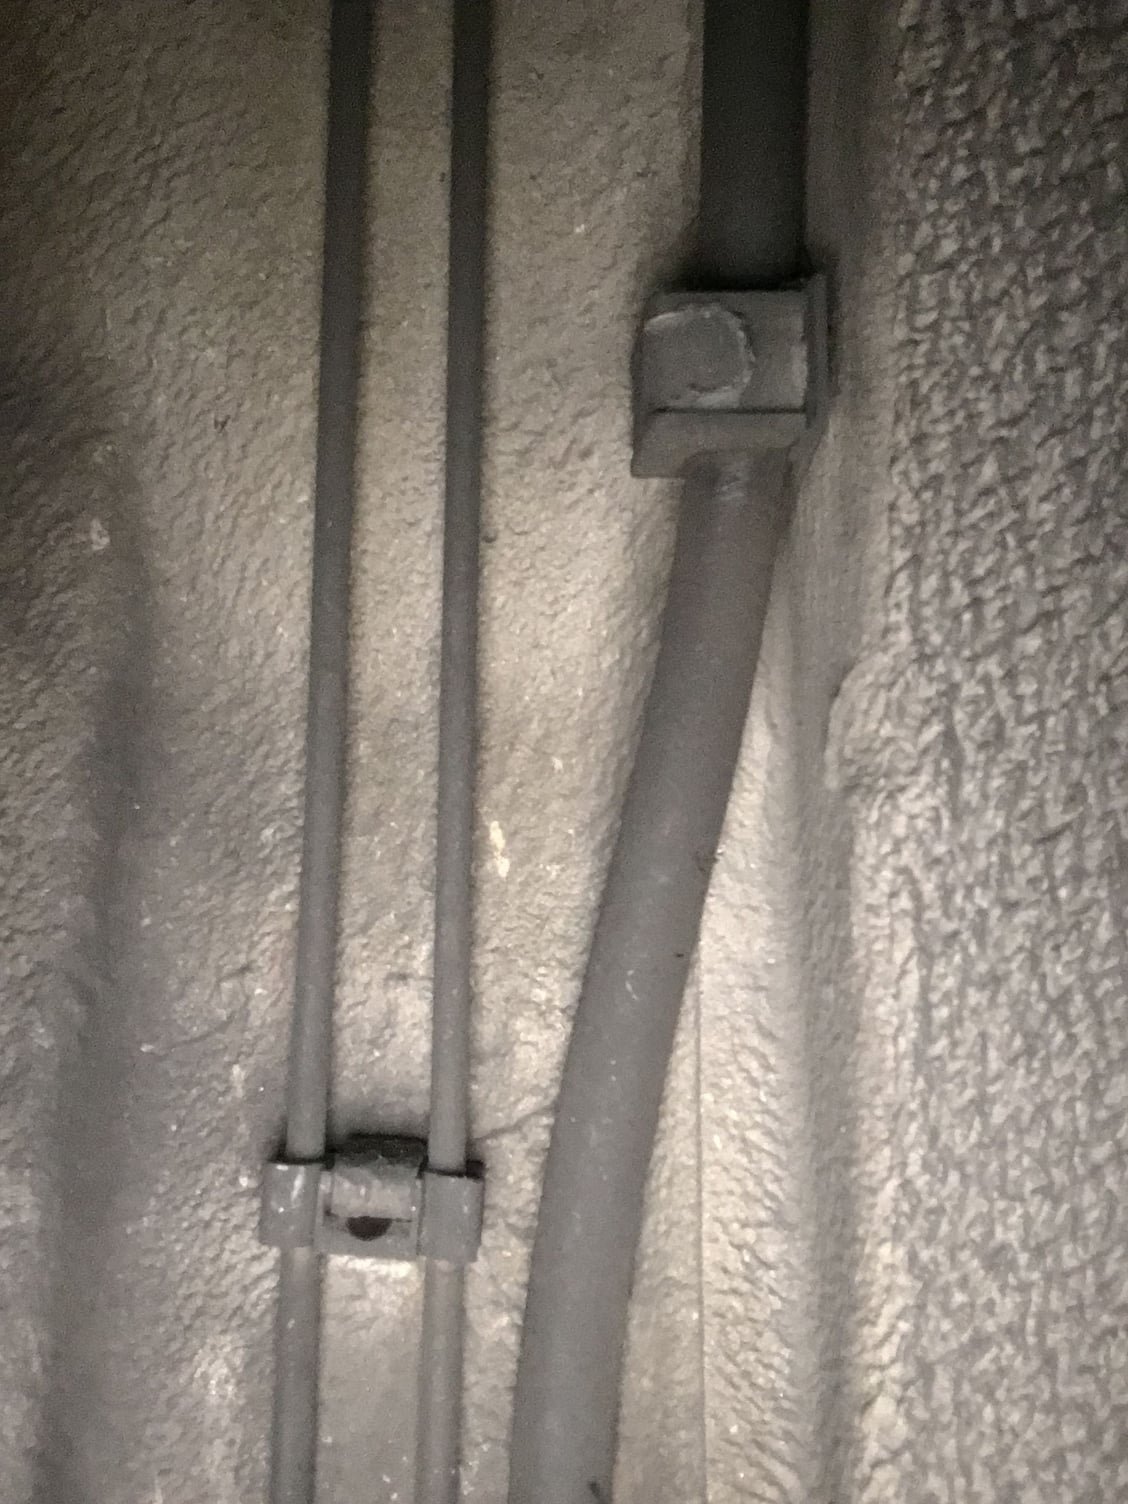
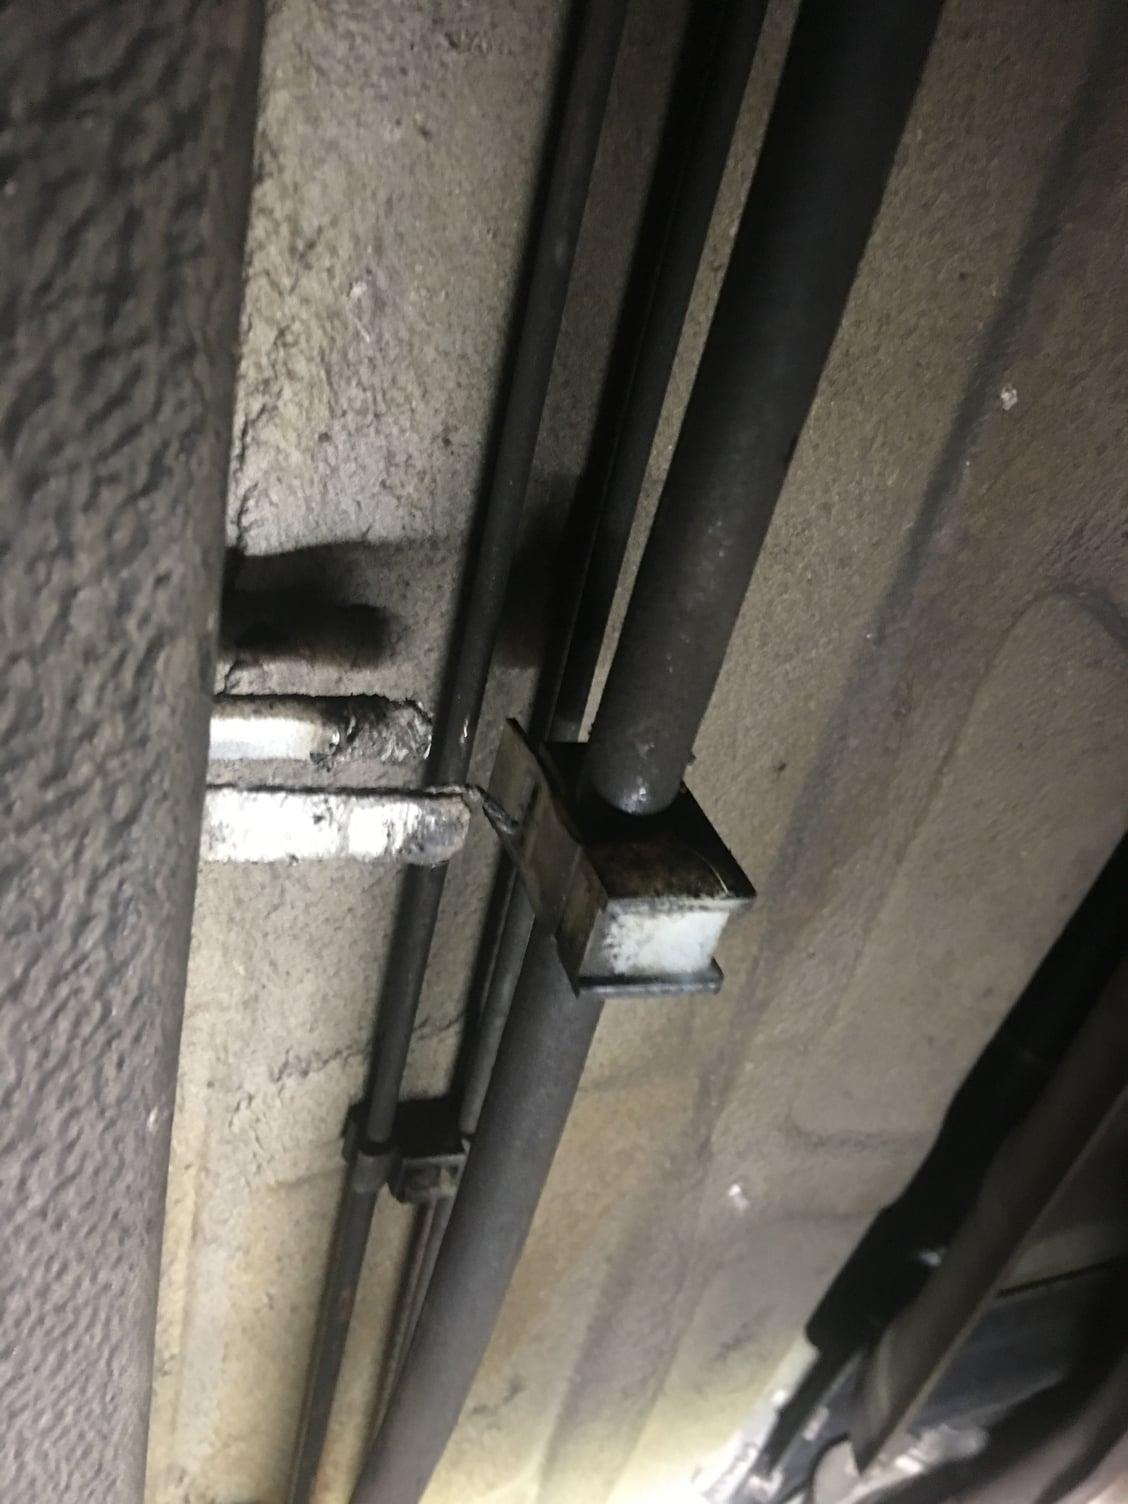
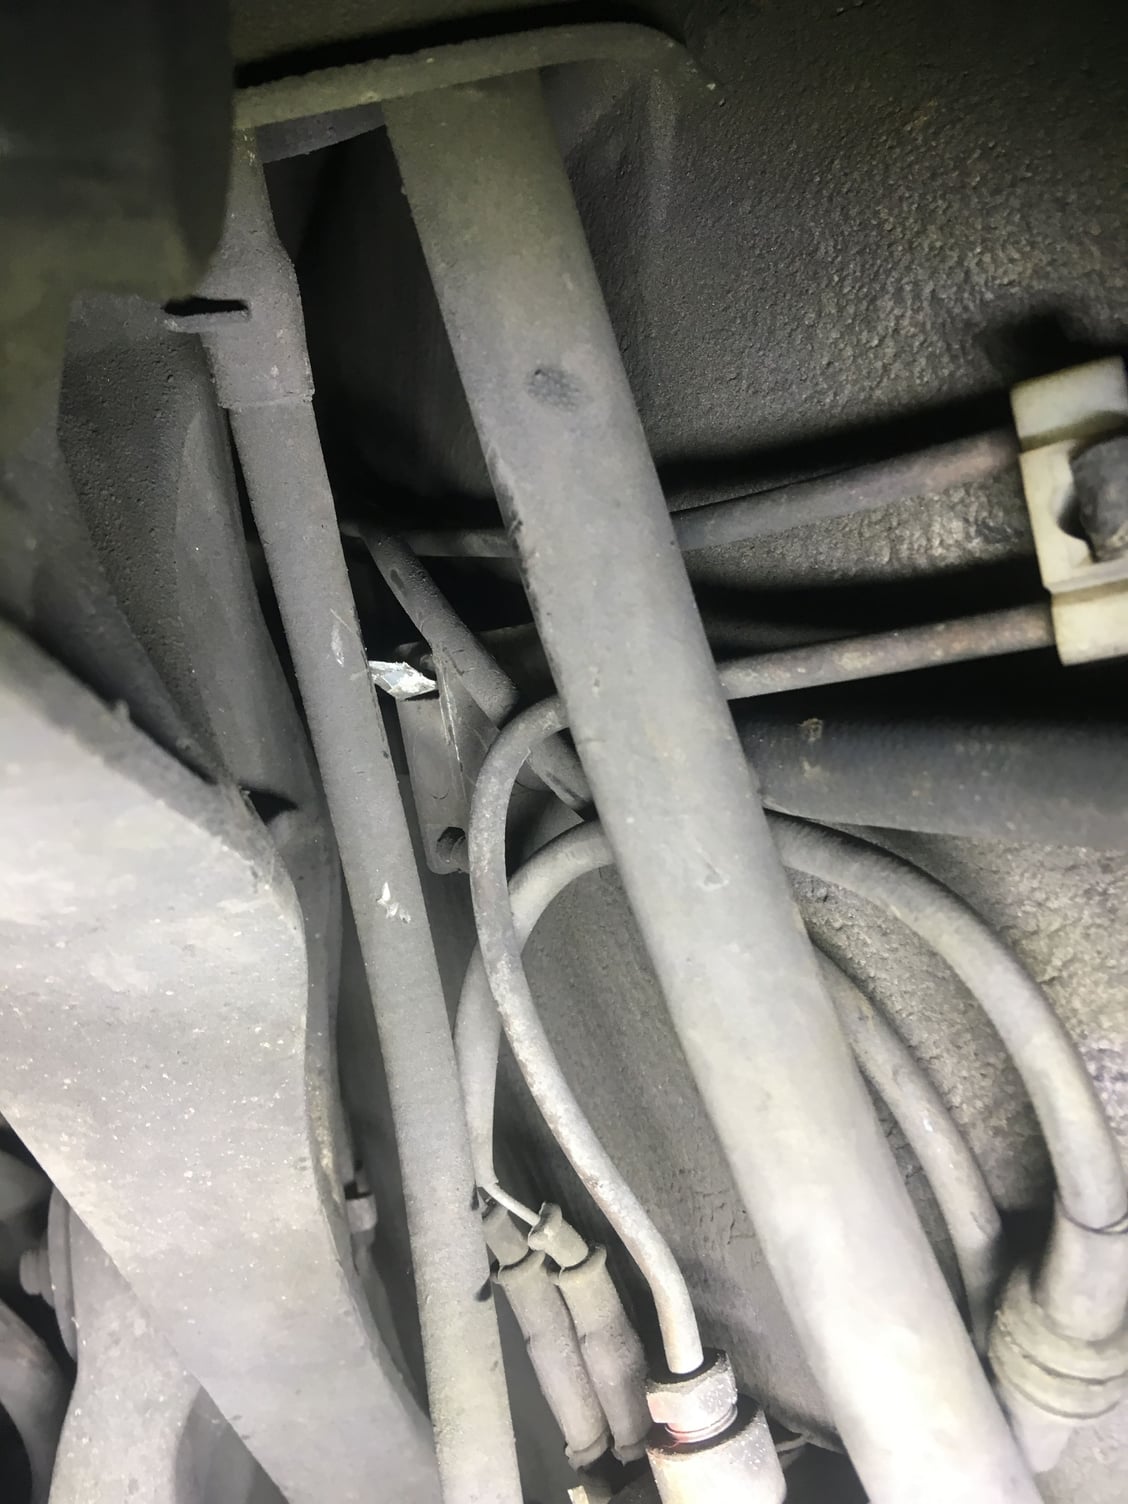
Making some progress on removing the original cable. Here are the old-style cable hold downs with the square plastic insert. Mine�s a USA �83. I used a three dollar set of angled picks from Harbor Freight and a variety of straight and angled pliers to bend back the tabs on the hold downs. I loosened the rear heat shield just ahead of the left rear wheel and slid it towards the center of the car to get better access. Getting access to both tabs on every hold down throughout the entire cable was challenging. I was able to remove them all though except for one hold down in the rear wheel well area, which is trapped in place by a brake fluid hard line (not to mention the rear cross member).
As originally installed. Here�s a hood down with its tabs bent straight and the plastic insert removed. This one can�t readily be removed but it can be slid about a quarter inch up - here I think I�ll need to try to slide the cable through the hold down in situ.
The cable on my �83 is about 11 feet 2 inches fwiw.
It has three sleeves, all the same material: one at the battery end and two on either side of the big P-clamp on the cross brace. There is one apparently identical sleeve on the electrical harness to the alternator at the power steering area.
The sleeve for the battery cable is .5 inch ID (and totally immovable on the original cable) and approximately.80 inch OD. The new sleeve will need to be somewhat flexible and of course resistant to fuel, oil, water and at least a reasonable temperature.
Question: what�s a good/best sleeve material from these three choices, and is there a better choice?
Option 1: .58 inch ID .70 inch OD PVC flexible irrigation pipe from Home Depot
Option 2: 5/8 ID 7/8 OD clear braided PVC flexible dishwasher drain pipe, also Home Depot
Option 3: Nylon braided fuel line, CPE synthetic rubber/steel mesh/nylon braid cover, .56 ID .82 OD -40 to +350F.
BTW one potential advantage of running Option 1 is to possibly use a single sleeve near the starter going straight through the P clamp rather than two sections as per stock where the P clamp grips the cable directly in between the two sections of sleeve. Has anyone tried this (or did you stick with two sections there)?
I�m leaning toward option 3 because of its known material properties.
Someplace in this thread I shared that I found a piece of sprinkler PVC repair hose at Home Depot that is the perfect fit over the Anchor cable I used. Black sleeve, looks and feels exactly like the original, slides over the new cable before you install the starter-end lug. Under $2 at the time.
Dr Bob,
I saw your earlier post and have made two visits to Home Depot so far and haven’t found it yet! Instead I came back with a roll of PVC irrigation tubing, but it’s definitely not just like the original. Much thinner wall than original. My original has a wall thickness of about 1/8 inch.

 04-26-2019, 11:27 PM