
First start after 15 years parked - Intake Restored
 08-20-2012, 10:10 PM
#106
Instructor
Thread Starter

Thats was easy compared to drive shaft bearings... I forgot the original position and spent more them 4 hours to put it at right position.
 08-20-2012, 11:45 PM
#107

Usually there's a hole to put a paperclip size pin in to hold the brushes or the springs. I don't see any holes but maybe the arrows indicate spring perches for the purpose?
08-21-2012, 12:01 AM
#108
Three Wheelin'

Is this the first time you started the engine? Taking the engine out is not that bad. When you take your heads off the decision will come if you should replace all the head studs or just reuse them all. I would not try to replace just one or two if they look rusty. If you decide to change only o few of them change all of them.
I hope the block is okay, if not you can find a good one here for cheap.
I hope the block is okay, if not you can find a good one here for cheap.
08-21-2012, 10:59 PM
#109
Instructor
Thread Starter
08-21-2012, 11:05 PM
#110
Instructor
Thread Starter
Is this the first time you started the engine? Taking the engine out is not that bad. When you take your heads off the decision will come if you should replace all the head studs or just reuse them all. I would not try to replace just one or two if they look rusty. If you decide to change only o few of them change all of them.
I hope the block is okay, if not you can find a good one here for cheap.
I hope the block is okay, if not you can find a good one here for cheap.
Was the first time running for a couple minutes and idling. Last attempts was just few seconds - less them 5 seconds.
Today I started the task to remove the engine.
08-21-2012, 11:20 PM
#111
Instructor
Join Date: Jun 2012
Location: Lancaster CA
Posts: 191
Likes: 0
Received 0 Likes
on
0 Posts
After reading this thread, it's impossible to not cheer for you. You've done some really impressive work on that car and I'm excited for the time to come when you will be able to finally enjoy it! I look forward to following your progress and best of luck!
Last edited by fltechpilot; 08-21-2012 at 11:21 PM. Reason: Typeo
08-22-2012, 06:51 PM
#112
Instructor
Thread Starter
I'm with beast's heart in hands...
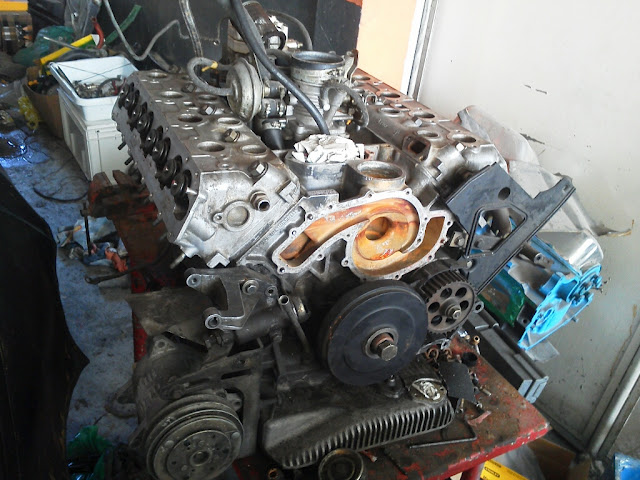
We removed the engine and here the results.
The Engine's block - Left side
Attachment 658231
The Left Head
Attachment 658233
The infamous gasket
Attachment 658232
Well, at least it's a good news, the cylinder is in a good shape.
Now is time to put new gasket.
Let�s keep moving !!!!!
We removed the engine and here the results.
The Engine's block - Left side
Attachment 658231
The Left Head
Attachment 658233
The infamous gasket
Attachment 658232
Well, at least it's a good news, the cylinder is in a good shape.
Now is time to put new gasket.
Let�s keep moving !!!!!
08-23-2012, 02:20 AM
#114
Three Wheelin'
How does the top machined surface of the cylinders look, any corrosion pitting? Also how does the outside surface of the cylinders look like?
You have to be careful how you clean the machined surface on the heads and the block to not gouge it or remove aluminum making the surface uneven. All you want to do is to remove old head gasket material, once you are done you should still be able to see the factory machining marks. The surface does not have to look nice and shiny, just flat with no raised or loose material. Some dark spots will be left when you are done, their not a big deal, so don't go at it with sand paper or scotch brite. Make sure surfaces are dry from oil before new head gasket. Many have done head gasket jobs improperly, resulting in a pre mature head gasket failure. I would take the heads to a good machine shop to have them at least resurfaced before putting new head gaskets on. If you do decide to have them re machined make sure they have a actual Mill to do the job, not the old school sandpaper wheel method.
You have to be careful how you clean the machined surface on the heads and the block to not gouge it or remove aluminum making the surface uneven. All you want to do is to remove old head gasket material, once you are done you should still be able to see the factory machining marks. The surface does not have to look nice and shiny, just flat with no raised or loose material. Some dark spots will be left when you are done, their not a big deal, so don't go at it with sand paper or scotch brite. Make sure surfaces are dry from oil before new head gasket. Many have done head gasket jobs improperly, resulting in a pre mature head gasket failure. I would take the heads to a good machine shop to have them at least resurfaced before putting new head gaskets on. If you do decide to have them re machined make sure they have a actual Mill to do the job, not the old school sandpaper wheel method.
08-26-2012, 12:10 PM
#115
Instructor
Thread Starter
How does the top machined surface of the cylinders look, any corrosion pitting? Also how does the outside surface of the cylinders look like?
You have to be careful how you clean the machined surface on the heads and the block to not gouge it or remove aluminum making the surface uneven. All you want to do is to remove old head gasket material, once you are done you should still be able to see the factory machining marks. The surface does not have to look nice and shiny, just flat with no raised or loose material. Some dark spots will be left when you are done, their not a big deal, so don't go at it with sand paper or scotch brite. Make sure surfaces are dry from oil before new head gasket. Many have done head gasket jobs improperly, resulting in a pre mature head gasket failure. I would take the heads to a good machine shop to have them at least resurfaced before putting new head gaskets on. If you do decide to have them re machined make sure they have a actual Mill to do the job, not the old school sandpaper wheel method.
You have to be careful how you clean the machined surface on the heads and the block to not gouge it or remove aluminum making the surface uneven. All you want to do is to remove old head gasket material, once you are done you should still be able to see the factory machining marks. The surface does not have to look nice and shiny, just flat with no raised or loose material. Some dark spots will be left when you are done, their not a big deal, so don't go at it with sand paper or scotch brite. Make sure surfaces are dry from oil before new head gasket. Many have done head gasket jobs improperly, resulting in a pre mature head gasket failure. I would take the heads to a good machine shop to have them at least resurfaced before putting new head gaskets on. If you do decide to have them re machined make sure they have a actual Mill to do the job, not the old school sandpaper wheel method.
The machine parts looks nice and i can see some light factory honing inside the cylinder. The car has only about 30k miles !
I'll leave the heads to a machine shop to resurface and cleaning.
09-12-2012, 12:22 AM
#116
At the start of the thread, the advice was to fix mechanical and then cosmetic, maybe you did it the wrong way round?
Well done on what you have done though, that is a lot of progress with only working a few hours each weekend.
So how is the car now?
Well done on what you have done though, that is a lot of progress with only working a few hours each weekend.
So how is the car now?
09-29-2012, 10:04 PM
#117
Instructor
Thread Starter
Good day today !
Heads came from machine shop and new heads gasket installed !!!! Bolts not torqued yet, but sleeves' top and engine block cleaned and ready to finish.
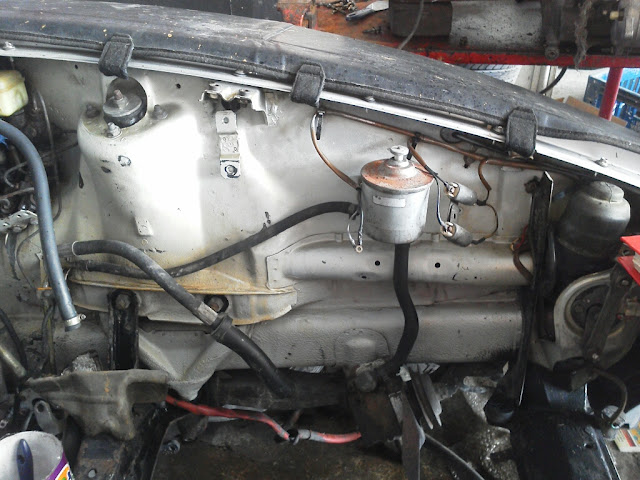
Once the engine is off the car I decide to clean the engine bay... 1 galon of Simple Green and 3 hour of labor... I'm happy with results.
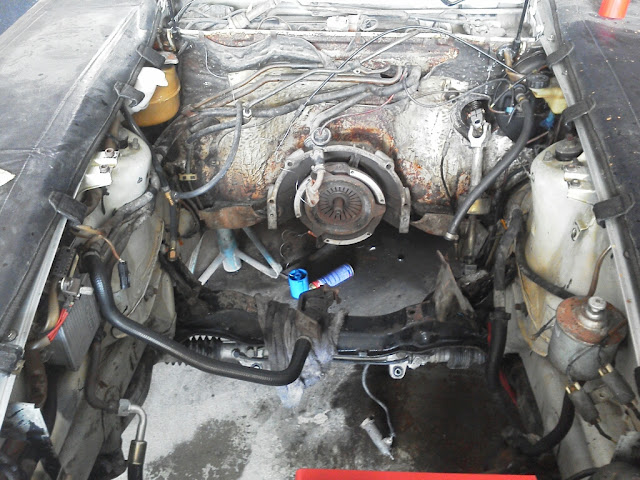
I'm very anxious to put this car back on the road after almost 17 years parked !
Heads came from machine shop and new heads gasket installed !!!! Bolts not torqued yet, but sleeves' top and engine block cleaned and ready to finish.
Once the engine is off the car I decide to clean the engine bay... 1 galon of Simple Green and 3 hour of labor... I'm happy with results.
I'm very anxious to put this car back on the road after almost 17 years parked !
09-29-2012, 10:15 PM
#118
Three Wheelin'
This would be the time to either replace with new or rebuilt your AC lines. One of the AC lines will not come out without the engine being out. Also rebuilt or replace power steering lines.
09-29-2012, 10:19 PM
#119
Three Wheelin'
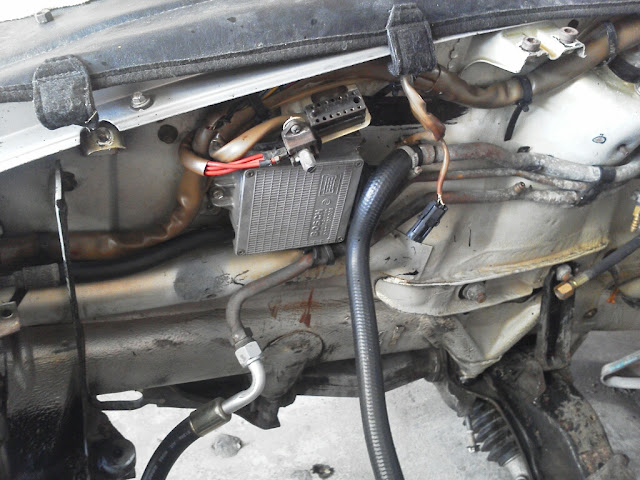
Also, since this is a 5 speed change the infamous blue hose under the master cylinder....With the engine in, its so difficult to change that some people have cut holes behind the fender to get to them. Since you have the engine out now is the time to change it if you haven't done so yet.