
Rear seat removal and rear seat belt upgrade
 10-18-2011, 09:36 PM
#46
Instructor
Join Date: Oct 2011
Posts: 130
Likes: 0
Received 0 Likes
on
0 Posts
How did it go for everyone trying to reattach the cushions with velcro? Or did everyone use the Weldwood Contact Cement? What is everyone doing? I'm to the point that I have everything ripped out and the new 3-point belts installed. I need to clean things up and then put it all together.
Under the cushions found about .60 cents! Woo hoo, I'm rich! And a groovy triangular earring that looks like it would have fit great circa 1987 (the year of my S4).
Under the cushions found about .60 cents! Woo hoo, I'm rich! And a groovy triangular earring that looks like it would have fit great circa 1987 (the year of my S4).
 10-18-2011, 10:16 PM
#47
Burning Brakes
Thread Starter
How did it go for everyone trying to reattach the cushions with velcro? Or did everyone use the Weldwood Contact Cement? What is everyone doing? I'm to the point that I have everything ripped out and the new 3-point belts installed. I need to clean things up and then put it all together.
Under the cushions found about .60 cents! Woo hoo, I'm rich! And a groovy triangular earring that looks like it would have fit great circa 1987 (the year of my S4).
Under the cushions found about .60 cents! Woo hoo, I'm rich! And a groovy triangular earring that looks like it would have fit great circa 1987 (the year of my S4).
Steve
10-18-2011, 10:21 PM
#48
Rennlist Member
In my case the old glue residue that remained after removing the seats was still sticky enough to hold the cushions firmly in place upon re-install with no additional adhesive. I have my can of Weldwood handy, but have not had to use it. But, my car has not baked in the sun much over it's lifetime, so the original glue remained somewhat pliant and sticky.
10-30-2011, 05:13 PM
#49
Instructor
Join Date: Oct 2011
Posts: 130
Likes: 0
Received 0 Likes
on
0 Posts
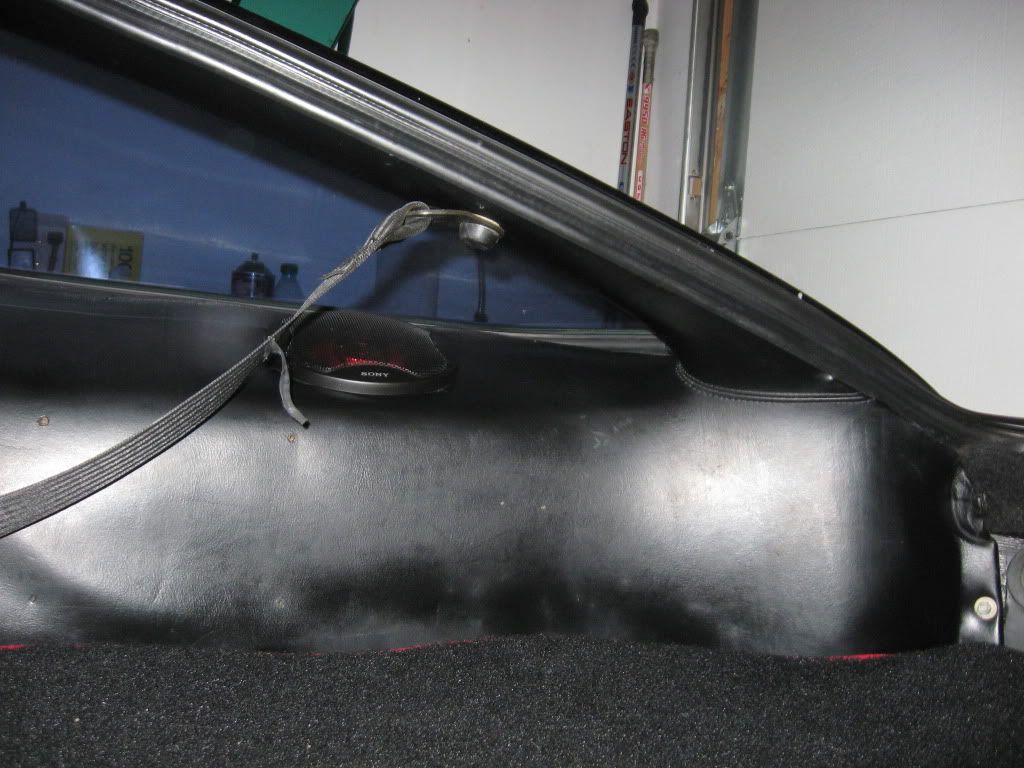
Does anyone have any more photos to show exactly where I am supposed to cut into to find the hole for the 3-point mount on the C-pillar? I definitely find one really good sized whole, but it is way in the back. I found a second hole more in the middle. I have all the hardware ready and have the new retractors in and seats back in too, but really want to check and double check before I start cutting. If anyone can give measurements from other points of reference to make sure I don't screw it up, that would be appreciated.
I'll attach a photo and marks for where I think those two holes are I am finding.
Thanks
-Bill
I'll attach a photo and marks for where I think those two holes are I am finding.
Thanks
-Bill
10-31-2011, 12:40 AM
#50
Rennlist Member
Rearmost - I make it 7" forward of the seam between the quarter panel and the C pillar cover. ie from the rearmost point you can get on the C pillar with its trim in place.
jp 83 EurO SAT 54k
jp 83 EurO SAT 54k
10-31-2011, 09:27 AM
#51
Instructor
Join Date: Oct 2011
Posts: 130
Likes: 0
Received 0 Likes
on
0 Posts
Really! Wow, that is so far back, I thought I might have been wrong. But that is definitely the one that I can feel the best. And I double checked the distance and it is 7" from the seam just like you said.
Does anyone have a photo that shows it that far back once installed? Not that I doubt you (I really don't), but just for that final piece to put my mind at easy before I take my exacto knife to the interior. :O
Does anyone have a photo that shows it that far back once installed? Not that I doubt you (I really don't), but just for that final piece to put my mind at easy before I take my exacto knife to the interior. :O
 10-31-2011, 09:24 PM
#54
Instructor
Join Date: Oct 2011
Posts: 130
Likes: 0
Received 0 Likes
on
0 Posts
Hey, thanks everyone! I sliced it up today and worked like a charm. Now I'll need to tackle an upgrade on something much more complex. Imagine how many posts I'll have to figure that out!
12-17-2023, 09:17 AM
#56
3rd Gear
You need to remove the inner brackets if you have rear A/C. Once that center cover is removed, you can access a second bolt and remove the inner bracket.