When you click on links to various merchants on this site and make a purchase, this can result in this site earning a commission. Affiliate programs and affiliations include, but are not limited to, the eBay Partner Network.
John- that’s interesting and had not thought of the that- thanks. To clarify the drop out I was seeing was on the supplied pressure gauge on the R134 recharger, it’s probably not the highest quality tool and so I am going to take it to my mech for a proper pressure test. I believe that the low pressure situation on the coolant end is causing the low pressure switch to do its job, but will do more testing today. You do give me something to think about though concerning the existing relay.
THANK YOU DWAYNE! I just did the relay plus inline fuse on my 928. Without your write up I would have never tackled it and just dropped tons of money on a new controller. Under $20 with shipping and my time = success. So happy. It takes a lot of effort and time to document what you did and people like me greatly appreciate it.
dr bob is a long time Rennlist member (lifetime member, moderator)
I'd suggest a different username would avoid real confusion. Glad Dwayne's detailed materials worked out for you - always a pretty awesome level of detail
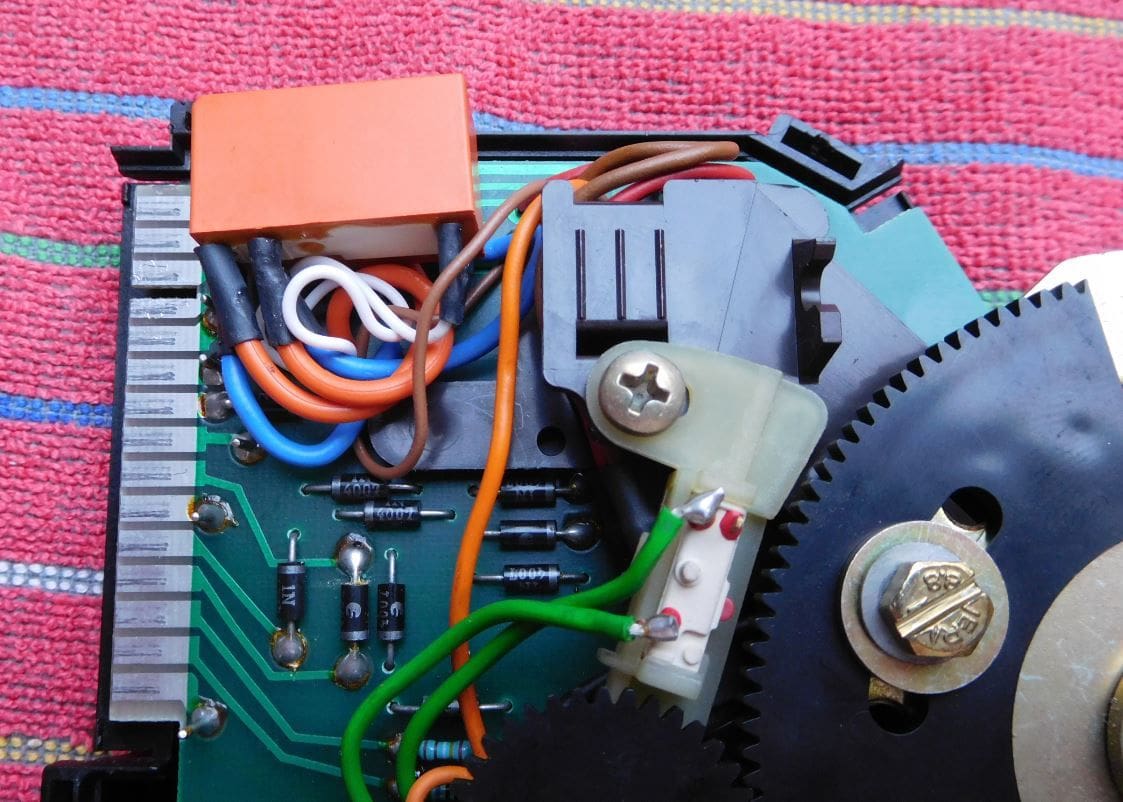
Other problems the occur to the control head besides a bad relay:
1. Bad micro-switches
2. Bad temperature potentiometer, or mis-adjusted
3. Broken fan speed dial indicator
4. Bad PCB track wipers on mode selector
5. Bad diodes (1N4001)
6. Broken fiber optic cables
7. Broken slider *****
8. Broken plastic frame/housing
I had to open the HVAC to change the light bulb in it, all works perfectly now but in the mean time I moved to another house and cannot find the 6 screws in the pictures below that are used for holding the covers together, it would be incredibly helpful if anyone knew their length and width so that i could buy new substitutes
Originally Posted by Dwayne
Begin by removing the 2 Phillips Head screws on the top of the unit. Attachment 500486
Turn the unit over and remove the 4 Phillips Head screws there. Attachment 500487
I noticed that 2 screws found on top were shorter than the 4 screws found on the bottom. Attachment 500488
Thanks a lot Dwayne for this very clear write-up !
I replaced the relay with a Schrack RT424012, fits nicely into the housing. I used thin wires for the coil, 0.35mm� and thick ones for the contacts 0.75mm�.
I used this type because I had one
If you have to order one the RT444012 will also work since one needs only two normally open contacts (DPST) and the RT424012 is a DPDT.
Just as a note, my putting a 20a relay in series with the compressor clutch and switching it with my damaged internal relay finally failed after several years. I pulled the climate unit, popped the top off the internal relay, cleaned the contacts with 1000 grit sandpaper, put it together and all is working.
Given that the stock relay is now switching a 100ma instead of a 5a load it should last for another 1,000 years. We'll see.
Hey,
Did I understood you well, you used the original relay to drive a new one, right?
I don�t think it�s a good idea for two reasons:
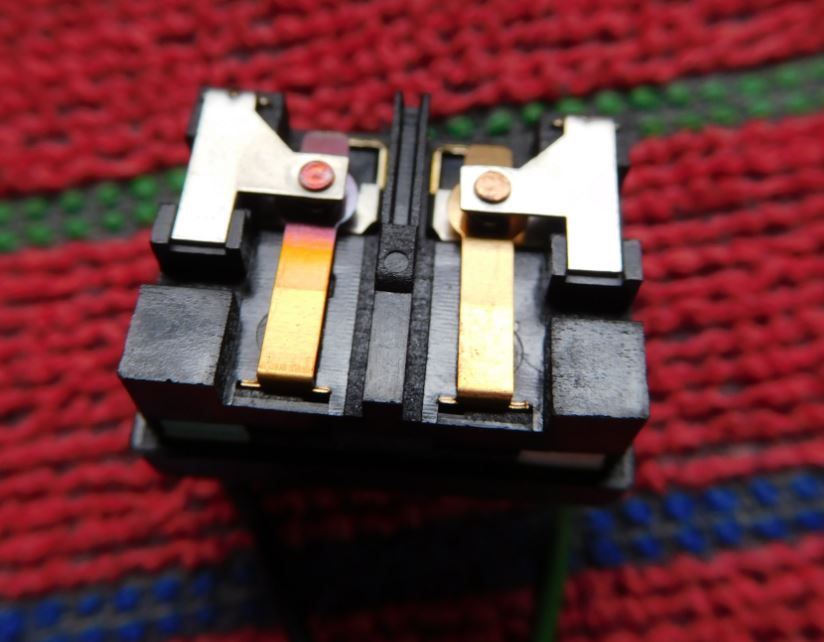
a) As you can see in attached picture the one contact that drives the compressor clutch has a nice colour due to heating. To me, the blade is mechanically weakened so that the expected force can�t be applied to the contacts anymore.
b) I measured the resistance of the contacts; it is around 150 Ohm where it should be less than 1 Ohm. Any relay in series with this contact will never get the correct voltage on his coil.
Just a thought� �
2) A quick brush up on the original relay contacts will restore operation. However if you don't do something else they will burn up again because:
a) The compressor is a heavy load, too much for this relay.
b) The compressor is an inductive load which includes a high current draw when contact is made and broken.
So I went with the long term solution which is to have a nice big automotive relay fire the clutch. The little relay should be able to handle switching a <100ma load with a kickback diode pretty much forever. The bluing is probably not going to cause the relay contact to fail, but if it does I'll be happy to report on it :-)

 06-03-2018, 07:53 AM