

Torque Tube and Input Shaft are Toast - What would you do?
 08-23-2010, 03:08 PM
#16
Craic Head
Lifetime Rennlist
Member
Lifetime Rennlist
Member
well I don't know if the link below works, but I posted a picture with description of the event back on 8-21-10. see if you can find that. It's not all that gruesome, and the picture's not too good. unfortunately the coupling is still somewhere inside the torque tube and out of sight in the picture, so I don't have a picture of it to share.
Please forgive the following description if you already know this, inside the torque tube is the central shaft that has grooves machined around the circumference near each end. At each end is a split coupling that uses a bolt which should fit inside these grooves. As you tighten the bolt the coupling closes together in turn closing the trans input shaft ID spline onto the central shaft OD spline.
https://rennlist.com/forums/928-foru...-came-off.html

 08-23-2010, 08:32 PM
#17
Instructor
Thread Starter
Join Date: Sep 2007
Location: NE PA aka-the endless mountains
Posts: 184
Likes: 0
Received 0 Likes
on
0 Posts
Hey Mike, did what you suggested. The input shaft turns, but the central shaft has moved fore-aft such that the groove is not visible from the opening on the input shaft. lots of metal shavings came raining down as the input shaft turn, so it definitely did not ID-OD spline machining! Not sure I'd want to try and run the car even if I could line them up again. But it's good to know the input shaft did not break.
Thanks for the advice.
Thanks for the advice.
08-23-2010, 08:47 PM
#18
Former Vendor

Keith:
Compared to what I just went through, this is not a huge deal.
Pop that transmission out of the car, before the weather turns bad. This will let you survey the damage. '83/'84 fifith gears (input shaft) are tough to come by, but perhaps the new parts guy on the East Coast might have a tranmssiion with a good gear in it. If not, thinbk about a '85/'86 complete transmission swap...has much better syncros. This is what I'm going to do, for my son's car.
If you get stuck, I'll help you fix the transmission, from afar. Pictures and the internet make this easy.
08-23-2010, 08:59 PM
#19
The Parts Whisperer
Rennlist
Site Sponsor
Rennlist
Site Sponsor
You could always do the hack method. I bought a parts car once that had a bad 5th and torque tube shaft and the it was welded together. Sweet
 08-23-2010, 09:01 PM
#20
Rennlist Member
I have a donor 84 USA. It shifted very well for me. Problem is some play that lets it pop out of 4th on decel. Looks like the 4th and 5th gears are very much clean and intact, and synchros too, I think. (actually I think the codes say its an open differential 83)
Reverse gear is chipped.
This box is available because generous rennlisters as of last week made other parts available to me. (and I don't know how to fix this one, or any one for that matter)
So, I think this would help and its available to the OP at no cost for execution of this project.
I can take pictures if you guide me on it, it is clean and on my benchtop in the basement.
Last edited by Landseer; 08-23-2010 at 09:30 PM.
08-23-2010, 10:22 PM
#21
Rennlist Member
Here's some pictures of a possible donor for consideration.
Internals after the camera battery recharges.
5th has very slight chipping around center.
Upshifts 1 thru 5 and downshifts 5 thru 2 were always smooth.
Internals after the camera battery recharges.
5th has very slight chipping around center.
Upshifts 1 thru 5 and downshifts 5 thru 2 were always smooth.
08-24-2010, 07:53 AM
#22
Instructor
Thread Starter
Join Date: Sep 2007
Location: NE PA aka-the endless mountains
Posts: 184
Likes: 0
Received 0 Likes
on
0 Posts
thanks for all the advice and encouragement guys.
not sure I'll take you up on your, er, "advice" there Mark and weld them together.
I know you were being facetious.
all this good advice has got me re-invigorated to give it a go and pull that baby out. hopefully this is not just a short-lived manic phase to be followed by the horrible crash after i see what's inside the box. but let's not think bad thoughts, and go one step at a time.
thanks again all!
not sure I'll take you up on your, er, "advice" there Mark and weld them together.
You could always do the hack method. I bought a parts car once that had a bad 5th and torque tube shaft and the it was welded together. Sweet
all this good advice has got me re-invigorated to give it a go and pull that baby out. hopefully this is not just a short-lived manic phase to be followed by the horrible crash after i see what's inside the box. but let's not think bad thoughts, and go one step at a time.
thanks again all!
08-24-2010, 09:59 AM
#23
Craic Head
Lifetime Rennlist
Member
Lifetime Rennlist
Member
thanks for all the advice and encouragement guys.
not sure I'll take you up on your, er, "advice" there Mark and weld them together.
I know you were being facetious.
all this good advice has got me re-invigorated to give it a go and pull that baby out. hopefully this is not just a short-lived manic phase to be followed by the horrible crash after i see what's inside the box. but let's not think bad thoughts, and go one step at a time.
thanks again all!
not sure I'll take you up on your, er, "advice" there Mark and weld them together.
I know you were being facetious.
all this good advice has got me re-invigorated to give it a go and pull that baby out. hopefully this is not just a short-lived manic phase to be followed by the horrible crash after i see what's inside the box. but let's not think bad thoughts, and go one step at a time.
thanks again all!
Good luck and keep us posted.
08-24-2010, 07:48 PM
#24
Instructor
Thread Starter
Join Date: Sep 2007
Location: NE PA aka-the endless mountains
Posts: 184
Likes: 0
Received 0 Likes
on
0 Posts
Thanks for the generous offer Chris!
I've started getting the clutch out, and hopefully will be in a position to know the condition of the trans innerds soon. I'll keep you posted on what I find.
Regards, Keith
I've started getting the clutch out, and hopefully will be in a position to know the condition of the trans innerds soon. I'll keep you posted on what I find.
Regards, Keith
08-24-2010, 08:30 PM
#25
Rennlist Member
No problem. I think the right parts are here and in the right hands (the West Coast guys) you should be in good shape quickly.
(I know about the wedding thing, BTW, youngest daughter gets married at X-mas)
(I know about the wedding thing, BTW, youngest daughter gets married at X-mas)
08-24-2010, 08:58 PM
#26
Instructor
Thread Starter
Join Date: Sep 2007
Location: NE PA aka-the endless mountains
Posts: 184
Likes: 0
Received 0 Likes
on
0 Posts
congrats! now simply hand over all liquid assets to wife, grin, shrug, bite tongue and lip simultaneously, nod when appropriate, learn to say "sure, whatever you think" when appropriate. practice smiling, and holding the smile for long periods of time. it's worked for me so far.
08-29-2010, 09:50 AM
#27
Instructor
Thread Starter
Join Date: Sep 2007
Location: NE PA aka-the endless mountains
Posts: 184
Likes: 0
Received 0 Likes
on
0 Posts
Well I'm beginning the process of getting the trans and TT out. 
Clutch out? --> Check. [Note to self, remember to use shorter shims for the intermediate plate release springs]. I had one hang up at the top of the bellhousing and could not rotate the engine to loosen the clutch bolts. I had to get a bigger breaker bar to finally pop the shim out and re-do. Don't make my mistake. 
rear wheels and brakes off? --> Check.
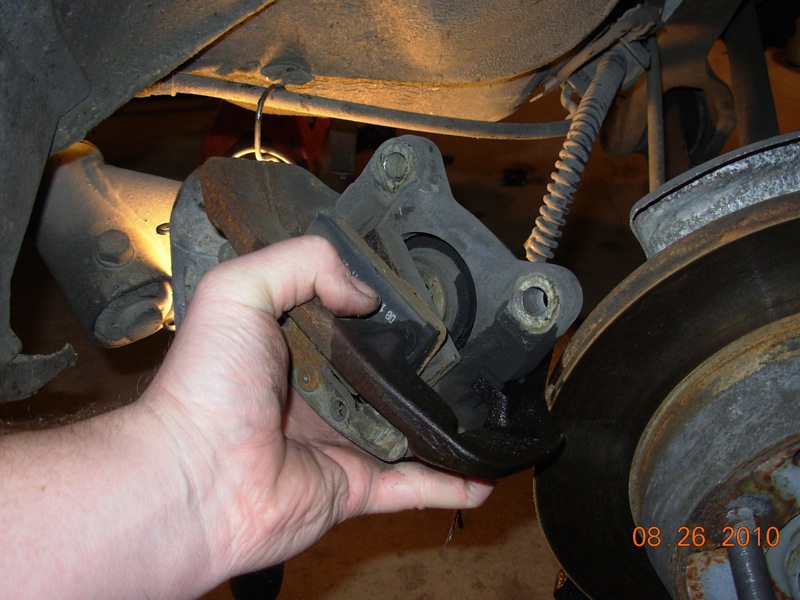
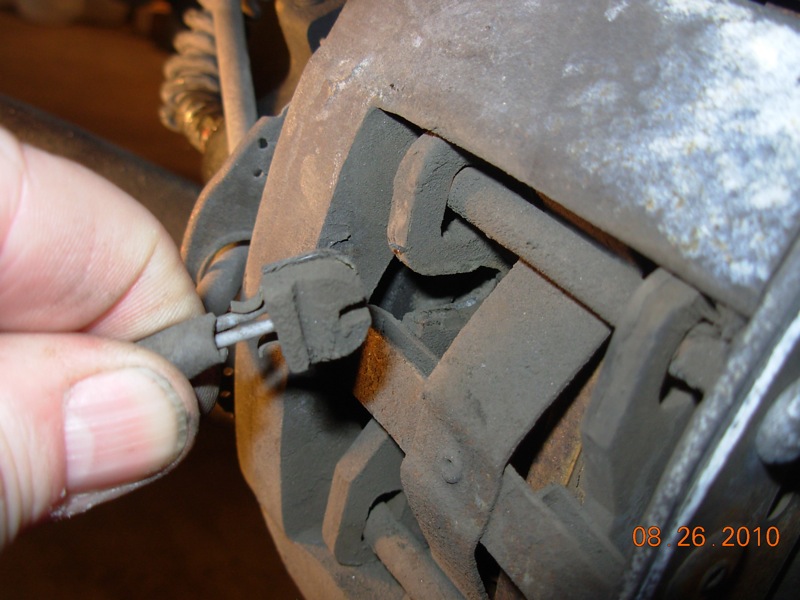
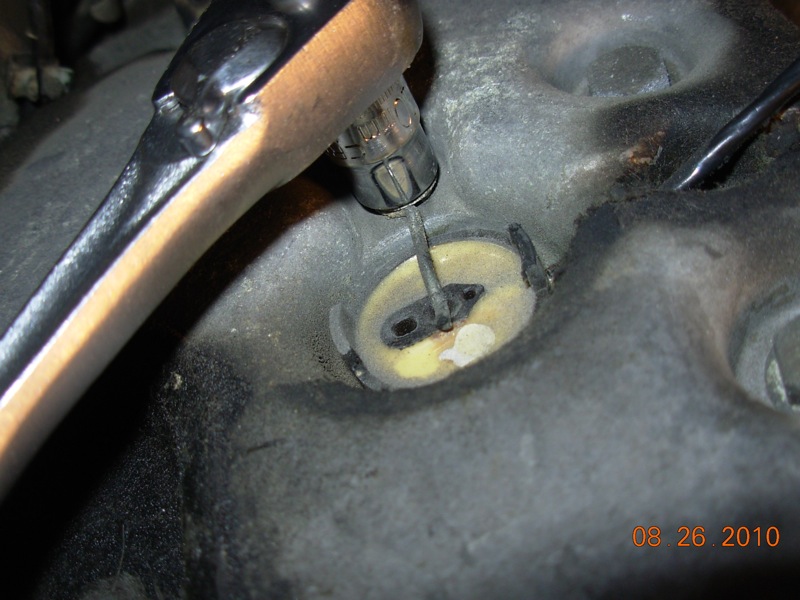
I was a little hesitant to pull on the wires to the brake wear sensor, but with a little elbow grease it came out. For future reference, is there a better way to remove the sensors?
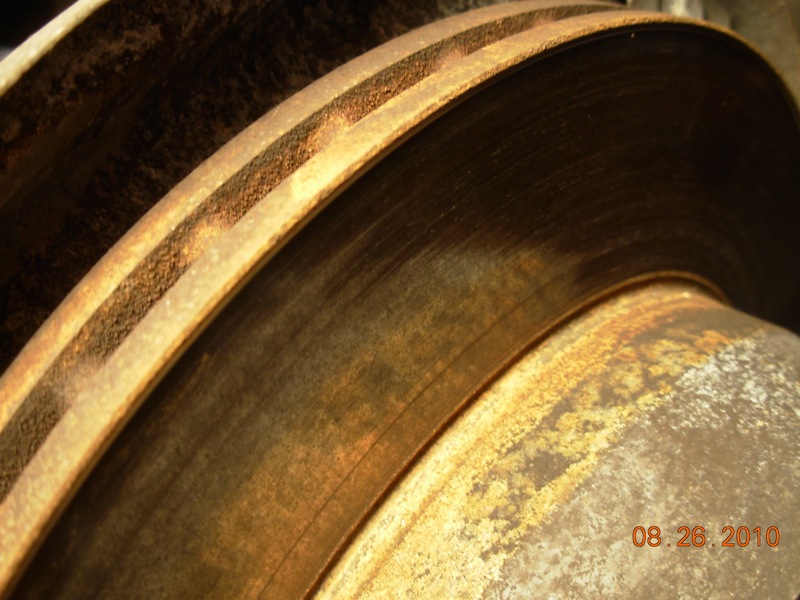
Rotors are very worn, there is a lip of metal at the outer rim, the picture does not do it justice. I measured the rotor thickness at 17.64mm, which according to the WSM is below low limit. An unanticipated cost. Well, that can wait till the spring, keep your head down and forge ahead Keith.
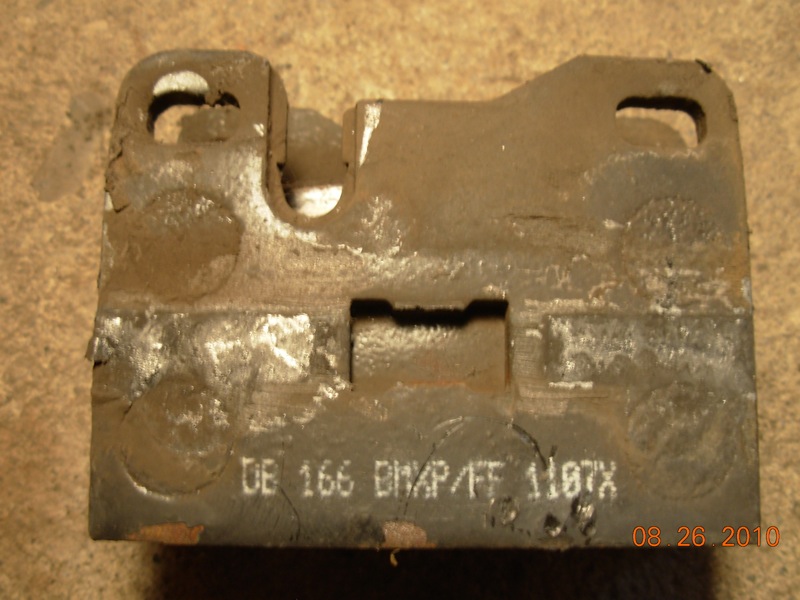
By the way, anyone recognize the numbering on the brake pads?
Disconnect speedo sensor and backup light wires? --> Check.
[Note to self, next time take picture with wires in their original position BEFORE removing them you dumb ****!]
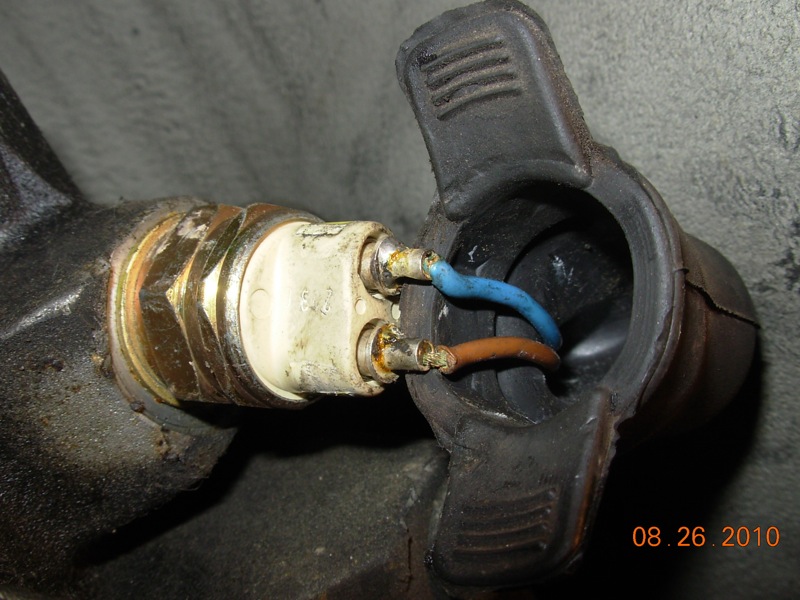
Does anyone know if blue up or orange up in the sensor matters?
Well, I've also noticed a couple of things that may be problems but I'm unsure about.
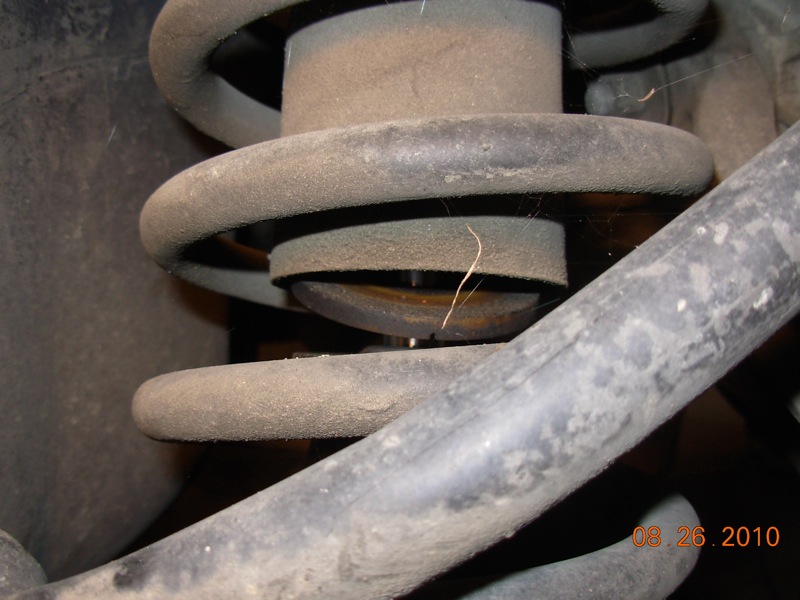
First, Pass Side Shock has a spacer sort of hung up on the shaft. I assume this is an issue, but does this mean I should replace the shocks while I'm in there?
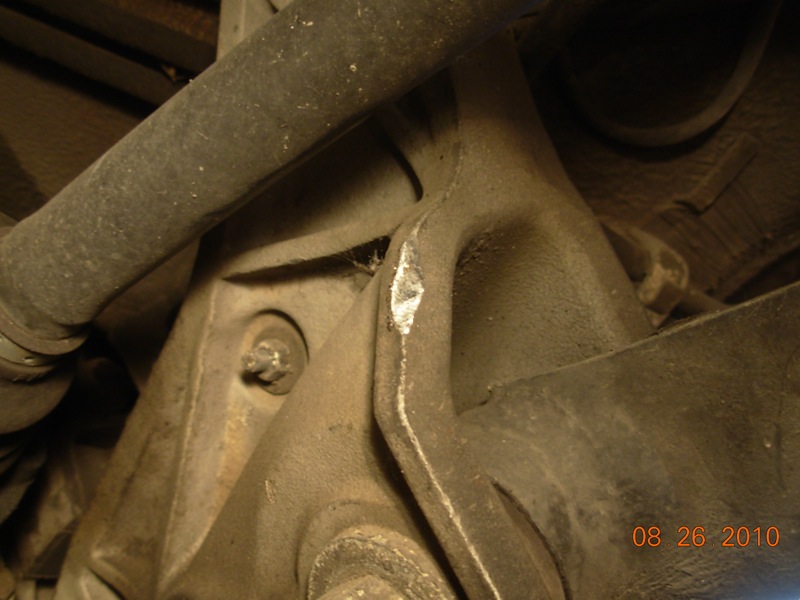
Second, is what looks like a pretty good ding in the aluminum cross member, again on the pass side. I don't see any scoring of the half shaft to imply that it somehow hit the cross member, but there is nothing else nearby, any thoughts on what could have done this? Got me a little concerned. It's not covered in grime like the rest of the underneath, so it must have happened relatively recently, but I don't remember anything special to have caused it.
So now I'm ready to get some cable under the trans and hang it from the sawy bar, then loosen up and drop the rear suspension. Hopefully more pics tonight after a successful day.
Clutch out? --> Check.
[Note to self, remember to use shorter shims for the intermediate plate release springs]. I had one hang up at the top of the bellhousing and could not rotate the engine to loosen the clutch bolts. I had to get a bigger breaker bar to finally pop the shim out and re-do. Don't make my mistake. rear wheels and brakes off? --> Check.
I was a little hesitant to pull on the wires to the brake wear sensor, but with a little elbow grease it came out. For future reference, is there a better way to remove the sensors?
Rotors are very worn, there is a lip of metal at the outer rim, the picture does not do it justice. I measured the rotor thickness at 17.64mm, which according to the WSM is below low limit. An unanticipated cost. Well, that can wait till the spring, keep your head down and forge ahead Keith.
By the way, anyone recognize the numbering on the brake pads?
Disconnect speedo sensor and backup light wires? --> Check.
[Note to self, next time take picture with wires in their original position BEFORE removing them you dumb ****!]
Does anyone know if blue up or orange up in the sensor matters?
Well, I've also noticed a couple of things that may be problems but I'm unsure about.
First, Pass Side Shock has a spacer sort of hung up on the shaft. I assume this is an issue, but does this mean I should replace the shocks while I'm in there?
Second, is what looks like a pretty good ding in the aluminum cross member, again on the pass side. I don't see any scoring of the half shaft to imply that it somehow hit the cross member, but there is nothing else nearby, any thoughts on what could have done this? Got me a little concerned. It's not covered in grime like the rest of the underneath, so it must have happened relatively recently, but I don't remember anything special to have caused it.
So now I'm ready to get some cable under the trans and hang it from the sawy bar, then loosen up and drop the rear suspension. Hopefully more pics tonight after a successful day.
08-29-2010, 10:23 AM
#28
Team Owner
dont forget to remove the e brake cable from the handle,
then with a spray of PB blaster on the housing where it meets the chassis twist gently and the cable pulls out of the chassis and stays with the rear sub frame
then with a spray of PB blaster on the housing where it meets the chassis twist gently and the cable pulls out of the chassis and stays with the rear sub frame
08-29-2010, 11:45 AM
#30
Instructor
Thread Starter
Join Date: Sep 2007
Location: NE PA aka-the endless mountains
Posts: 184
Likes: 0
Received 0 Likes
on
0 Posts
yeah, i had forgotten to mention the ebrake disconnect at the handle, which I had done. However I'm glad you gave direction on how to extricate from the passenger compartment, I was wondering how I was gonna do that!
Thanks!
Thanks!