

Re-design and fabricate console trim piece--HOW TO
 06-27-2010, 06:48 PM
#196
Three Wheelin'
Join Date: Mar 2006
Location: San Diego / Las Vegas
Posts: 1,813
Likes: 0
Received 0 Likes
on
0 Posts
Jerry, you have some skills!
That thing looks pretty cool as is, I am definantly on the wait list of what peices and configurations will come out of this thing...
That thing looks pretty cool as is, I am definantly on the wait list of what peices and configurations will come out of this thing...
 06-27-2010, 07:19 PM
#197
Nordschleife Master
06-27-2010, 08:42 PM
#198
Jerry those mini dashes are very expensive, over $1k maybe more, don't buy one yet, I don't know if it will be compatible with my system but I wont need a clock, it is in the radio. So for me if it works out it is a great use of space. Things for me will be happening later in the year. I will keep you informed.
Greg
By Jerry Feather
Greg
By Jerry Feather
I suppose if there is even a handfull if users interested in this item to be incorporated into the clock panel , making a form for it will not be much of a big deal. What I will need to do is try to buy one of these and then try to design around it in such a way that the case front becomes replaced by the face on the panel. I think the space is adequate, except the clock will have to go away, I think. Other than that I don't think adapting this unit will be any different than adapting the original clock or any other.
Good idea, and I really appreciate the input. I'll look on eBay for one of these and maybe start planning for it as an option. I anyone else interested in this unit as a replacement for the clock?
Jerry Feather
Good idea, and I really appreciate the input. I'll look on eBay for one of these and maybe start planning for it as an option. I anyone else interested in this unit as a replacement for the clock?
Jerry Feather
06-27-2010, 09:53 PM
#199
Rennlist Member
Thread Starter
Well, the company showed up right at the end of my first forming effort. They got to watch me pull the first heated form from the oven and form the first trim piece. I would have liked to have been able to take pictures of each step, but it has to go so fast that I was not able. What I did was take pictures of the unfolding of the machine after the first plastic had cooled. Here they are.
First, here is the machine with the formed plastic all clamped in place.
Second, I have lifted the last forming lever to reveal the formed plastic more clearly.
Third, I have lifted the first forming lever and this reveals the complete formed plastic trim piece for the first time.
Fourth and fifth I have removed the plastic work piece and this reveals the completed formed plastic sheet into the trim piece we are after.
A couple of more pictures follow. Jerry
06-28-2010, 10:01 AM
#201
Drifting
Very impressive work!
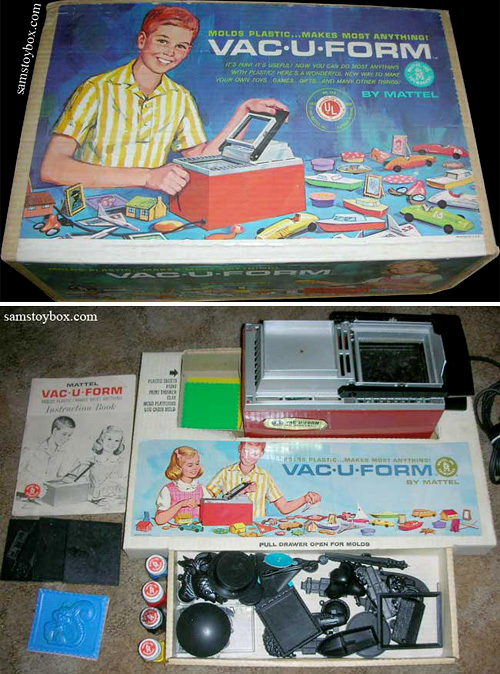
Those last photo's reminded me of a toy my brothers had in the 60's where you took flat plastic sheets and put them in a little toaster like box with a metal form over the sheet, clamp it down, turn on the heat and form little car bodies. Cut off the excess and snap a little car together.
Keep at it.
06-28-2010, 10:25 AM
#202
Rennlist Member
Thread Starter
Darn! Here I thought I was going to keep my technology secret. That's just about exactly what I am doing here. Jerry
06-29-2010, 12:06 PM
#203
Rennlist Member
Thread Starter
Last night I was able to make another example of this new design of flush console lower trim piece. I first made some adjustments in the forms and then loaded the machine with plastic. Then I put the whole thing in the oven and cooked it for about an hour and 20 minutes. It takes that long just to get up to temperature with the machine in it. My new target temperature is 280 degrees F. I find that that is giving me soft enough plastic and time enough to perform all three operations without reheating it in the middle.
Then I put it outside where the air is moving and let it cool for about an hour. Even then it was still pretty warm. This machine weighs about 30 to 40 pounds, so it can soak up quite a bit of heat.
After it had cooled enough, I took the plastic out and trimmed the excess off roughly in my bandsaw. I was going to start the finish trimming with my disc sander, but I couldn't find it. Here are some pictures of my progress.
The first two simply show the top side and bottom of the roughly trimmed trim piece.
The next two show where I have put the roughly trimmed piece in a console just to show approximately how close I am coming to my target. When this trim piece is trimmed a little more it will move farther back in the console and then it will be a little snugger, it will close up the gap in the rear and the curvature in front will very closely line up, I think.
One thing that might occur is that this trim piece may end up slightly above flush. Then I will have to decide whether or not I like it there and develop the upper flush panel at the same over-flushness. We will see.
Jerry
 06-29-2010, 12:36 PM
#205
Rennlist Member
Jerry,
Looking good, man!
Regarding flush fit: Could you trim from the sidewalls to vary the height? As opposed to leaving the bottom lip flange as you have done.
Have you chose a final material & texture?
Looking good, man!
Regarding flush fit: Could you trim from the sidewalls to vary the height? As opposed to leaving the bottom lip flange as you have done.
Have you chose a final material & texture?
06-29-2010, 12:52 PM
#206
Rennlist Member
Thread Starter
Jerry
06-29-2010, 01:02 PM
#207
Rennlist Member
Thread Starter
Hi Jim. I could very easily trim the bottom off of the sides in oder to vary the finish height. However, that is a somewhat crude approach and still needs a trim pattern to trim to. What I would rather do is adjust the shape of the form member that forms the sides so that when they are formed they will be just where I want them. I also would like to retain that little flange you see along the bottom edges both as a nicer more professional finish and as a guide for the narrow strip of ABS plastic I will be glueing just on top of it to form the locking ledge for the trim piece, and, later, the upper panel, to lock into place in the factory groove provided for that purpose.
I found my sander and ground off some of the tail end of this last piece and it fits a little better into position. However, I still need to grind a little more off since there is some curvature at the very end that I did not form for. I'll work on that a little more tonight while I am forming another to see if I can get it to fit.
I also notice now that it is getting closer, there is close to flushness in the front, but a little above in the rear. I am going to grind off the side forms tonight and try again.
06-29-2010, 01:23 PM
#208
Under the Lift
Lifetime Rennlist
Member
Lifetime Rennlist
Member
Jerry: That looks excellent. I'm very interested in a flush piece when you get to production grade.
At the rear there appears to be a 1/3" or so gap. I don't understand that. Is it that you have not trimmed the piece to allow it to be positioned all the way back?
The rear wall appears to be straight up and down while the console is beveled. How is that dealt with?
If it were slid back, that would alleviate what appears to be a below flush and non-matching angle at the front.
06-29-2010, 01:55 PM
#209
Supercharged
Rennlist Member
Rennlist Member
Join Date: May 2002
Location: Back in Michigan - Full time!
Posts: 18,925
Likes: 0
Received 61 Likes
on
35 Posts
Wow! This is so cool. I've been watching the progress, and I am amazed at the skill involved and the results. Very very cool. Thanks for sharing. Back to lurking. 
06-29-2010, 02:43 PM
#210
Rennlist Member
Thread Starter
Hi Bill. Those are very good questions and I would say that you are very observant. Actually that gap at the rear is more nearly an inch and you are right, the mismatch of curvature up in the front will be cured with further trimming and pulling the part back into its correct position.
What I try to do when I post the progress is to explain what is going on along with the pictures, but I am sure with as verbose as I seem to get, it is just much easier to see what is going on in the pictures and not bother reading what I have explained about them.
So, if it helps, here are a couple of more pictures from some additional trimming I did this morning.
In the first picture you can see that I have trimmed some of the excess plastic, but I am still having to hold it with my thumb because it doesn't want to stay there yet.
In the second picture you can see that with the trim piece pulled back to near its correct position the curvature up front is lining up very well.
Oh, Jim had asked before about texture. What you see here is the texture of the plastic that I am calling a "pebble finish." It doesn't actually look too bad in this setting just that way. However, I have sized this part in such a way that it can be covered with leather. Whatever texture of leather is glued onto it is the texture that it will end up with except for places where the leather will be stretched so much as to pull the texture out of it.
I suppose I could even cover it with ostrich if that might be appealing to someone. I have seen other 928 dashes and pods trimmed with something like that.
In addition, about the shape--you might recall that I had opted out of the bevel design with this flush mounted trim piece and went with this rounded inner edge instead. I think the rounded goes with the flush theme much better than the bevel. I may even do away with that and go with a shallower straight recess that has niether a bevel nor a rounded edge and, after the shifter boot is installed, will in fact have no recess at all.
Jerry Feather