When you click on links to various merchants on this site and make a purchase, this can result in this site earning a commission. Affiliate programs and affiliations include, but are not limited to, the eBay Partner Network.
Just a small update... I've been climbing the learning curve of reupholstering seats. I've done the kits before but this time I am diving into the deep end and doing it all from scratch. There have been times when I thought I might have to abort but I think I'm over the confidence hump and surprising myself how much I look forward to working on it now.
After the carpet was done, I moved on to what I thought was the next easiest job, the rear seats. The materials that I chose were simple fabric/nauhga combination but with the vinyl, I couldn't find a matching color for the welt cord. Lucky that my craigslist sewing machine came with the foot for sewing the covering over these and doing that was easy - and a good confidence builder.
Then since the rear seats were in good shape, I could just use the old hides for patterns and cut the pieces. Anyway, here are some pics that tell the story a lot better. Still waiting on the special stapler I need to finish the rears.
I'm pretty happy with how this is going; evethough theres still a lot of slow stitch-by-stitch, manual work (because I can't steer the machine with any real speed)....Bruce
This would be a good time to swap them out with a more desirable colour.
planning on keeping the brown dash, pod and center console?
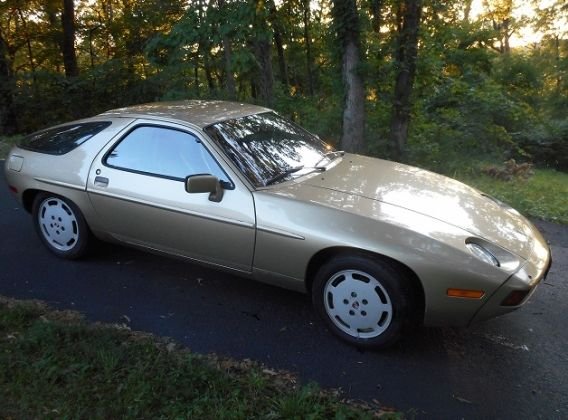
True, it would be a good time but I'm staying with the brown. I argued with myself for weeks about the color. At first I thought the brown was a big minus for the car but a color change made the project even bigger and more scary. Now, its growing on me - sort of an eighties earthtone thing. My immediate color concern is that my vinyl is too red; and dang if it wasn't so perfect on those little swatch thingies.
...very inspirational
Ha...I come in here every few days to get a dose from you guys. I've read and re-read the DIY interior threads to get pumped. Maybe someday I could be that brave.
Sometimes this backfires though when before I can even get close to finished, someone comes up with LED dimmer project or something that I didn't think I gave a damn about and I'm off day dreaming instead of finishing....Bruce
Just a small update... I think I am in the doldrums, progress is slow due to other life stuff but I do get down to work on this project on cold days for an hour or an evening.
Here is a pic of my almost finished bolsters for the first front seat. I still needs a little stuffing here and there,but I'm pretty happy with how it is coming.
The center sections are driving me crazy though. I have re-positioned and re-glued them twice and I'm still not there. Getting the little pattern lines to be straight is a lot harder than I expected it to be. I'm still studying on this a little but I think I'm going to try another method of attaching them. I did some seats on my old Dodge truck and they used a strip of industrial vecro and that worked so well that I think I'll try that instead of the contact cement. Hoping it will be just as strong and easier to position.
Here's a pic of the problem and another of where the vecro would go. Other ideas welcome...Bruce
So ... a long time since my last update. Here is my my catch-up post (it might take two).
So anyway....I had a setback on recovering the front seats when I managed to tear one of the bolsters. I guess I was due a reality check and that small thing sidelined my whole project. I moved the car to the carport, thinking it was only for a month or two but the car sat there through two winters. Some good things happened in those two years but some funerals too and the hardest of those was my best friend George the helper-dog. When I finally got back to it (summer of 2016), the fuel lines were contaminated, the injectors clogged up, fuel pump was dead, the battery was dead and the whole car was coated with tree sap. Even one of the brakes was locked up.
I did the Witch Hunter thing and new rubber lines (Pelican PN:n-020-281-1-m21 and clamp mcmaster PN:53175k26) along with a new pump and a leaking pump-to-filter line. Also I got the tank out for a flush of what looked like molasses and install of a new strainer. That finally got me running so next on the hit parade were the aluminum ball joints. Of course, those are hard but I found new ones on Australia Ebay. This link helped with alignment. That led to new tie-rods, new brake pads/rotors/sensors, hoses & piston seals. And of course there were aggravations at every step.
"Search is your friend", and so I did. I wish I could remember who to credit for the post that suggested the rack boots could be seated by gently bumping the steering wheel against the stop. Or the post on how to modify the clutch master for full stroke (Merlin, I think). That post and so many others bailed me out time after time.
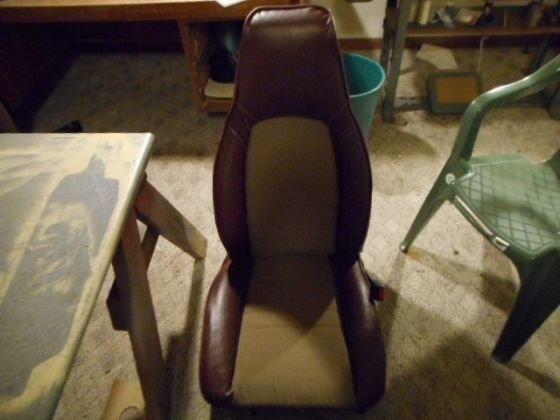
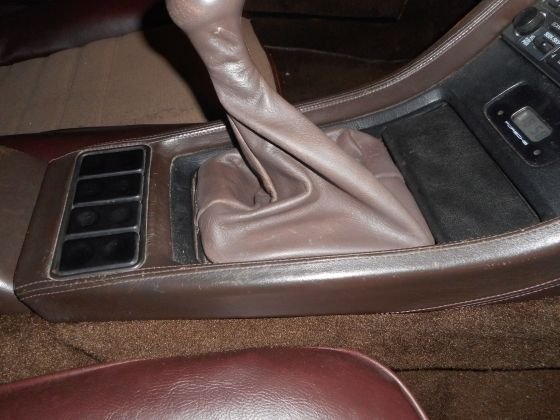
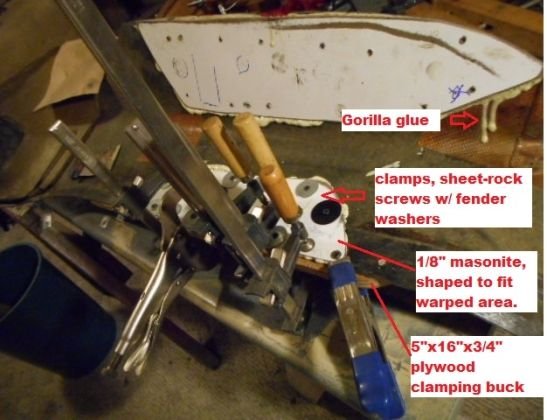
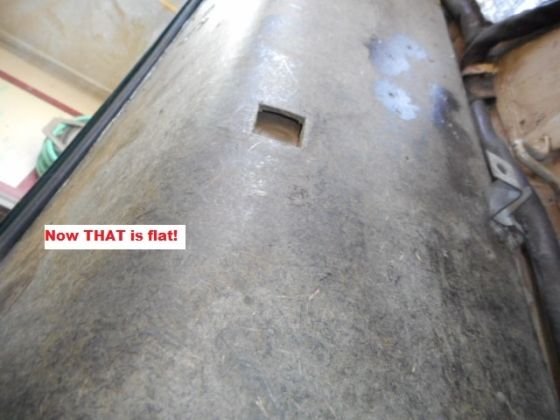
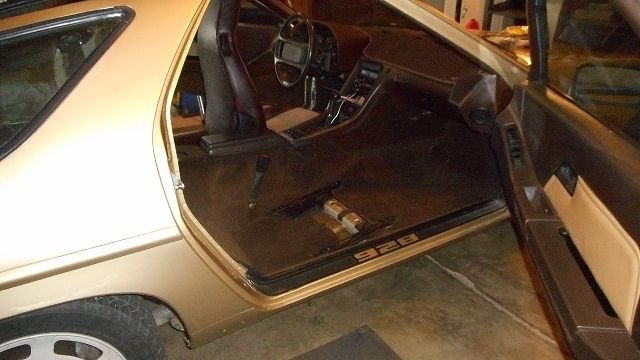
The cushy 928 seats never made it out of my small sewing room but I did manage to finish some easier-to-do 944 seats and they will work for now. I wish I could say the shifter boot was a one-shot effort but that actually took a couple of rounds to get to here. The last big thing to do on the interior is the quarter panels. My flattening fix from earlier didn't work - in time, they warped again. So I tried a different approach and this I'm sure will keep them flat.
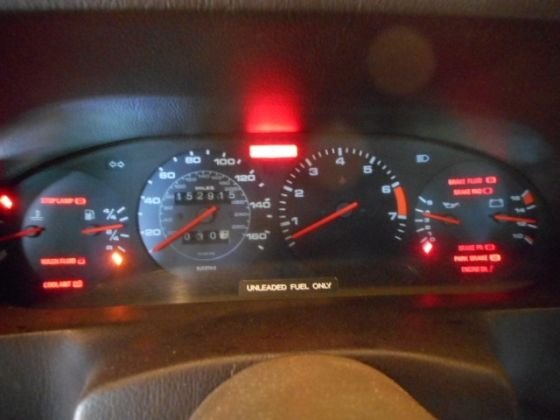
So by now its fall of 2016 and I'm to the point I'm starting the car every few days and climbing the steps to road worthiness. Over the two year sleep I gained a warning lights controller problem and along the way to fixing that it took a long time for me to realize (found in Rennlist) that the GM alternator belt has to be really tight. Otherwise it slips and makes for big spikes/dips in charging voltage. I also had some other electrical problems that took forever to work through. When that was all over I was back to a Bosch alternator with a new headlight switch and a new fuel pump relay. I learned that if I really tried I could insert the 6 pin 'Y' or 'Z' connectors into the CEP upside-down which makes for some interesting "no-f'in-way" troubleshooting scenarios.
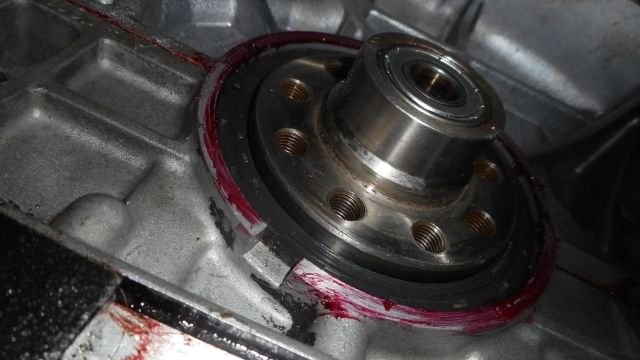
So spring is almost here and I have a nice oil spot directly under the new, but now 3 year old, rear main seal. I read about a guy (Sharkskin, I think) who made a simple RMS press. I made up something similar and had used it on a 944. That worked so well, I went right back to that tool and it came through again for me on my 928. I also fixed some oil pan bolt leaks by pulling the bolts and doping them with high-tack sealant. Its old school but Permatex high-tack is still my go-to stuff.
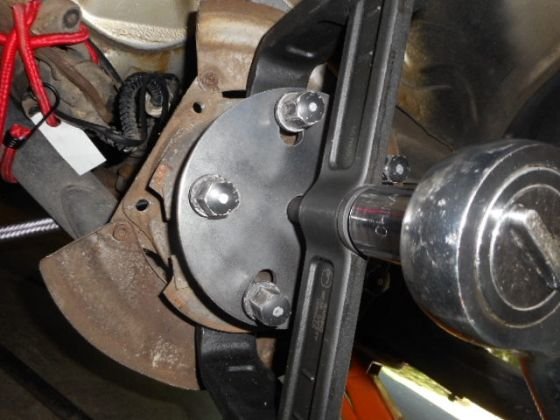
So now its late spring of 2017 and one or both of my rear wheel bearings is rumbling. I'm thinking I'l make up a simple tool and use it after I pull the hub with a slide hammer. But no, the slide hammer, which always works on the 944 cars, won't budge the 928 axle hub. So after some fiddlin I came up with a hub adapter to work with an impressive but cheap puller that I found on the internet (Hub Grappler - $107).
So now I'm on the road again and this thread is up to date. Still far to go.

 12-12-2012, 03:51 PM