

My supercharger build thread
 02-07-2010, 12:58 AM
#1
Rennlist Member
Thread Starter
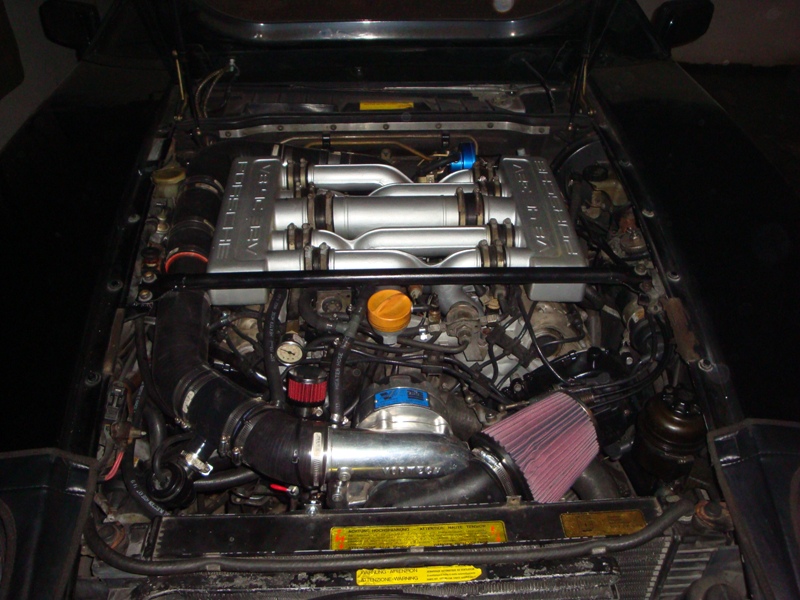
Well after lots of figuring, sweat and tears I finally have my S/C up and running. I bought it off Rennlist here a few months back.
I started with pulling my entire intake and cleaning up the valley, new TB studs and zip tied all the hard vacuum lines. My car came with rebuilt heads from the PO so that was a definite plus for doing a performance increase. I eliminated and plugged the lines from the cam cover/oil filler neck and anything else that I didn't need. I put new grade 8.8 water pump bolts to help with the load of the S/C. I purchased Porken's cam timing tools and set up my cams (I had 6 degrees of separation!) and set them up to spec. Car also got new fuel filter, plugs, wires, caps and rotors so everything would be up to snuff. I also removed the air pump.
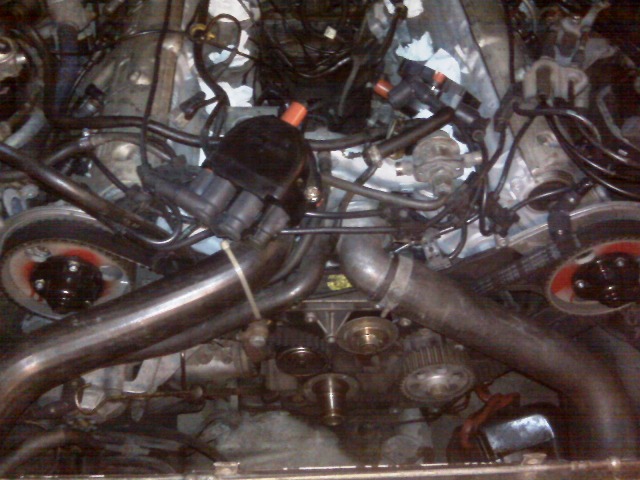
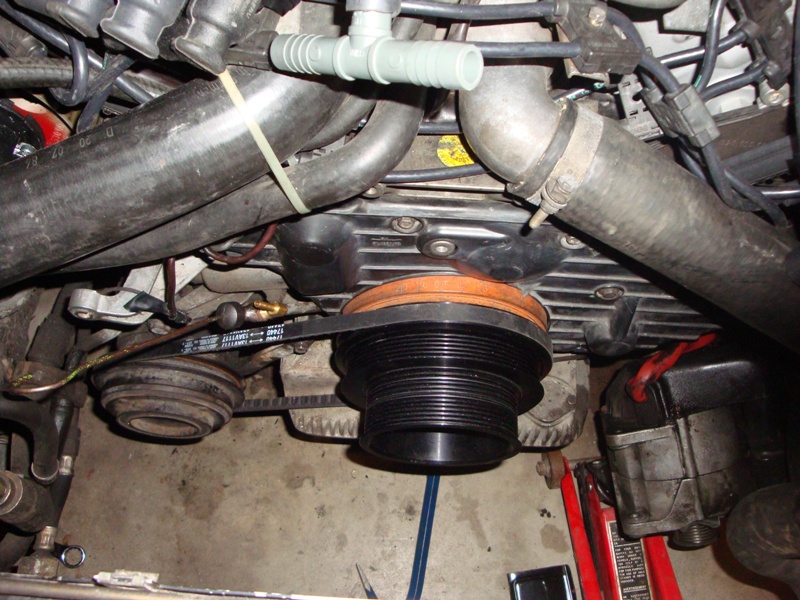
Here is a pic with the crank pulley and A/C belt on and the dipstick drain for the S/C, which ended up being ridiculously too small. I ended up removing the block off plate on the right side of the oil pan and drilling/tapping it to fit a 1/2" hose barb.
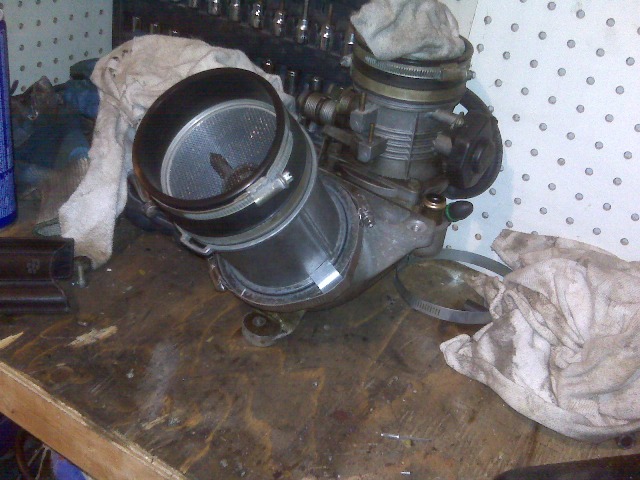
The 85 - 86 models have the MAF just sitting in the throttle body and they will pop out under boost. My FAST instructions say to silicone it in but I was not happy with that. I fabricated some aluminum C clamps to fit the base of the throttle body and clip the bottom edge of the MAF and held them on with a gear clamp. I also zip tied the c clamps to the gear clamp to keep them from sliding off. This is a very effective setup BUT it requires the center T to be removed for installation which is a bit of a pain.
I installed the small pull fan making some brackets up and bolting them to the locations of the stock fan shroud. I still ahve to wire it up and I haven't decided yet on how I want to trigger it.

The kit came with and AFPR and 30 lb injectors, which I tried but found was over fueling the card while not under boost. I sold the injectors on Ebay and the AFPR to a Rennlister. I reinstalled my stock 24 lb injectors and picked up a Vortech FMU and set it up with an 8-1 ratio disk.

After that, I got the S/C bolted up and ran my oil line from the oil adapter. I used 3/16" hard brake line and bent it to fit. Using this method I was able to use a small profile 90 deg elbow as I was having clearance problems for the cruise control linkage. With spacing my throttle linkage mounting plate I JUST had enough clearance.


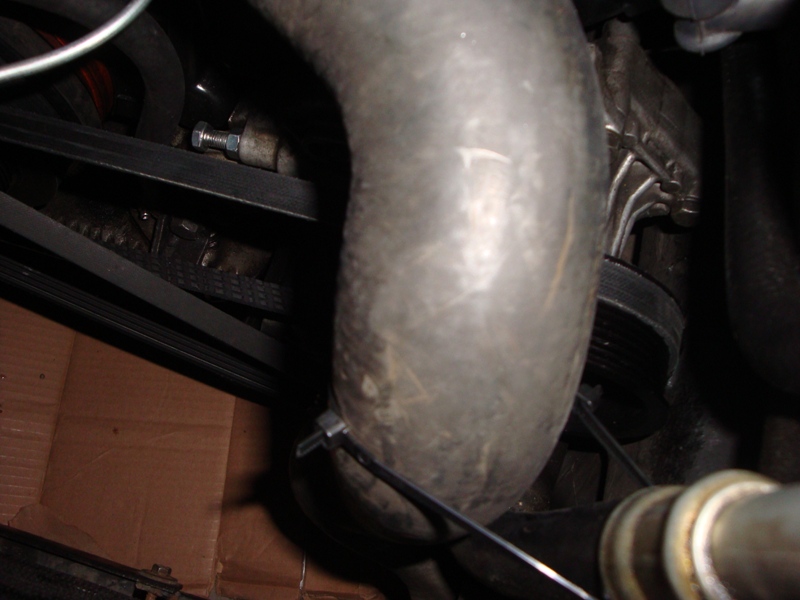
The FAST design has the S/C belt go around the tensioner, the PS pulley and back to the crank, which in my opinion is a poor design. I noticed the tensioner is a standard Vortech unit used on many other cars. I found a 1085 belt fit around it perfectly but the problem was how to get it tight. I locked down the tensioner not too tight and tapped it with a wood dowel until the belt was tight and locked it down hard. Time will tell to see how it works as I am just working the belt in now. The idler pulley is on the pull side as well which isn't ideal but due to space constraints it is the only way.

Now that I have a dedicated S/C belt running where my power steering belt lines up I had to find a way to drive it. I took the pulley that came with the kit and reversed it and installed a 4 rib belt on the power steering and alternator. So far all is good and no issues. The reversed pulley runs close to the radiator hose so I zip tied it out of the way a bit give it more room.

I picked up a small JAZ products 1 pt catch can and ran my lines from the valve cover and oil neck to it. It had a drain valve at the bottom and I still have my open dipstick tube fitting so I may set up a drain back. The first bit I have drained out has been 50 - 50 water oil so this I am not sure of yet.
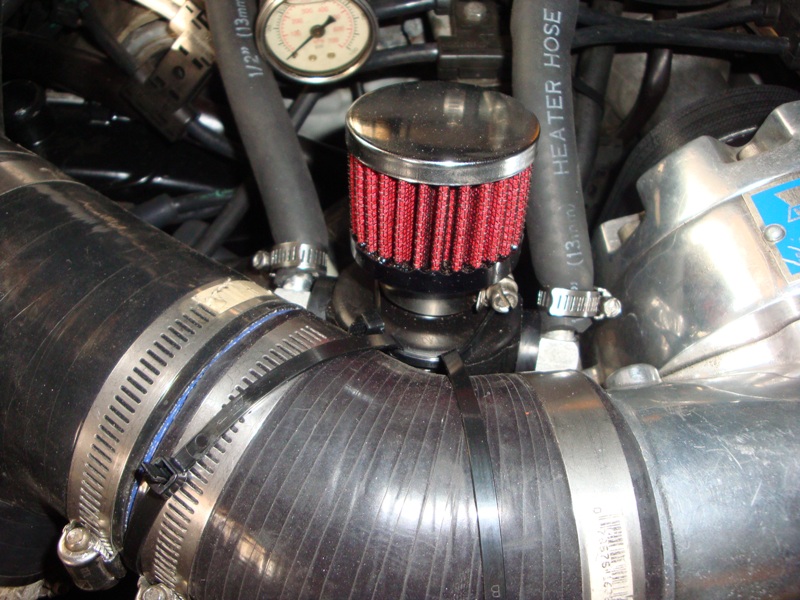
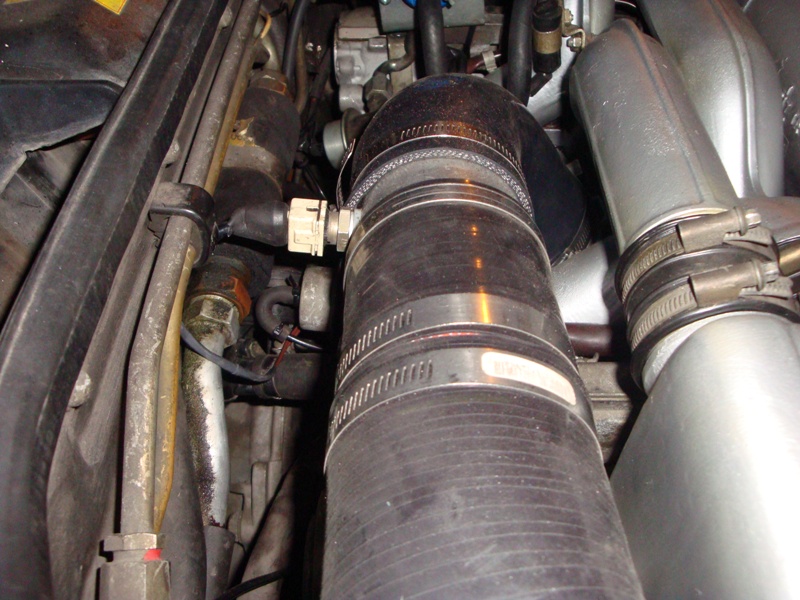
I plumbed the S/C with the Purosil that came with the kit. I had to make some small modifications along the way but it worked well for the most part. I drilled and tapped one of metal junction tubes at the back and installed the airbox temp sensor. I also ran a hose from the check valve to the charcoal canister to a hose barb I installed in the inlet pipe to the S/C to give it a little vacuum to pull the gas tank fumes out.
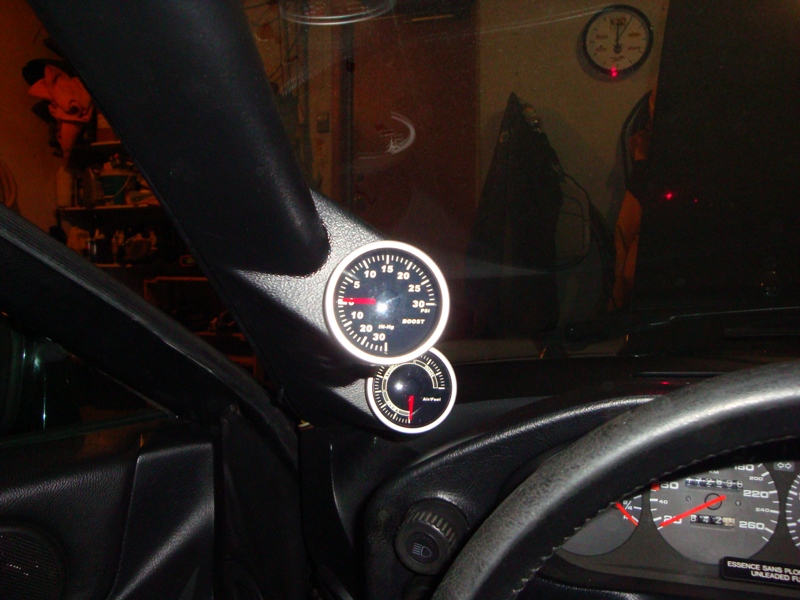
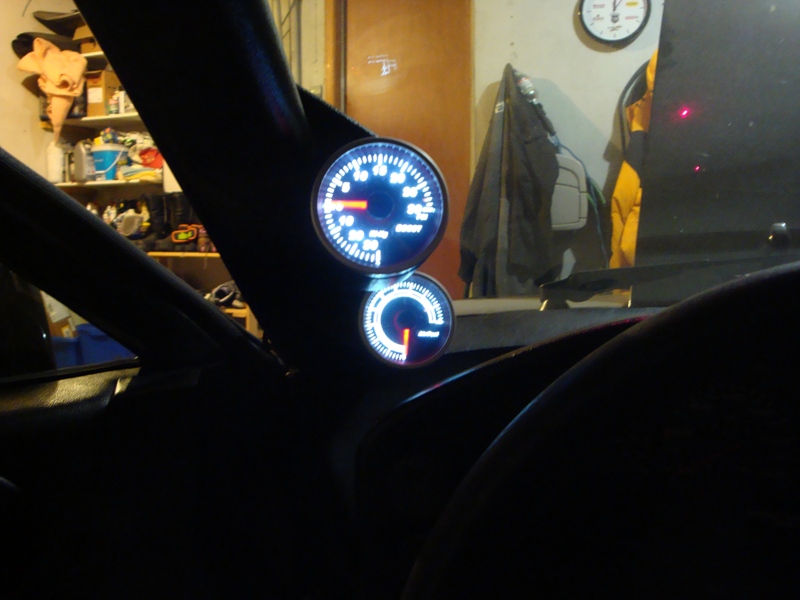
I picked up one a gauge pod from 928 MS and installed LED A/F and boost gauges that I got on sale at Princess Auto (Canadian version of Harbour Freight LOL). The A/F is not very accurate but I don't think narrow band ones are.
All in all it is working well. The first run saw massive detonation and I found the FMU gasket not sealing well. Once that was fixed the detonation was cured. Second run it ran much better but I was losing some boost on the high rpm. Came back in and found the S/C belt needed to be tightened. We will see how the next run goes.
On cold pavement here absolutely no traction in 1st on the auto and will break loose kicking it down at 60 mph in 2nd. When the belt was tight on the first drive I saw 7 psi on the gauge. I will say the S/C has completely transformed the performance of my car that is for sure.
I will keep everyone up to date as I go along and finish my tweaks.
I started with pulling my entire intake and cleaning up the valley, new TB studs and zip tied all the hard vacuum lines. My car came with rebuilt heads from the PO so that was a definite plus for doing a performance increase. I eliminated and plugged the lines from the cam cover/oil filler neck and anything else that I didn't need. I put new grade 8.8 water pump bolts to help with the load of the S/C. I purchased Porken's cam timing tools and set up my cams (I had 6 degrees of separation!) and set them up to spec. Car also got new fuel filter, plugs, wires, caps and rotors so everything would be up to snuff. I also removed the air pump.
Here is a pic with the crank pulley and A/C belt on and the dipstick drain for the S/C, which ended up being ridiculously too small. I ended up removing the block off plate on the right side of the oil pan and drilling/tapping it to fit a 1/2" hose barb.
The 85 - 86 models have the MAF just sitting in the throttle body and they will pop out under boost. My FAST instructions say to silicone it in but I was not happy with that. I fabricated some aluminum C clamps to fit the base of the throttle body and clip the bottom edge of the MAF and held them on with a gear clamp. I also zip tied the c clamps to the gear clamp to keep them from sliding off. This is a very effective setup BUT it requires the center T to be removed for installation which is a bit of a pain.
I installed the small pull fan making some brackets up and bolting them to the locations of the stock fan shroud. I still ahve to wire it up and I haven't decided yet on how I want to trigger it.
The kit came with and AFPR and 30 lb injectors, which I tried but found was over fueling the card while not under boost. I sold the injectors on Ebay and the AFPR to a Rennlister. I reinstalled my stock 24 lb injectors and picked up a Vortech FMU and set it up with an 8-1 ratio disk.
After that, I got the S/C bolted up and ran my oil line from the oil adapter. I used 3/16" hard brake line and bent it to fit. Using this method I was able to use a small profile 90 deg elbow as I was having clearance problems for the cruise control linkage. With spacing my throttle linkage mounting plate I JUST had enough clearance.
The FAST design has the S/C belt go around the tensioner, the PS pulley and back to the crank, which in my opinion is a poor design. I noticed the tensioner is a standard Vortech unit used on many other cars. I found a 1085 belt fit around it perfectly but the problem was how to get it tight. I locked down the tensioner not too tight and tapped it with a wood dowel until the belt was tight and locked it down hard. Time will tell to see how it works as I am just working the belt in now. The idler pulley is on the pull side as well which isn't ideal but due to space constraints it is the only way.
Now that I have a dedicated S/C belt running where my power steering belt lines up I had to find a way to drive it. I took the pulley that came with the kit and reversed it and installed a 4 rib belt on the power steering and alternator. So far all is good and no issues. The reversed pulley runs close to the radiator hose so I zip tied it out of the way a bit give it more room.
I picked up a small JAZ products 1 pt catch can and ran my lines from the valve cover and oil neck to it. It had a drain valve at the bottom and I still have my open dipstick tube fitting so I may set up a drain back. The first bit I have drained out has been 50 - 50 water oil so this I am not sure of yet.
I plumbed the S/C with the Purosil that came with the kit. I had to make some small modifications along the way but it worked well for the most part. I drilled and tapped one of metal junction tubes at the back and installed the airbox temp sensor. I also ran a hose from the check valve to the charcoal canister to a hose barb I installed in the inlet pipe to the S/C to give it a little vacuum to pull the gas tank fumes out.
I picked up one a gauge pod from 928 MS and installed LED A/F and boost gauges that I got on sale at Princess Auto (Canadian version of Harbour Freight LOL). The A/F is not very accurate but I don't think narrow band ones are.
All in all it is working well. The first run saw massive detonation and I found the FMU gasket not sealing well. Once that was fixed the detonation was cured. Second run it ran much better but I was losing some boost on the high rpm. Came back in and found the S/C belt needed to be tightened. We will see how the next run goes.
On cold pavement here absolutely no traction in 1st on the auto and will break loose kicking it down at 60 mph in 2nd. When the belt was tight on the first drive I saw 7 psi on the gauge. I will say the S/C has completely transformed the performance of my car that is for sure.
I will keep everyone up to date as I go along and finish my tweaks.
Last edited by Cosmo Kramer; 02-07-2010 at 10:01 PM.

 02-07-2010, 05:33 PM
#4
Pro
Join Date: Oct 2009
Location: Grimsby, Ontario
Posts: 673
Likes: 0
Received 0 Likes
on
0 Posts
Nice job. I'd like that set up on mine, but I 'm not sure yet how it would be with the 5 speed? with the driving season comeimg soon, I will probably wait till next winter for mine.
02-07-2010, 05:57 PM
#5
Advanced
Join Date: Aug 2007
Location: South Jersey
Posts: 86
Likes: 0
Received 0 Likes
on
0 Posts
This may have been covered before but....... my insurance company says superchargers are a big no no! How do you guys deal with your insurance companies on the issue of modifications?
 02-07-2010, 06:08 PM
#7
Administrator - "Tyson"
Lifetime Rennlist
Member
Lifetime Rennlist
Member
What is the exact wording in the policy? IMO relying on the agent for anything but cashing my check is kind of worthless (no offense Brendon).
It's a knee jerk reaction you will get from most agents, they have nothing to lose (except maybe a customer) telling you no. I'm not saying your policy doesn't exclude adding a supercharger, just worth digging a bit deeper. I have friends in Jersey with highly modified cars that have no problems with insurance.
Trending Topics
02-07-2010, 10:10 PM
#8
Rennlist Member
Thread Starter
Mine is a FAST bracket and it had holes drilled in it to mount the bracket for the throttle linkage. THe guys at Motorsports SLC included a shortened bracket the give extra clearance to the rad hose and more clearance for the throttle rod and the driver side head. In order to get the cruise control linkage to clear the oil line, I had to shim the bracket out about 1/2" and use the very small elbow for the oil line that you saw in the pic above.
5 speed GT will love the boost, they have good cams from the factory and flow the air real nice. If you are looking for a kit that is pretty much turnkey I would get the Murf system, it is really well engineered. I got my "kit" for a good deal but I have had to do some messing around with it to get it right. Still not there yet, but getting closer!
02-07-2010, 10:16 PM
#9
Rennlist Member
Thread Starter
After Imre helped me get my belt nice and tight all is good, now it goes to 8 psi over 5000 rpm. Problem is now once it passes 7 psi I get detonation. I tried jumpering the wires on the EZF to back off the timing and it helped a bit but was still there. My FMU came with a whole set of tuning disks so I am going to try the next size larger and see what happens.
Does anyone know if taking off my stock cats and adding an X pipe would help with detonation? I am thinking it would because it would be getting the exhaust out faster and would not dilute the incoming air/fuel charge.
Does anyone know if taking off my stock cats and adding an X pipe would help with detonation? I am thinking it would because it would be getting the exhaust out faster and would not dilute the incoming air/fuel charge.
02-12-2010, 03:02 AM
#10
Rennlist Member
Join Date: Dec 2002
Posts: 1,051
Likes: 0
Received 0 Likes
on
0 Posts
I'm not really sure of exactly how you have that set up, but you might want to check how much actual vacuum that you get where you plumbed in at the supercharger inlet. Depending on the configuration of everything, it's possible to get a pretty good bit of vacuum there. You don't want any chance of something like vacuum collapsing your gas tank.
02-12-2010, 09:50 AM
#11
Rocket Pilot
Rennlist Member
Rennlist Member
Join Date: Apr 2004
Location: gettysburg pa.
Posts: 3,298
Likes: 0
Received 0 Likes
on
0 Posts
Maybe ry another boost gauge. I had a cheap one on there at first and was only seeing 6-7 psi with a 3.50, then I switched to a 2.95 (dangerous) for a test run. I saw 10psi and I thought man now that's fun. Problem is is it was my gauge. I installe d a very nice AEM unit and put the 3.50 back on and saw 9psi! Added the IC, Begi and 42lb injectors, and the 2.95, set it up to overfuel and saw 14psi and no det. up to 6000 rpm. Made 552 whp with a little black smoke but I left it that way for 2 years no issues. Drag radials allowed me to obtain 11.3's in the 1/4 and it was a handful for sure.To be fair I have the squirter engine and had some other neat additions to my set-up. I guess the point is try a new gauge first, a quality one before you go any further.
02-12-2010, 10:17 AM
#12
Rennlist Member
Thread Starter
The hose to the charcoal canister is still hooked up to the factory check valve which is controlled by manifold vacuum. I believe it only opens under deceleration, and the vacuum at the S/C inlet will be minimal.
Thanks Kevin, good to know. I wish I would have measured the crank pulley diameter before I put it on, I think it is a bit smaller then the norm as it was originally designed to power the power steering pulley as well. FAST said 5 - 6 psi but the S/C was covered in belt dust so I think they were accounting for some slippage! My S/C top pulley is a 3.12 but I guess calculating the boost is dependent on both diameters.
I'm not really sure of exactly how you have that set up, but you might want to check how much actual vacuum that you get where you plumbed in at the supercharger inlet. Depending on the configuration of everything, it's possible to get a pretty good bit of vacuum there. You don't want any chance of something like vacuum collapsing your gas tank.
Maybe ry another boost gauge. I had a cheap one on there at first and was only seeing 6-7 psi with a 3.50, then I switched to a 2.95 (dangerous) for a test run. I saw 10psi and I thought man now that's fun. Problem is is it was my gauge. I installe d a very nice AEM unit and put the 3.50 back on and saw 9psi! Added the IC, Begi and 42lb injectors, and the 2.95, set it up to overfuel and saw 14psi and no det. up to 6000 rpm. Made 552 whp with a little black smoke but I left it that way for 2 years no issues. Drag radials allowed me to obtain 11.3's in the 1/4 and it was a handful for sure.To be fair I have the squirter engine and had some other neat additions to my set-up. I guess the point is try a new gauge first, a quality one before you go any further.
Last edited by Cosmo Kramer; 02-12-2010 at 11:47 AM.
02-12-2010, 10:43 AM
#13
Craic Head
Lifetime Rennlist
Member
Lifetime Rennlist
Member
Ted, great work!
Nice write-up and I like how you added your mods into the description.
I've seen several ways people have attached the MAF to the lower air guide and yours is the best except maybe for Imre's (which doesn't require you to remove the center 'T' to pull the MAF).
Very cool!
Keep us posted on the tuning.
BTW- I would definitely suggest a set of crossovers for a couple of reasons. One is that they come with two O2 sensor bungs so you can put in a WB-O2 and monitor your AFR more accurately.
Then SharkTune that bad boy and hold on!
02-12-2010, 03:58 PM
#14
Rennlist Member
Thread Starter
Thanks Mike, the nice thing about my clamp is it pulls the MAF down tighter and tighter as the gear clamp is tightened. I still have both O rings in so I have a very tight seal.
I am going to continue my tune with the cats in for now with the wideband installed and a chip from Tim Murphy to retard the timing. If I do the X pipe now I may run lean and have to buy 30 lb injectors, so I am gonna do baby steps on this one. Believe me, even with the cats in it has a tremendous amount of power. On the cold pavement with PS2's I was laying rubber at 50 - 60 mph in 2nd gear on the auto.
I am going to continue my tune with the cats in for now with the wideband installed and a chip from Tim Murphy to retard the timing. If I do the X pipe now I may run lean and have to buy 30 lb injectors, so I am gonna do baby steps on this one. Believe me, even with the cats in it has a tremendous amount of power. On the cold pavement with PS2's I was laying rubber at 50 - 60 mph in 2nd gear on the auto.
02-12-2010, 04:10 PM
#15
Craic Head
Lifetime Rennlist
Member
Lifetime Rennlist
Member
I am going to continue my tune with the cats in for now with the wideband installed and a chip from Tim Murphy to retard the timing. If I do the X pipe now I may run lean and have to buy 30 lb injectors, so I am gonna do baby steps on this one. Believe me, even with the cats in it has a tremendous amount of power. On the cold pavement with PS2's I was laying rubber at 50 - 60 mph in 2nd gear on the auto.
 yikes
yikes