
DIY - Auto-Dimming Rear View Mirror Installation
 01-17-2010, 07:43 PM
#1
Drifting
Thread Starter

I installed a used OEM auto dimming mirror from a 2009 Hyundai Santa Fe on my 1990 S4. The exact same OEM mirror is used by other newer Asian makes and models. Used ones, sell on eBay for about $80 including shipping.
This mirror is manufactured by Gentex and has some nice features like Homelink and compass. The compass display is hidden when deselected by the compass button or power is interrupted by the ignition switch; most other mirrors have an unsilvered rectangle for the display. The Homelink feature can be programmed to operate as three different remote controls, like garage door openers, a community gate, or outdoor lighting. It also has non-volitile memory, so you don’t have to reprogram it after reconnecting the car battery.
http://www.homelink.com/about/about.taf
I purchased a new Gentex installation kit from another eBay seller for about $30 with shipping. He also sells new and used mirror kits which also include instructions.
http://www.wembleysells.com/


Mounting the mirror requires removing the old mirror button from the windshield, then mounting a different one in its place. I mounted the new button 5 3/8” down from the aluminum windshield trim piece. That’s about �” lower than the factory button. This places the mirror only slightly closer to the driver than the factory mirror, while still maintaining the same mirror height. You can see in my photo, there is still plenty of space between the new mirror and the sun visors.
Here’s the thread (post #36) that details how I removed the old button…
https://rennlist.com/forums/928-foru...e-removal.html
Here’s a video, on how to glue the new button on using windshield adhesive…
http://www.permatex.com/videos/video_rearview_eng.html
For this mirror, it’s a four wire hookup installation, including reverse inhibit. The wiring kit from wimbleysells.com came with 8 feet of wire; which is just enough to complete the routing and hookup. Make sure you ask that the reverse inhibit wire be included.
I connected the wiring to the CE Panel in the passenger footwell. The wiring routes from the mirror above the headliner and down the A pillar on the passenger side. This requires releasing the headliner slightly and removing the A pillar cover. The A pillar cover removal is detailed in the WSM.
Once you remove the A pillar cover, there’s a big opening to the underside of the dash. I routed the wires above the LH/EZK controllers and down behind the CE panel using nylon tie wraps.
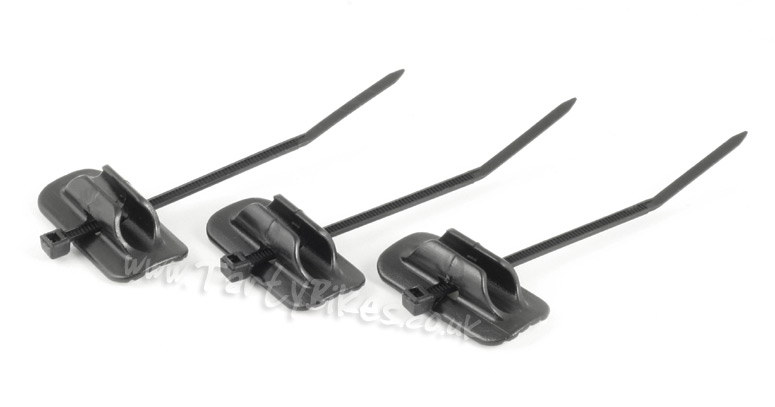
For routing the wires along the A pillar, I used a couple of these stick bicycle cable guides that I had, but you could also use plastic tape.
All the wiring connections needed can be found on the ‘U’ Connector. The X power bus is accessory/ignition, while 15 power bus is ignition. There's also battery power on this connector, but it is not fused (direct to battery).


You can use wiring splices to connect the mirror wires to the car’s wiring, but I preferred to partially disassemble the U connector and solder the wires directly to the ends of the U connector terminals.
If you decide the remove the U connector, make sure you unlatch the locking mechanisms first.
This mirror is manufactured by Gentex and has some nice features like Homelink and compass. The compass display is hidden when deselected by the compass button or power is interrupted by the ignition switch; most other mirrors have an unsilvered rectangle for the display. The Homelink feature can be programmed to operate as three different remote controls, like garage door openers, a community gate, or outdoor lighting. It also has non-volitile memory, so you don’t have to reprogram it after reconnecting the car battery.
http://www.homelink.com/about/about.taf
I purchased a new Gentex installation kit from another eBay seller for about $30 with shipping. He also sells new and used mirror kits which also include instructions.
http://www.wembleysells.com/
Mounting the mirror requires removing the old mirror button from the windshield, then mounting a different one in its place. I mounted the new button 5 3/8” down from the aluminum windshield trim piece. That’s about �” lower than the factory button. This places the mirror only slightly closer to the driver than the factory mirror, while still maintaining the same mirror height. You can see in my photo, there is still plenty of space between the new mirror and the sun visors.
Here’s the thread (post #36) that details how I removed the old button…
https://rennlist.com/forums/928-foru...e-removal.html
Here’s a video, on how to glue the new button on using windshield adhesive…
http://www.permatex.com/videos/video_rearview_eng.html
For this mirror, it’s a four wire hookup installation, including reverse inhibit. The wiring kit from wimbleysells.com came with 8 feet of wire; which is just enough to complete the routing and hookup. Make sure you ask that the reverse inhibit wire be included.
I connected the wiring to the CE Panel in the passenger footwell. The wiring routes from the mirror above the headliner and down the A pillar on the passenger side. This requires releasing the headliner slightly and removing the A pillar cover. The A pillar cover removal is detailed in the WSM.
Once you remove the A pillar cover, there’s a big opening to the underside of the dash. I routed the wires above the LH/EZK controllers and down behind the CE panel using nylon tie wraps.
For routing the wires along the A pillar, I used a couple of these stick bicycle cable guides that I had, but you could also use plastic tape.
All the wiring connections needed can be found on the ‘U’ Connector. The X power bus is accessory/ignition, while 15 power bus is ignition. There's also battery power on this connector, but it is not fused (direct to battery).
You can use wiring splices to connect the mirror wires to the car’s wiring, but I preferred to partially disassemble the U connector and solder the wires directly to the ends of the U connector terminals.
If you decide the remove the U connector, make sure you unlatch the locking mechanisms first.

 01-17-2010, 09:35 PM
#3
Rennlist Member
I put the same mirror in my S4 but in the factory location. I had the display changed to Amber to match the interior lights. I used the cigar lighter as the switched power and picked a heavy constant power wire under the dash to splice into, not sure where it goes but it was large and the mirror doesn't draw significant power so why not use it.
Very nice. I had to cut down my wire cover on the windshield because it was too long.
Very nice. I had to cut down my wire cover on the windshield because it was too long.
02-19-2019, 12:36 PM
#5
Rennlist Member
Hey guys, I'm about to install a Gentex 453 auto-dimming mirror with Homelink . Quick question, how do you "release the headliner slightly". I've searched the forum on "headliner" but most of the posts discuss recovering and repairing a sagging headliner.
Thanks.
Thanks.
02-20-2019, 03:57 PM
#6
Rennlist Member
I have been using a Gentex 341 that has the compass, the temp gauge, auto dim and homelink, but also has the map lights because the 928 is lacking enough light IMHO.
05-03-2020, 05:32 AM
#7
1st Gear

Join Date: May 2020
Posts: 1
Likes: 0
Received 0 Likes
on
0 Posts
I installed a used OEM auto dimming mirror from a 2009 Hyundai Santa Fe on my 1990 S4. The exact same OEM mirror is used by other newer Asian makes and models. Used ones, sell on eBay for about $80 including shipping.
This mirror is manufactured by Gentex and has some nice features like Homelink and compass. The compass display is hidden when deselected by the compass button or power is interrupted by the ignition switch; most other mirrors have an unsilvered rectangle for the display. The Homelink feature can be programmed to operate as three different remote controls, like garage door openers, a community gate, or outdoor lighting. It also has non-volitile memory, so you don’t have to reprogram it after reconnecting the car battery.
http://www.homelink.com/about/about.taf
I purchased a new Gentex installation kit from another eBay seller for about $30 with shipping. He also sells new and used mirror kits which also include instructions.
http://www.wembleysells.com/


Mounting the mirror requires removing the old mirror button from the windshield, then mounting a different one in its place. I mounted the new button 5 3/8” down from the aluminum windshield trim piece. That’s about �” lower than the factory button. This places the mirror only slightly closer to the driver than the factory mirror, while still maintaining the same mirror height. You can see in my photo, there is still plenty of space between the new mirror and the sun visors.
Here’s the thread (post #36) that details how I removed the old button…
https://rennlist.com/forums/928-foru...e-removal.html
Here’s a video, on how to glue the new button on using windshield adhesive…
http://www.permatex.com/videos/video_rearview_eng.html
For this mirror, it’s a four wire hookup installation, including reverse inhibit. The wiring kit from wimbleysells.com came with 8 feet of wire; which is just enough to complete the routing and hookup. Make sure you ask that the reverse inhibit wire be included.
I connected the wiring to the CE Panel in the passenger footwell. The wiring routes from the mirror above the headliner and down the A pillar on the passenger side. This requires releasing the headliner slightly and removing the A pillar cover. The A pillar cover removal is detailed in the WSM.
Once you remove the A pillar cover, there’s a big opening to the underside of the dash. I routed the wires above the LH/EZK controllers and down behind the CE panel using nylon tie wraps.
For routing the wires along the A pillar, I used a couple of these stick bicycle cable guides that I had, but you could also use plastic tape.
All the wiring connections needed can be found on the ‘U’ Connector. The X power bus is accessory/ignition, while 15 power bus is ignition. There's also battery power on this connector, but it is not fused (direct to battery).


You can use wiring splices to connect the mirror wires to the car’s wiring, but I preferred to partially disassemble the U connector and solder the wires directly to the ends of the U connector terminals.
If you decide the remove the U connector, make sure you unlatch the locking mechanisms first.
This mirror is manufactured by Gentex and has some nice features like Homelink and compass. The compass display is hidden when deselected by the compass button or power is interrupted by the ignition switch; most other mirrors have an unsilvered rectangle for the display. The Homelink feature can be programmed to operate as three different remote controls, like garage door openers, a community gate, or outdoor lighting. It also has non-volitile memory, so you don’t have to reprogram it after reconnecting the car battery.
http://www.homelink.com/about/about.taf
I purchased a new Gentex installation kit from another eBay seller for about $30 with shipping. He also sells new and used mirror kits which also include instructions.
http://www.wembleysells.com/
Mounting the mirror requires removing the old mirror button from the windshield, then mounting a different one in its place. I mounted the new button 5 3/8” down from the aluminum windshield trim piece. That’s about �” lower than the factory button. This places the mirror only slightly closer to the driver than the factory mirror, while still maintaining the same mirror height. You can see in my photo, there is still plenty of space between the new mirror and the sun visors.
Here’s the thread (post #36) that details how I removed the old button…
https://rennlist.com/forums/928-foru...e-removal.html
Here’s a video, on how to glue the new button on using windshield adhesive…
http://www.permatex.com/videos/video_rearview_eng.html
For this mirror, it’s a four wire hookup installation, including reverse inhibit. The wiring kit from wimbleysells.com came with 8 feet of wire; which is just enough to complete the routing and hookup. Make sure you ask that the reverse inhibit wire be included.
I connected the wiring to the CE Panel in the passenger footwell. The wiring routes from the mirror above the headliner and down the A pillar on the passenger side. This requires releasing the headliner slightly and removing the A pillar cover. The A pillar cover removal is detailed in the WSM.
Once you remove the A pillar cover, there’s a big opening to the underside of the dash. I routed the wires above the LH/EZK controllers and down behind the CE panel using nylon tie wraps.
For routing the wires along the A pillar, I used a couple of these stick bicycle cable guides that I had, but you could also use plastic tape.
All the wiring connections needed can be found on the ‘U’ Connector. The X power bus is accessory/ignition, while 15 power bus is ignition. There's also battery power on this connector, but it is not fused (direct to battery).
You can use wiring splices to connect the mirror wires to the car’s wiring, but I preferred to partially disassemble the U connector and solder the wires directly to the ends of the U connector terminals.
If you decide the remove the U connector, make sure you unlatch the locking mechanisms first.
Last edited by dr bob; 05-03-2020 at 12:56 PM. Reason: deleted blatant marketing link from new user.