

WP/TB/PKsnr/APD/TH-OF/CTGH RR Job....Done
 05-14-2009, 09:14 PM
#1
Three Wheelin'
Thread Starter
Join Date: Nov 2004
Location: Gatineau/Ottawa Canada 84 928S triple black
Posts: 1,372
Likes: 0
Received 1 Like
on
1 Post
Well, that was a hell of a 3 weekdend job for me - about 35h including going to the store for parts & tools.
It was at a friend's place in a winter type car shelter, I had to get the tools out/in the house every day so deduct a few hours there.
Overal, I'm pretty satisfied with the work I have done. Took the time needed and did not rush.
The only help I had was to remove high torqued bolts and retorque the crankshaft monster bolt and instaling the TB.
I will spare you the usual tools/acc needed to do this job but get yourself a mirror and a magnet on a stick.
Disclamer : I am not a profesional wrench and will not describe every single detail of this job and yes I may forget some important information...
This was my guide for this job.
TH-OF : Themostate housing / Oil filler (no pic of bridge)
Before you start playing in there, remove/loosen and twist the torsion bar out of the way.
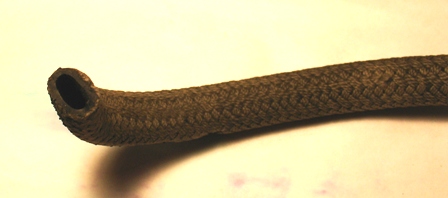
At this point this hose will brake so buy some. If its like mine, it's petrified(sp) by now.
Remove all sensors on the bridge - remove bolts for the oil filler (one is inside).
On my car 84, I could not remove the filler but I could move it around enough to give me more room to get to the Allen bolt on the driver's side.
Almost forgot, remove the front gas line/dampner in one piece (3 nuts : 2 at the rails and one at the dampner facing plenum).
In my case everything went well with NO broken bolts.
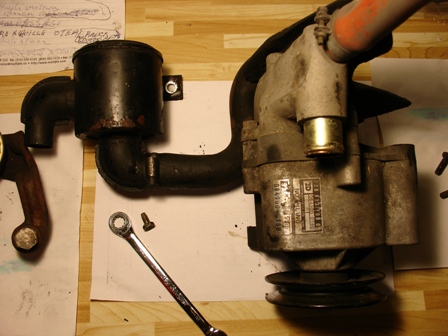
WP : Water pump
Ha, the WP, I was not so lucky on this one. I did brake ONE bolt in the block.
Wasted about a day on that sh*t, ended up grinding to dust with a couple of diamond tiped dremmel bits.
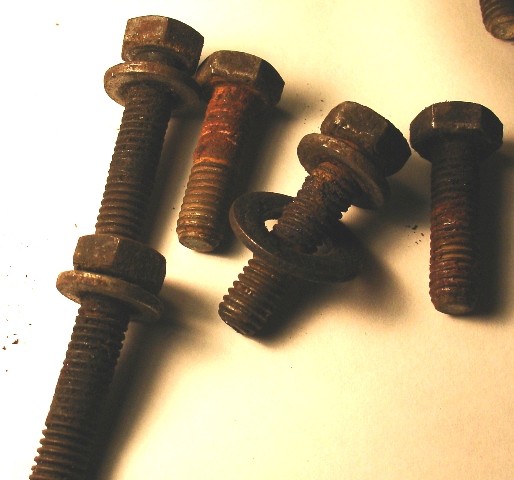
Can we say "Experienced" Jim!? I have to say that they came off fairly easy.
I think the stuff we see on them was antisieze material!?
Yes, replaced all bolts with new ones and antiseize....
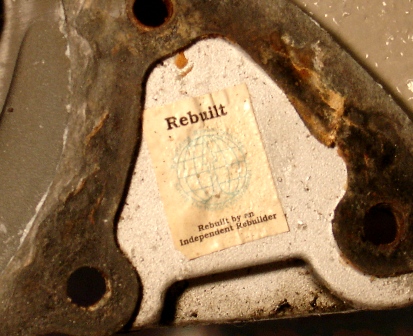
It was a Porsche WP 928.106.122
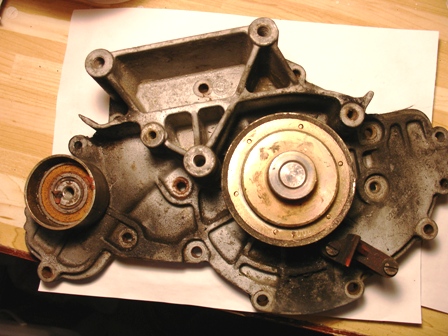
Annnd rebuilt....leaking from the shaft.
APD : Air pump delete
Self explanatory(sp) get a good 10mm wrachet wrench to get to the hidden bolt.
The removal was fairly easy. In my case, the belt was replaced with a 4L210(21in.)
PKsnr : Porken's now famous Audi tensioner/roller bracket
The old one was pretty much shot.
Fairly easy fob to do; Just follow instructions....
I still have to clean-up the AC covered in oily grime left by the cam tower housing oil leak.
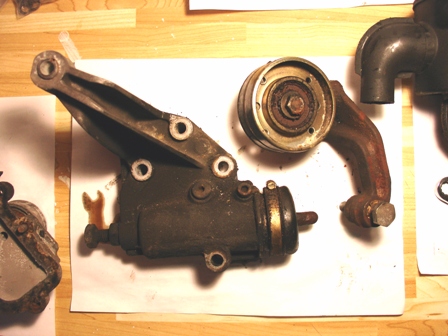
CTGH : Cam tower gear housing
RR all O-rings and seals on both sides; Had terrible leaks on both sides.
Easy to do but on the driver's side you have to follow these steps when reassembling :
Once you have RR the O-rings, start with bolting the housing > rear washer > gear > flang > finaly the seal.
Note : the passenger flang is different from the driver flang...
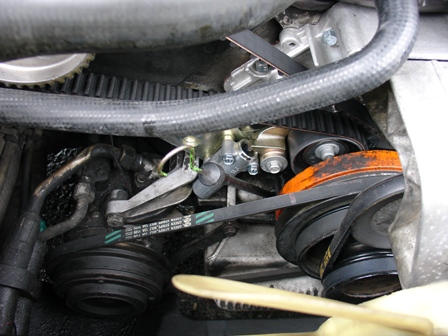
TB : Duhh
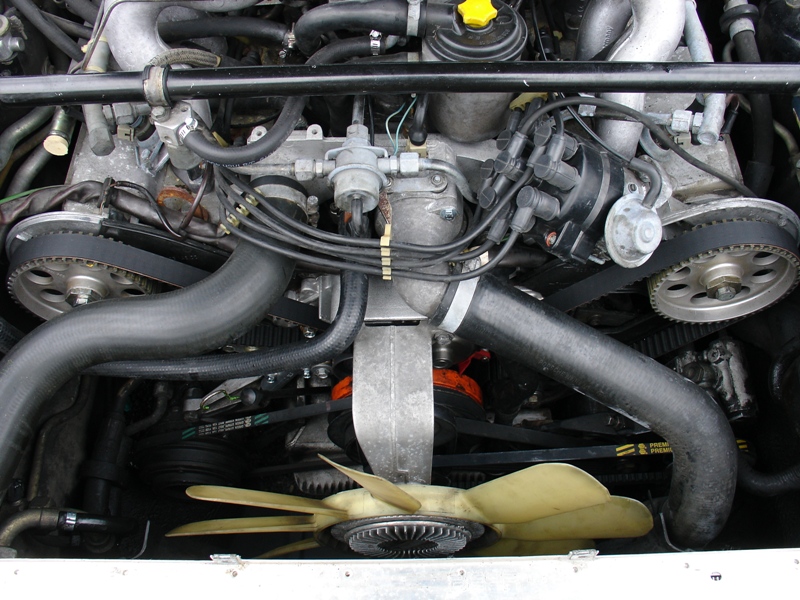
Voil�, the final product.....
No the brace is not bent, it's the lens distortion...
I love it without the plastic cover for 2 reasons :
First is the eye candy and second, if something is happening you don't have to guess, you can see it.
Next will be the Plenum/runner RR
In the process of doing this work, On the end of day one, I broke rib no.2 (front) running the risk of lung ponture and/or cevering a heart nurishing blood vessel.
Fortunitly, none of those scenario happened but working on a car with a broken rib ain't fun.
If you need some details or photos, just ask.
PS; I found the diagrams in the PARTS catalog as useful if not more than the WSM for telling me what went where.
It was at a friend's place in a winter type car shelter, I had to get the tools out/in the house every day so deduct a few hours there.
Overal, I'm pretty satisfied with the work I have done. Took the time needed and did not rush.
The only help I had was to remove high torqued bolts and retorque the crankshaft monster bolt and instaling the TB.
I will spare you the usual tools/acc needed to do this job but get yourself a mirror and a magnet on a stick.
Disclamer : I am not a profesional wrench and will not describe every single detail of this job and yes I may forget some important information...
This was my guide for this job.
TH-OF : Themostate housing / Oil filler (no pic of bridge)
Before you start playing in there, remove/loosen and twist the torsion bar out of the way.
At this point this hose will brake so buy some. If its like mine, it's petrified(sp) by now.
Remove all sensors on the bridge - remove bolts for the oil filler (one is inside).
On my car 84, I could not remove the filler but I could move it around enough to give me more room to get to the Allen bolt on the driver's side.
Almost forgot, remove the front gas line/dampner in one piece (3 nuts : 2 at the rails and one at the dampner facing plenum).
In my case everything went well with NO broken bolts.
WP : Water pump
Ha, the WP, I was not so lucky on this one. I did brake ONE bolt in the block.
Wasted about a day on that sh*t, ended up grinding to dust with a couple of diamond tiped dremmel bits.
Can we say "Experienced" Jim!? I have to say that they came off fairly easy.
I think the stuff we see on them was antisieze material!?
Yes, replaced all bolts with new ones and antiseize....
It was a Porsche WP 928.106.122
Annnd rebuilt....leaking from the shaft.
APD : Air pump delete
Self explanatory(sp) get a good 10mm wrachet wrench to get to the hidden bolt.
The removal was fairly easy. In my case, the belt was replaced with a 4L210(21in.)
PKsnr : Porken's now famous Audi tensioner/roller bracket
The old one was pretty much shot.
Fairly easy fob to do; Just follow instructions....
I still have to clean-up the AC covered in oily grime left by the cam tower housing oil leak.
CTGH : Cam tower gear housing
RR all O-rings and seals on both sides; Had terrible leaks on both sides.
Easy to do but on the driver's side you have to follow these steps when reassembling :
Once you have RR the O-rings, start with bolting the housing > rear washer > gear > flang > finaly the seal.
Note : the passenger flang is different from the driver flang...
TB : Duhh
Voil�, the final product.....
No the brace is not bent, it's the lens distortion...
I love it without the plastic cover for 2 reasons :
First is the eye candy and second, if something is happening you don't have to guess, you can see it.
Next will be the Plenum/runner RR
In the process of doing this work, On the end of day one, I broke rib no.2 (front) running the risk of lung ponture and/or cevering a heart nurishing blood vessel.
Fortunitly, none of those scenario happened but working on a car with a broken rib ain't fun.
If you need some details or photos, just ask.
PS; I found the diagrams in the PARTS catalog as useful if not more than the WSM for telling me what went where.
Last edited by DANdeMAN; 05-14-2009 at 10:59 PM.
 05-14-2009, 10:40 PM
#2
Inventor
Rennlist Member
Rennlist Member
Looks great!
If you leave the covers off, make sure that no oil leaks onto it. An oily belt will collect grit, and will grind the gears down pretty quickly. (It happened to my old '81.)
If you leave the covers off, make sure that no oil leaks onto it. An oily belt will collect grit, and will grind the gears down pretty quickly. (It happened to my old '81.)
05-14-2009, 10:53 PM
#3
Rennlist Member
Join Date: Oct 2005
Location: Gatineau, Qu�bec, Canada
Posts: 5,194
Received 1,349 Likes
on
512 Posts
Happy to see that everything went well.
Stop by if you are in Buckingham.
By the way, I'm still working on my Intake and valve coversR/R. Just taking my time!!
Stop by if you are in Buckingham.
By the way, I'm still working on my Intake and valve coversR/R. Just taking my time!!
