
how to remove crank position sensor
 03-21-2009, 04:08 PM
#1
Burning Brakes
Thread Starter

Join Date: Sep 2006
Location: Myrtle Beach, South Carolina
Posts: 1,203
Likes: 0
Received 0 Likes
on
0 Posts
I got the allen bolt out and grabbing the body of the sensor it will rotate at least as much as the stuff around it will allow...but she doesn't want to come up and out of the hole!
I've sprayed Kroil on it and tried all sorts of tools...needle nose vise grips clamped on tight with a big flat blade screw driver prying up on it...etc. practicallly pulled both hamstrings trying to stretch my old fat body into position to get some more leverage...
Is there a secret?
PS: I tried search. it told me: Sorry - no matches. Please try some different terms.
The following words are either very common, too long, or too short and were not included in your search : remove+crank+position+sensor
 03-21-2009, 04:38 PM
#2
Addict
Rennlist Member
Rennlist Member
Join Date: Oct 2003
Location: Gone. On the Open Road
Posts: 16,496
Received 1,638 Likes
on
1,069 Posts
Try this search phrase:
"remove" AND "crank" AND "position" AND "sensor"
Sharkskin turned me on to this, apparently, new-fangled way to poke rennlist's search in the eye.
It at least comes up with a short list of matching threads.
Can't help ya with the impulse sender though. They've always come out for me. If I was in your shoes I'd try a 50/50 mix of acetone and ATF as the lubricant. WallyP found this mix in a machinist tech article and passed it on. It works really, really well. (However, don't use it in an unventilated space or where there's fire... duh...)
03-21-2009, 05:09 PM
#3
Burning Brakes
Thread Starter
Join Date: Sep 2006
Location: Myrtle Beach, South Carolina
Posts: 1,203
Likes: 0
Received 0 Likes
on
0 Posts
Thanks for the search tip!
I got the it out. Holy crap was that the most difficult piece of crap I ever had to fight!!
I finally took enough of the car apart to be able to get a large pair of vice grips clamped firmly on the body directly over the probe...look at your new probe to see which part.
Once they were clamped on, using a flat blade screw driver to pry up against the tip of the vise grip created the straight up pull required. You have to be pulling straight up and cuss so violently the dog leaves the garage....
03-21-2009, 05:16 PM
#4
Addict
Rennlist Member
Rennlist Member
Join Date: Oct 2003
Location: Gone. On the Open Road
Posts: 16,496
Received 1,638 Likes
on
1,069 Posts
 03-22-2009, 01:21 AM
#7
Rest in Peace
Rennlist Member
Rennlist Member
Join Date: May 2006
Location: Bird lover in Sharpsburg
Posts: 9,903
Likes: 0
Received 2 Likes
on
2 Posts
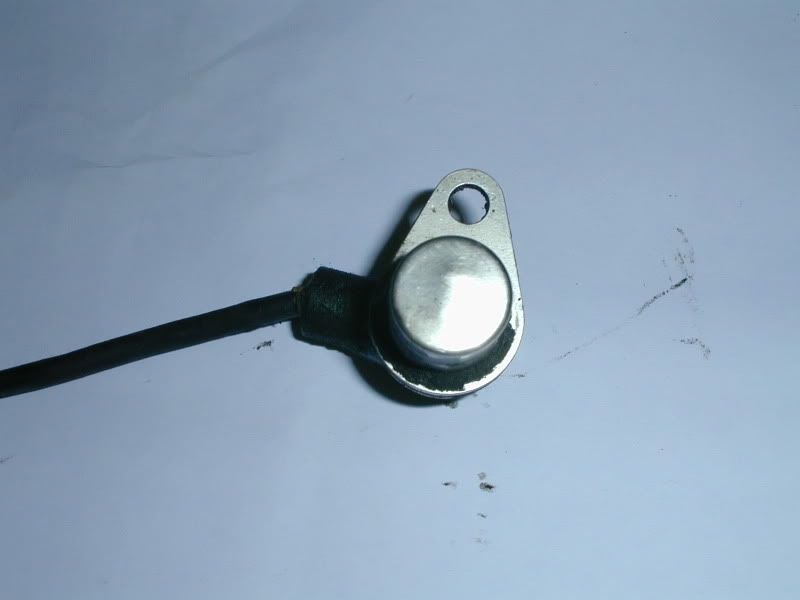
I have made hundreds of cars run again by replacing them.
If they are not flat on the bottom replace them.
This one was still running, but it was not going to be running for long.
Trending Topics
04-26-2010, 10:45 AM
#8
Rennlist Member
Does anyone have a picture of the CPS pre-removal? I would like to replace mine because I was told to do so. After reading all the nightmare stories on replacing them, Im not sure I want to risk this project. 
Ive been looking for photos, at least now I know what its NOT supposed to look like. HA!
Ive been looking for photos, at least now I know what its NOT supposed to look like. HA!
04-26-2010, 10:55 AM
#9
Administrator - "Tyson"
Lifetime Rennlist
Member
Lifetime Rennlist
Member
I suppose dropping the clutch and smacking it with a hammer is not an approved method for removal.
04-26-2010, 05:00 PM
#10
Official Bay Area Patriot
Fuse 24 Assassin
Rennlist Member
Fuse 24 Assassin
Rennlist Member
Worked for my 944... 
I just hosed my bad one with PB Blast and went to bed. 10 hours later it still wouldn't come out. I just pulled really hard on the wire and saw it lifting out. Surprised the wire didn't separate from the sensor itself on the 928.
I just hosed my bad one with PB Blast and went to bed. 10 hours later it still wouldn't come out. I just pulled really hard on the wire and saw it lifting out. Surprised the wire didn't separate from the sensor itself on the 928.
06-17-2012, 10:21 AM
#12
Advanced

Join Date: Apr 2004
Location: Annapolis, MD
Posts: 83
Likes: 0
Received 0 Likes
on
0 Posts
After reading all the CPS stores that end with success I took a run at mine and broke it clean off with the beast still in the hole. Not good. Any suggestions are welcome.
After days of soaking (to come) I plan to tap it in ever so slightly to break it loose and then sink some kind of bolt into it so I can get a grip and work it out. But that is just an idea at this point.
After days of soaking (to come) I plan to tap it in ever so slightly to break it loose and then sink some kind of bolt into it so I can get a grip and work it out. But that is just an idea at this point.
07-05-2012, 05:40 PM
#13
Racer
Join Date: Feb 2005
Location: Orlando, FL: Treasure Coast, FL
Posts: 337
Likes: 0
Received 0 Likes
on
0 Posts
Bertrand was very helpful to me writing on how he removed his when his broke apart. Ended up pushing it through and picking it out.
I have broken a CPS and removed much of the plastic with a dremel drill bit. Removed the magnet which broke as well leaving the metal to remove.
I have broken a CPS and removed much of the plastic with a dremel drill bit. Removed the magnet which broke as well leaving the metal to remove.
07-05-2012, 08:01 PM
#15
Rennlist Member
Join Date: Oct 2005
Location: Gatineau, Qu�bec, Canada
Posts: 5,178
Received 1,318 Likes
on
499 Posts
Didn't find the thread but here's how I removed mine after I broke it.
Ok here we go!
I did remove it from the top.
By the way, you can't easily reach it from under as the flywheel is the way!!!
Also, don't try to push it out from under as you will probably bent it and have more problem removing it from the the top. Ask me how I know!
Anyway here's how I did it.
1) Is the intake out? If so it is easier to work down there. Mine was out when I did the job. If not, still doable but harder as it is deep behind the intake.
2) I put alot of penetring oil on top of the CPS.
3) From the top, I used a Dremel tool to remove as mutch plastic as I can inside the CPS on top and around the magnet. About 1/4" below the top of the magnet worked fine for me.
4) I used a pair of long nose plier and pull the magnet out. It did come out quite easily. Now that the magnet is out, you can tap the hole and use a long bolt, nut and a spacer (a 1/2" small pipe work well for me) and take it out!
5) Take a bolt about 3 inches long and a) put a nut all the way to the top of the bolt head. b) put a big washer. Maybe about 1". c) then a piece of pipe (1/2") and screw it in there as much as you can. Don't put it to tight as not to striped it.
6) Then, screw the nut down. It will eventually lift the bolt and at the same time, the sensor.
When I pull the CPS out, the lower metal part separated from the top plastic section and stayed stuck inside. Now another problem. As I could't remove it from the top, I push it from the top and picked it from under on the top of the bell housing.
It took me few hours to do it but at least I did not have to remove it from under - moving the trans./ torque tube, removing the flywheel etc.
Just take your time and try to remove it without braking it!
I hope you understand what I mean by using the bolt, nut, washer and the small pipe as a lever.
It is the way I did it after a friend suggest me to do so and it worked.
Hope it will work for you. It should.
With time and patience, it will get out!