

'88 Brake Pads & Rotors Replacement w/pics
 07-25-2008, 09:25 PM
#1
Three Wheelin'
Thread Starter
Join Date: Sep 2007
Location: Ridgecrest, California
Posts: 1,363
Likes: 0
Received 149 Likes
on
33 Posts
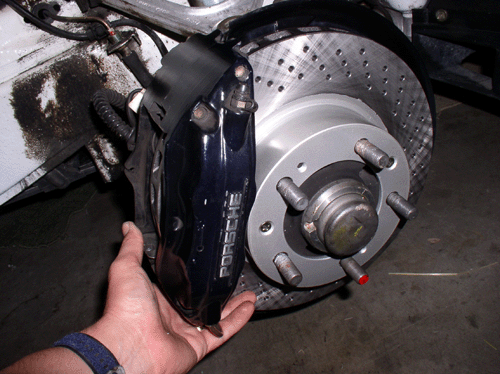
As far as I could tell from the records that came with the '88 we got for my wife, the brakes had never been serviced. At 22K miles, the brake were squeaking and the pads looked pretty thin. If these were the factory pads, they were putting out a LOT of dust. I'd wash the car, my wife would take it on an errand and the wheels came back dusty! 
I had never done brakes on an S4 before, so I thought I'd take a few pics of the process I went through in case it helps other Noobs like me. WARNING: there's a lot of pictures!
To start with, I did some pre-planning by inspecting the brakes for worn parts to make sure new parts were ordered and on hand before starting the job. I could tell by inspection that the front pads were worn. I took off the calipers (described later) and measured the rotors thickness, inspected the brake hose for cracks, worn spots or hardening, inspected the caliper piston boots for leaks or wear.
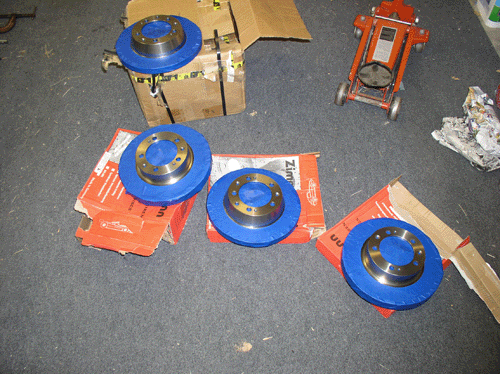
It turns out that I only really needed front rotors and pads but decided to replace all four rotors and pads. So I ordered and received the parts before beginning.
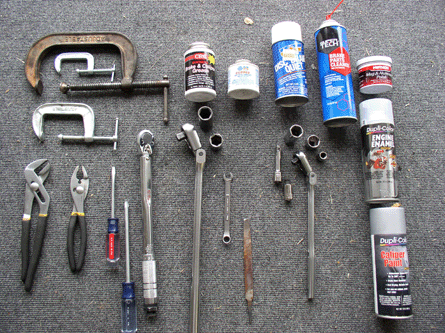
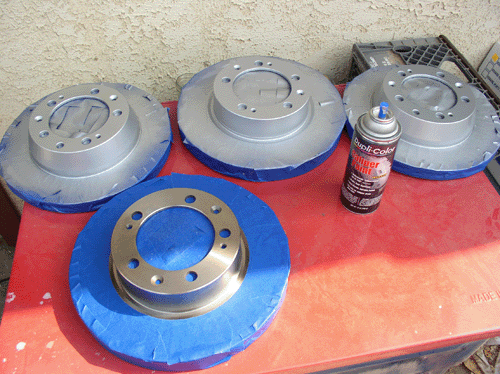
Here's a pic of the tools and materials I used. It includes:
1/2" drive pivot head ratchet, 19mm tall socket, 19mm short (regular height) socket (6 point)
3/8" drive pivot head ratchet, 19mm tall socket, 19mm short socket (6 point), 10mm allen socket, 3" extension, 10mm socket
1/2" and 3/8" drive torque wrenches
10mm combination wrench
Phillips head and slotted head screwdrivers
Standard pliers and channel lock pliers
6", 4", 3" C-Clamps
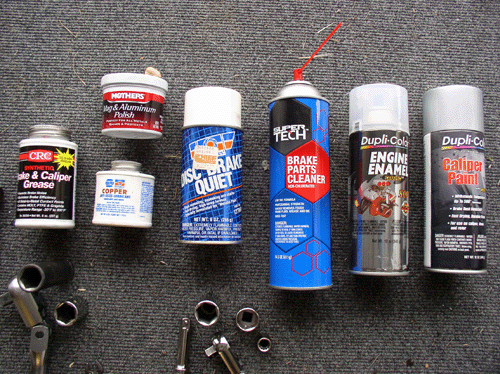
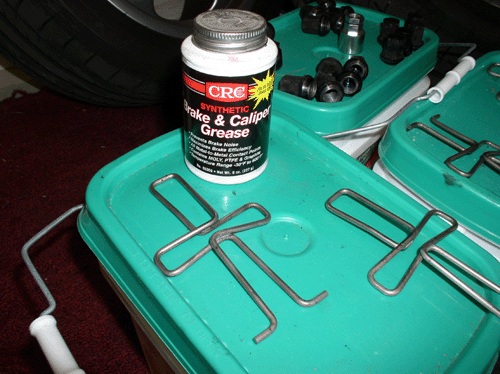
Brake Caliper Grease
Optimoly HT (Copper Anti-Seize)
Disk Brake Quiet
Brake Cleaner
Mother's Aluminum & Mag Polish
Caliper Paint (DupliColor - Silver)
High Temp. Engine Enamel (Duplicolor - clear coat)
Painter Blue Masking Tape
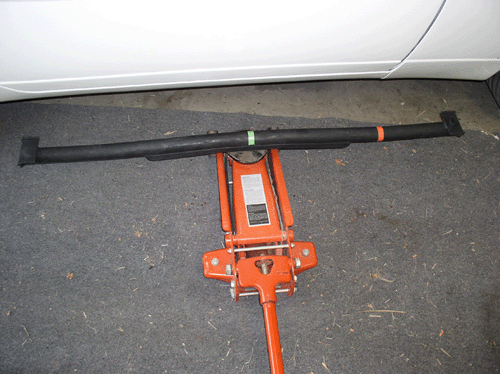
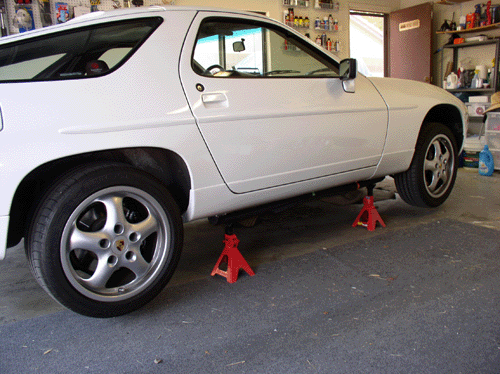
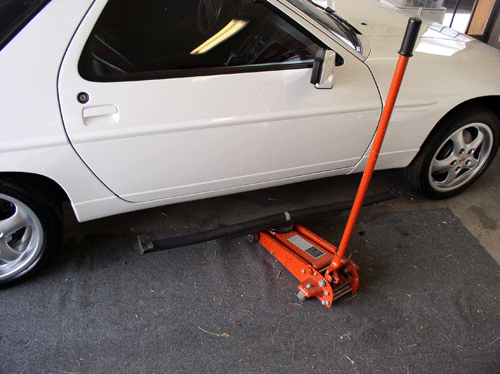
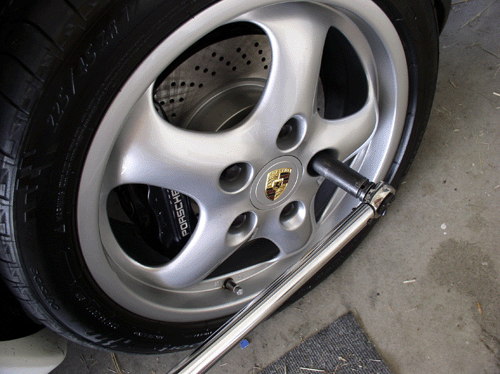
First, using the 19mm socket and 1/2" drive, loosen the lugnuts on all four wheels before lifting the car. Then, safely lift the car off all 4 wheels and use Jack stands to support the car (unless you're fortunate enough to have a lift!
I used Porken's lift bars. Which, by the way, I ordered on a Saturday and he had manufactured and shipped and on my doorstep by the following Thursday, just in time to start the brake job on Friday Morning! THANKS Porken!
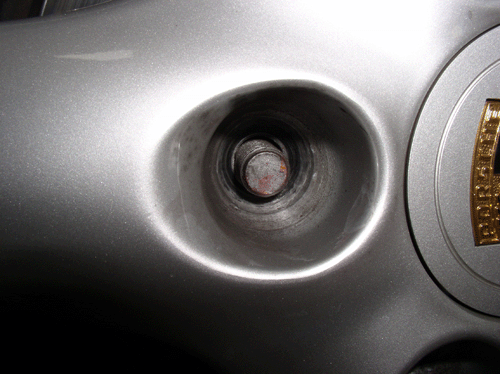
I noticed that one of the wheel studs on each of the wheels had RED paint on the end. After doing some research, I found that this lug is marked for locating the factory locking lug nut. The red stud is supposed to be opposite the valve stem when mounting the tire ONLY on 17" cup design wheels (which is what is on this car). However, the wheel is supposed to be mounted so the valve stem is next to (facing) the painted stud for stock wheels. Since we replaced the factory locking lugs (heavier) with the lighter 928Intl locking lugs, this isn't so important (or even required). But nevertheless, I maintain the red lug across from the valve stem and put the locking lug on that stud.
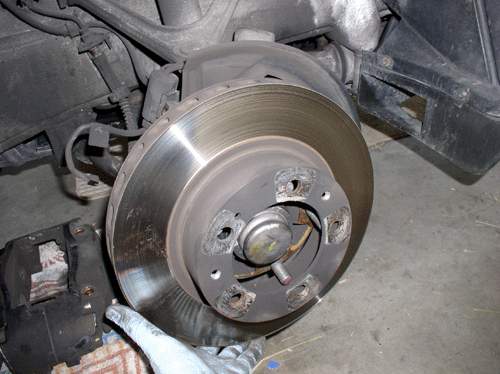
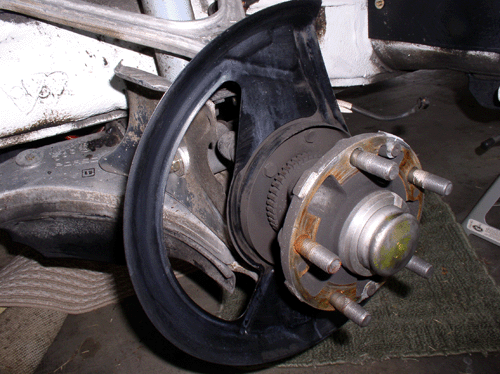
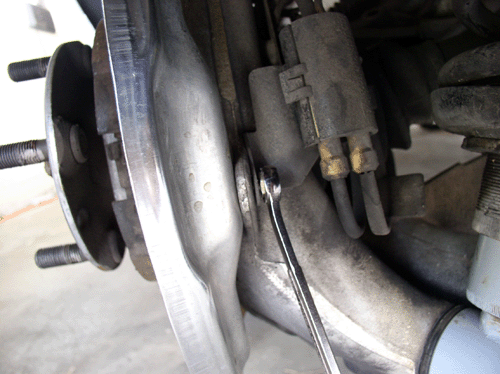
After taking off the wheel, you can inspect for obvious problems like leaks and worn hoses. Lots of brake dust on the wheel well here...
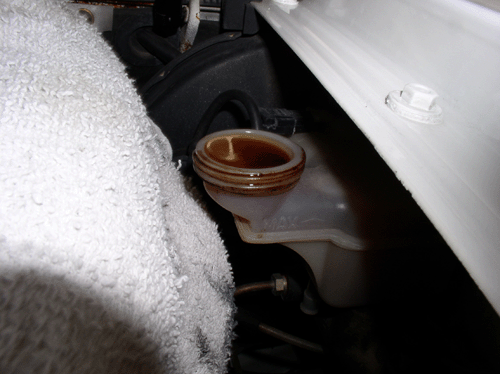
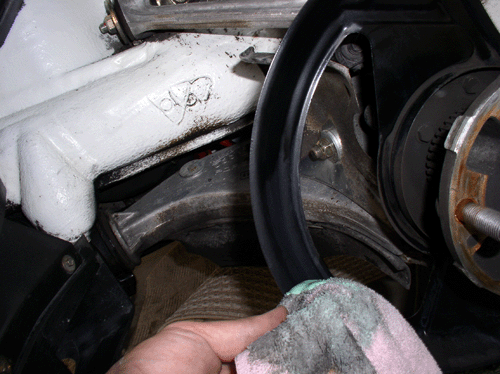
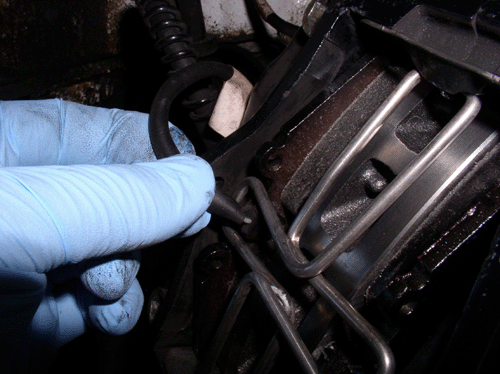
Before taking off the caliper, you should open the cap on the brake fluid reservior and remove some fluid.
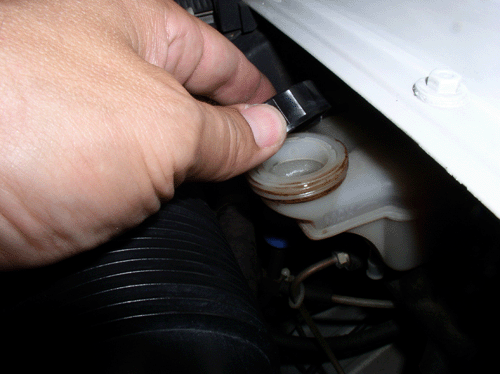
I used a suction bulb to remove a few oz. According to the service records, this brake fluid was flushed and replaced with fresh in March, 2004 so I didn't plan to flush and replace fluid yet. EDIT: I didn't realize the fluid needed to be flushed and replaced at the time of this repair. The WSM recommends renewing the brake fluid every 2 years. So I'll be flushing the brake fluid soon - might even post a few pics!
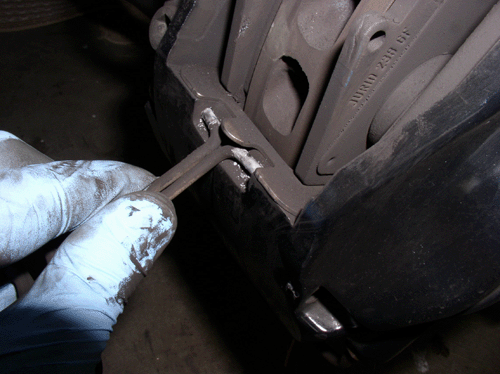
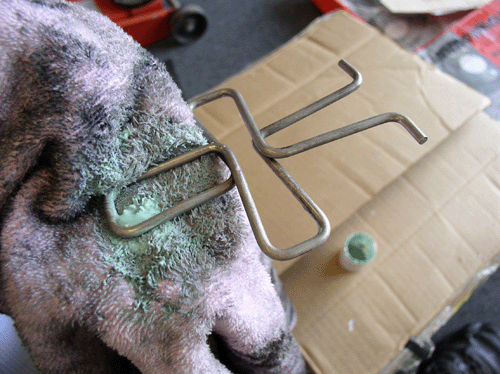
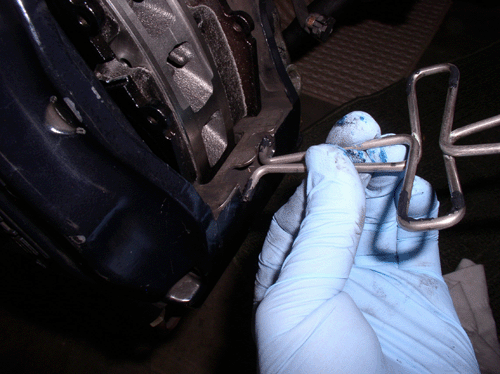
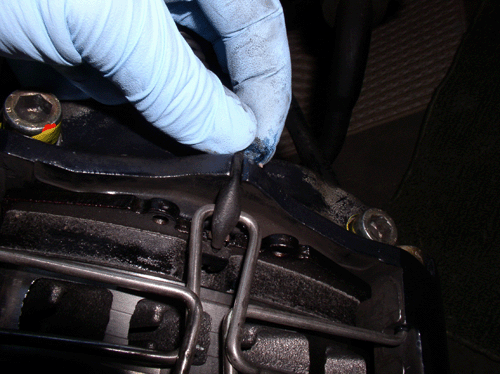
Next, start removing the calipers. Use regular pliers and/or channel lock pliers to squeeze the center of the retaining spring while pushing down on the latched end (the end opposite the pivot end). According to the manual, it's good to be careful (hence push down slightly at the latched end) so you don't bend or damage the catch that holds the retaining spring in place. I used channel lock pliers on the front springs and regular pliers on the rears. Also note that the front retaining springs pivot at the bottom while the rear retaining springs pivot at the top.
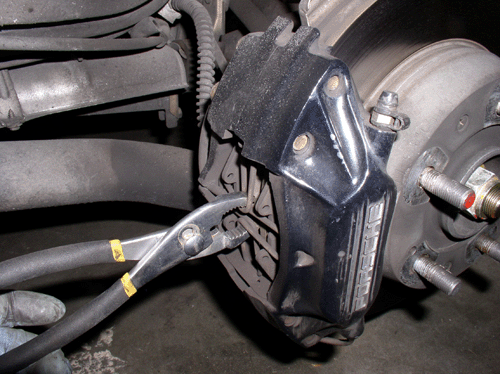
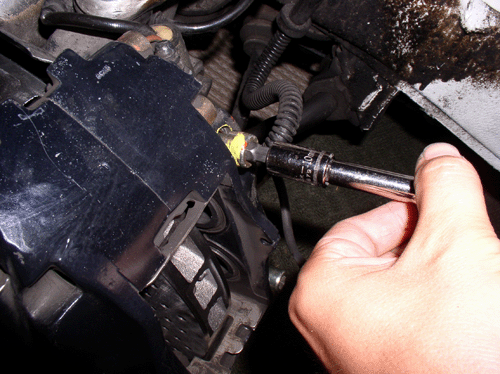
After releasing the retaining spring from the catch, you can pivot it down somewhat and gain better access to the brake pad wear sensor. You remove this by pulling it straight out and can use the flat blade screwdriver to give you some leverage if it's tight. Be carful with how much force you apply, the black plastic end can be brittle and break under too much stress. I just take my time and slowly work it out.
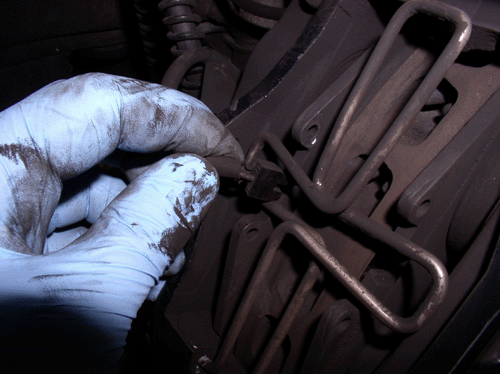
With the brake pad wear sensor removed from the caliper, you can pivot the retaining spring all the way down (front) or all the way up (rear) and squeeze the spring together at the pivot point to remove the spring from the caliper. I found it a litter easier to remove from one hole at a time.
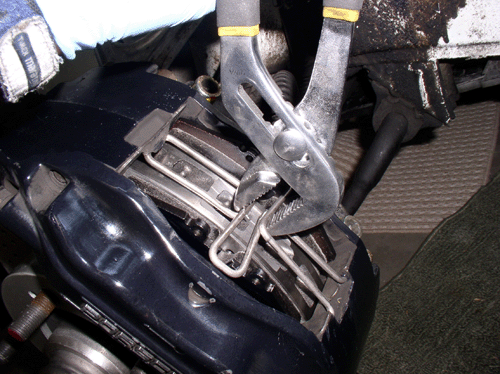
Next, you can remove the pads from the calipers. I used 4" C-Clamps mounted on the top of the pad and the outside of the caliper. You can use a small cloth to place between the clamp and the caliper so you don't chip the paint. You will also notice a small flat divot at the center of the caliper on the front and this made a good spot to place the clamp. I turned the clamps down just enough to clear about a millimeter of space between the pad and the disk.
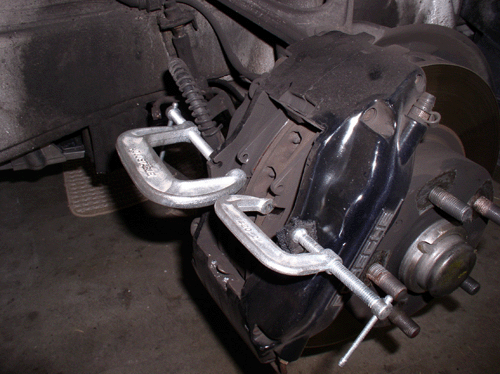
I also loosened the caliper bolts which gave added room to easily remove the pads. You will need a 10mm allen socket to loosen the caliper bolts.
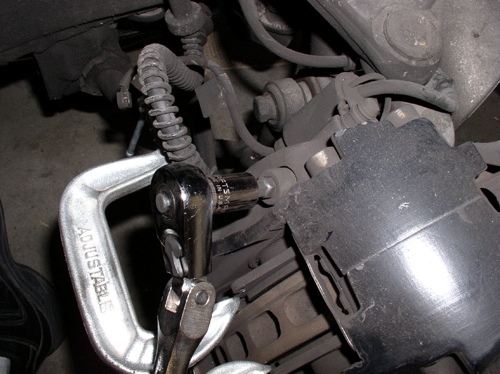
At this point, you can remove the clamps and the pads should pull straight out without fuss. You can see from this picture, the divot where you can place the C-Clamp on the front of the caliper.
Continued......
I had never done brakes on an S4 before, so I thought I'd take a few pics of the process I went through in case it helps other Noobs like me. WARNING: there's a lot of pictures!
To start with, I did some pre-planning by inspecting the brakes for worn parts to make sure new parts were ordered and on hand before starting the job. I could tell by inspection that the front pads were worn. I took off the calipers (described later) and measured the rotors thickness, inspected the brake hose for cracks, worn spots or hardening, inspected the caliper piston boots for leaks or wear.
It turns out that I only really needed front rotors and pads but decided to replace all four rotors and pads. So I ordered and received the parts before beginning.
Here's a pic of the tools and materials I used. It includes:
1/2" drive pivot head ratchet, 19mm tall socket, 19mm short (regular height) socket (6 point)
3/8" drive pivot head ratchet, 19mm tall socket, 19mm short socket (6 point), 10mm allen socket, 3" extension, 10mm socket
1/2" and 3/8" drive torque wrenches
10mm combination wrench
Phillips head and slotted head screwdrivers
Standard pliers and channel lock pliers
6", 4", 3" C-Clamps
Brake Caliper Grease
Optimoly HT (Copper Anti-Seize)
Disk Brake Quiet
Brake Cleaner
Mother's Aluminum & Mag Polish
Caliper Paint (DupliColor - Silver)
High Temp. Engine Enamel (Duplicolor - clear coat)
Painter Blue Masking Tape
First, using the 19mm socket and 1/2" drive, loosen the lugnuts on all four wheels before lifting the car. Then, safely lift the car off all 4 wheels and use Jack stands to support the car (unless you're fortunate enough to have a lift!
I used Porken's lift bars. Which, by the way, I ordered on a Saturday and he had manufactured and shipped and on my doorstep by the following Thursday, just in time to start the brake job on Friday Morning! THANKS Porken!
I noticed that one of the wheel studs on each of the wheels had RED paint on the end. After doing some research, I found that this lug is marked for locating the factory locking lug nut. The red stud is supposed to be opposite the valve stem when mounting the tire ONLY on 17" cup design wheels (which is what is on this car). However, the wheel is supposed to be mounted so the valve stem is next to (facing) the painted stud for stock wheels. Since we replaced the factory locking lugs (heavier) with the lighter 928Intl locking lugs, this isn't so important (or even required). But nevertheless, I maintain the red lug across from the valve stem and put the locking lug on that stud.
After taking off the wheel, you can inspect for obvious problems like leaks and worn hoses. Lots of brake dust on the wheel well here...
Before taking off the caliper, you should open the cap on the brake fluid reservior and remove some fluid.
I used a suction bulb to remove a few oz. According to the service records, this brake fluid was flushed and replaced with fresh in March, 2004 so I didn't plan to flush and replace fluid yet. EDIT: I didn't realize the fluid needed to be flushed and replaced at the time of this repair. The WSM recommends renewing the brake fluid every 2 years. So I'll be flushing the brake fluid soon - might even post a few pics!
Next, start removing the calipers. Use regular pliers and/or channel lock pliers to squeeze the center of the retaining spring while pushing down on the latched end (the end opposite the pivot end). According to the manual, it's good to be careful (hence push down slightly at the latched end) so you don't bend or damage the catch that holds the retaining spring in place. I used channel lock pliers on the front springs and regular pliers on the rears. Also note that the front retaining springs pivot at the bottom while the rear retaining springs pivot at the top.
After releasing the retaining spring from the catch, you can pivot it down somewhat and gain better access to the brake pad wear sensor. You remove this by pulling it straight out and can use the flat blade screwdriver to give you some leverage if it's tight. Be carful with how much force you apply, the black plastic end can be brittle and break under too much stress. I just take my time and slowly work it out.
With the brake pad wear sensor removed from the caliper, you can pivot the retaining spring all the way down (front) or all the way up (rear) and squeeze the spring together at the pivot point to remove the spring from the caliper. I found it a litter easier to remove from one hole at a time.
Next, you can remove the pads from the calipers. I used 4" C-Clamps mounted on the top of the pad and the outside of the caliper. You can use a small cloth to place between the clamp and the caliper so you don't chip the paint. You will also notice a small flat divot at the center of the caliper on the front and this made a good spot to place the clamp. I turned the clamps down just enough to clear about a millimeter of space between the pad and the disk.
I also loosened the caliper bolts which gave added room to easily remove the pads. You will need a 10mm allen socket to loosen the caliper bolts.
At this point, you can remove the clamps and the pads should pull straight out without fuss. You can see from this picture, the divot where you can place the C-Clamp on the front of the caliper.
Continued......
Last edited by Dwayne; 07-26-2008 at 06:04 PM. Reason: Added more WSM info on locking lug nut
 07-25-2008, 10:08 PM
#2
Three Wheelin'
Thread Starter
Join Date: Sep 2007
Location: Ridgecrest, California
Posts: 1,363
Likes: 0
Received 149 Likes
on
33 Posts
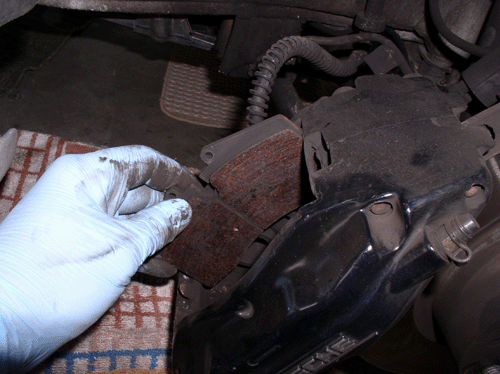
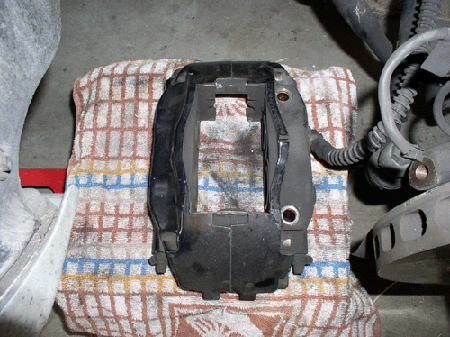
While removing the pads, you can look for anything unusual. It's a good idea to keep track of which wheel and which side (inside/outside pad) the pads were from in case you notice significantly different wear patterns on the pads. These looked fine although there was a reddish tint under the camera.
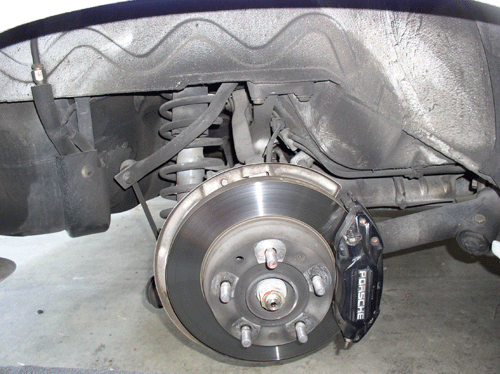
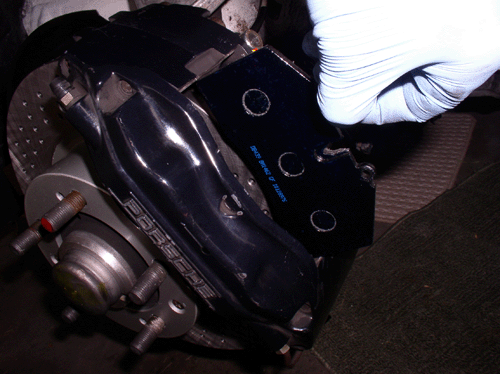
Now you can remove the caliper bolts completely and pull the caliper off the mounting. I set the caliper on a small box with a towel on it to work on inspecting and pushing in the pistons. Once off, check the piston boots for leakage or rips or other damage. These looked fine.

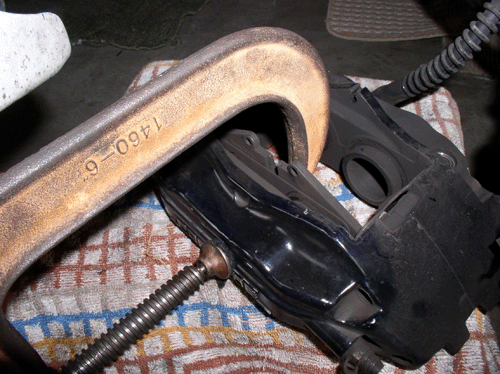
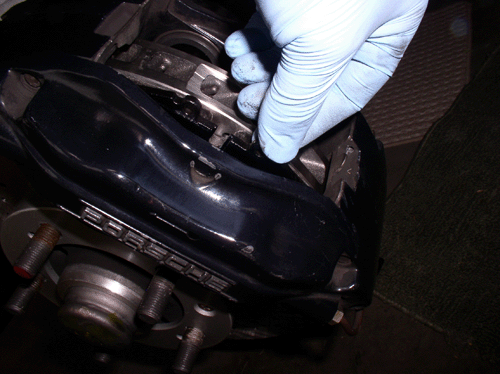
Since front pads were very worn, the pistons were extended quite a bit. In order for the new, thicker pads to fit, I needed to push the pistons back in. I used the 6" C-Clamp for this (remember to use a cloth pad between the clamp and the caliper facing). You can use the old pad (if you aren't going to reuse them) to clamp against the pistons. I had marginal success with this approach as I found with the clamp in the center, the pistons would not go in equally....
So, I turned the old brake pad on end and pressed the pistons in one at a time.
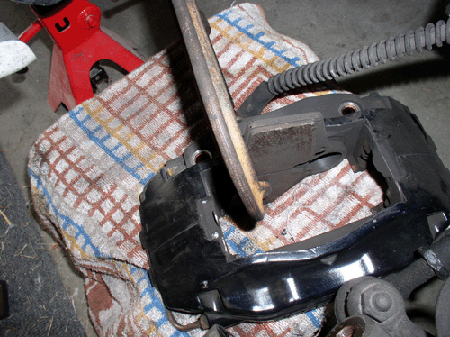
While pressing in the pistons, you need to carefully watch the brake fluid reservior level as you pump fluid back into the reservior. Since my pistons were extended, I had to remove more fluid.
I pressed the pistons in until they were level with the inside caliper surface.
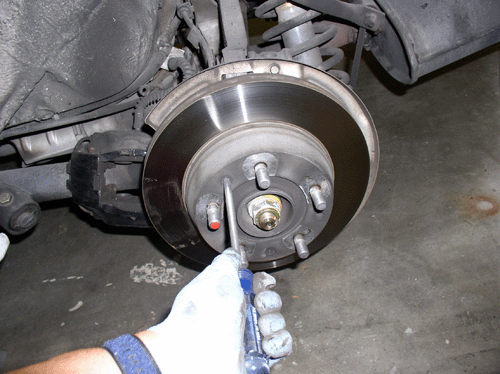
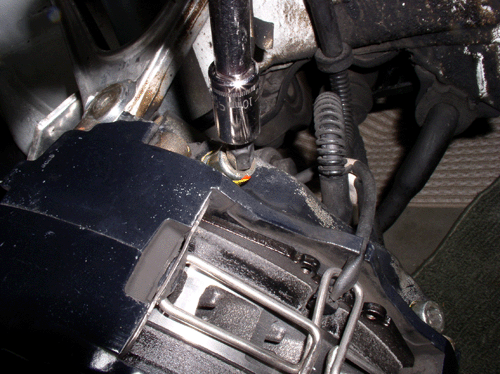
Next you can remove the rotor. It's held in place by two phillips head screws. They should not be too difficult to remove since they are only supposed to be torqued to 7 ftlbs. Use a large phillips screwdriver so you can get a good grip. You'll have to hold the rotor with one hand while breaking the screws free....
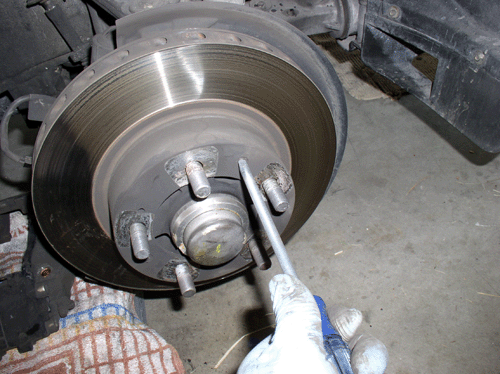
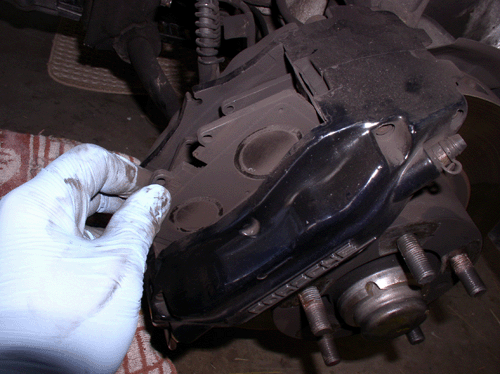
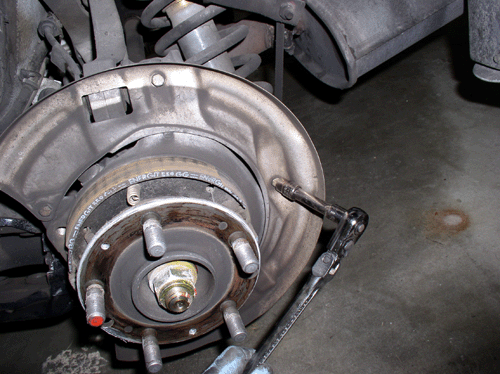
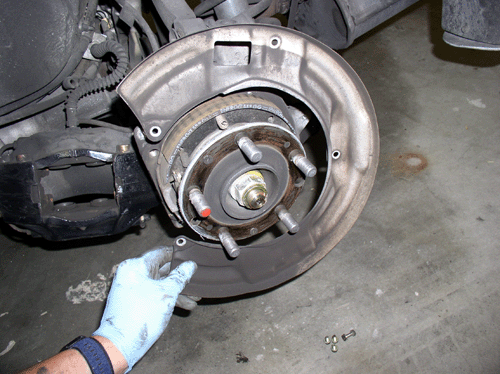
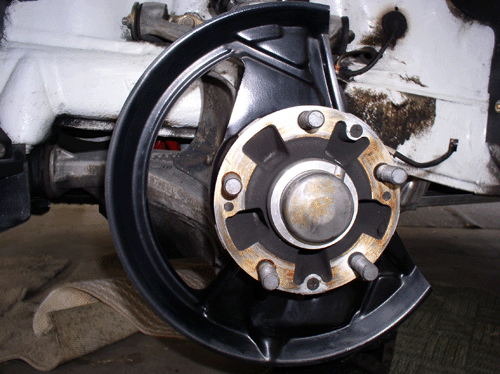
...and remove the rotor from the wheel. Once the rotor is off, you can access the rotor shield. However, I could not find an easy way to remove it for cleaning without removing the hub. Since the wheel bearings seemed to be in perfect order with no play, I decided to simply clean the shield in place (described later).
For the rear brakes, remove the retaining spring, brake pad wear sensor and brake pads in the same manner you did the front brakes (except the retaining spring pivots UP instead of down).
To remove the rear calipers, you will need the 19mm socket. I found the pivot head 1/2" ratchet to work well in breaking these bolts free. The ratchet I used has a long handle and provided extra leverage.

Next remove the rotor as you did the front.
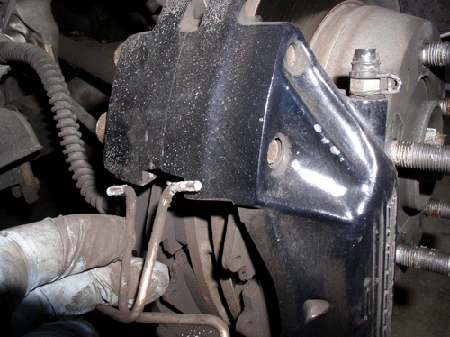
Once the rotor is removed from the rear wheel, you can access the retaining bolts for the rotor shield. I planned to take the shield off and clean it. It has 4 10mm bolts holding it in place. The one in the center, shown in the picture, has a 10mm self-locking nut on the other side you will need to counterhold/remove first before you can unscrew the bolt from the front side.
After the bolts are off, remove the shield.
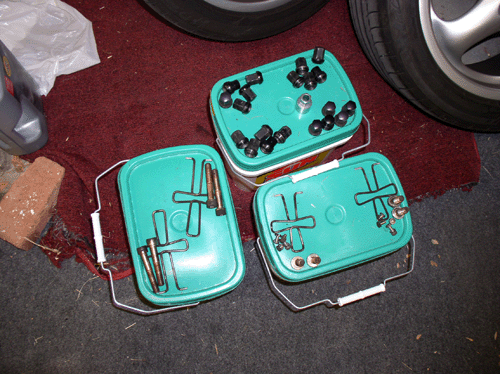
Since the brake pad retaining springs are different sizes for front and rear, I kept all the hardware grouped by wheel.
Continued.....
Now you can remove the caliper bolts completely and pull the caliper off the mounting. I set the caliper on a small box with a towel on it to work on inspecting and pushing in the pistons. Once off, check the piston boots for leakage or rips or other damage. These looked fine.
Since front pads were very worn, the pistons were extended quite a bit. In order for the new, thicker pads to fit, I needed to push the pistons back in. I used the 6" C-Clamp for this (remember to use a cloth pad between the clamp and the caliper facing). You can use the old pad (if you aren't going to reuse them) to clamp against the pistons. I had marginal success with this approach as I found with the clamp in the center, the pistons would not go in equally....
So, I turned the old brake pad on end and pressed the pistons in one at a time.
While pressing in the pistons, you need to carefully watch the brake fluid reservior level as you pump fluid back into the reservior. Since my pistons were extended, I had to remove more fluid.
I pressed the pistons in until they were level with the inside caliper surface.
Next you can remove the rotor. It's held in place by two phillips head screws. They should not be too difficult to remove since they are only supposed to be torqued to 7 ftlbs. Use a large phillips screwdriver so you can get a good grip. You'll have to hold the rotor with one hand while breaking the screws free....
...and remove the rotor from the wheel. Once the rotor is off, you can access the rotor shield. However, I could not find an easy way to remove it for cleaning without removing the hub. Since the wheel bearings seemed to be in perfect order with no play, I decided to simply clean the shield in place (described later).
For the rear brakes, remove the retaining spring, brake pad wear sensor and brake pads in the same manner you did the front brakes (except the retaining spring pivots UP instead of down).
To remove the rear calipers, you will need the 19mm socket. I found the pivot head 1/2" ratchet to work well in breaking these bolts free. The ratchet I used has a long handle and provided extra leverage.
Next remove the rotor as you did the front.
Once the rotor is removed from the rear wheel, you can access the retaining bolts for the rotor shield. I planned to take the shield off and clean it. It has 4 10mm bolts holding it in place. The one in the center, shown in the picture, has a 10mm self-locking nut on the other side you will need to counterhold/remove first before you can unscrew the bolt from the front side.
After the bolts are off, remove the shield.
Since the brake pad retaining springs are different sizes for front and rear, I kept all the hardware grouped by wheel.
Continued.....
07-25-2008, 10:55 PM
#3
Three Wheelin'
Thread Starter
Join Date: Sep 2007
Location: Ridgecrest, California
Posts: 1,363
Likes: 0
Received 149 Likes
on
33 Posts
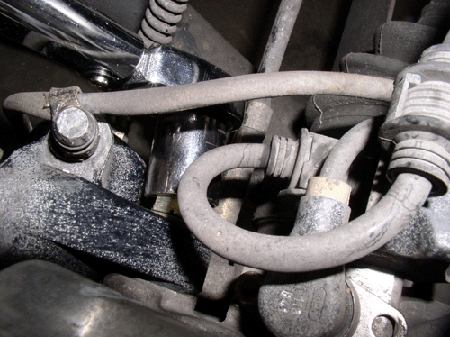
Next, you can clean the wheel wells and calipers. Even though I had inspected the hoses before starting the job, after they were cleaned, I decided to inspect them again. I check for obvious cracking.
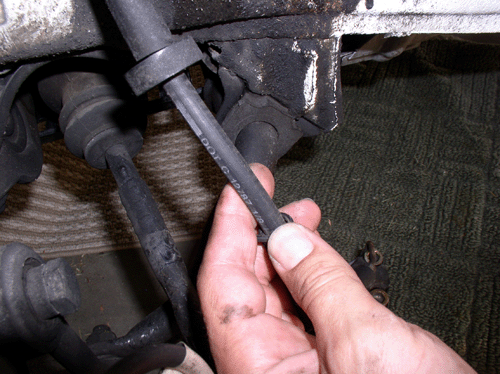
Also try bending the hose and see if it is stiff or cracks show up. These appeared to be fine.
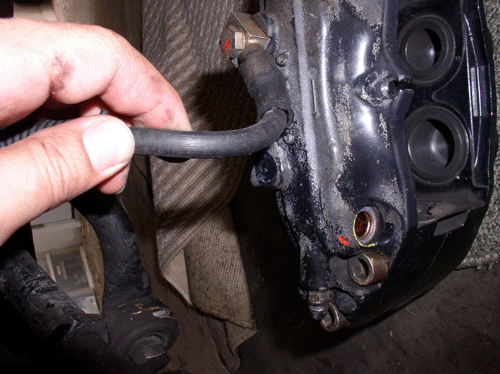
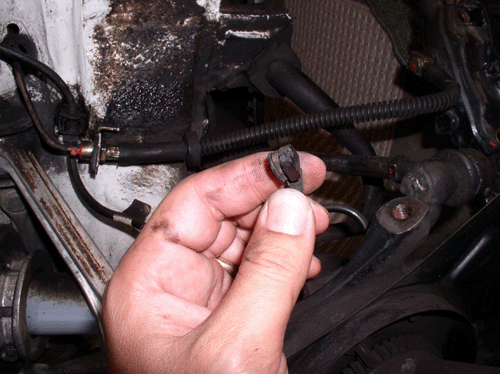
Also inspect the brake pad wear sensor. If the plastic head is worn down to the wire and wire is exposed, you probably should have been experiencing brake sensor light on the instrument panel and the sensor should be replaced. If the wire is still intact, you can reuse. These appeared to be fine with little to no wear on the plastic head.
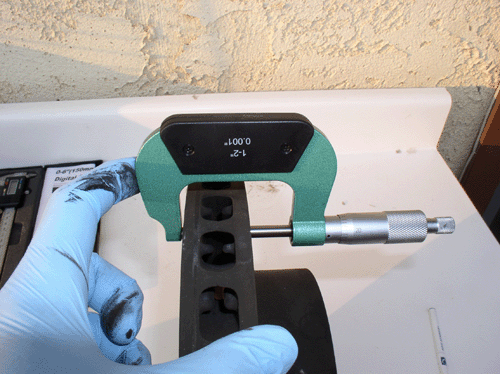
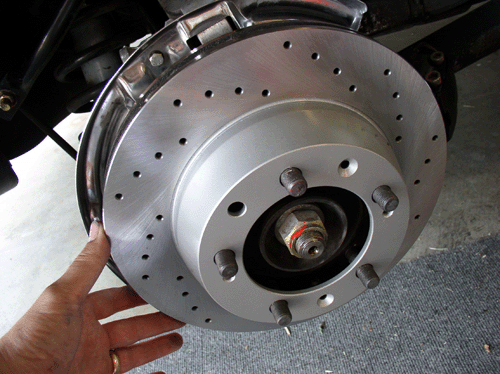
Measuring the rotor thickness was done before starting the job but I did it again here with pictures. The front rotors here ended up being 30.61mm and 30.53mm thick for the Passenger and Driver side front, respectively. The minimum thickness allowed according to the WSM is 30mm. A new rotor is supposed to be 32mm thick. So it was time to change the front. The rear rotors were 23.44mm and 23.37mm thick for passenger and driver sides, respectively. Minimum thickness is 22mm and new rear rotors are supposed to be 24mm thick. So we could have gone longer with the rear rotors before replacing.
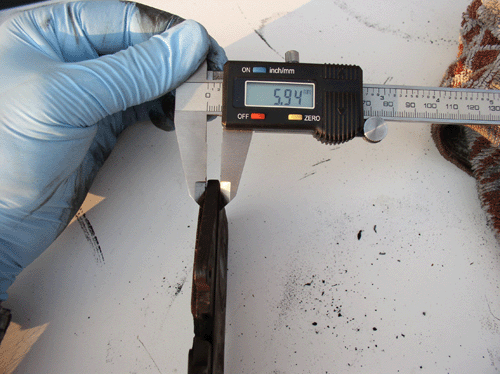
For the pads, I found it easier to measure the thickness of the pad backing plate (5.95mm thick) and subtract that from the total pad+backing thickness.
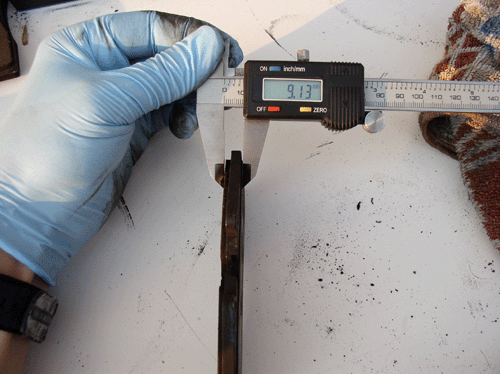
The total thickness for the font driver's was 9.13mm - 5.95mm for backing = 3.18mm thick. The passenger side was 9.32mm - 5.95mm for backing = 3.37mm thick. Minimum thickness is 2mm. So there was a little more than 1mm left on the fronts before minimums. The rears had plenty of pad left but I replaced them anyway since new rotors were going on all around.
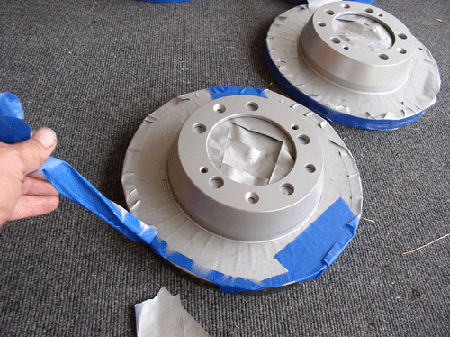
Next, you can prepare the rotors for paint. I paint the rotor hats only for all four rotors. First, clean the rotor hat surface of any contaminants. I used brake cleaner and a clean rag.
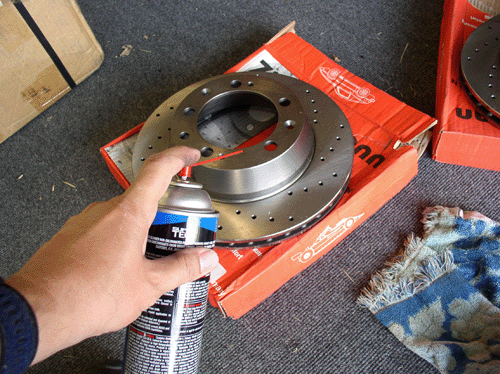
I use blue painters tape to mask the rotor surface. It leaves minimal residue behind. I cut small strips (about 1/2" wide) of the tape and place them around the groove that lies between the rotor surface and the base of the rotor hat. The smaller the strips, the closer you can get to a perfect circle.
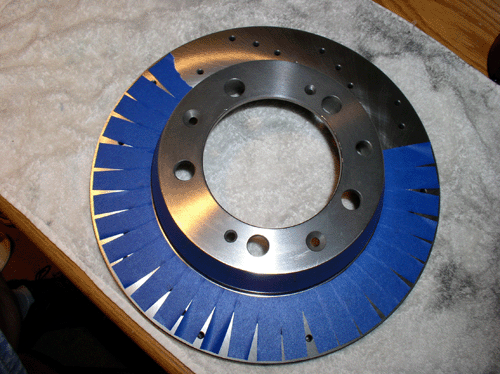
Then place longer stips of tape across the small strips to cover the gaps.
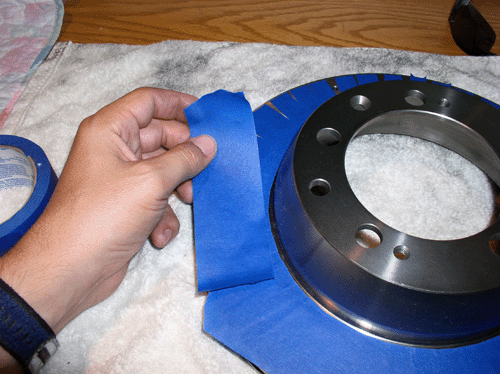
Wrap a strip of tape around the edge of the rotor and tape the inside of the rotor hat to prevent paint spray from getting inside the hat.
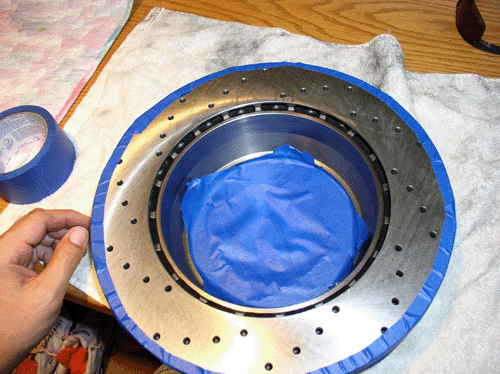
When It's all taped up, you are ready for paint.

Tape and prepare all four for paint at the same time.
I used Duplicolor Caliper silver caliper paint. Three coats of paint followed by three coats of High Temp. Engine Enamel Clear Coat.
I let the paint dry/harden for at least 24 hours before mounting the wheels against them.

Continued....
Also try bending the hose and see if it is stiff or cracks show up. These appeared to be fine.
Also inspect the brake pad wear sensor. If the plastic head is worn down to the wire and wire is exposed, you probably should have been experiencing brake sensor light on the instrument panel and the sensor should be replaced. If the wire is still intact, you can reuse. These appeared to be fine with little to no wear on the plastic head.
Measuring the rotor thickness was done before starting the job but I did it again here with pictures. The front rotors here ended up being 30.61mm and 30.53mm thick for the Passenger and Driver side front, respectively. The minimum thickness allowed according to the WSM is 30mm. A new rotor is supposed to be 32mm thick. So it was time to change the front. The rear rotors were 23.44mm and 23.37mm thick for passenger and driver sides, respectively. Minimum thickness is 22mm and new rear rotors are supposed to be 24mm thick. So we could have gone longer with the rear rotors before replacing.
For the pads, I found it easier to measure the thickness of the pad backing plate (5.95mm thick) and subtract that from the total pad+backing thickness.
The total thickness for the font driver's was 9.13mm - 5.95mm for backing = 3.18mm thick. The passenger side was 9.32mm - 5.95mm for backing = 3.37mm thick. Minimum thickness is 2mm. So there was a little more than 1mm left on the fronts before minimums. The rears had plenty of pad left but I replaced them anyway since new rotors were going on all around.
Next, you can prepare the rotors for paint. I paint the rotor hats only for all four rotors. First, clean the rotor hat surface of any contaminants. I used brake cleaner and a clean rag.
I use blue painters tape to mask the rotor surface. It leaves minimal residue behind. I cut small strips (about 1/2" wide) of the tape and place them around the groove that lies between the rotor surface and the base of the rotor hat. The smaller the strips, the closer you can get to a perfect circle.
Then place longer stips of tape across the small strips to cover the gaps.
Wrap a strip of tape around the edge of the rotor and tape the inside of the rotor hat to prevent paint spray from getting inside the hat.
When It's all taped up, you are ready for paint.
Tape and prepare all four for paint at the same time.
I used Duplicolor Caliper silver caliper paint. Three coats of paint followed by three coats of High Temp. Engine Enamel Clear Coat.
I let the paint dry/harden for at least 24 hours before mounting the wheels against them.
Continued....
07-25-2008, 11:06 PM
#4
Nordschleife Master

Hell, it probably took you longer to get all your tools out than it took me to change my pads and rotors the other day... I think I did it w/ one allen wrench, one pair of pliers, a jack, and a lug wrench! Oh, and one screw driver to get the set screws out of the rotors. I think it took me about 15 minutes a wheel and most of that was jacking the car up and actually getting the wheel off and back on!
LOL! You took the time to clean up your rotor hats though...they look GREAT! I didn't do that. I have the standard dish wheels on my '88 so you can't see them anyway unless you are looking for them! Good work and EXCELLENT write up for those who have not done it before!
LOL! You took the time to clean up your rotor hats though...they look GREAT! I didn't do that. I have the standard dish wheels on my '88 so you can't see them anyway unless you are looking for them! Good work and EXCELLENT write up for those who have not done it before!
07-25-2008, 11:10 PM
#5
Banned
4 year old brake fluid is way too old, brake fluid absorbs moisture, after about a year the boiling point is lowered to unsafe levels if you do any type of spirited driving. I would recommend you change it. Good write up though.
07-25-2008, 11:30 PM
#6
Drifting
Join Date: Dec 2003
Location: an unnatural suburban habitat
Posts: 2,902
Likes: 0
Received 0 Likes
on
0 Posts
That's some brown brake fluid, I see a yellowish tint and it is time to change it.
BTW, great write up of course, these would be great for the average noob 928er to get him through another wrenching project.
BTW, great write up of course, these would be great for the average noob 928er to get him through another wrenching project.
07-25-2008, 11:31 PM
#7
Three Wheelin'
Thread Starter
Join Date: Sep 2007
Location: Ridgecrest, California
Posts: 1,363
Likes: 0
Received 149 Likes
on
33 Posts
Next, I cleaned the front rotor shields.
After washing off with cleaner, I thought I'd try applying regular Turtle Wax to see if it would help repel brake dust and ease cleaning next time I cleaned
The wax did clean them up better than regular washing.
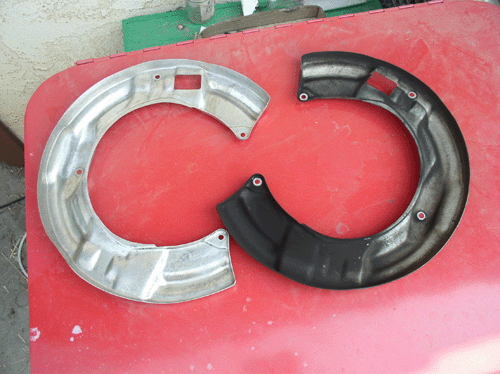
Next were the rear rotor shields. First I cleaned them with citrus cleaner. Here's the before and after. They cleaned up fairly well so I decided not to give them an acid bath like I had to do on the '84 rotor shields.
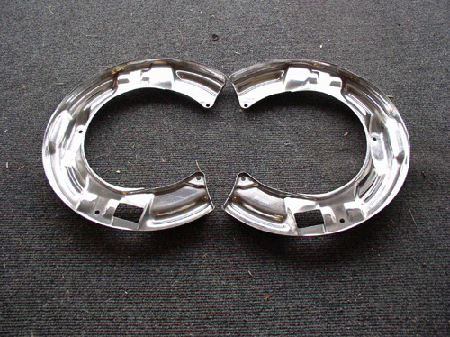
To get a little more shine, I decided to try Mother's Aluminum & Mag Polish on them and it worked great! I got the idea from Stan (Mrmerlin) at SATL last month when he showed me how nice the top of his radiator looked after polishing it. I was so impressed with the mirror like shine, I had to try it myself. THANKS, Stan!

Here's both shields after polishing and ready for installation.
Another experiment I thought I'd try is to apply wax to to the brake pad retaining spring. Again, just to see if it repelled brake dust and made future cleaning easier. I'll let y'all know if it works.
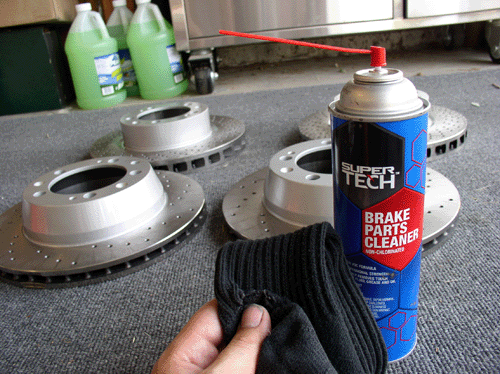
Next, you can prepare the rotors for install. Remove the masking tape....
....and clean the rotor surface with brake cleaner to remove any tape residue that may be left. DO NOT SPRAY BRAKE CLEANER ON THE PAINTED SURFACES. The Clear Coat does not like Brake Cleaner! Instead, spray the cleaner on a clean rag and use the rag to wipe the rotor surface.
Now you can install the rear rotor shields....
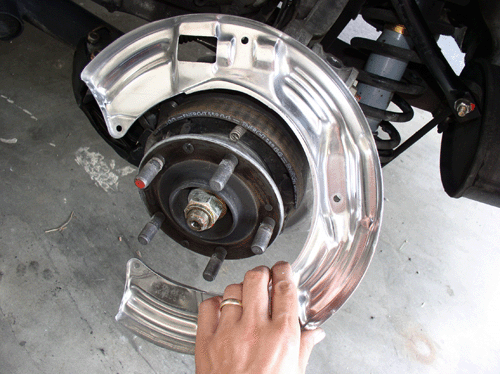
....install the Four bolts and remember....
....on the middle one to install the 10mm nut at the back that holds the bracket in place.
Once the rotor shield is in place.......
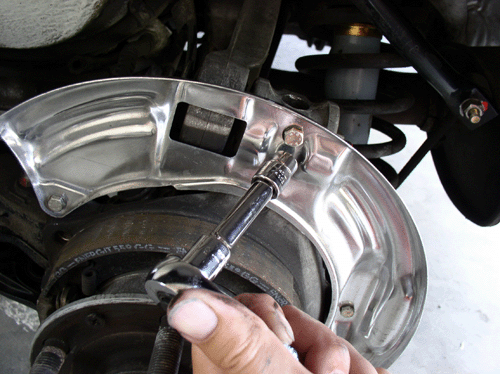
....mount the rear rotor. It does not make any difference which wheel the rotors are assigned - it does matter on the front.
Install the screws and tighten to 7 ftlbs.
Continued.....
After washing off with cleaner, I thought I'd try applying regular Turtle Wax to see if it would help repel brake dust and ease cleaning next time I cleaned
The wax did clean them up better than regular washing.
Next were the rear rotor shields. First I cleaned them with citrus cleaner. Here's the before and after. They cleaned up fairly well so I decided not to give them an acid bath like I had to do on the '84 rotor shields.
To get a little more shine, I decided to try Mother's Aluminum & Mag Polish on them and it worked great! I got the idea from Stan (Mrmerlin) at SATL last month when he showed me how nice the top of his radiator looked after polishing it. I was so impressed with the mirror like shine, I had to try it myself. THANKS, Stan!
Here's both shields after polishing and ready for installation.
Another experiment I thought I'd try is to apply wax to to the brake pad retaining spring. Again, just to see if it repelled brake dust and made future cleaning easier. I'll let y'all know if it works.
Next, you can prepare the rotors for install. Remove the masking tape....
....and clean the rotor surface with brake cleaner to remove any tape residue that may be left. DO NOT SPRAY BRAKE CLEANER ON THE PAINTED SURFACES. The Clear Coat does not like Brake Cleaner! Instead, spray the cleaner on a clean rag and use the rag to wipe the rotor surface.
Now you can install the rear rotor shields....
....install the Four bolts and remember....
....on the middle one to install the 10mm nut at the back that holds the bracket in place.
Once the rotor shield is in place.......
....mount the rear rotor. It does not make any difference which wheel the rotors are assigned - it does matter on the front.
Install the screws and tighten to 7 ftlbs.
Continued.....
Trending Topics
07-25-2008, 11:52 PM
#8
Three Wheelin'
Thread Starter
Join Date: Sep 2007
Location: Ridgecrest, California
Posts: 1,363
Likes: 0
Received 149 Likes
on
33 Posts
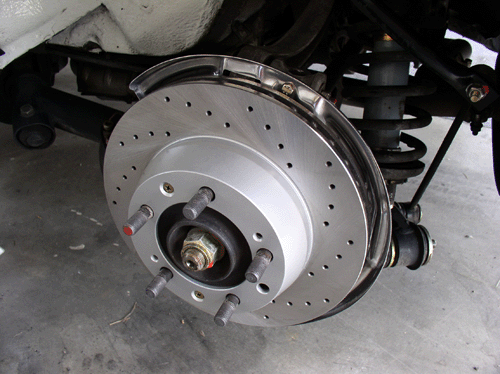
Next, mount the front rotors. These are marked Left and Right.
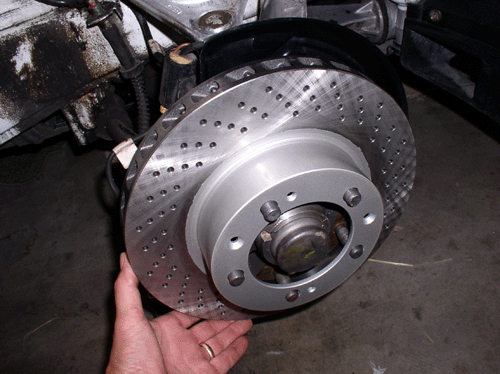
And secure with the phillips screw at 7 ftlbs.

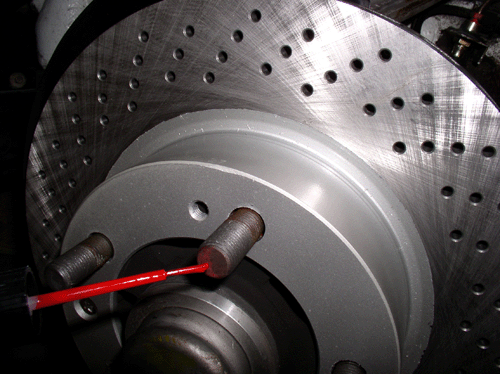
Some of the lug nut studs barely had any red paint visible so if you want to freshen the paint on the studs, now's the time. First clean the surface with brake cleaner....
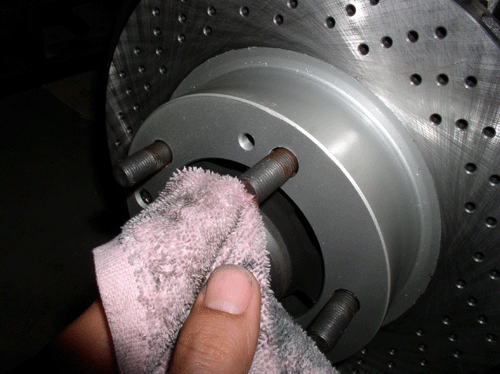
...and apply body paint. I just picked any red color.
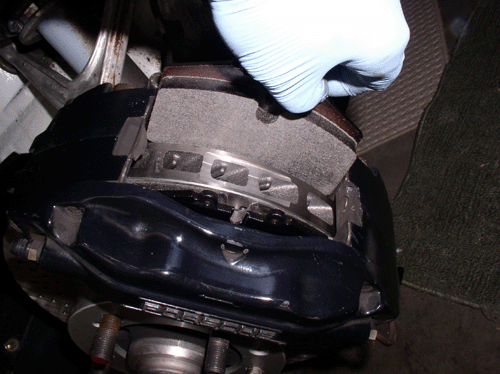
At this point, you can install the calipers and brake pads. First need to prepare the pads....
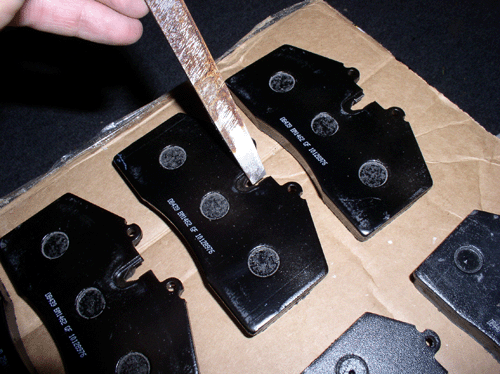
When I installed the new pads on the '84 earlier, I had trouble fitting the brake pad wear sensor in the slot of the new pads. I figured it was because on some of the pads, there were rough metal edges that were binding the sensor. So, this time I decided to file the slots where the sensor resides to ensure a smooth fit and no broken sensors.
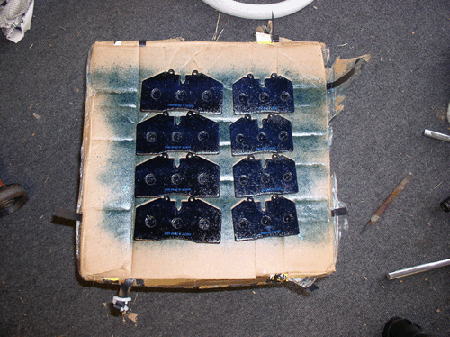
I apply Disk Brake Quiet to the back of the pads.
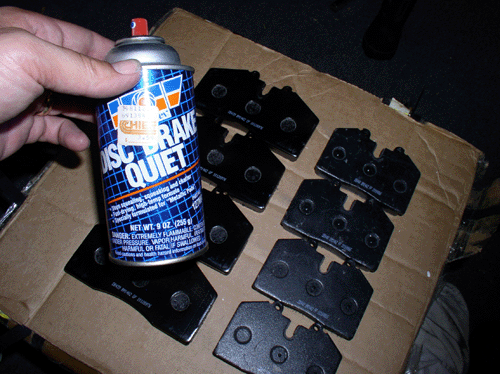
One moderate coat is sufficient to keep the brakes quiet. Spray from the top down and not at an angle from the sides - you do not want to get this stuff on the pads.
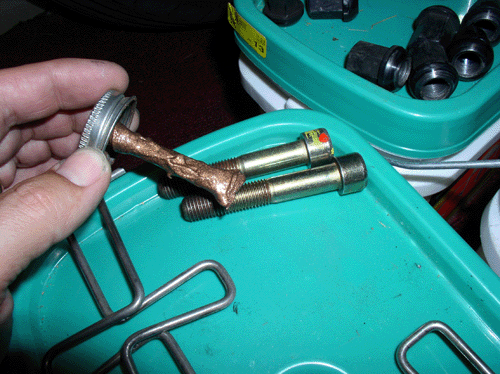
I noticed that the Caliper bolts had copper anti-seize on them when I removed them so I applied a fresh dose before re-installing them.
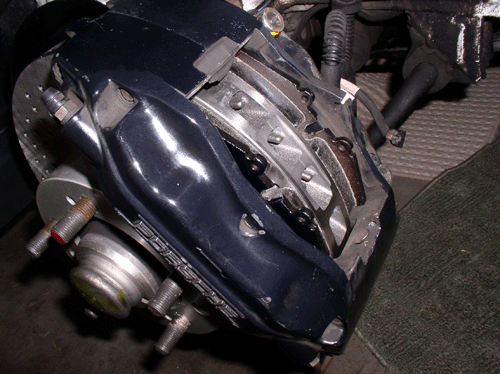
Next, position the caliper on the mounting....
....and install the allen head bolts but do not tighten all the way yet. I like to keep the caliper a little loose while fitting the pads.
Then insert the brake pads....
...and ensure they are fully seated.
Install both pads before tightening the caliper bolts.
You can confirm they are fully seated by checking to make sure the top of the brake pad material is just below the outer rim of the rotor.
Continued......
And secure with the phillips screw at 7 ftlbs.
Some of the lug nut studs barely had any red paint visible so if you want to freshen the paint on the studs, now's the time. First clean the surface with brake cleaner....
...and apply body paint. I just picked any red color.
At this point, you can install the calipers and brake pads. First need to prepare the pads....
When I installed the new pads on the '84 earlier, I had trouble fitting the brake pad wear sensor in the slot of the new pads. I figured it was because on some of the pads, there were rough metal edges that were binding the sensor. So, this time I decided to file the slots where the sensor resides to ensure a smooth fit and no broken sensors.
I apply Disk Brake Quiet to the back of the pads.
One moderate coat is sufficient to keep the brakes quiet. Spray from the top down and not at an angle from the sides - you do not want to get this stuff on the pads.
I noticed that the Caliper bolts had copper anti-seize on them when I removed them so I applied a fresh dose before re-installing them.
Next, position the caliper on the mounting....
....and install the allen head bolts but do not tighten all the way yet. I like to keep the caliper a little loose while fitting the pads.
Then insert the brake pads....
...and ensure they are fully seated.
Install both pads before tightening the caliper bolts.
You can confirm they are fully seated by checking to make sure the top of the brake pad material is just below the outer rim of the rotor.
Continued......
 I really like the look
07-26-2008, 12:24 AM
I really like the look
07-26-2008, 12:24 AM
#10
Three Wheelin'
Thread Starter
Join Date: Sep 2007
Location: Ridgecrest, California
Posts: 1,363
Likes: 0
Received 149 Likes
on
33 Posts
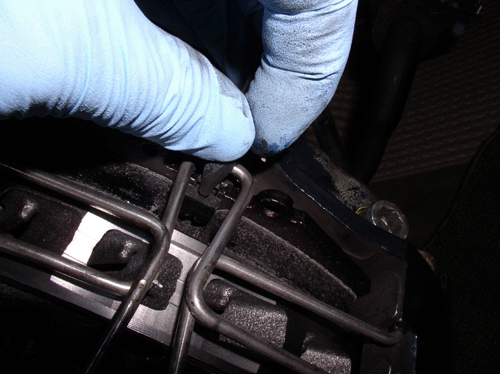
Next, you can re-install the pad retaining spring. I thought I'd use brake caliper grease on the contact points of the spring to reduce the chance of squeak.
The contact points are pretty easy to see....just look for the worn spots on the spring and apply a very small amount of grease.
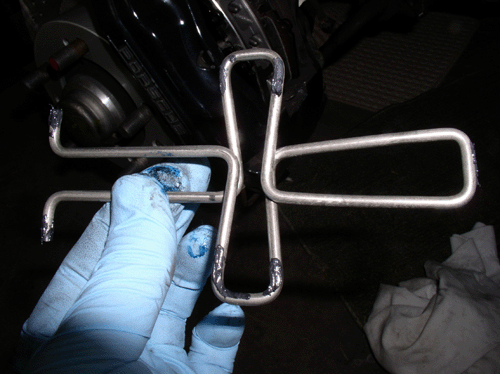
To install the spring, position the pivot end at the receiving holes on the caliper and squeeze the ends together enough so you can instert the spring into the holes.
Using the pliers, squeeze the center of the spring together to give enough clearance to slide the end of the spring in under the catch at the top of the caliper.
Then set the brake pad wear sensor in position through the retainer spring...
...and guide it down into the slot in the brake pad. You can use the flat blade screwdriver to press it down into place - just be careful not to force it or it could break. Take your time and ensure it is fully seated.
Next, push the brake pad wear sensor wire/housing down into the holding slot in the caliper.
Then torque down both of the 10mm Allen Head caliper bolts to 62 ftlbs.
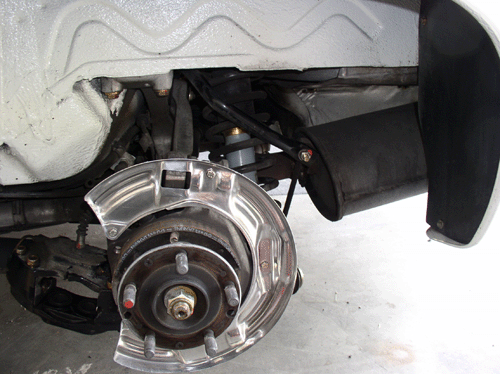
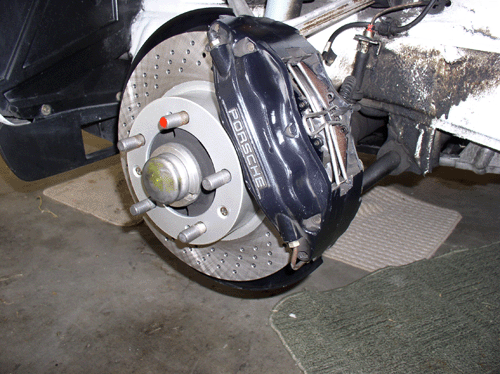
Now the assembly is ready to install the wheel.
For the rears, assembly is the same as the front except the spring spring is installed upside down compared to the front spring and the caliper bolts are a little trickier to get to with the torque wrench. They are tightened to 62 ftlbs as well.
Now you are ready to install the wheels. I decided to wash and wax them before reinstalling them. Here's the before and after.
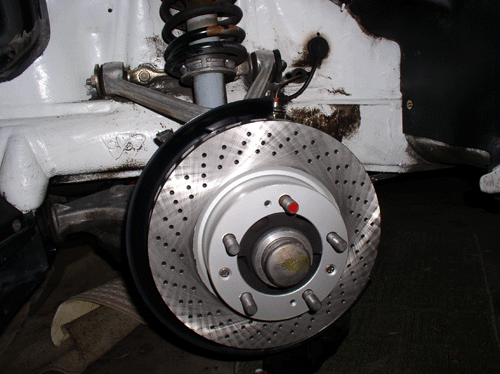
When placing the wheels, remember to orient the red stud.....

....so it's opposite the valve stem.
Snug down all the lug nuts. Now's a good time to apply tire conditioner to the sidewalls of the tires if you wish. Before lowering the car, I started the car and worked the brakes until the pads were seated against the rotors and monitored the brake fluid level to make sure it did not get low enough to suck air into the lines. As it turns out, I did not need to add any fluid. You should not have to bleed air out of the lines since the bleeder valves were not opened and the fluid level never reached low levels in the reservior. Replace the cap on the brake fluid reservior. Still a good idea to check for leaks before lowering the car.
Now you can can lower the car.
Continued.....
The contact points are pretty easy to see....just look for the worn spots on the spring and apply a very small amount of grease.
To install the spring, position the pivot end at the receiving holes on the caliper and squeeze the ends together enough so you can instert the spring into the holes.
Using the pliers, squeeze the center of the spring together to give enough clearance to slide the end of the spring in under the catch at the top of the caliper.
Then set the brake pad wear sensor in position through the retainer spring...
...and guide it down into the slot in the brake pad. You can use the flat blade screwdriver to press it down into place - just be careful not to force it or it could break. Take your time and ensure it is fully seated.
Next, push the brake pad wear sensor wire/housing down into the holding slot in the caliper.
Then torque down both of the 10mm Allen Head caliper bolts to 62 ftlbs.
Now the assembly is ready to install the wheel.
For the rears, assembly is the same as the front except the spring spring is installed upside down compared to the front spring and the caliper bolts are a little trickier to get to with the torque wrench. They are tightened to 62 ftlbs as well.
Now you are ready to install the wheels. I decided to wash and wax them before reinstalling them. Here's the before and after.
When placing the wheels, remember to orient the red stud.....
....so it's opposite the valve stem.
Snug down all the lug nuts. Now's a good time to apply tire conditioner to the sidewalls of the tires if you wish. Before lowering the car, I started the car and worked the brakes until the pads were seated against the rotors and monitored the brake fluid level to make sure it did not get low enough to suck air into the lines. As it turns out, I did not need to add any fluid. You should not have to bleed air out of the lines since the bleeder valves were not opened and the fluid level never reached low levels in the reservior. Replace the cap on the brake fluid reservior. Still a good idea to check for leaks before lowering the car.
Now you can can lower the car.
Continued.....
07-26-2008, 12:34 AM
#11
Three Wheelin'
Thread Starter
Join Date: Sep 2007
Location: Ridgecrest, California
Posts: 1,363
Likes: 0
Received 149 Likes
on
33 Posts
Finally,
Torque down the lug nuts to 96 ftlbs with the 19mm socket. And you're done!
Recommended break-in depends on what kind of driving one does (city or hiway). We're using about 100 mile breaking in period since it's driven mostly in the city. I used about 300 miles on the '84 since it's mostly highway driving.
Another job off the list.....Now next big job is motor mounts, silicone oil pan gasket and oil cooler lines on the '88.
Feel free to comment or suggest improvements - I'm always looking for ways to improve. THANKS for reading!
07-26-2008, 12:43 AM
#13
Three Wheelin'
Thread Starter
Join Date: Sep 2007
Location: Ridgecrest, California
Posts: 1,363
Likes: 0
Received 149 Likes
on
33 Posts
THANKS for reading and for the comments on the Brake Fluid Change. Great advice....I was assuming 4 years was OK but based on your comment, I checked the manual and it recommends renewing the brake fluid every 2 years! Along with the radiator fluid. Even though we don't do spirited driving in it, yet, it's well overdue for a fluid flush and change. I'll edit that into the post.
I'd like to rent or buy a machine or device that will flush the system like the one described in the WSM. Anyone got a good lead on where I can find one or anyone have luck with another device that makes flushing the brake system easier??
THANKS again!!


The following users liked this post:
havana928 (10-23-2019)