
My build project/plans. (long)

 09-13-2008, 01:30 PM
#92
Nordschleife Master
Thread Starter
Well, finally getting to add another update onto this, I know it has been awhile.
I will start with some pictures.
I will have an altenator belt on there later today.
I also got a damaged lower cradle from Stan Shaw and will be using that so that I dont warp the pan while welding the bungs in.
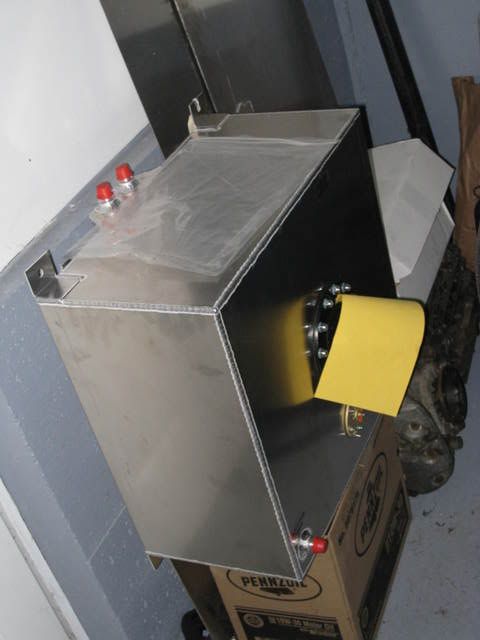
I also picked up a fuel cell to mount into the car.
Some of the bits and pieces, one of the 044s, a high flow filter, and fuel pressure reg with electric pressure sender.

A new toy for all the fancy 928 parts.
The other thing which a few of the locals and PacNW crew thought I should post is the modification to my shifter linkage.
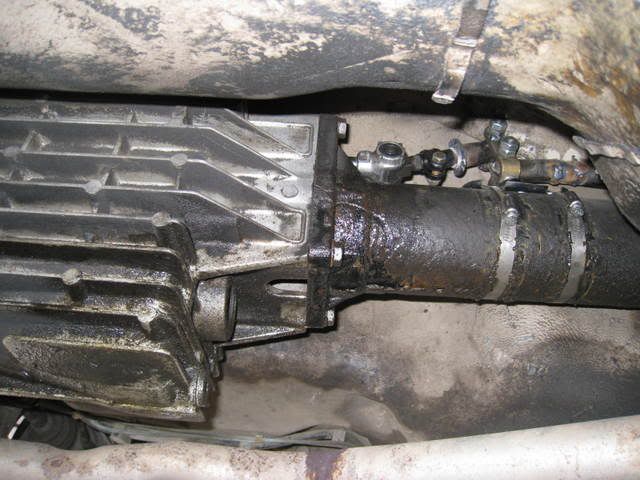
You can see the tranny with the linkage being cut and angled. I used a 924/944/951/968 audi based tranny shift lever on the rear, for the linkage to attach to this I cut a 928 shift lever up and used the eyelets with the nylon sleeves to ensure that it would not wear quickly.
This modification combined with a short shift lever in the cabin that most people really like results in roughly 1 or 1.5" of throw gear to gear.
It isnt for everyone, but going for quick shifts around the track it sure does make quick work for them.
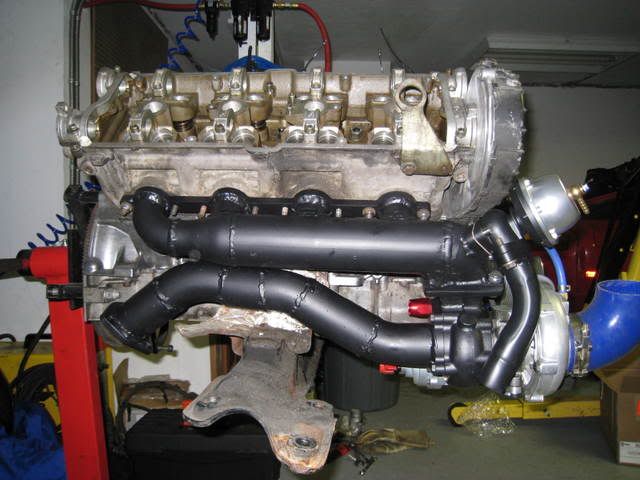
The hot componants of the exhaust you see are now black, and that is the special ceramic coating which gives it that appearance.
ENJOY!
I will start with some pictures.
I will have an altenator belt on there later today.
I also got a damaged lower cradle from Stan Shaw and will be using that so that I dont warp the pan while welding the bungs in.
I also picked up a fuel cell to mount into the car.
Some of the bits and pieces, one of the 044s, a high flow filter, and fuel pressure reg with electric pressure sender.
A new toy for all the fancy 928 parts.
The other thing which a few of the locals and PacNW crew thought I should post is the modification to my shifter linkage.
You can see the tranny with the linkage being cut and angled. I used a 924/944/951/968 audi based tranny shift lever on the rear, for the linkage to attach to this I cut a 928 shift lever up and used the eyelets with the nylon sleeves to ensure that it would not wear quickly.
This modification combined with a short shift lever in the cabin that most people really like results in roughly 1 or 1.5" of throw gear to gear.
It isnt for everyone, but going for quick shifts around the track it sure does make quick work for them.
The hot componants of the exhaust you see are now black, and that is the special ceramic coating which gives it that appearance.
ENJOY!
 09-14-2008, 03:23 PM
#95
Nordschleife Master
Thread Starter
Thanks for the comments guys,
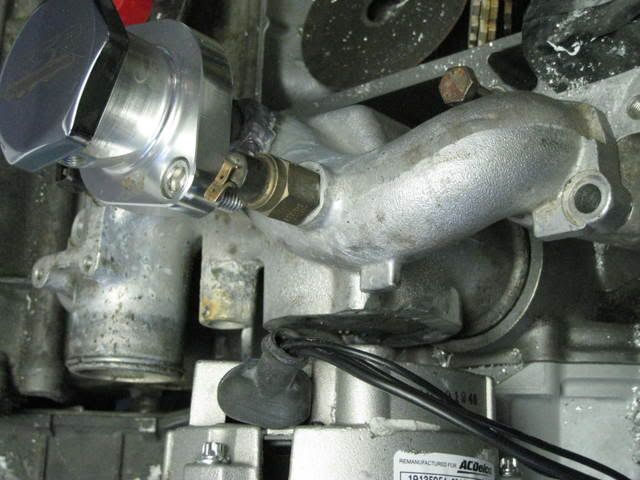
I have also worked out that I will be able to use most of the factory coolant bridge for my water circulation which is really nice. I got a spare off of Stan Shaw, and all I have to do is remove the thermostat neck and weld those 2 holes shut. I will then tap into the side of the neck which goes into the block and reroute the hose to exit the side. I have JUST enough room to clear the altenator which is a nice relief, and simplifies the building.
I have also worked out that I will be able to use most of the factory coolant bridge for my water circulation which is really nice. I got a spare off of Stan Shaw, and all I have to do is remove the thermostat neck and weld those 2 holes shut. I will then tap into the side of the neck which goes into the block and reroute the hose to exit the side. I have JUST enough room to clear the altenator which is a nice relief, and simplifies the building.
09-14-2008, 03:38 PM
#96

Will you weld in the pieces to use AN fittings? Is that like - larger than -16 (16/16)
09-15-2008, 12:20 AM
#98
Nordschleife Master
Thread Starter
Brendan, weld in fittings to use AN fittings on what? The rail stock is designed to be threaded with AN threads and then simply thread the fitting in with a crush washer, or countersink the hole and use an o-ring.
Rick, how will I not break drivetrain parts. To be honest besides lightening the car, I haven't done anything to take loads off of the drivetrain. I plan on crossing that bridge when I get to it. However when I run slicks on the car I plan on dialing back the power so to help prevent things from breaking.
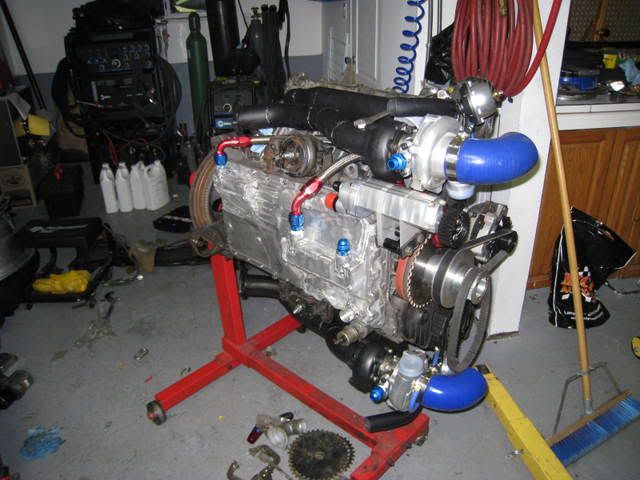
Now I just got out of the garage and got a fair bit done today in a fairly short period of time. So I snapped up some more pics.
For the coolant bridge/coolant fill. As you can see I made up a plate which fit perfectly into where the thermostat should sit. I did this for the inside hole too, and welded them in there.
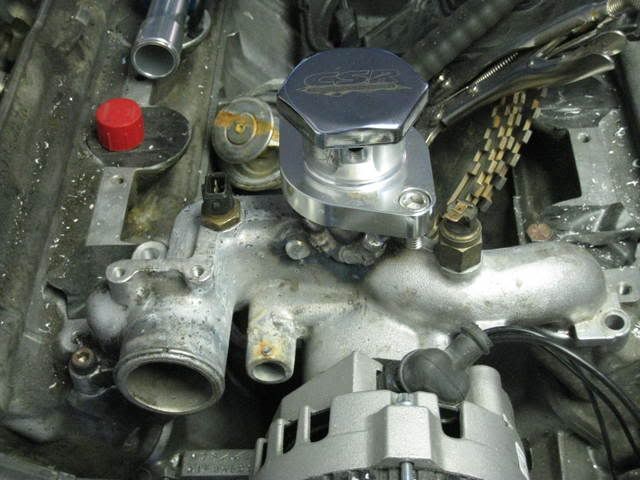
I did not but off the area with the bolt holes with comes on the premade piece from CSR but decided to leave it so that as I build the intake and other pieces I can use that as an anchoring point should I so need to.
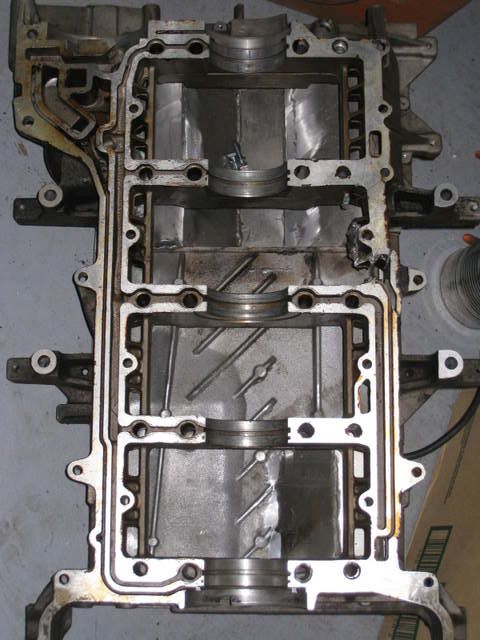
Now for the oil pan, I needed to get the suction ports into the low sections of the pan, and I needed the oil feed port to come out of the pan.
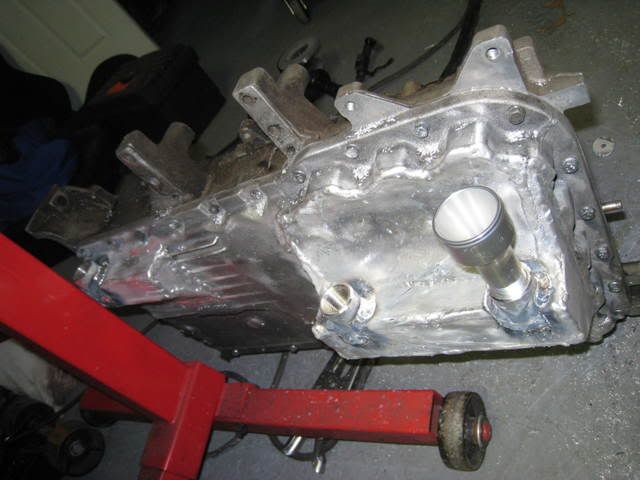
Here is the finished product.
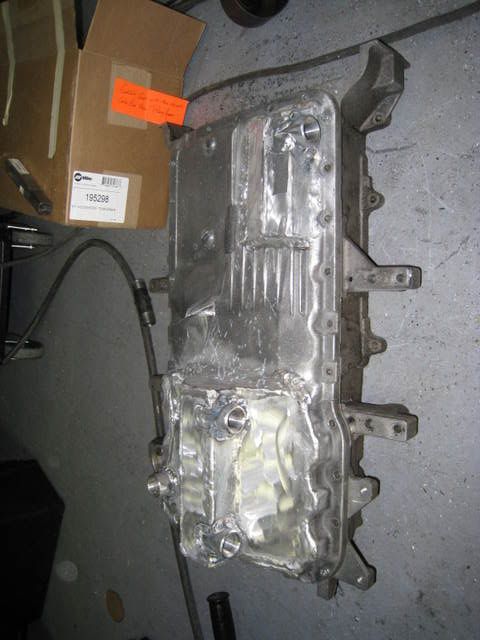
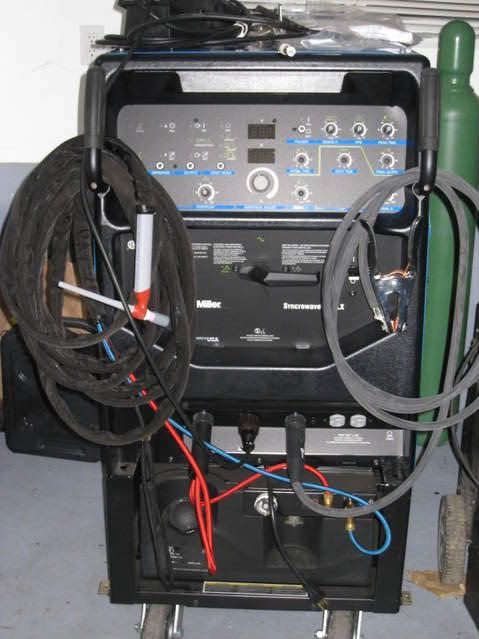
Now keep in mind that while I have the TIG welder, I havent gotten a plug onto it and have done all my welding with the mig.
Here are some pictures of some of the welds I am able to obtain with MIG working on aluminum.
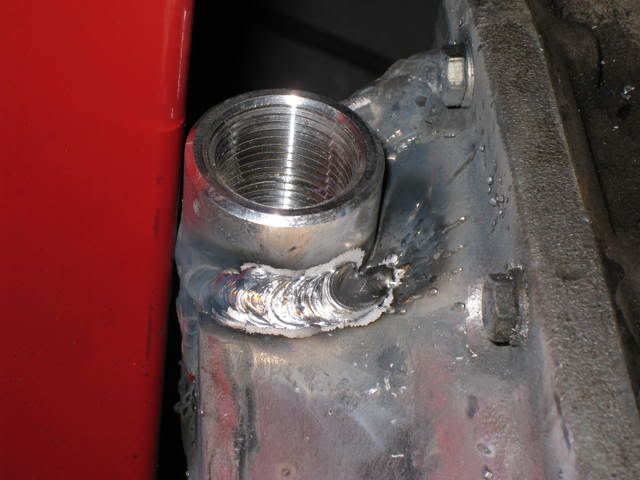
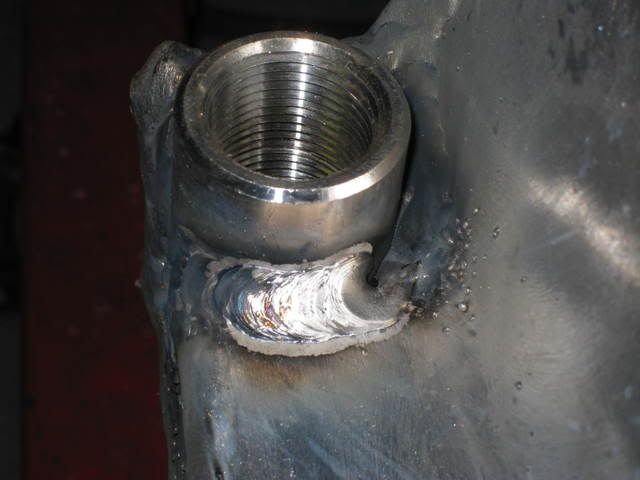
Nice and pretty, good penetration, and no holes for any oil loss.
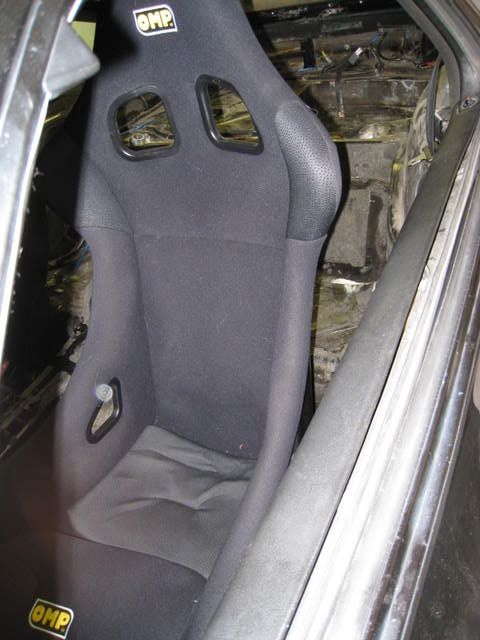
I also forgot to mention that I have installed an OMP seat and steering wheel into the car. The OMP seat is a fixed fiberglass shell seat. I love it. Others wont really be able to drive the car though, not just because I am smaller and most would have issues fitting into the seat. but that the shifter has so little throw noone else can seem to find any gears! LOL.
Enjoy
Rick, how will I not break drivetrain parts. To be honest besides lightening the car, I haven't done anything to take loads off of the drivetrain. I plan on crossing that bridge when I get to it. However when I run slicks on the car I plan on dialing back the power so to help prevent things from breaking.
Now I just got out of the garage and got a fair bit done today in a fairly short period of time. So I snapped up some more pics.
For the coolant bridge/coolant fill. As you can see I made up a plate which fit perfectly into where the thermostat should sit. I did this for the inside hole too, and welded them in there.
I did not but off the area with the bolt holes with comes on the premade piece from CSR but decided to leave it so that as I build the intake and other pieces I can use that as an anchoring point should I so need to.
Now for the oil pan, I needed to get the suction ports into the low sections of the pan, and I needed the oil feed port to come out of the pan.
Here is the finished product.
Now keep in mind that while I have the TIG welder, I havent gotten a plug onto it and have done all my welding with the mig.
Here are some pictures of some of the welds I am able to obtain with MIG working on aluminum.
Nice and pretty, good penetration, and no holes for any oil loss.
I also forgot to mention that I have installed an OMP seat and steering wheel into the car. The OMP seat is a fixed fiberglass shell seat. I love it. Others wont really be able to drive the car though, not just because I am smaller and most would have issues fitting into the seat. but that the shifter has so little throw noone else can seem to find any gears! LOL.
Enjoy
09-15-2008, 01:25 PM
#99
I have not read the entire thread, but I'd love to hear more on this shifter mod. It looks like you've added a secondary linkage/pivot just in front of the trans, right? What's the ratio there you went with? It sounds like a 2:1 throw if you're getting that short a shift. How did you mount it? Very interesting!
09-15-2008, 02:03 PM
#100
Nordschleife Master
Thread Starter
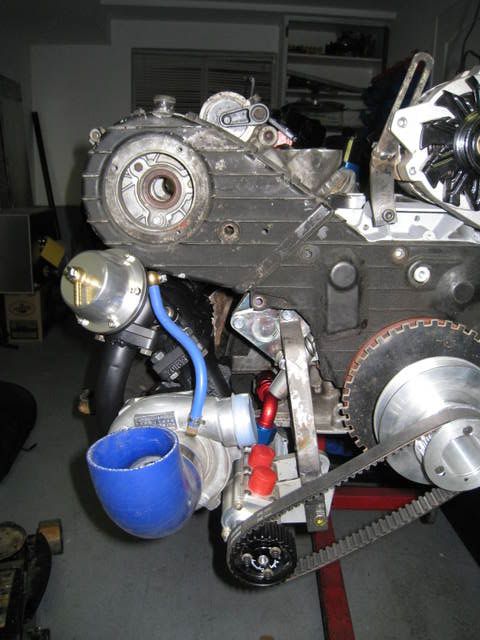
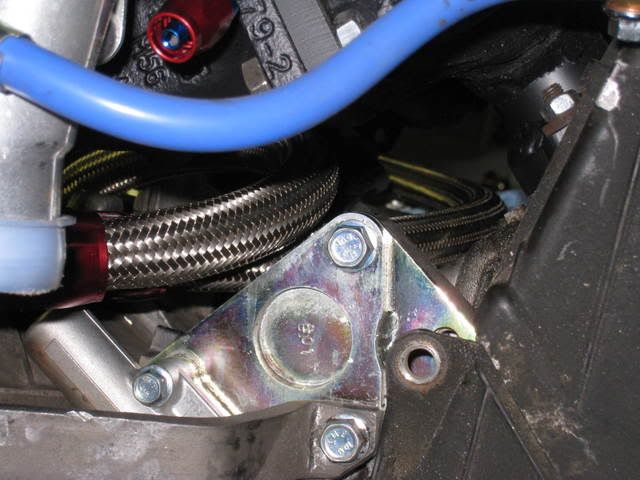
The mounting it as you can see in the above picture is very simple, I have tied it down with a couple of hose clamps, this worked well for me as I didnt feel like dropping the TT and drilling and tapping holes to be able to bolt this piece down.
The lever, base, and pivot I didnt actually fabricate. They are shift lever parts from the 924/944 line for the audi based tranny. The piece that the clamps go around is perfectly shaped to the TT and it has a nylon bushing that sits in the middle which the ball on the end of the lever sits in. I then drilled the holes where I wanted them and mounted it to the torque tube. Now keep in mind that moving the base which is clamped to the TT around does adjust the position of the shift lever in the cabin (side to side and for aft). So adjusting the lever to be exactly where you want it is ALOT easier as well.
I have had that in the car now for many months and have had no issues with it.
However I would not recommend this for everyone! Noone else can seem to find the gears in this car now. LOL
09-15-2008, 10:58 PM
#101
Colin - I know you have a local guy for the VEMS, as you mentioned. Is there any other movement, however, past this laughably complex and nearly-on-purpose UNuser-friendly way of getting information (Read: The damn wiki site)? Its ludicrous that someone that designed this for what its used for has any notion that THAT is a good way to disseminate info, or have other's share theirs. It just seems so scary that you would buy it, install it, get to know it, and THAT quandry is your support mechanism.
Back to your topic.
Back to your topic.
09-16-2008, 01:51 AM
#102
Nordschleife Master
Thread Starter
Brendan,
If you go to the UK site for VEMS they have the forum, which I know you know of. But I agree there main website is not the best, though to be honest I dont think that english is there first language.
If you go to the UK site for VEMS they have the forum, which I know you know of. But I agree there main website is not the best, though to be honest I dont think that english is there first language.
09-16-2008, 01:33 PM
#103
Three Wheelin'
Question on wp. What will initiate the wp; on all the time or via a temp switch? Reason for asking - if the thermostat is closed on a cold engine the wp will be pumping against a closed discharge and pressurize the block and also will not be good for the life of the pump. Or am I missing some information? I am really interested in this conversion for my own because this winter, during storage, I will be installing the porkensioner and this could be my WYIT project. PS: If you go for the WP block out plate count me in also.
09-17-2008, 02:30 AM
#104
Nordschleife Master
Thread Starter
Hessank,
The water pump will be on all the time that the engine is running. The thermostats will be in the return line with the cold port dumping back into a T for the suction port.
I will be running the system at 15psi.
I dont think that I will go for the block off plate for ONE reason, I like having the upper brackets, which I have mounted my altenator to.
For the record my altenator belt is a 5060345, the only supplier that has that size of belt is Gates.
09-19-2008, 12:52 AM
#105
Nordschleife Master
Thread Starter
Alright, more pornography.
My new steering wheel, as well you can see my floor mounted clutch pedal.

Fixed bucket seat.
Now for the shifter. These two following pictures show the shifter from GEAR TO GEAR. Neutral is between these two locations. 3rd to 2nd


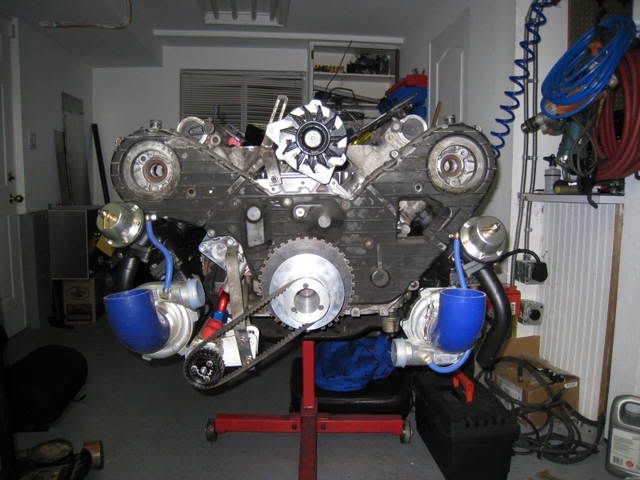
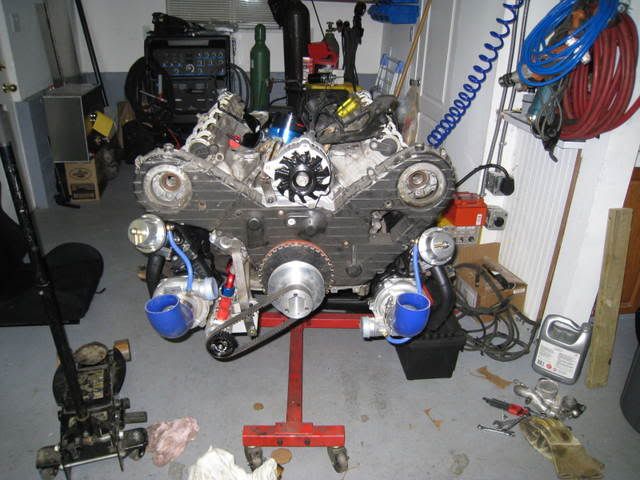
More pics of the turbos and drysump.
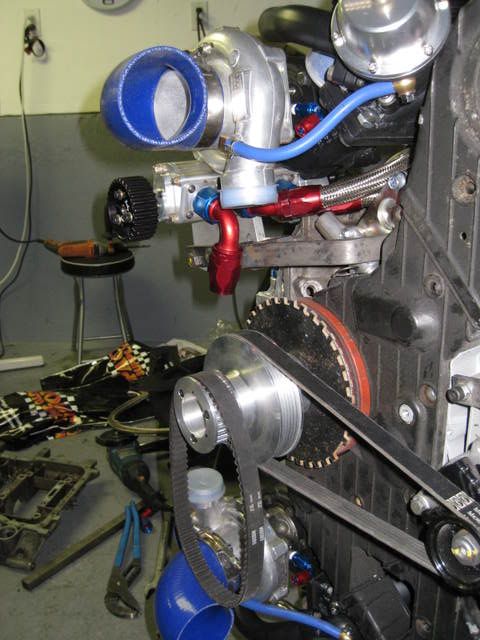
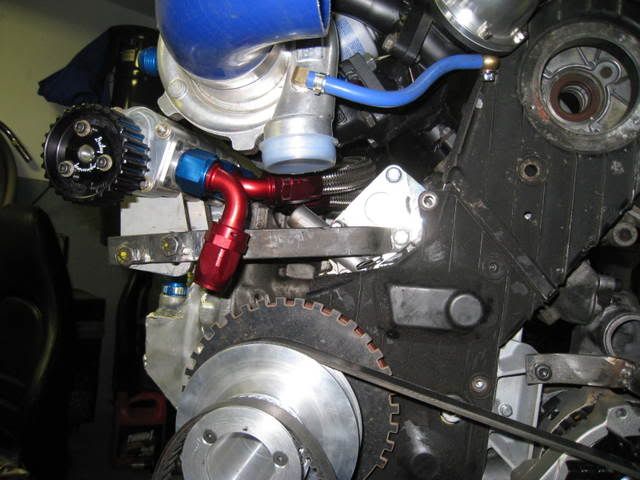
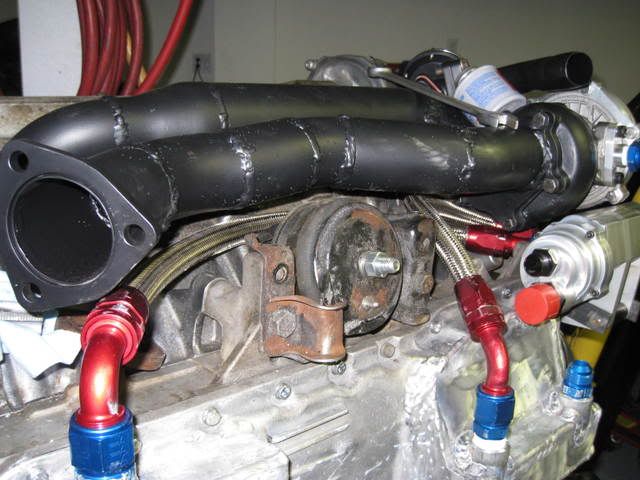
Unfortunatly I buggered up a couple of the fittings alittle due to the gualling of anodized aluminum on bare aluminum. So dont mind those ones they will be replaced later. For now Antisieze (NOT COPPER) saves the day.
My new steering wheel, as well you can see my floor mounted clutch pedal.
Fixed bucket seat.
Now for the shifter. These two following pictures show the shifter from GEAR TO GEAR. Neutral is between these two locations. 3rd to 2nd
More pics of the turbos and drysump.
Unfortunatly I buggered up a couple of the fittings alittle due to the gualling of anodized aluminum on bare aluminum. So dont mind those ones they will be replaced later. For now Antisieze (NOT COPPER) saves the day.