

My build project/plans. (long)
 02-05-2008, 01:35 AM
#46
Nordschleife Master
Thread Starter
Well I got my 2 external wategates in the mail today.
I am in the middle of a timing belt/water pump on my 87 5 speed though (just waiting for stainless bolts to come in) and will finish that, then I have alittle to do to the 81, then I can pull out the manifolds etc, and get to welding on the pipes etc needed for attaching the external WGs,
I will supply picks of them and the IC tomorrow.
 02-05-2008, 10:11 AM
#49
Nordschleife Master
Join Date: Dec 2004
Location: Guelph, Ontario, Canada
Posts: 6,164
Likes: 0
Received 5 Likes
on
5 Posts
Actually the bolts have less tensile strength and they stretch much easier (and break easier).
Having said that, if the bolt will never see yield forces (the force where it deforms and stays that way) then I am a big fan of stainless. I have always exchanged exhaust studs with stainless, but never on a high performance engine (lots of beetle engines and a 914 engine)
They are great for covers and such but not on anything that requires strength (suspension and engine rotating mechanicals for instance)
02-05-2008, 11:32 AM
#51

There are higher grade SS bolts. I think the place is "Totally stainless"
02-05-2008, 10:32 PM
#52
Addict
Rennlist Member
Rennlist Member
Colin is not your average DIYselfer. He's an accomplished mechanic crossed with McGiver....must be catching since Maniacal Shane and Portland PorKen are also fearlessly creative (and precise) in their 928 projects. I should mention that all three are in the Northwest.
Having thumbs instead of fingers, write-ups like these help inspire un-anointed dummies like me.
H2
Having thumbs instead of fingers, write-ups like these help inspire un-anointed dummies like me.
H2
02-06-2008, 12:27 AM
#53
Nordschleife Master
Thread Starter
Thanks Harvey,

we have a pretty strong group in the PAC NW here. I do agree.
I finished up the belt job this morning in the rain and at the same time replaced the fuel lines in the engine bay (kit from 928srus) and she is back to running strong.
Though I can tell that car needs to have the intake refreshed on it as the protective coating is coming off of the knock sensor wires. Oh well another day.
Forgot to get pics of the pieces today and have to do some inside stuff atm, will try for tomorrow.
02-07-2008, 12:24 AM
#54
Nordschleife Master
Thread Starter
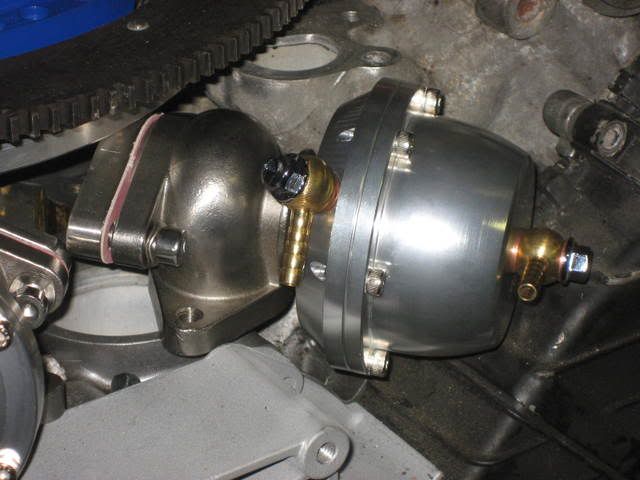
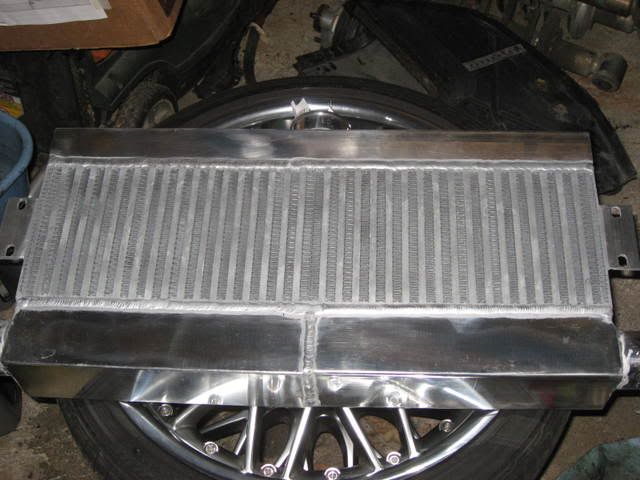
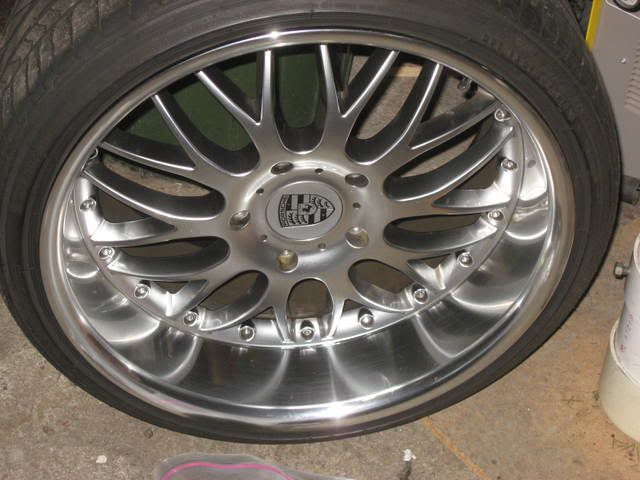
Well here are the pics of some of the parts.
Tial style WG (1 of 2)
Intercooler.
One of the set of 4 new rims for the car.
I fixed a few things on the 87 5 speed today, got the windshield washer system going again on the 81, fixed a non working running light (bulb controller had a broken solder joint) and replaced a part that I am waiting to see if someone can identify.
04-22-2008, 01:40 AM
#55
Nordschleife Master
Thread Starter
Figured I would just post an update on this as I have gotten some stuff done, but havent been able to get too it too much as of late.
I have recieved more bits and pieces.
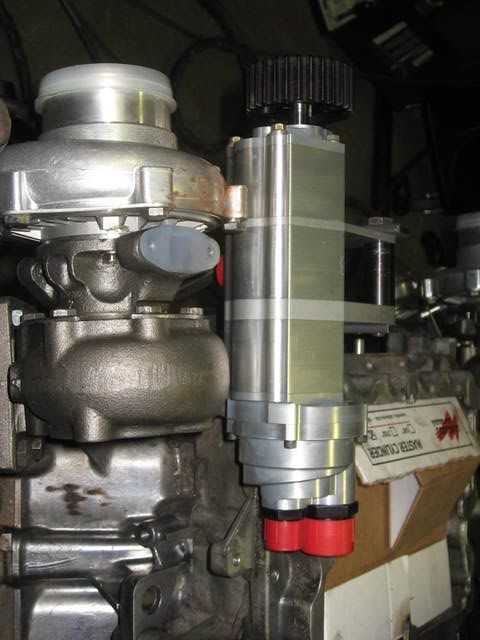
I recieved my 3 stage scavenge pump with air oil seperator and have almost finished mounting it. I got it from Dailey Engineering. As stated before, I will be using the factory pressure pump, so this is strictly for scavenging. Working with Bill there I should see roughly 20 in HG vacuum in the crankcase.
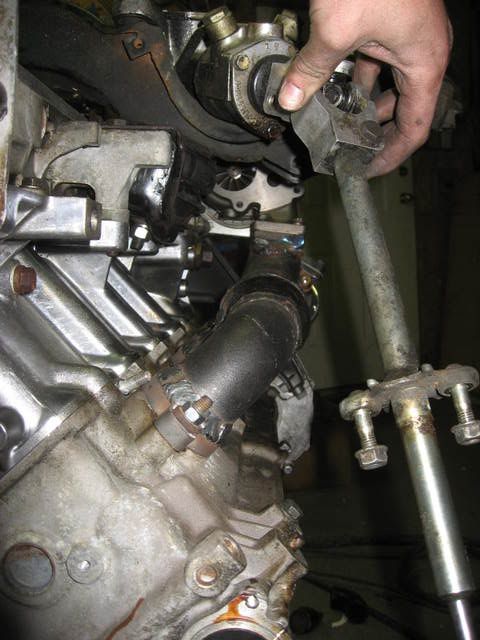
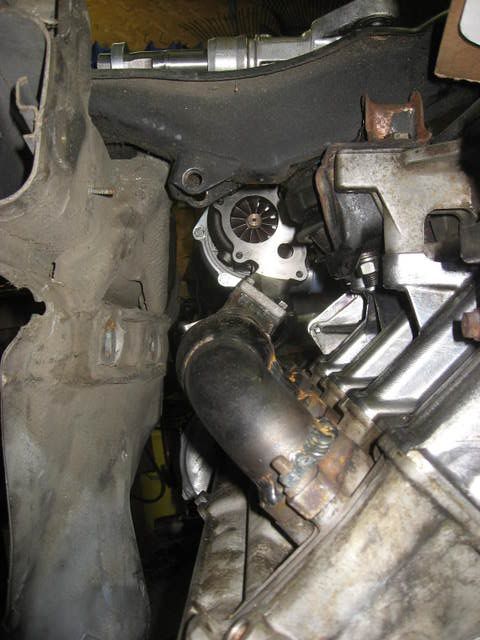
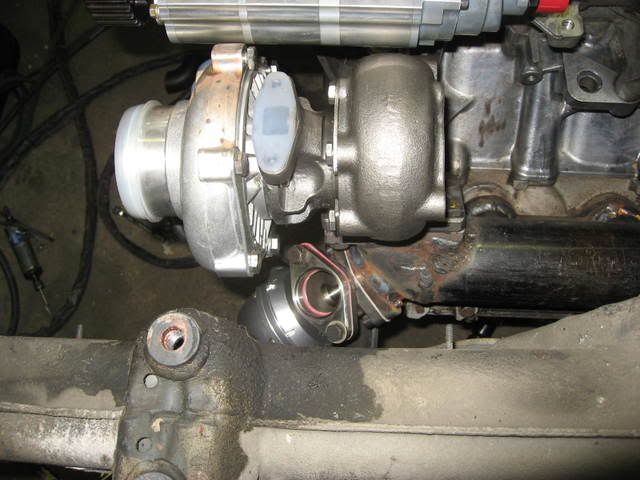
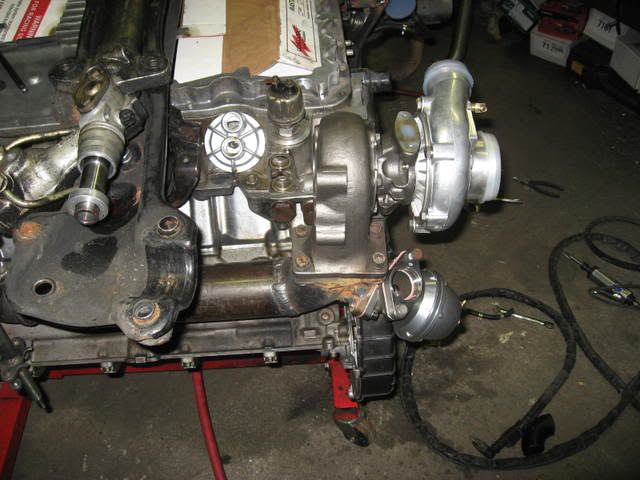
I also have mounted my two external wastegates. I was no able to mount them in the most ideal location, but everywhere else would require alot more plumbing and steel work. For what I am after it should work just fine.
And for the part you all are waiting for the pics.
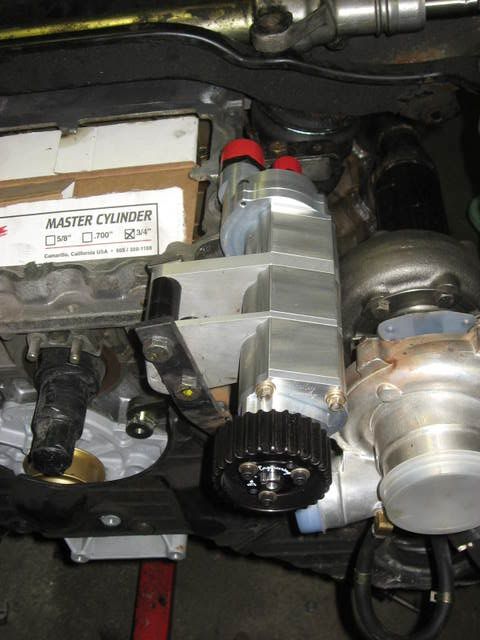
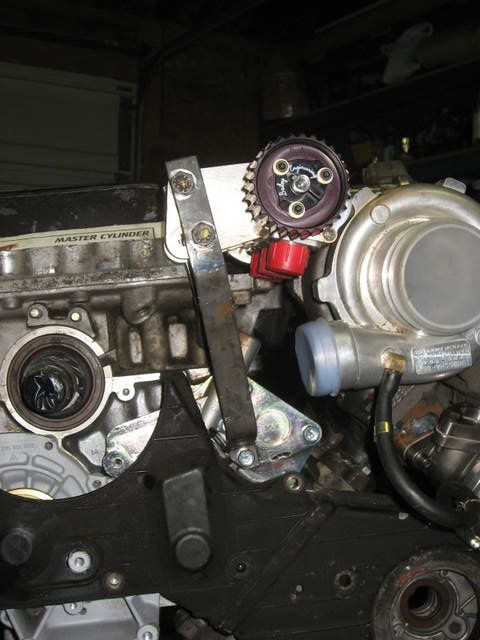
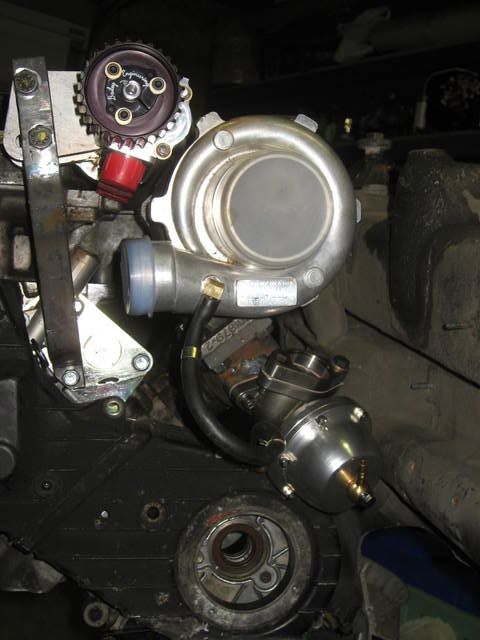
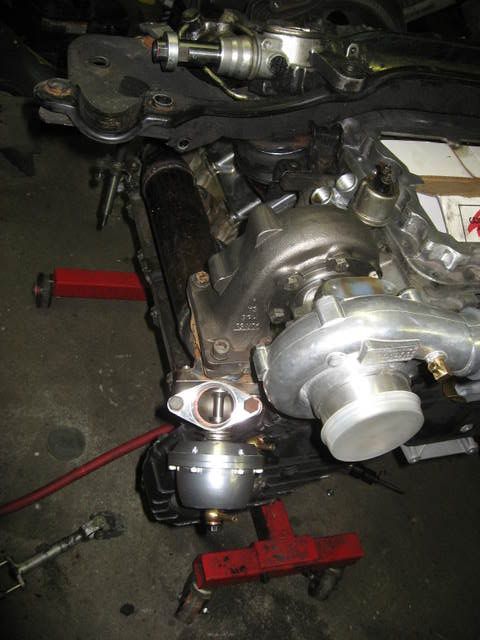
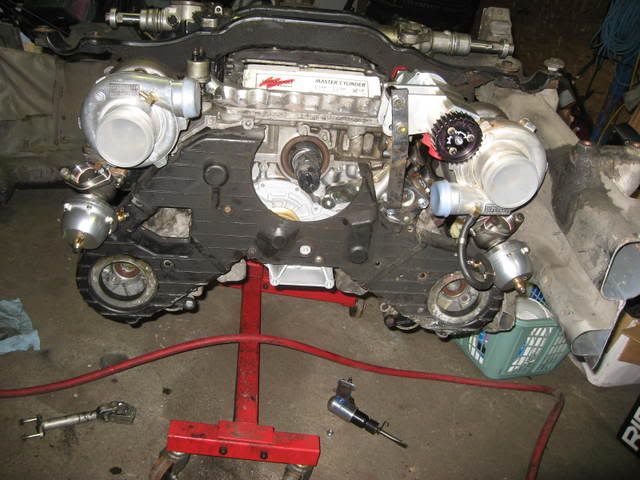
Hope you all enjoy.
I will be getting the aluminum tomorrow for welding up the oil pan for the drysump. I am REALLY looking forward to getting that done.
I have recieved more bits and pieces.
I recieved my 3 stage scavenge pump with air oil seperator and have almost finished mounting it. I got it from Dailey Engineering. As stated before, I will be using the factory pressure pump, so this is strictly for scavenging. Working with Bill there I should see roughly 20 in HG vacuum in the crankcase.
I also have mounted my two external wastegates. I was no able to mount them in the most ideal location, but everywhere else would require alot more plumbing and steel work. For what I am after it should work just fine.
And for the part you all are waiting for the pics.
Hope you all enjoy.
I will be getting the aluminum tomorrow for welding up the oil pan for the drysump. I am REALLY looking forward to getting that done.
04-22-2008, 01:42 AM
#56
Nordschleife Master
Thread Starter
I will also be making up the mount for the altenator and once I have that made, then I can have a custom crank pulley made up with the gear for the pump and altenator.
As well thanks to Heinrich, and Sab I now have an 87 tranny with the 2.20 and LSD in the car.
However While it was out I pulled out the shift rod going to the tranny and cut it into two pieces and used some bits and pieces to make a short shift lever system that the rod connects to. I used the same bushings that the shift lever in the cabin uses so it is smooth without alot of play.
I also replaced the bushings in the back with new ones from Roger (thanks again). Though the old ones were not bad, it appears that most of the play is from the ball cup in the front.
I will be maing a piece to replace that with a hiem joint in such a way that I dont have to drop the tube to replace it.
Taking out the play from the ballcup there is only about 1.25" from being engaged in 2nd, to being engaged in 3rd. VERY nice for precise shifts between gears, but finding neutral is apparently abit hard according to my friends who tried to put the car in neutral.
04-22-2008, 11:54 AM
#58
Nordschleife Master
Thread Starter
This should be enough for keeping the heat away from all the other componants, though I will probably put a piece of stainless sheeting between there to protect it yes.
04-22-2008, 12:15 PM
#59