
Tailgate weatherstrip (?) restoration write up!
 07-01-2006, 05:54 PM
#1
Instructor
Thread Starter
Not sure what this part is even called but I am talking about the metal strip underneath the tailgate which you can see when you lift the hatch up. All the paint was peeling off mine and it was spoiling the look of the rear end so I decided to paint it.
I should imagine this is pretty common and very easy to rectify so I thought it would be nice if I took the time to take some photos along the way to help others out, should they wish to put this right.
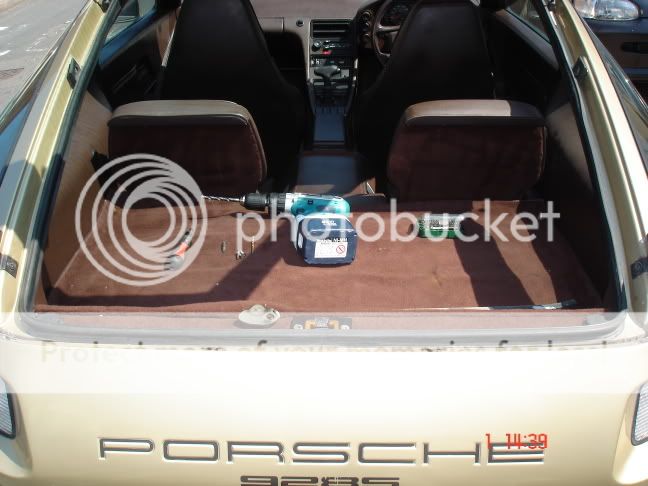
You will need:
- Some screwdrivers
- A drill & bits
- A scraper
- Wet and dry sandpaper
- Metal primer
- Black paint
- Some 2 penny pieces (trust me on this one!)
- 4x M5 Countersunk machine screws with a 1" shaft
Step 1. Removing the metal strip.
This is basically just a case of unscrewing the 4 pozi drive m5 screws holding it in place. Lift the hatch up and you will see them on the lip in front of you.
Mine were a bitch to get out since they had obviously been untouched from the factory. 3 came out easily but I had to drill one of them out, which was a little hairy! If you need to do this, simply use a nice large HSS drill bit such as a 6 or 7mm and just go easily into it and remove the head. Be careful not to slip! After you remove the strip the screw bodies should unscrew by hand should you have beheaded any with your drill!
Horrible crappy paint:

Screw I drilled out:
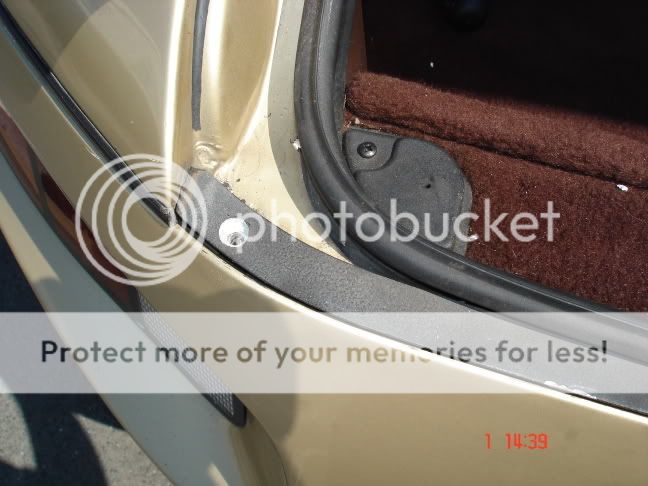
Pic with strip removed:
Step 2. Preparing the strip for paint.
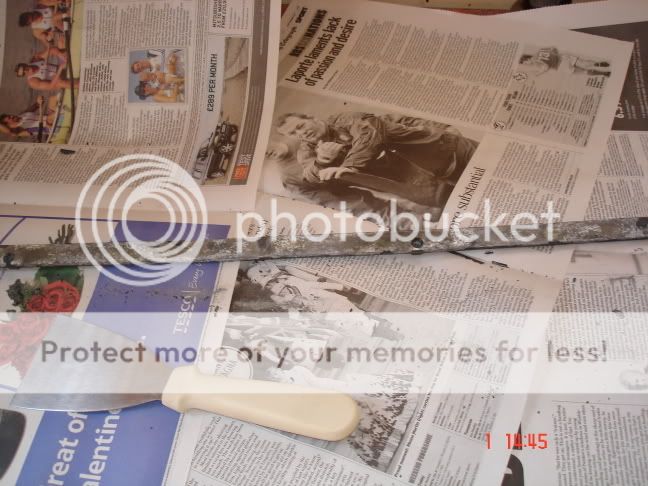
Set yourself out a nice work area. Grab a scraper, or a butter knife, anything really! And remove all the excess flaky paint. Be careful not to bend it out of shape as it is only aluminium.
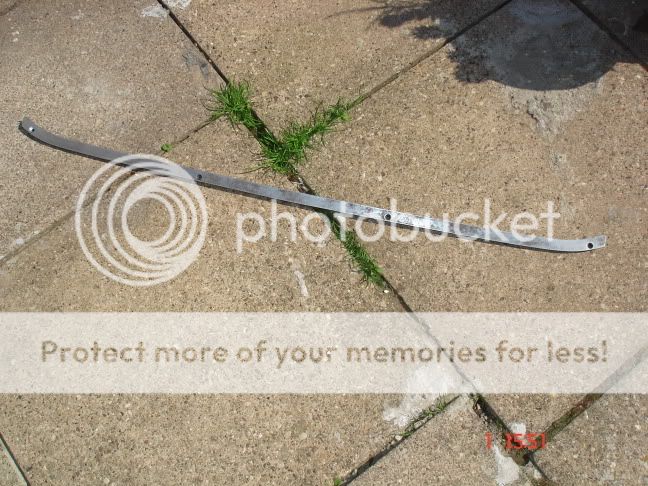
After this, use some coarse grade wet and dry sand paper and take the top and sides of the strip to bare metal. Don't worry about the underneath because you won't be painting that bit, well I didn't. This is a time consuming process but it will pay off in the long run! After you have removed all the paint from the top and sides, go over the lot with some 400 grit, followed by some 800 grit and you will be ready to paint it.
Removing excess flakey paint:
Sanded and ready for primer:
Step 3. Primer and paint.
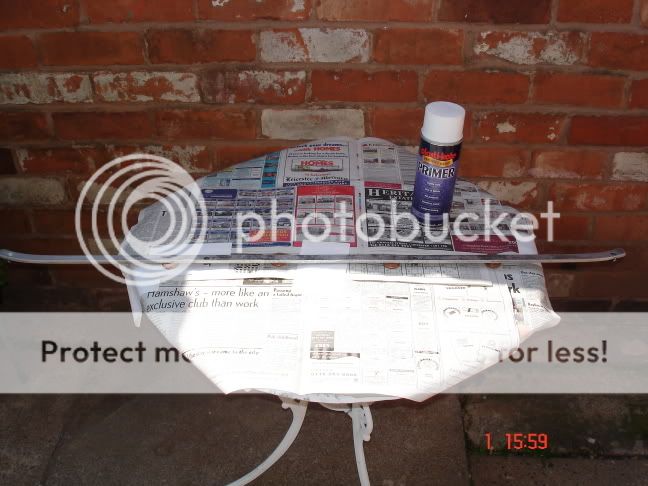
I found that using little stacks of 2 penny pieces work great as workpiece holders! You can use what you like but I found these worked quite well.
Primer. I used Plastikote multi purpose primer. Apply thin coats, holding the can around 10 to 20 cms away from the strip. Use even strokes. Make sure the aerosol tip is clean, and make sure your finger isn't getting in the way of the jet - This will stop large spots of paint hitting the workpiece. Cover lightly, allow to dry for a few mins and repeat. Repeat this process until you have completely covered the strip in primer. Thats top and sides, not bottom - Unless you really really want to!
If there are any imperfections such as hair, flies or runs etc, wait until its dry and sand them out with some 800 wet and dry. Re-apply some more primer over the top.
Here is a pic of just before I applied the primer:
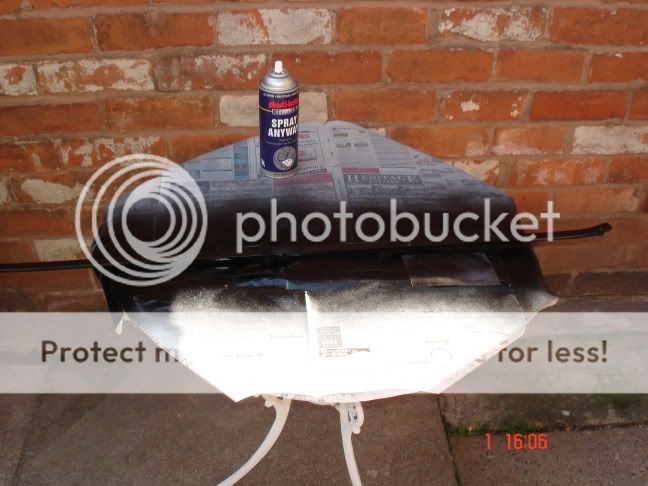
Gloss black coat. Its up to you what colour you use but I decided on black because I wanted an OEM look. I used Plasticote industrial gloss black. I guess you could quite easily colour code it if you happen to have any porsche paint lying around!
Same deal as the primer - Light even coats, 10 minutes between coats, as many coats as possible! Take your time! You can take this opportunity to whack a quick layer of black paint over your new screws too if you want. I did because they were silver and would have looked crap!
If there are any blemishes, runs repeat the last primer step.
Drying time is around 1 hour.
Here is mine after 1 coat of black:
Step 4. Refitting.
As they say in the trusty Haynes' Manuals, Refitting is the reversal of removing, or something like that! I'm sure you can work it out!
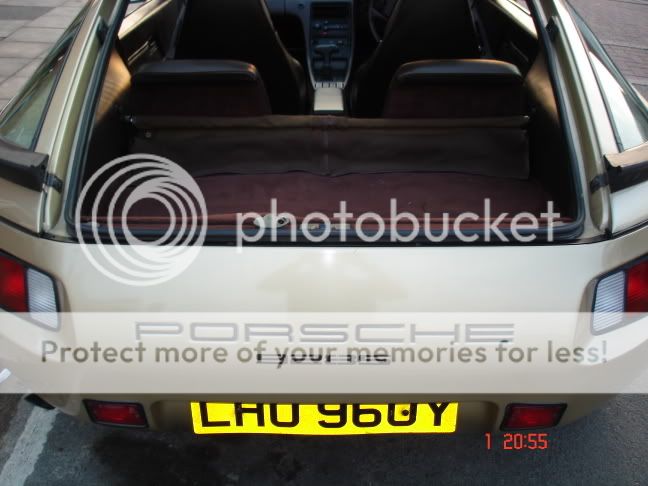
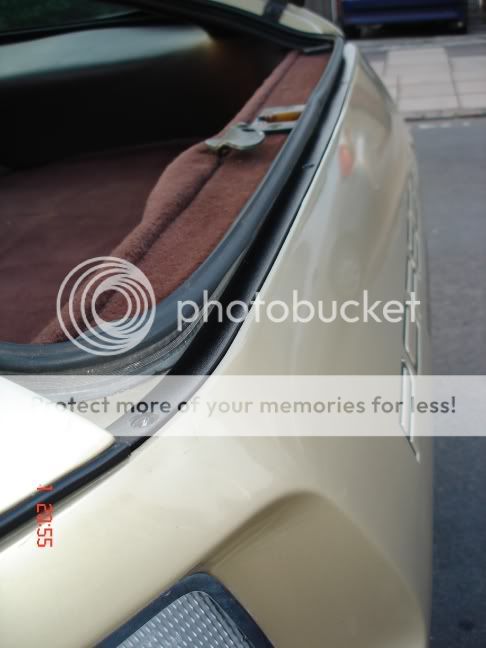
Here is a couple of pics of my finished article. A significant improvement me thinks!
I should imagine this is pretty common and very easy to rectify so I thought it would be nice if I took the time to take some photos along the way to help others out, should they wish to put this right.
You will need:
- Some screwdrivers
- A drill & bits
- A scraper
- Wet and dry sandpaper
- Metal primer
- Black paint
- Some 2 penny pieces (trust me on this one!)
- 4x M5 Countersunk machine screws with a 1" shaft
Step 1. Removing the metal strip.
This is basically just a case of unscrewing the 4 pozi drive m5 screws holding it in place. Lift the hatch up and you will see them on the lip in front of you.
Mine were a bitch to get out since they had obviously been untouched from the factory. 3 came out easily but I had to drill one of them out, which was a little hairy! If you need to do this, simply use a nice large HSS drill bit such as a 6 or 7mm and just go easily into it and remove the head. Be careful not to slip! After you remove the strip the screw bodies should unscrew by hand should you have beheaded any with your drill!
Horrible crappy paint:
Screw I drilled out:
Pic with strip removed:
Step 2. Preparing the strip for paint.
Set yourself out a nice work area. Grab a scraper, or a butter knife, anything really! And remove all the excess flaky paint. Be careful not to bend it out of shape as it is only aluminium.
After this, use some coarse grade wet and dry sand paper and take the top and sides of the strip to bare metal. Don't worry about the underneath because you won't be painting that bit, well I didn't. This is a time consuming process but it will pay off in the long run! After you have removed all the paint from the top and sides, go over the lot with some 400 grit, followed by some 800 grit and you will be ready to paint it.
Removing excess flakey paint:
Sanded and ready for primer:
Step 3. Primer and paint.
I found that using little stacks of 2 penny pieces work great as workpiece holders! You can use what you like but I found these worked quite well.
Primer. I used Plastikote multi purpose primer. Apply thin coats, holding the can around 10 to 20 cms away from the strip. Use even strokes. Make sure the aerosol tip is clean, and make sure your finger isn't getting in the way of the jet - This will stop large spots of paint hitting the workpiece. Cover lightly, allow to dry for a few mins and repeat. Repeat this process until you have completely covered the strip in primer. Thats top and sides, not bottom - Unless you really really want to!
If there are any imperfections such as hair, flies or runs etc, wait until its dry and sand them out with some 800 wet and dry. Re-apply some more primer over the top.
Here is a pic of just before I applied the primer:
Gloss black coat. Its up to you what colour you use but I decided on black because I wanted an OEM look. I used Plasticote industrial gloss black. I guess you could quite easily colour code it if you happen to have any porsche paint lying around!
Same deal as the primer - Light even coats, 10 minutes between coats, as many coats as possible! Take your time! You can take this opportunity to whack a quick layer of black paint over your new screws too if you want. I did because they were silver and would have looked crap!
If there are any blemishes, runs repeat the last primer step.
Drying time is around 1 hour.
Here is mine after 1 coat of black:
Step 4. Refitting.
As they say in the trusty Haynes' Manuals, Refitting is the reversal of removing, or something like that! I'm sure you can work it out!
Here is a couple of pics of my finished article. A significant improvement me thinks!
 07-01-2006, 06:15 PM
#2
Rennlist Member

Ll,
Very nice work. It's often the sum of many small details which form an impression of the car. Where did you source the replacement posidrive screws? Porsche dealer?
Very nice work. It's often the sum of many small details which form an impression of the car. Where did you source the replacement posidrive screws? Porsche dealer?
 07-01-2006, 08:35 PM
#5
Team Owner
Hi since your working on the hatch try this, remove the weather seal and wash it with some strong car soap dry off then inject some Dow Corning 111 sealant into the channel that pushes onto the metal of the car, this will restore the water sealing properties of the seal to the car after this crimp the rubber channel with your hands so the seal will fit snug, then reinstall it then wipe the seal with a rag that has silicone sprayed on it or you can also use the DC111 and schmear it on the extrnal parts of the seal, If there are any tears in the seal then these should be fixed with super glue first ,as the sealant will not let the glue stick. just another way to keep things dry
