

Fixed headlights revised
 08-06-2005, 08:44 PM
#1
Inventor
Rennlist Member
Rennlist Member
Thread Starter
Quick fab job the day before driving 700 miles, return! I didn't even have time to aim them, so I only drove during the day. 
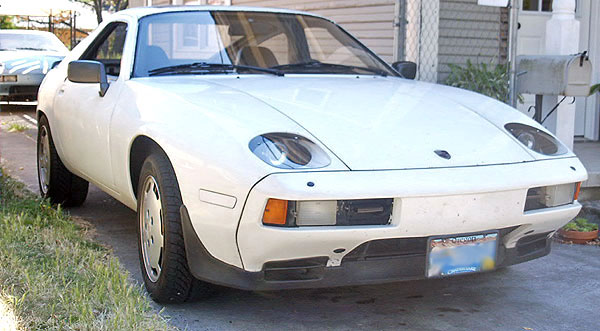
(Pardon the bugs.)
New brackets, new covers, separate cover bracket. Absolutely no vibration now, and easier to make. It turn out they were nearly right on for aiming, as is, so I was all worked up for nothing. I even reinstalled the driving lights, just in case.
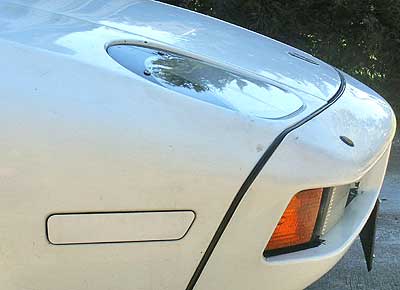
I couldn't think of an elegant way to hold down the cover at the front, that wouldn't get in the way of the beam. A few times, when I passed big rigs at 85MPH plus the cover would flutter and make a horrid racket.
Here's what I will probably change the cover to in a final version:
The plastic shop I go to can't do forming, but they can do straight line bending, and all I need here is a few degree slant to close the top.
(Pardon the bugs.)
New brackets, new covers, separate cover bracket. Absolutely no vibration now, and easier to make. It turn out they were nearly right on for aiming, as is, so I was all worked up for nothing. I even reinstalled the driving lights, just in case.
I couldn't think of an elegant way to hold down the cover at the front, that wouldn't get in the way of the beam. A few times, when I passed big rigs at 85MPH plus the cover would flutter and make a horrid racket.
Here's what I will probably change the cover to in a final version:
The plastic shop I go to can't do forming, but they can do straight line bending, and all I need here is a few degree slant to close the top.
 08-06-2005, 09:01 PM
#2
Inventor
Rennlist Member
Rennlist Member
Thread Starter
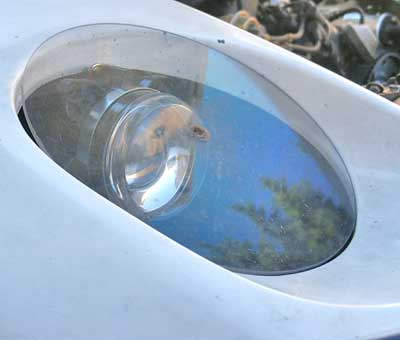
Side view:
I spray painted the back side of the acrylic in a band at the top, to hide the headlight body.
I tried white to match the car, but it looked odd. Black looks better. Chrome paint might be good...
I spray painted the back side of the acrylic in a band at the top, to hide the headlight body.
I tried white to match the car, but it looked odd. Black looks better. Chrome paint might be good...
 08-07-2005, 01:14 AM
#4

PorKen,
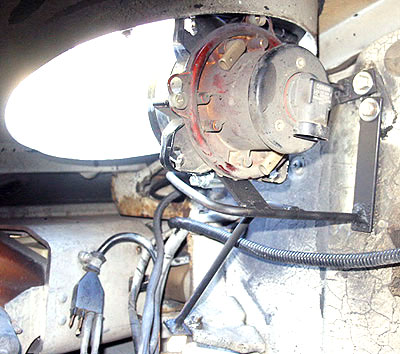
I noticed the 4 point connector was open in that left front fenderwell pic.
Then I noticed that the fender markers were blocked out - nice looking job btw -.
Anyhow, since the fronts are blocked out and they are on the same circuit , front left/rear left, front right/rear right, did you block out the rears as well?
Same pattern for the covers? Did you do this as a cosmetic mod?
Is it legal in your state?
08-07-2005, 03:04 PM
#5
Inventor
Rennlist Member
Rennlist Member
Thread Starter
Matt,
You're right, chrome would make it look like 'Altezza'. Black is always a safe bet.
...
John,
Good eye! I never came to terms with the US side markers and we don't have safety checks per se in Oregon. I've never been hassled about them.
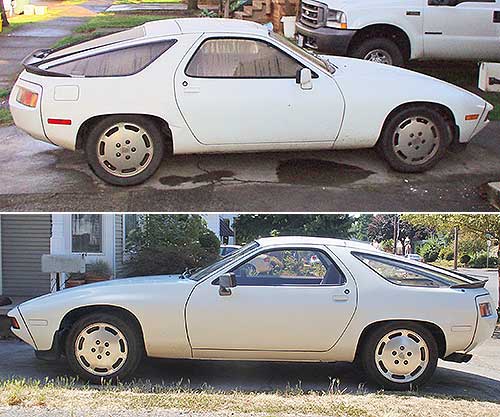
(top: as purchased, bottom: recent)
I removed the bulbs and wiring from a set (front and rear) of old side markers and epoxied the cracks, sanded the surface smooth and rattle-canned (and wet-sanded, and painted, and sanded...) the outside with a similar white.
(I deleted the central warning system and bulb brain, so I don't get a bulb warning.)
If I were to redo them, I would use clear acrylic, and paint the backside. It's a nice effect, and looks a bit more factory.
You're right, chrome would make it look like 'Altezza'. Black is always a safe bet.
...
John,
Good eye! I never came to terms with the US side markers and we don't have safety checks per se in Oregon. I've never been hassled about them.
(top: as purchased, bottom: recent)
I removed the bulbs and wiring from a set (front and rear) of old side markers and epoxied the cracks, sanded the surface smooth and rattle-canned (and wet-sanded, and painted, and sanded...) the outside with a similar white.
(I deleted the central warning system and bulb brain, so I don't get a bulb warning.)
If I were to redo them, I would use clear acrylic, and paint the backside. It's a nice effect, and looks a bit more factory.
08-07-2005, 03:44 PM
#6
Nordschleife Master
Porken -
How much to make a set of lens covers?. I need a set for my track shark. Black would work for me....
Food for thought - Maybe Ill start a trend for you. All the racers need something to cover the head lamp openings with.
TIA
How much to make a set of lens covers?. I need a set for my track shark. Black would work for me....
Food for thought - Maybe Ill start a trend for you. All the racers need something to cover the head lamp openings with.
TIA
08-07-2005, 04:28 PM
#7
Inventor
Rennlist Member
Rennlist Member
Thread Starter
Drewster,
Are you talking about the whole opening/recess, or just the (9") circle? I would think that an aluminum panel would be better for racing than acrylic - unless you want the look.
With no headlight in the way, I could make a bracket similar to the one above, that could hold an aluminum or acrylic panel, so you wouldn't have to drill into the fender for mounting...
For you, I'd make a pair gratis. But I can guessimate it'd be around $40-$50 for S&H.
Trending Topics
08-07-2005, 05:35 PM
#8
Nordschleife Master
The 9" circle - I need something to cover the headlamp openings (you can almost see in my avatar). Black with brackets.
Seriously, send me a PM and we'll "talk".
Im keeping my shark gray with future black accents and numbering - A two tone Black and Grey if you will.
Thanks!
Seriously, send me a PM and we'll "talk".
Im keeping my shark gray with future black accents and numbering - A two tone Black and Grey if you will.
Thanks!
08-07-2005, 06:24 PM
#9
Rennlist Member

Porken,
That looks better all the time. I have a feeling it needs an internal surround probably in body color to block out the view around the projector lamp. That's easy for me to say. I really like your design. I'm not saying it's better than stock; it's different and I like it.
FWIW.
Dave
That looks better all the time. I have a feeling it needs an internal surround probably in body color to block out the view around the projector lamp. That's easy for me to say. I really like your design. I'm not saying it's better than stock; it's different and I like it.
FWIW.
Dave
08-07-2005, 09:46 PM
#11
Rennlist Member

PorKen Wrote:
"I couldn't think of an elegant way to hold down the cover at the front, that wouldn't get in the way of the beam. The plastic shop I go to can't do forming, but they can do straight line bending, and all I need here is a few degree slant to close the top."
If they can do straight bends, maybe they can leave a tab at the front and bend it twice, into a hook that will catch under the lip of the hole.
Looking good, better all the time. Please post nighttime light pattern pix when all is done and aimed.
 08-08-2005, 02:59 PM
#13
Inventor
Rennlist Member
Rennlist Member
Thread Starter
Drewster,
After some thought, I reckon the acrylic would be less expensive, and besides, it's all that I can make easily.
...
Dave,
An internal surround would be cool. For me I have a low appearance threshold - if it looks good enough, I stop at the functional look. I like the popups, though, and I will keep them on my '80.
I've realized it's best to have (at least) two 928's. One for a dedicated fast-mover and one with the stock look, which I appreciate more and more.
...
Thanks, drnick!
...
Will,
The front lip is a problem with the full indent cover, the bent disk cover will fit inside the headlight hole, so it won't be a issue.
I haven't had a chance yet to take new pics, but here's the wall pattern from when I first installed them; the lower one is with low and high. Right now I don't have the highs installed, but they will mounted in place of the US driving light.
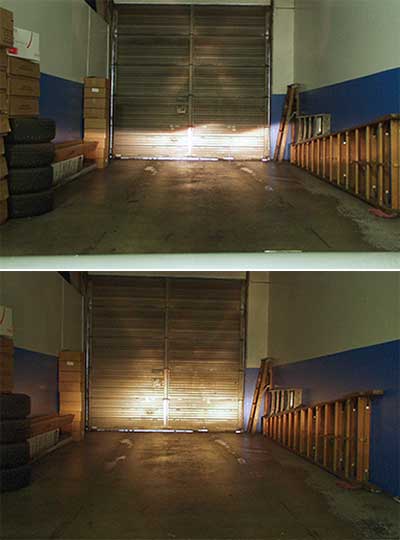
At night on the road, there's a bright central straight beam, maybe 3' wide, and a large fill area which is softer. The cutoff where the fill ends is very sharp. The fill is greatly improved now that the headlamp is exposed.
It's difficult for me to say now if it is superior to an 8" H4. But it's all about the weight.
...
Loren,
I removed the headlight relay, and used jumpers to put the proper signals through the headlight motor wires. From there I put together a harness that takes power off the jump stud. I would like to modify it, and take power directly from the alternator instead.
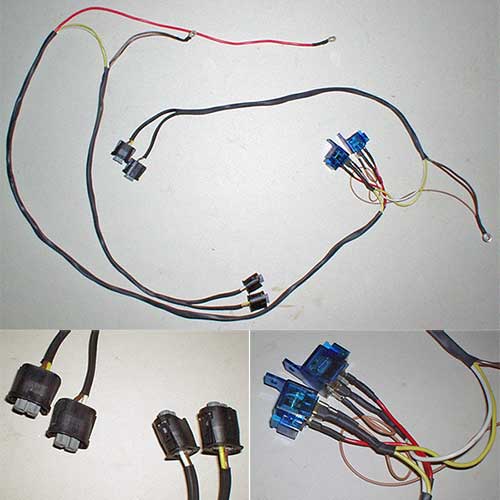
I also need to put the relays in a box, because I've lost a couple to water.
After some thought, I reckon the acrylic would be less expensive, and besides, it's all that I can make easily.
...
Dave,
An internal surround would be cool. For me I have a low appearance threshold - if it looks good enough, I stop at the functional look. I like the popups, though, and I will keep them on my '80.
I've realized it's best to have (at least) two 928's. One for a dedicated fast-mover and one with the stock look, which I appreciate more and more.
...
Thanks, drnick!
...
Will,
The front lip is a problem with the full indent cover, the bent disk cover will fit inside the headlight hole, so it won't be a issue.
I haven't had a chance yet to take new pics, but here's the wall pattern from when I first installed them; the lower one is with low and high. Right now I don't have the highs installed, but they will mounted in place of the US driving light.
At night on the road, there's a bright central straight beam, maybe 3' wide, and a large fill area which is softer. The cutoff where the fill ends is very sharp. The fill is greatly improved now that the headlamp is exposed.
It's difficult for me to say now if it is superior to an 8" H4. But it's all about the weight.
...
Loren,
I removed the headlight relay, and used jumpers to put the proper signals through the headlight motor wires. From there I put together a harness that takes power off the jump stud. I would like to modify it, and take power directly from the alternator instead.
I also need to put the relays in a box, because I've lost a couple to water.