When you click on links to various merchants on this site and make a purchase, this can result in this site earning a commission. Affiliate programs and affiliations include, but are not limited to, the eBay Partner Network.
I recommend using identical coils on both sides. And testing them prior to installation to make sure that they at least are within spec (from WSM), and preferably are a close match to each other. If you happen to have an LRC meter, I would also be interested in the resistance and inductance across the two side terminals.
NOTE If you unplug any of the left plug wires from the cap the engine dies that means the right side wires are not producing enough spark.
Warning these hi tension wires can produce a very hi spark, with the engine running ,
that can kill a garden widget
I recommend using identical coils on both sides. And testing them prior to installation to make sure that they at least are within spec (from WSM), and preferably are a close match to each other. If you happen to have an LRC meter, I would also be interested in the resistance and inductance across the two side terminals.
Both coils were removed and tested but they show to be fine. Changing the left side coil shows that testing them doesn't mean much. I did order another new Bosch coil identical to the one I just installed.
Originally Posted by Mrmerlin
Based on your report the right side coil is bad.
NOTE If you unplug any of the left plug wires from the cap the engine dies that means the right side wires are not producing enough spark.
Warning these hi tension wires can produce a very hi spark, with the engine running ,
that can kill a garden widget
That's what I thought but I wanted to take a look on the left side and thought I'd just replace the coil to see if the problem goes away, but wasn't expecting it too since like you said it would seem the right side must have a weak coil. Wouldn't shock me if both coils were just worn out at the same time. They are original 37+ year old coils with 210,000 miles on them.
Last edited by dukenukemx; 10-18-2022 at 02:38 PM.
NOTE some types of coil wires have screwed on ends and the ends can be unscrewed to fit either type of coil .
Generally unscrewing the end caps of the coil wire increases the chance of damaging the internal wire.
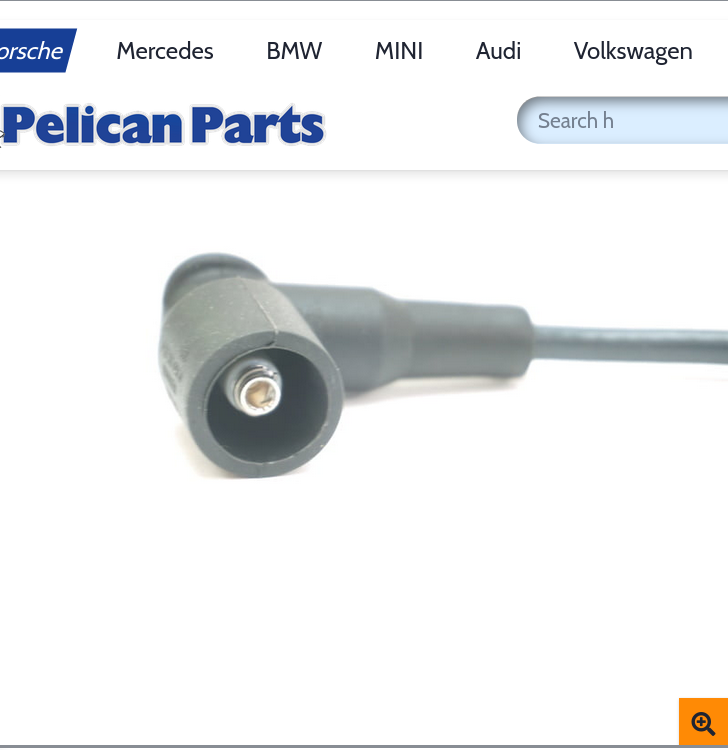
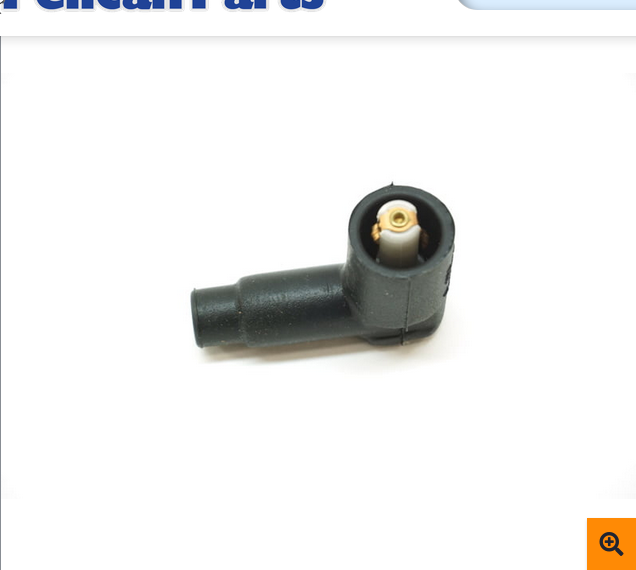
I think I just got a coil just as you explained. Instead of a cup like setup, this has a metal pin sticking out. Probably won't offer much of a connection. Looking at Bulvot's suggestion, it also has a pin. I wonder if there's an adapter so I don't grind down the pin and make a bad connection? I could take one of the old spark plug wires and cut it then solder it onto the pin?
Note there are 2different coil ends you can order new coil wires you just need to know what type of coil you have
Note don�t modify your coil to fit the wire end
Note there are 2different coil ends you can order new coil wires you just need to know what type of coil you have
Note don�t modify your coil to fit the wire end
I thought I ordered the correct wire and I ended up with another wire exactly like the one I have. So I did what I didn't want to do and that's modify the cable. I unscrewed the connector from an old cable which is just screwed on, and then did the same to the new cable, which is pressed on. I just took them apart and filled the inside with solder and then bent the wire down and soldered it on. I melted the metal over and fitted nicely, but I added some epoxy for insurance. A little silicon spray to screw on the connector and the wire is complete. What I discovered was that the old wires were all like this type of connector. All have the hole in the center without any metal clip on the side. I thought they were original but that can't be how the OEM wires were setup. Another good reason that I replaced the wires.
Sheesh call Roger and have him send you the correct coil wires...
he will know what you need but your going to have to answer a few questions first
The new wires are correct, but this wire is built from a bit of old wire. All the old wires have been replaced with correct ones. Is Roger going to ask me questions 3?
Originally Posted by GregBBRD
Wow.
What people, left unattended, can do...
I'm not sure if that's a compliment.
Last edited by dukenukemx; 10-31-2022 at 11:47 PM.
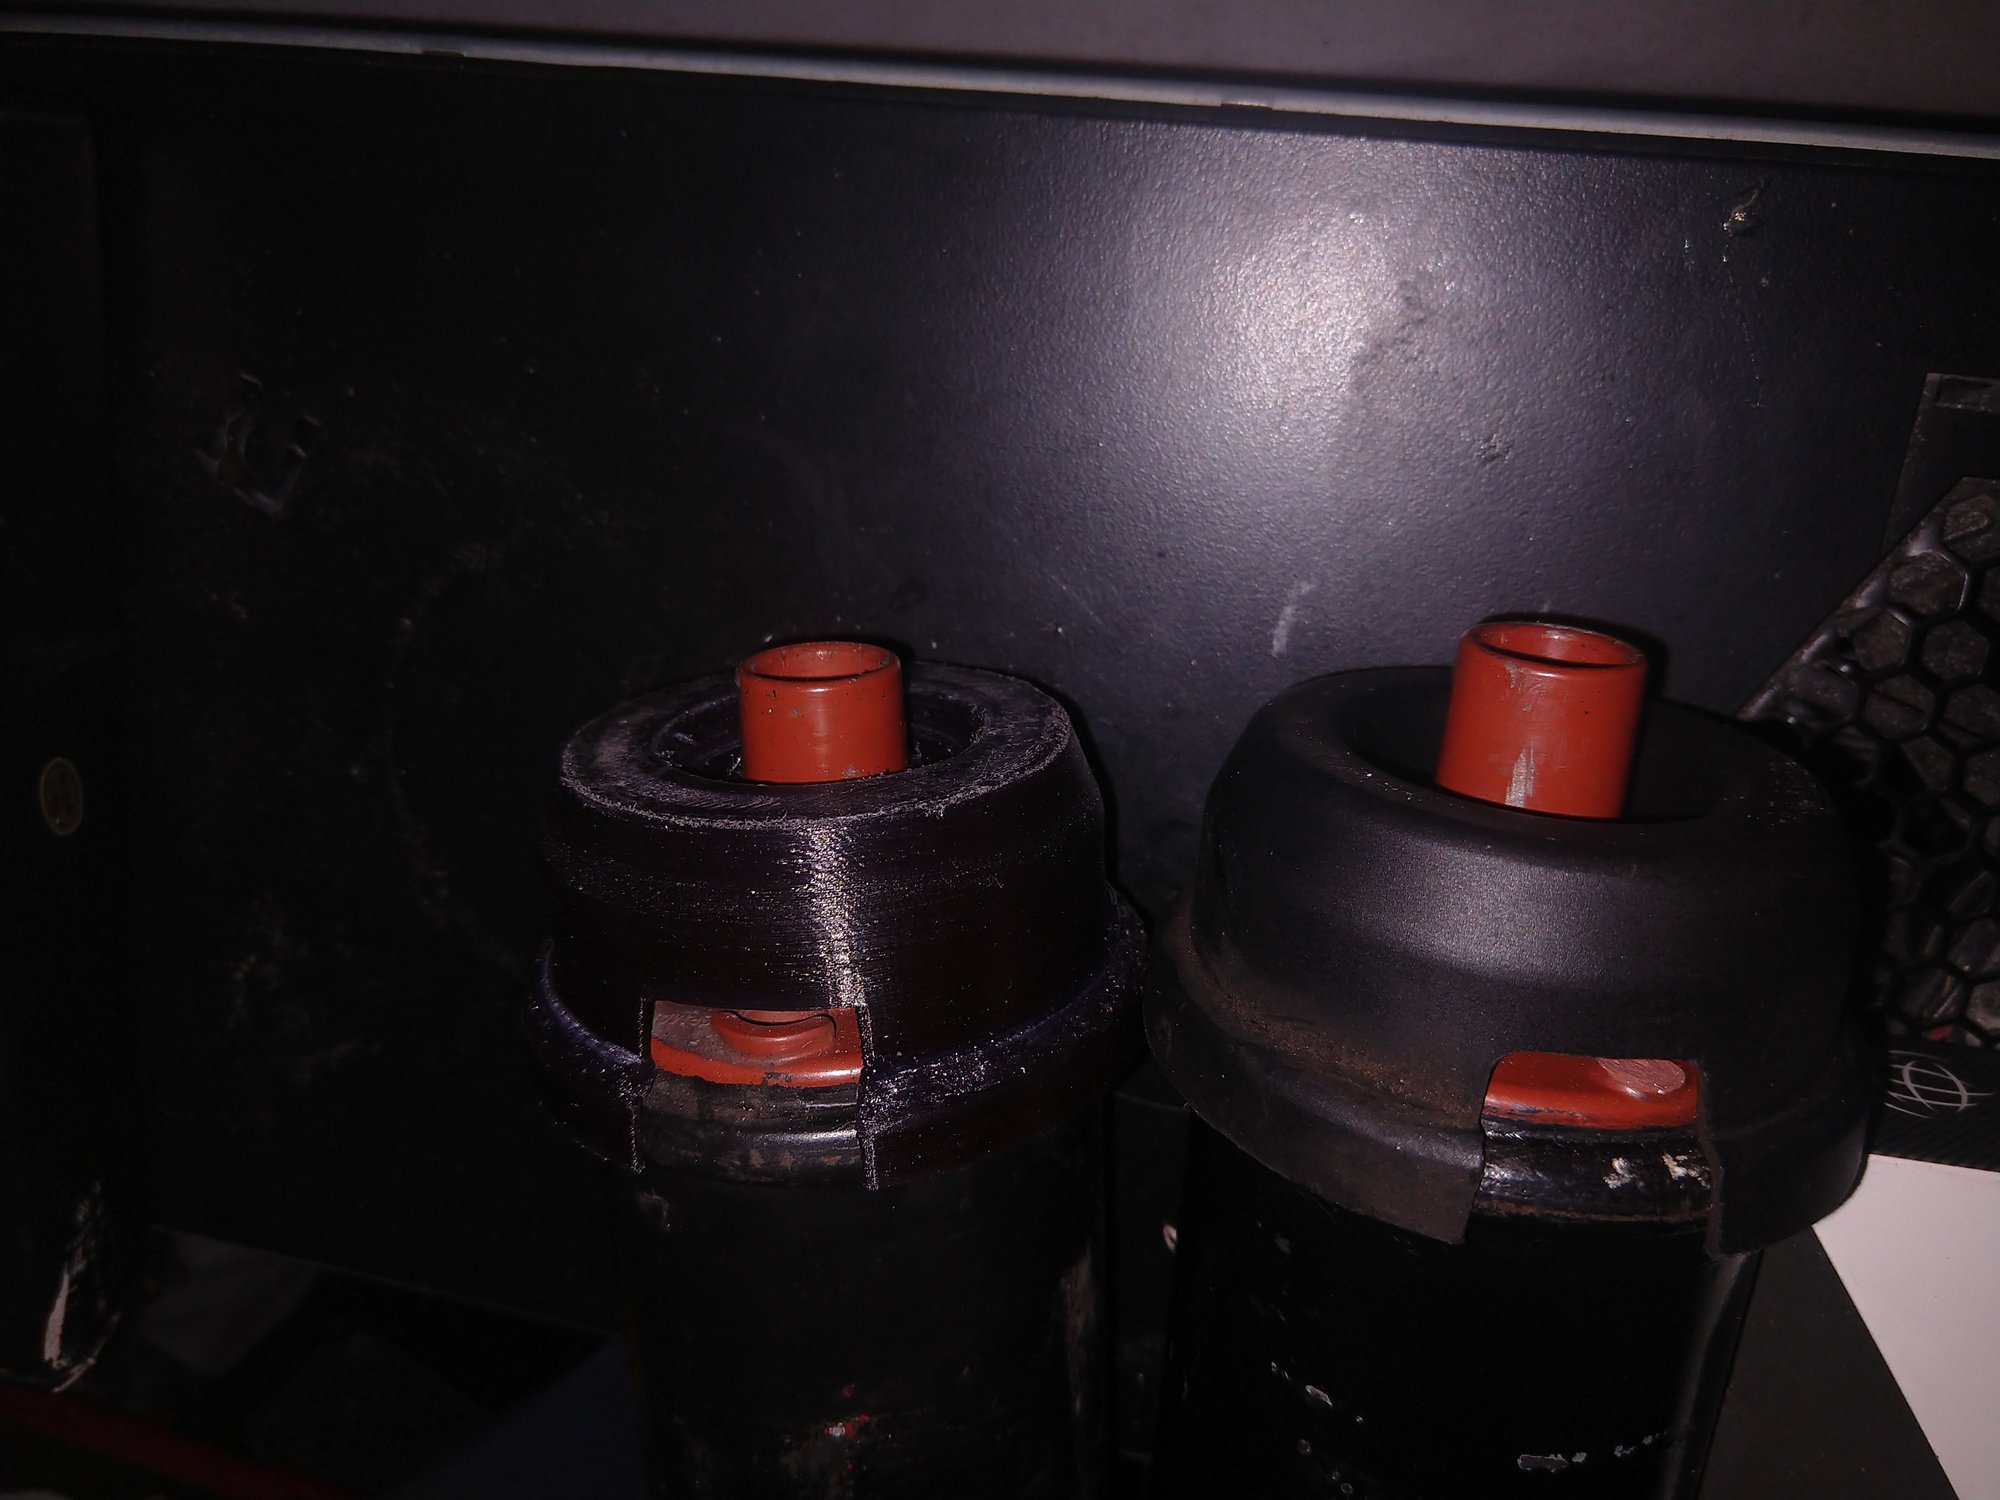
The external surface of the coil-facing ends of early 32v cars have a kind if hexagonal pattern that contacts the mating, call it inner diameter, surface of the coils. Snug, snap fit is the objective. Not sure I saw you recognize that feature, wondering if you saw that hex like pattern. And maybe what you started with wasn't original or correct. Not trying to cast dispersion here. I've got the cobble it up gene too.
Seems you didnt really address the a) vs b) fit in your analysis. Seems you swapped b) for a similar variant of b). Maybe you've achieved snug fit any how, which would make it driveable? What I mean is there are two very different boots possible, which differ in the part that contacts the coil.
OEM wires have that industrial crimp, tool is hundreds of dollars, and screw thread ends, also costly. All have that characteristic, and to Stan's point, with the screw ends, 'boots' can be swapped to match the coil to end.
Used to be at some point in past that you could buy a set of 8 plug wires, and it would come with two different pairs of coil wires. Only difference being the coil-facing ends.
Not certain what parts you actually have here, just be sure the boot and its electrode fit the coils snug
The external surface of the coil-facing ends of early 32v cars have a kind if hexagonal pattern that contacts the mating, call it inner diameter, surface of the coils. Snug, snap fit is the objective.
Seems you didnt really address the a) vs b) fit in your analysis. Seems you swapped b) for a similar variant of b). Maybe you've achieved snug fit any how, which would make it driveable? What I mean is there are two very different boots possible, which differ in the part that contacts the coil.
OEM wires have that industrial crimp, tool is hundreds of dollars, and screw thread ends, also costly. All have that characteristic, and to Stan's point, with the screw ends, 'boots' can be swapped to match the coil to end.
Used to be at some point in past that you could buy a set of 8 plug wires, and it would come with two different pairs of coil wires. Only difference being the coil-facing ends.
Not certain what parts you actually have here, just be sure the boot and its electrode fit the coils snug
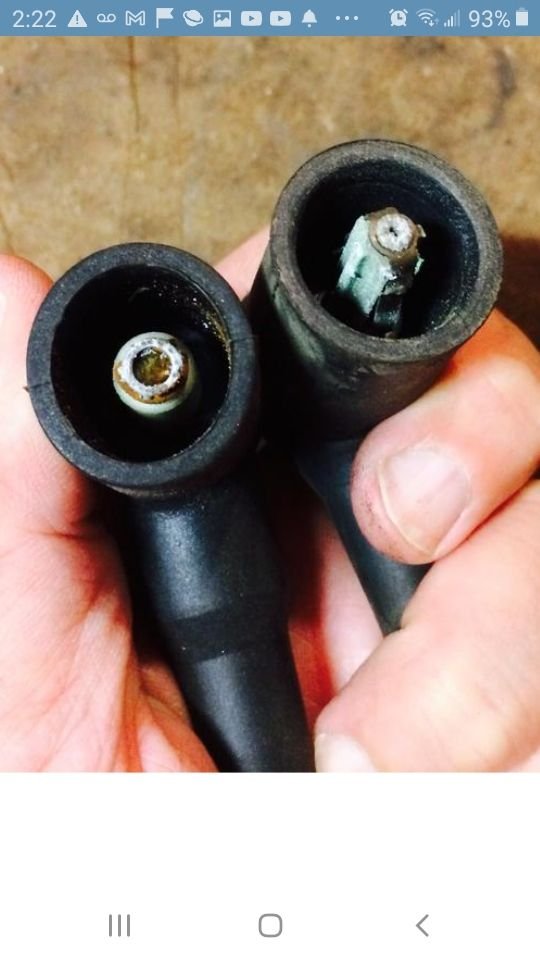
All the connectors including the ones that go to the original coils have this style connector I have pictured bellow. The exception is the bottom of the cap that goes to the coil, which is the reason for the modification. The old spark plug wires I replaced earlier this year have the same style as the connector that goes to the new coil. I never noticed this until now because once I pulled out the old wires, I threw them into a corner in my garage and forgot about them. Wasn't until I was trying to Jerry rig that wire that I noticed this and was also kinda a blessing. Going by your analogy I took a A style + B style wire and changed it to a B+B. I just looked on pelican parts and found the wire I just created.
The ones I'm speaking of are actually hexagonal. That's not it. I'll try to find a picture that contrasts them. I've had a. 85, 2 86 and an 86.5 all with the hex shape.
All the connectors including the ones that go to the original coils have this style connector I have pictured bellow. The exception is the bottom of the cap that goes to the coil, which is the reason for the modification. The old spark plug wires I replaced earlier this year have the same style as the connector that goes to the new coil. I never noticed this until now because once I pulled out the old wires, I threw them into a corner in my garage and forgot about them. Wasn't until I was trying to Jerry rig that wire that I noticed this and was also kinda a blessing. Going by your analogy I took a A style + B style wire and changed it to a B+B. I just looked on pelican parts and found the wire I just created.
Patience, young warrior.
There's not a single person, on this Forum, trying to make your life more difficult.
They are simply trying to help you do it right, the first time.
Trust me, I've spent thousands of people's dollars tracing spark plug wire/coil wire issues on 928's.
Sometimes these problems are so intermittent that it takes many hours to figure out what is causing the intermittent problem.
Doing it right, the first time, is highly desirable.
And will save you money, in the long run.
As the coup de grace I recreated the coil dust cover with my 3D printer. You have to rename the .zip to .3mf because rennlist won't let me upload it otherwise, and it's already compressed. I made it out of nylon so it should withstand the heat of the engine bay just fine. So if you happen to be missing a dust cover for your coil and have a 3D printer, you can make your own. I had one for the passenger side but no the drivers side.
Last edited by dukenukemx; 11-09-2022 at 12:13 PM.

 10-18-2022, 08:28 AM