When you click on links to various merchants on this site and make a purchase, this can result in this site earning a commission. Affiliate programs and affiliations include, but are not limited to, the eBay Partner Network.
Current status: having replaced the timing belt etc, now on to sorting out the leaking oil sump, leaking steering rack and replacing motor mounts.
So, I have now steering rack off, engine lifted, cross member off, old mounts out. I have removed oil sump, cleaned it all up, new gasket from Roger and this is now in place with the 36? or so bolts, torqued to 7NM with a drop of Loctite.
Next step is to try and get the MM on. I have 2 of the Volvo MM from Roger. Before I start, I have 3 (fairly na�ve) questions:
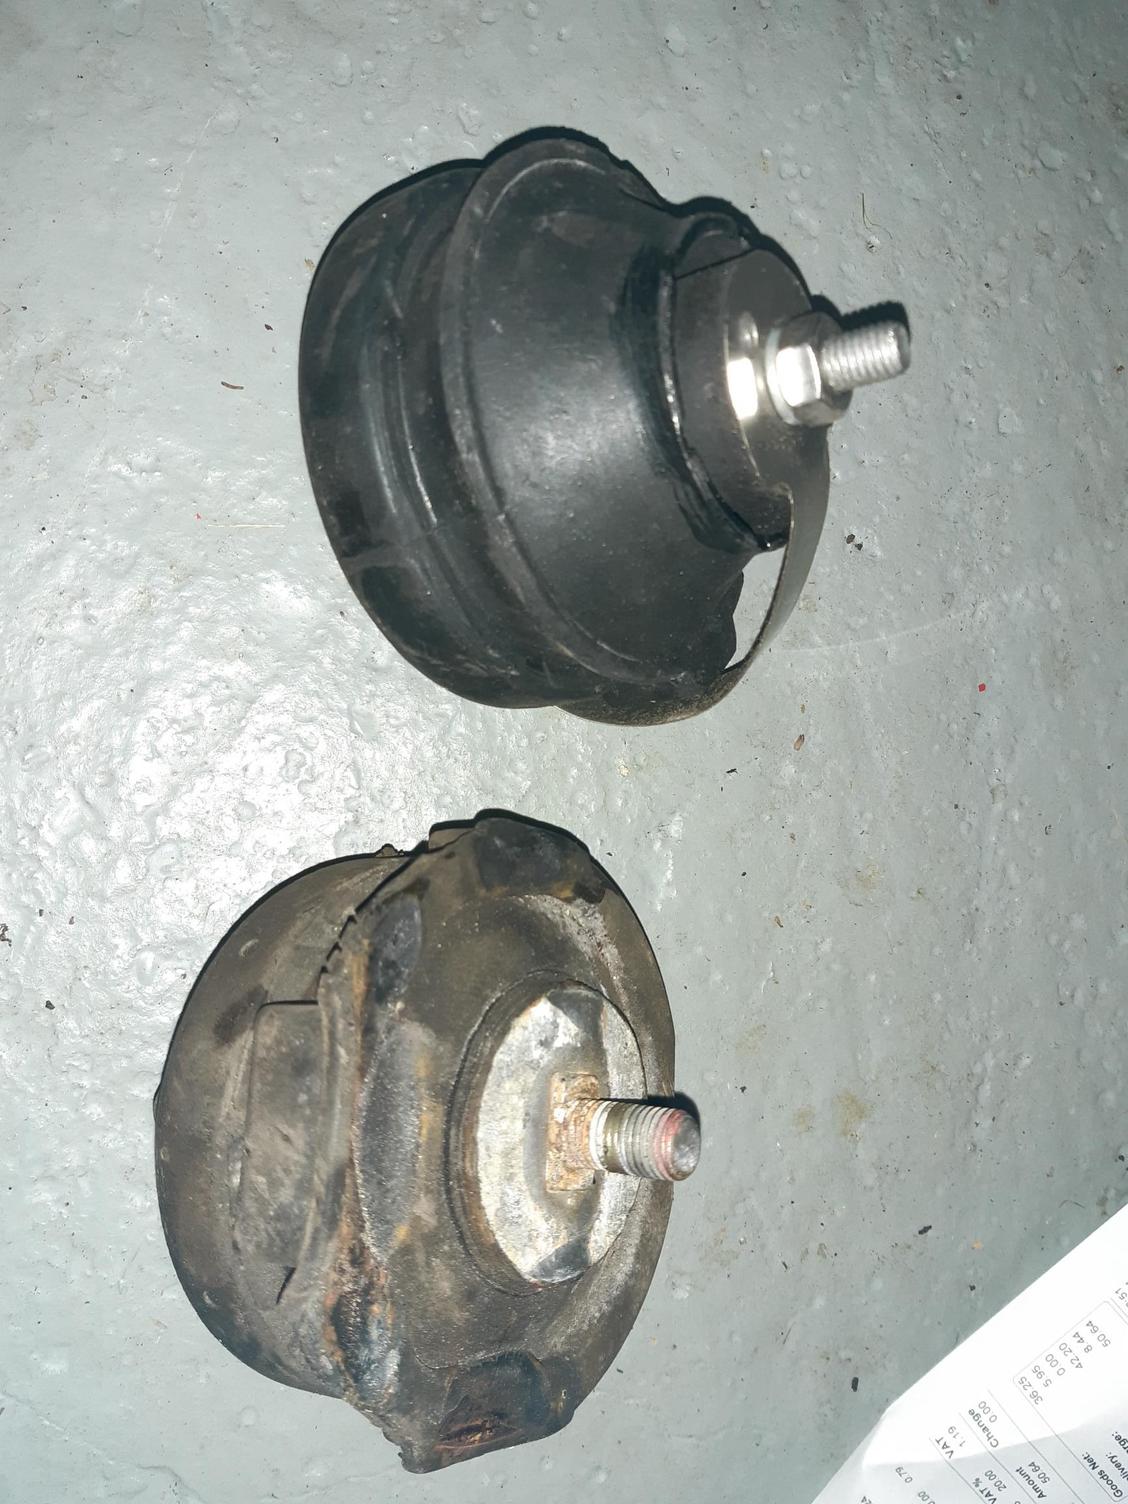
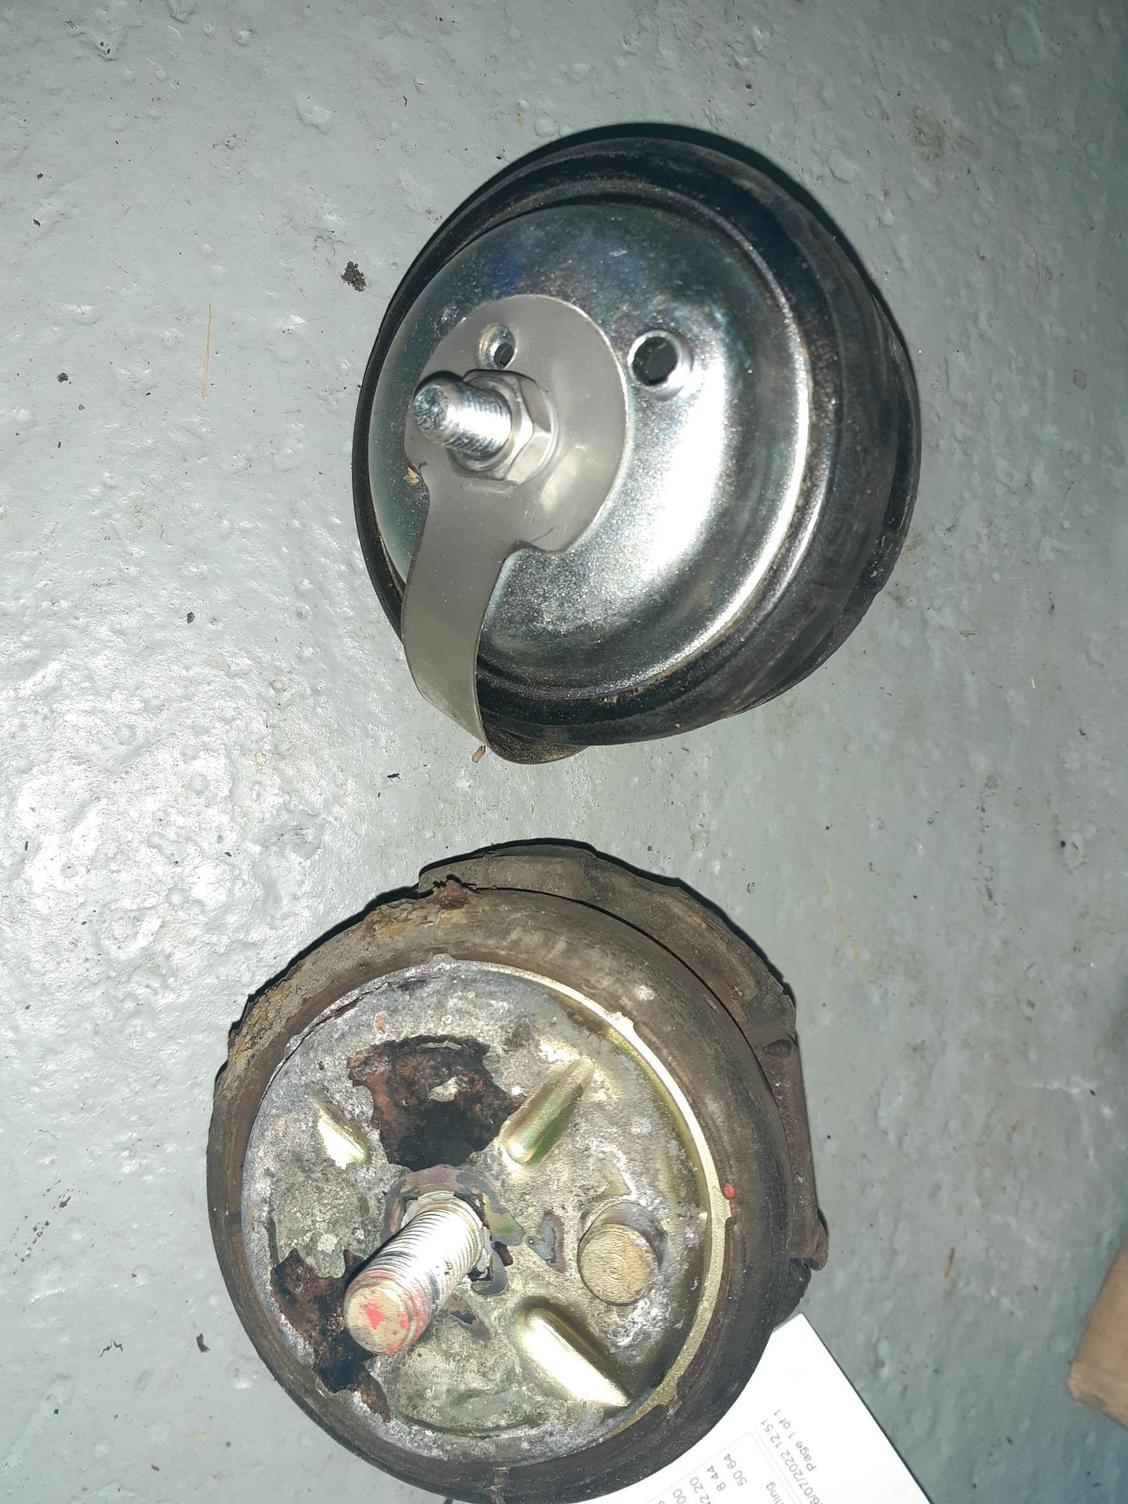
Do I need to leave the metal strip on that goes from top to bottom of the Volvo MM. If so, what is its purpose?
The Volvo one has a small pin on it. Is it correct positioned or do I have to Dremel it off?
Is there a correct orientation for the mounts? This might be obvious when I offer them up, but I haven�t got there yet.
My plan is to follow Dwayne�s set of instructions for the MM, but I have seen some variations on Rennlist depending on how well they go on. As you can see, there is the usual big difference between the height of the new ones and the (30 year?) old ones
keep the alignment pin in place on your new mount NO DREMEL.
Keep the metal strip and delete the lower finger plate.
Center the top stud in the hat support and tighten the nut/ washer,
I put paint lines to indicate center for the stud once the washer is in place,
then tighten the nut with an impact gun.
NOTE fit the lower mount to the cross member first to align the mount to the cross member,
leave this nut snug to loose so it can be moved a bit for installing.
Tighten these nutz after the engine weight is on the mount

 08-27-2022, 04:36 AM