When you click on links to various merchants on this site and make a purchase, this can result in this site earning a commission. Affiliate programs and affiliations include, but are not limited to, the eBay Partner Network.
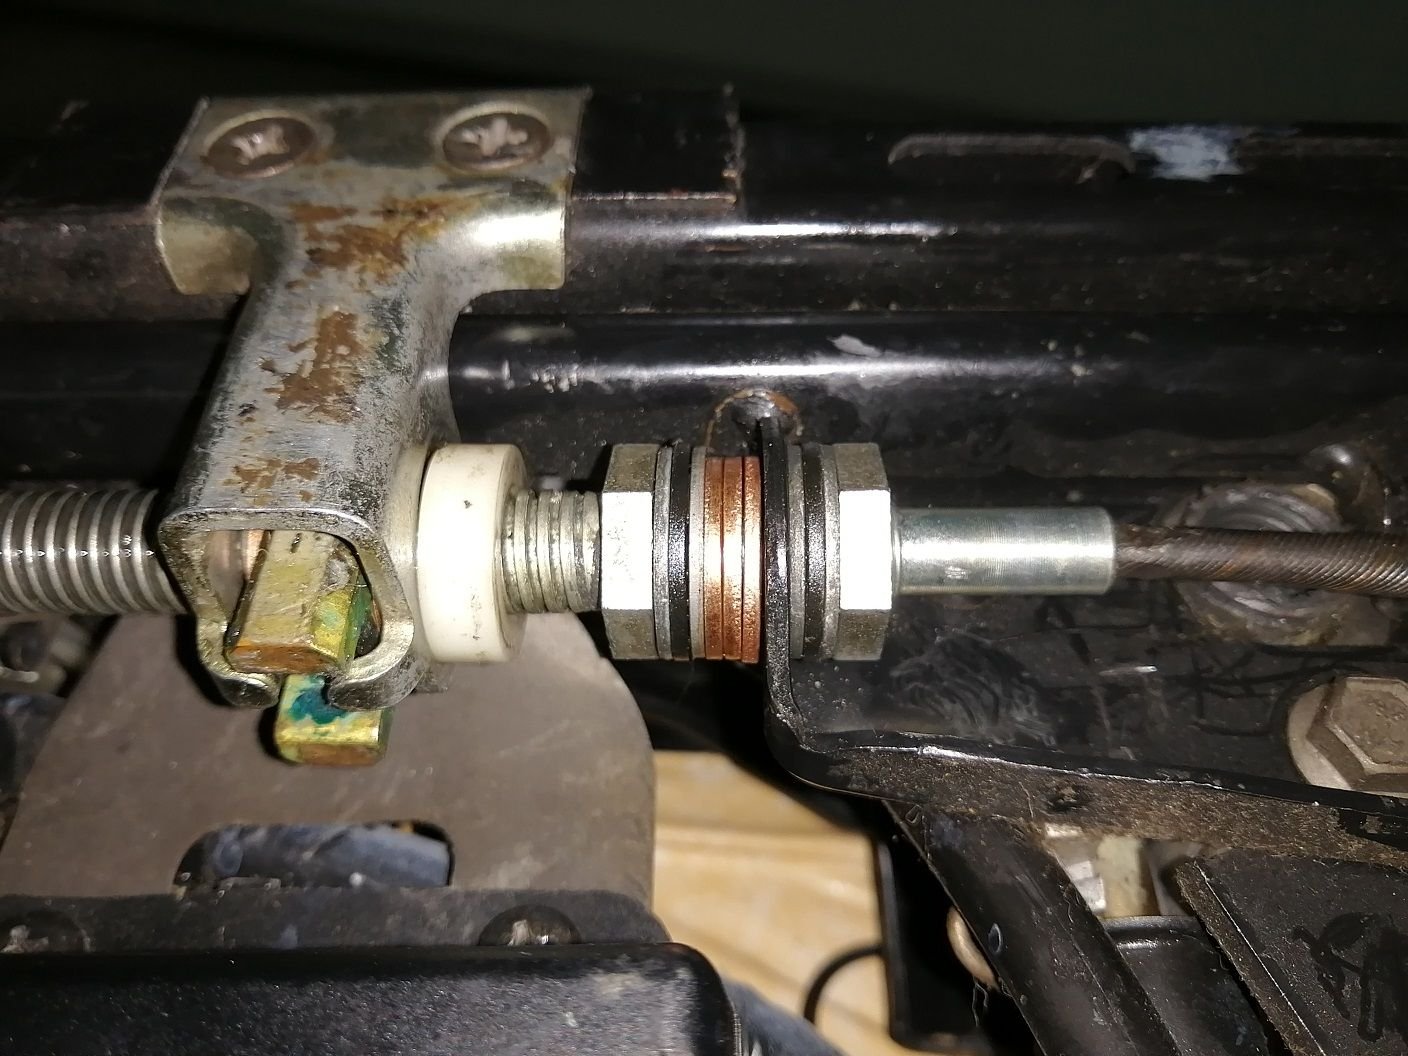
Those of us that have been around these cars for some time know full well that sooner or later the seats will start to rock back and forth as those dumbass plastic bushes in the mechanism fall apart. Had this happen years ago on my late S4 and managed to resolve most of the issue by fitting some copper washers in the captive pack that drives the worm screw back and forth.
Now I have just had my seats re-trimmed with new leather etc and very pleased with the result. Now I want to resolve the above issue on my current seats. Scratching around my parts bins I could not find my pack of copper washers so figured i might get away with using a zip tie of appropriate width and that seems as though it may work. Unfortunately it seems there is another problem area and that is where the bracket mounts over the shaft- that is also rocking back and forth- I assume there must have another silly plastic bush in there that has taken a dump. Scratching my head trying to figure a work around for that- wondered if any of you chaps might have had a brain wave and figured a work around for this.
Might the kind of thing that a 3D printer can help resolve. Will post a couple of pics of the hot spots a bit later.
I am at the point where I need to remove those two phillips screws. Had hoped there might be a way to avoid that but clearly not the case. Looks as though I am on the right track.
If you have a GOOD #3 Phillips bit/screwdriver that you can really keep pressure on so it stays seated in the screw and can be turned with a wrench and someone with some mASS to hold the seat steady you can likely break the thread sealant loose. The impact screwdriver makes quick work of it when flying solo.
If you have a GOOD #3 Phillips bit/screwdriver that you can really keep pressure on so it stays seated in the screw and can be turned with a wrench and someone with some mASS to hold the seat steady you can likely break the thread sealant loose. The impact screwdriver makes quick work of it when flying solo.
Mike,
On the passenger seat [that I am working first in case I screw up something] on one side the screws almost walked out themselves! The other side I could not get with my powered driver so expect a bit of a fight.
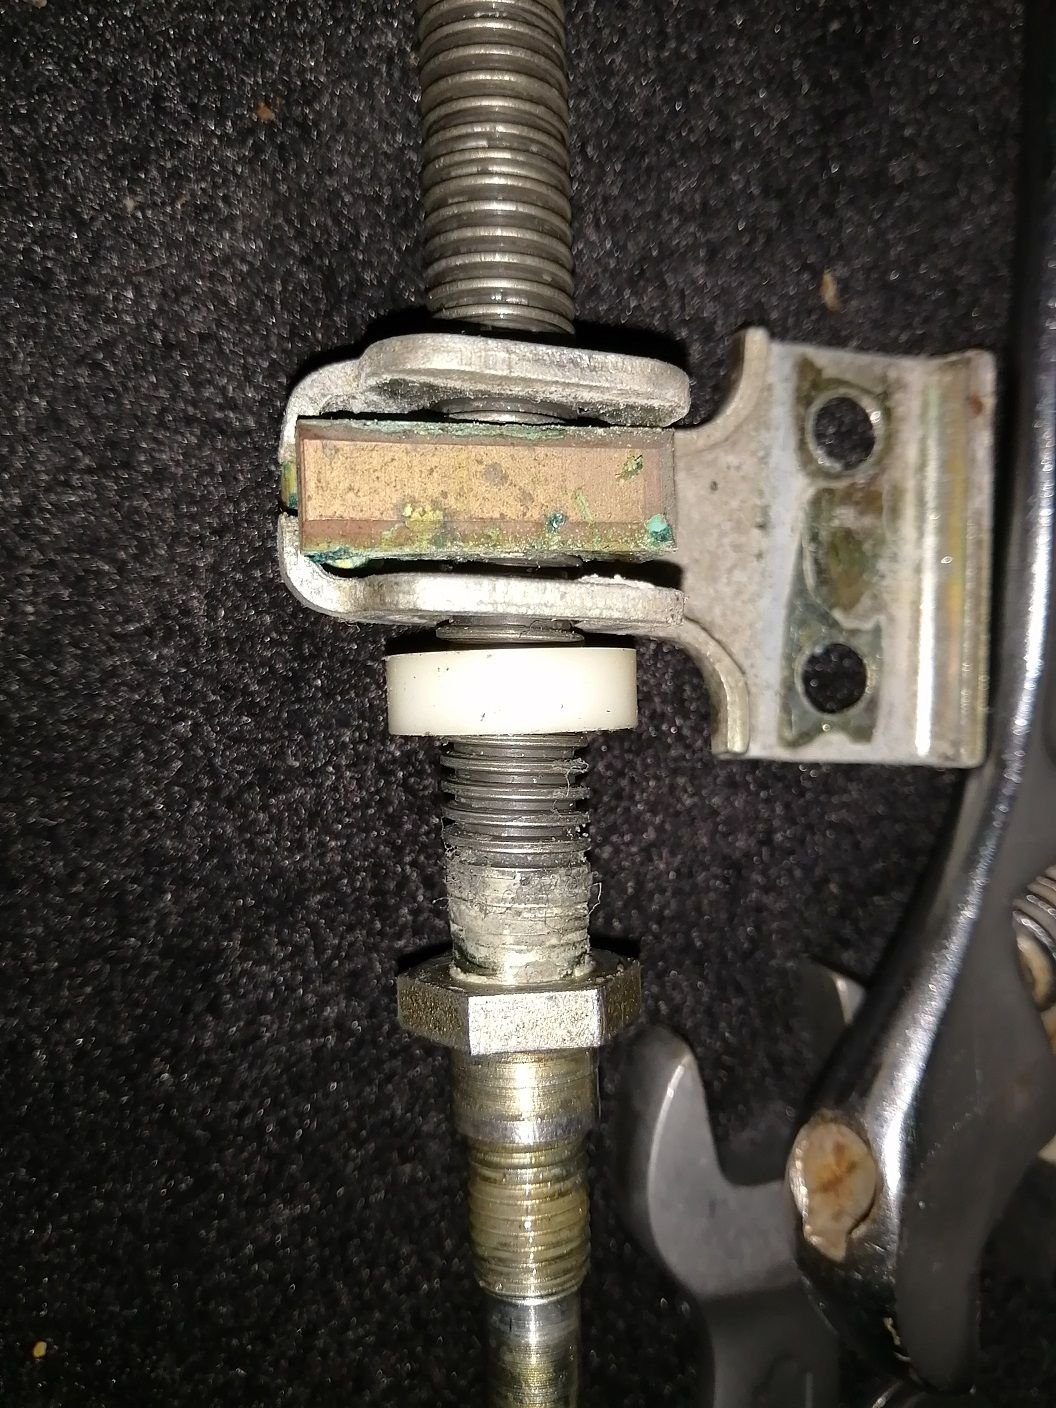
Why on earth simple spares are not available for such is beyond me- call to Roger! Now I have that bracket undone it should not be too difficult to find something to wedge in there.
This is another guaranteed failure point on every 928 and relatively simple to get at and ultimately fix- that rocking is something I find incredibly irritating.
Great write up- baffled as to how I missed it when searching [I tend to use Google search using hopefully appropriate words and add "Rennlist"- sems to work way better than the Rennlist search engine].
So today I had a crack at the passenger seat and first thing I did was purchase a lump hammer to hit the impact driver - worked a treat and the set screws were out in a jiff.
First thing I noticed today having read Mike's write up was that the worm drive screw has no support at the rear end- another victim of the degradation process I suppose- that being said it does not seem to need such but I will tke a look tomorrow to see if I can come up with some kind of support/stabilizer.
I then went to my local friendly hardware shop and they managed to dig out some copper washers internal diameter 14mm, external diameter 19mm and 1.5mm thick. The drive bracket needs 1 washer either side of the drive bolt [see the first photo below] and the anchor point needed three washers per side to take out the slack. With the assembly complete there is a tiny amount of play but nothing compared to what it was. I did not feel a need to compress the assembly to crimp it some with the washer thickness I used.
The only other point of note was that the drive worms not too surprisingly are such that one side is right hand threaded and the other side is left hand threaded. The overall details are covered in Mike's excellent thread linked by John in post No2 so no point in going over the details again.
Final assembly with copper washer installed in the two locations The drive bolt assembly showing the gap causing some of the rocking motion- this now has a washer either side of the drive nut.
Today I fitted the seats back into the 928 and driver's side no problem but as I went to position the passenger side seat it transpired that the pivot release mechanism did not work. Felt as though when I pulled one side up the other side went down as if on a pivot- whether or not it should do that I have no clue.
Hopefully one of you bright chaps may be able to advise me as to what the problem might be and what needs to be done to resolve it. If the new cover has to come off again so be it but hopefully not.
Insights and perhaps a photo of the likely offending item appreciated
Solved the problem with the seat release- all it needed was to stroke the seat upright position motors from full back to full upright and then the release mechanism lever seemed to engage as per normal so problem solved!
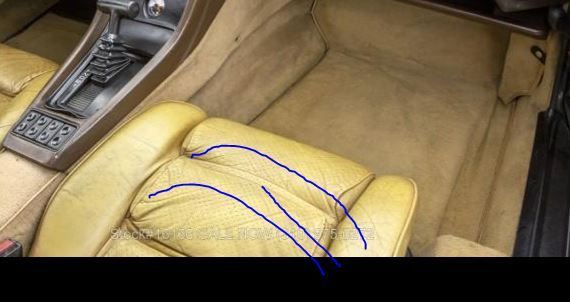
(please note actual picture - for illustrative purposes only)
Anyone know how to fix this common bulging in the seat?
I just had this entire section replaced with new leather by a local car upholsterer.
And within 1 year this bulge appeared.
Did a hog ring/clip come undone?
I can easily remove the seat but I"ve never pulled apart the seat and the parts diagrams aren't clear how to get to this section.
it looks like its under a much thicker rubber pad. .
Last edited by 928Collector; 10-08-2024 at 12:04 PM.


 02-12-2022 | 10:42 AM