When you click on links to various merchants on this site and make a purchase, this can result in this site earning a commission. Affiliate programs and affiliations include, but are not limited to, the eBay Partner Network.
Okay, several weeks ago, I got the shock and suspension reassembled. I stopped there and I haven't gotten back out to the garage because it's just been too damn cold. But, the temps have been in the 40s for the last couple days, so I had a chance to get back out.
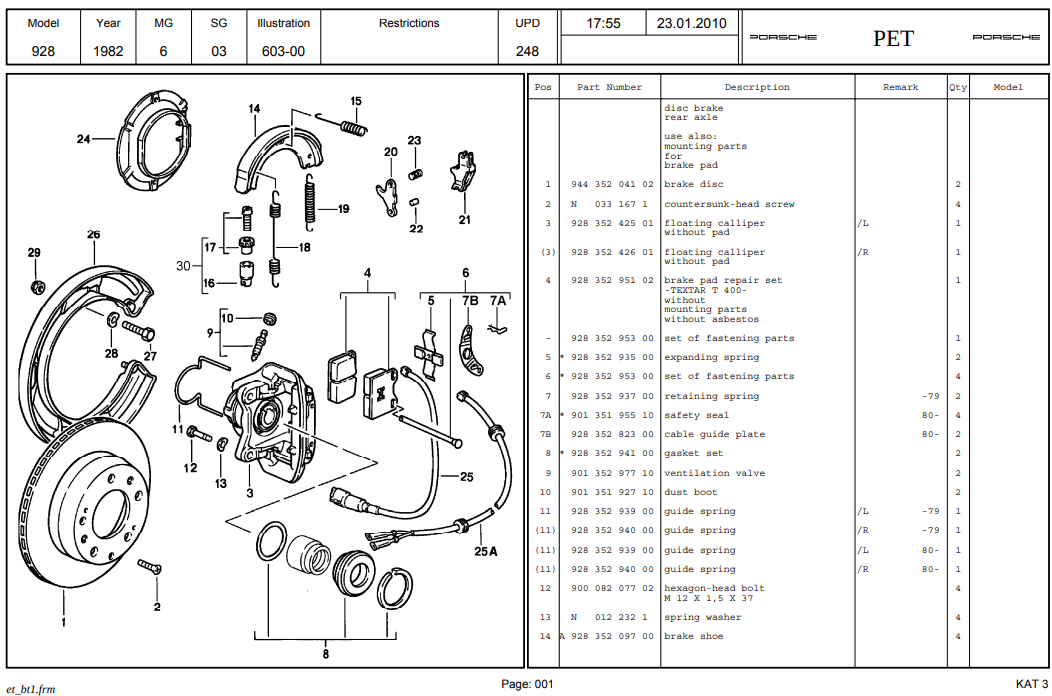
All that's left is to put the brake back together, and I'm having a hell of a time. I can't get the floating caliper (3) over the guide spring (11). The best idea I had was to squeeze the spring down with a couple pairs of vice grips, but that hasn't quite worked yet. Rather than keeping at a bad method, I thought I ask if there was a trick to getting it back together.
Okay, I poked around long enough to find a rebuild pictorial (by Dwayne of course!), and he used C-clamps. That worked for me as well.
Of course, now we're on to the next (self-induced) problem: When I was pulling the brake disc, if was jammed on there. It wouldn't come off at all. I thought maybe it was rusted, so I got out my 3-jaw puller and got it off (dammit!). It was only then that I remembered that the parking brake was on! Oh, I am such an idiot. I released the brake and took a look and everything seemed okay at first glance, but just now when I got everything back together, there was a horrible scraping noise when the wheel turned. I pulled the caliper and disc back off and found the I'd broken the hook on the lower parking brake pad retaining spring. so it was hitting the backs of the wheel bolts.
I have a new spring on order from Roger. I was hoping to get the one wheel buttoned up before starting on the next one, but we're in the middle of some decent weather, so I guess I'll start on the other rear wheel.
Let's see what else I can break.
Last edited by Shawn Stanford; 02-12-2022 at 09:03 AM.
The spring finally came in on Friday, just after I left for a weekend in DC. I got back too late last night to do anything with it, but it's lovely here today, so I'm out in the garage.
It took some twisting and pressing and crawling under the car, but I finally figure out how to position the spring so it would go into the hole in the correct orientation. When I did, the hook popped over the retaining 'bump', and everything went back together in about 15 minutes.
Make sure to adjust emergency brake shoes on each wheel should have about three clicks on the emergency brake handle the other side spin each adjuster till the wheel one or till the rotor want to turn them back it off three or four clicks that�ll give you about three clicks on the handle as far as the battery goes it�s always a smart idea to disconnect the battery until you�re ready to use the car have a good day
Okay, so today I went out to do the front shock on the left side. I watched a video or two to see how other people had done it, and one of the guys said, "This is a lot harder than the rear shock."
Honestly it was super easy. I separated the lower suspension arm by undoing the alignment bolts, which freed the spindle pretty well. I pulled out the through-bolt on the bottom of the shock, which also freed the anti-roll bar. I removed the three bolts at the top of the shock and freed the bottom from the mount in the lower suspension arm. Then I decided to remove the lower arm entirely, which is only 4 more bolts. Then I loosened, but didn't remove, the two bolts holding the upper control arm to the car. This gave me enough clearance to drop the shock and spring assembly straight down.
I swapped the new Koni shock in (adjusting it to half-stiff) and reassembly was the reverse of assembly. Full disclosure: I did not know they alignment bolts were alignment bolts until I saw the eccentric washers drop out. But there was enough dirt and enough of a clean spot on the lower suspension so that I could see where it needed to go when I put it back together.
I took it out for a couple mile turn around my town, including some spring pot holes and railroad tracks, and everything is tight, and there's no more groaning and diving.
Time to do the left side. I'm going to Vermont next week, so I'm not sure I'll get all the way done, but I think I can do the remaining front in about an hour to an hour and a half.
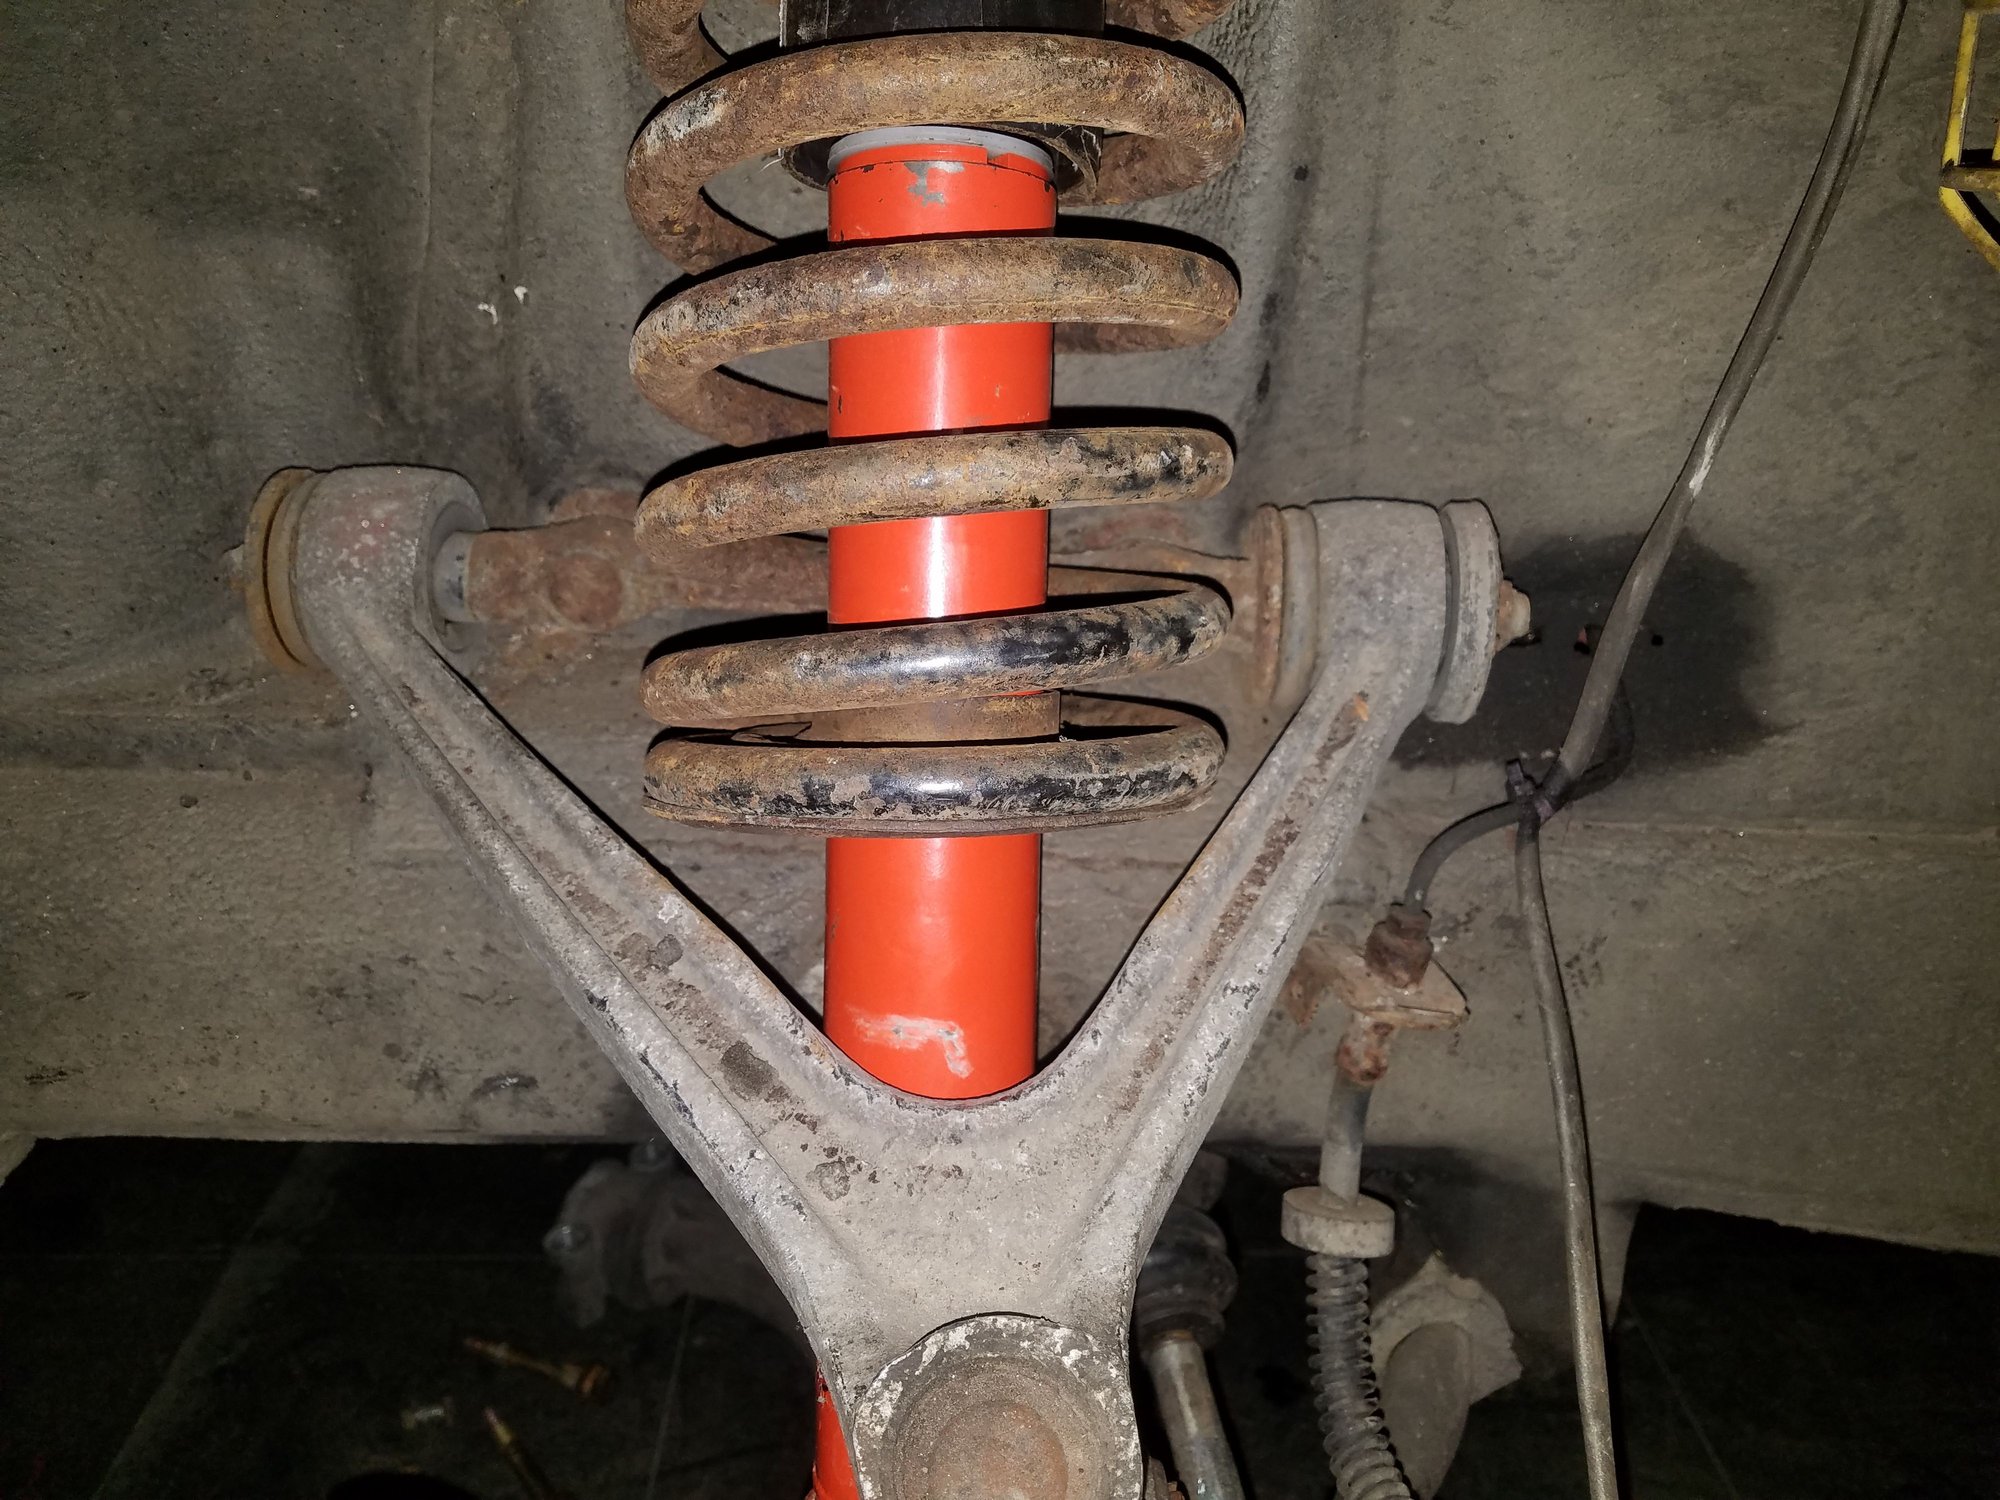
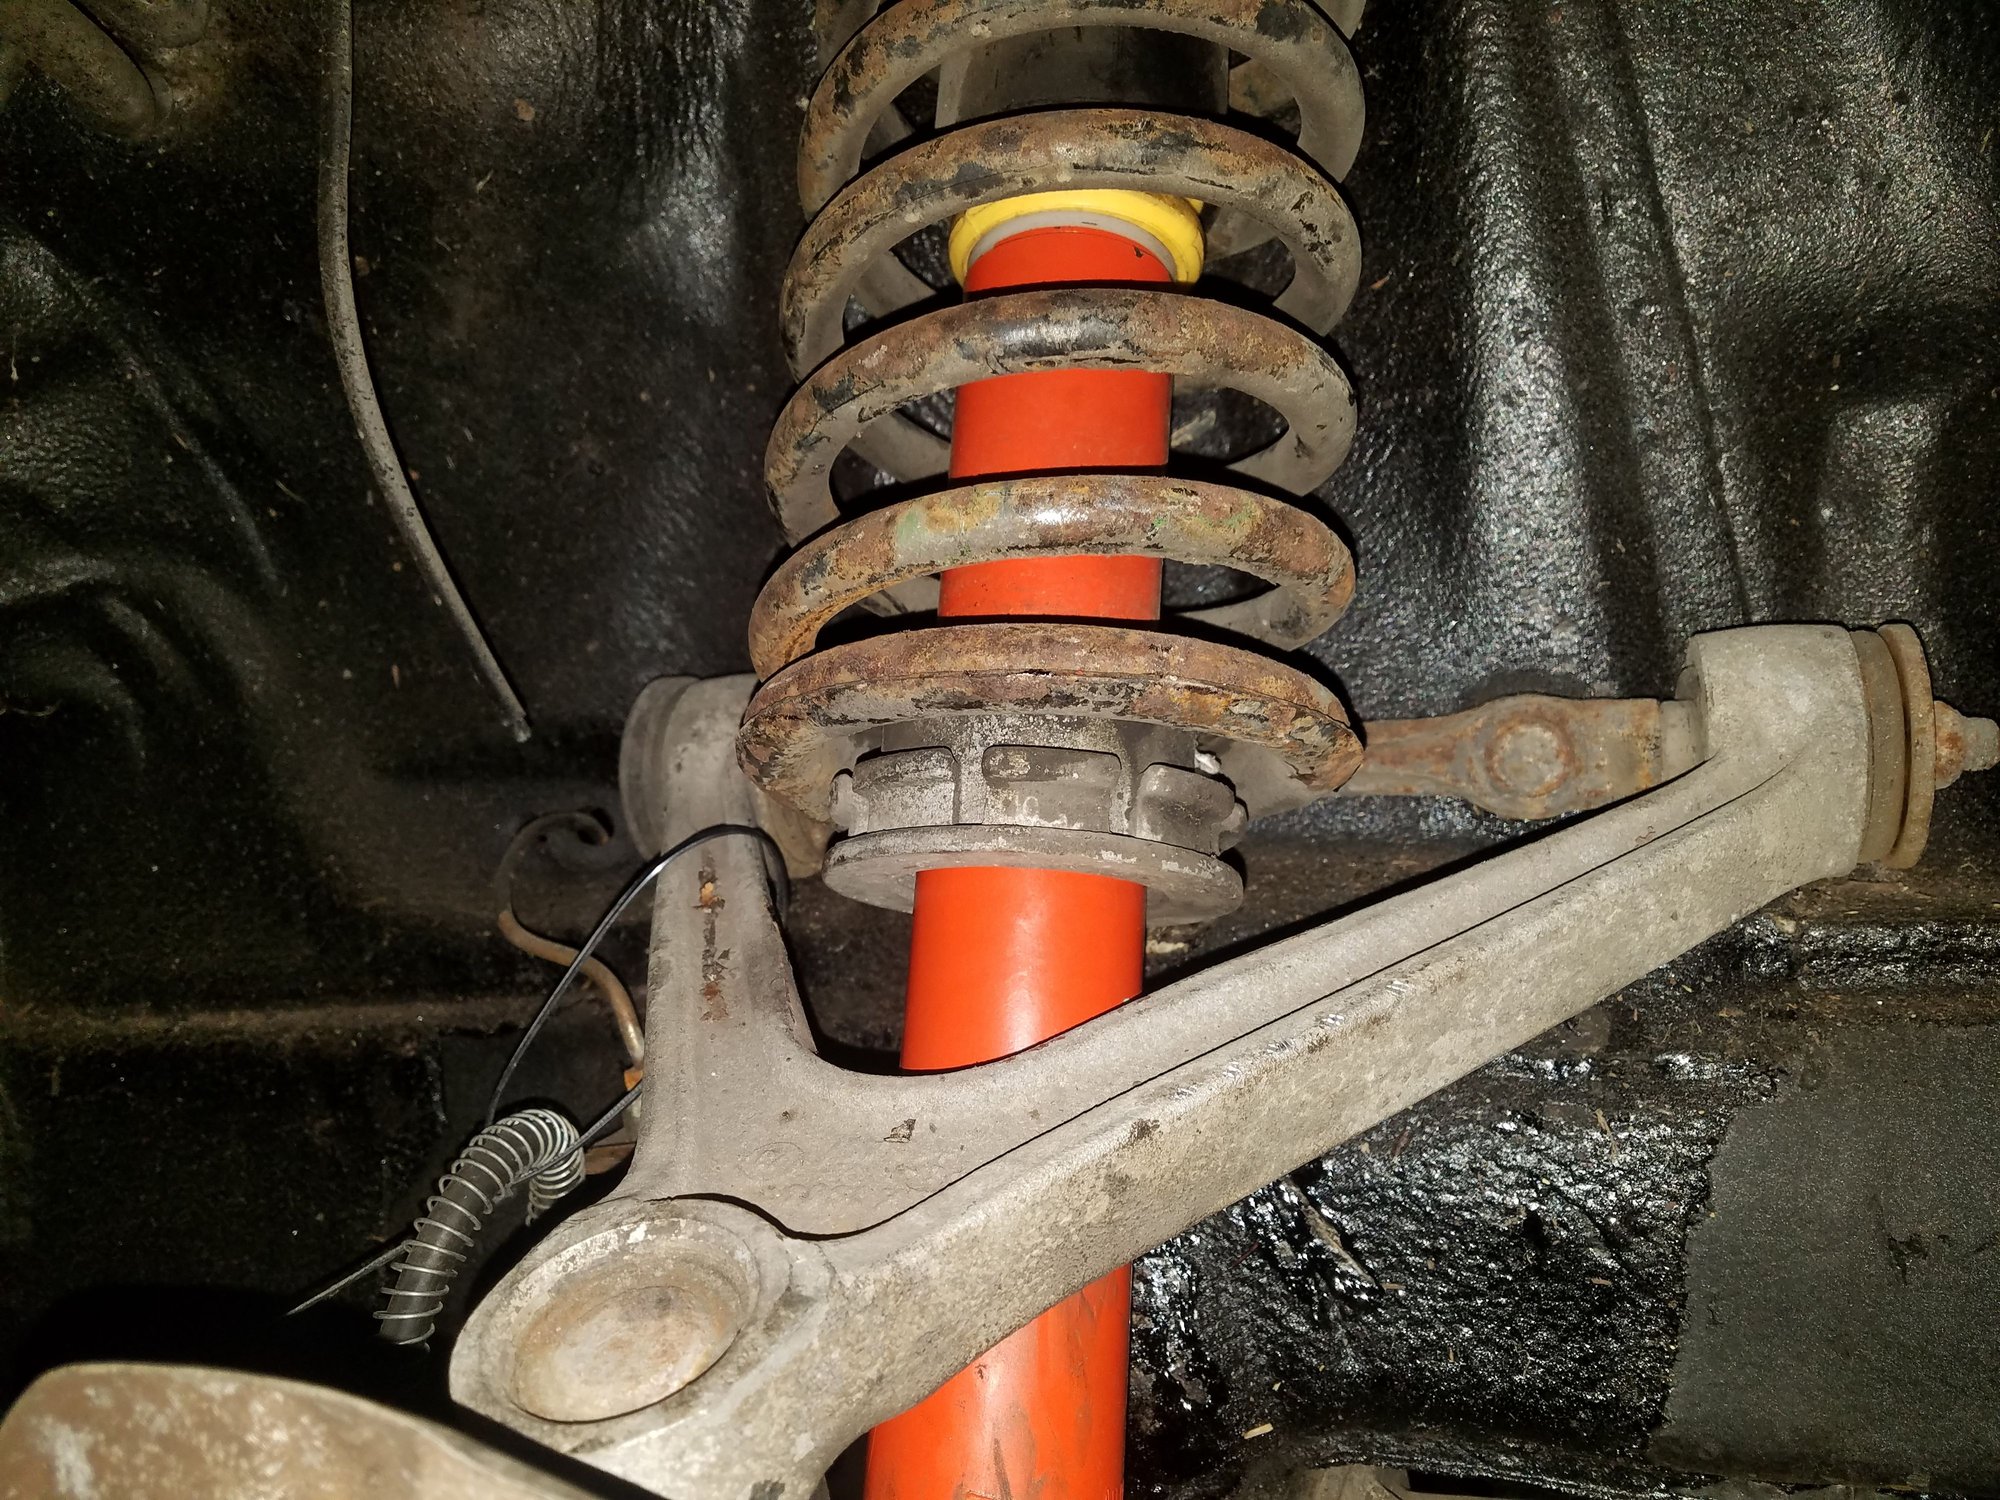
Okay, hell, I did the left front (twice, but I'll explain later), and now I see that there's some kind of extra collar on one side. The wheel assemblies came from two different cars, so: Okay. different shocks setups.
Is this going to make a difference in ride? I don't see why it would, since the weight of the car should keep the spring compressed anyway.
Last edited by Shawn Stanford; 03-21-2022 at 06:19 PM.
So, yeah, the right front corner is an inch higher than the left. The car doesn't have any odd handling characteristics that I've noticed, but I've only had it up to 45 or so. I guess at some point I'll pull the shock out and remove the collar, but I'm not sure when. Of course, I can pull the front shock out of a 928 in about 15 minutes now.
I've gotten more than my share of practice, since the first time I put the left front shock in, I actually put in the wrong shock. I mean, I thought it looked kind of weird going in, but I was trying to get done. I got everything back together and tightened up and dropped the car off the QuickJack and the left front went way down. I put the car back up and got the wheel of and... Son of a bitch.
But the upshot is that, as I said, I can now pull out a front shock in 15 minutes.
My method is to remove the bolt holding the shock to the lower control arm (which also holds the sway bar link), then the two alignment adjustment bolts under the lower arm. At this point, the hub just swings up and out of the way. I then remove the four bolts holding the lower arm and remove it. Then the three bolts at the top of the shock. Finally, I loosen the two upper control arm bolts about half way (22mm socket on my longest ratchet). Then, I lift the wheel carrier (I use a floor jack) until the upper control arm is at a 90-degree angle from the inner wheel well. This gives room for the spring to fit through the upper control arm with some wiggling and twisting - and maybe a little screwdriver work - and drop straight down. Installation is the reverse, including lifting the wheel hub and levering with a screwdriver. The hardest parts of getting everything back together (other than working the spring through the upper control arm) is getting the studs through the holes at the top, and getting the lower control arm back in place.
After doing it three times, it gets pretty easy...
Last edited by Shawn Stanford; 03-22-2022 at 08:51 AM.


 01-14-2022, 10:30 PM