When you click on links to various merchants on this site and make a purchase, this can result in this site earning a commission. Affiliate programs and affiliations include, but are not limited to, the eBay Partner Network.
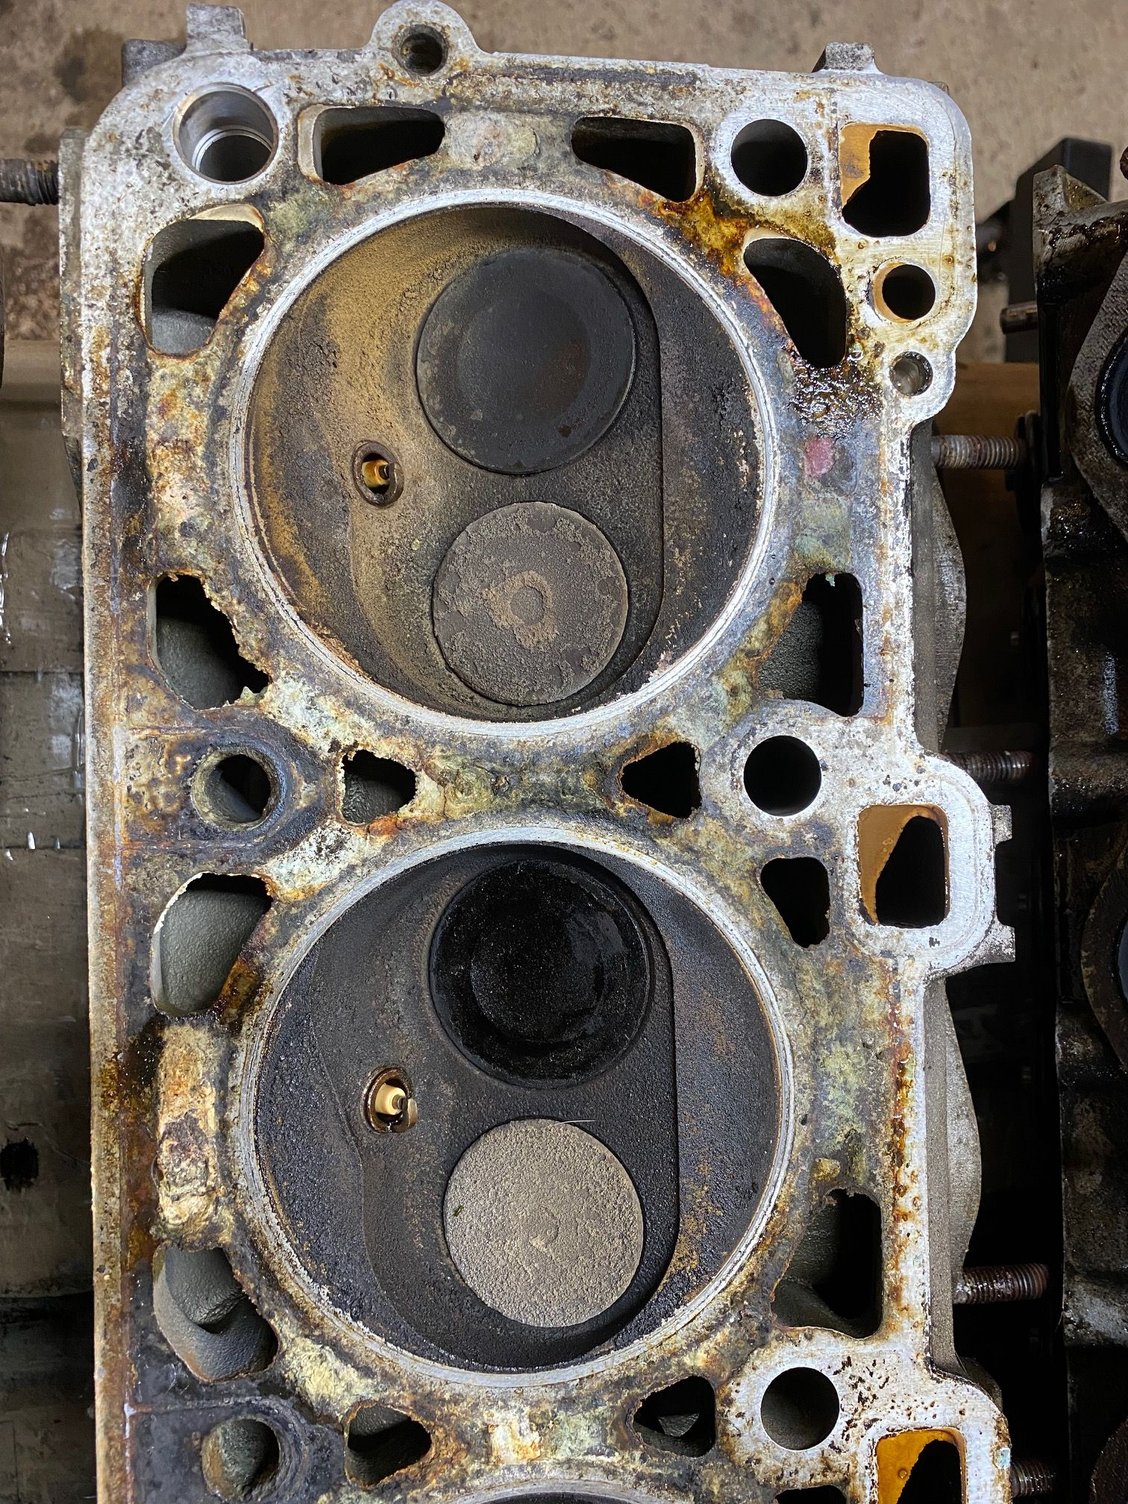
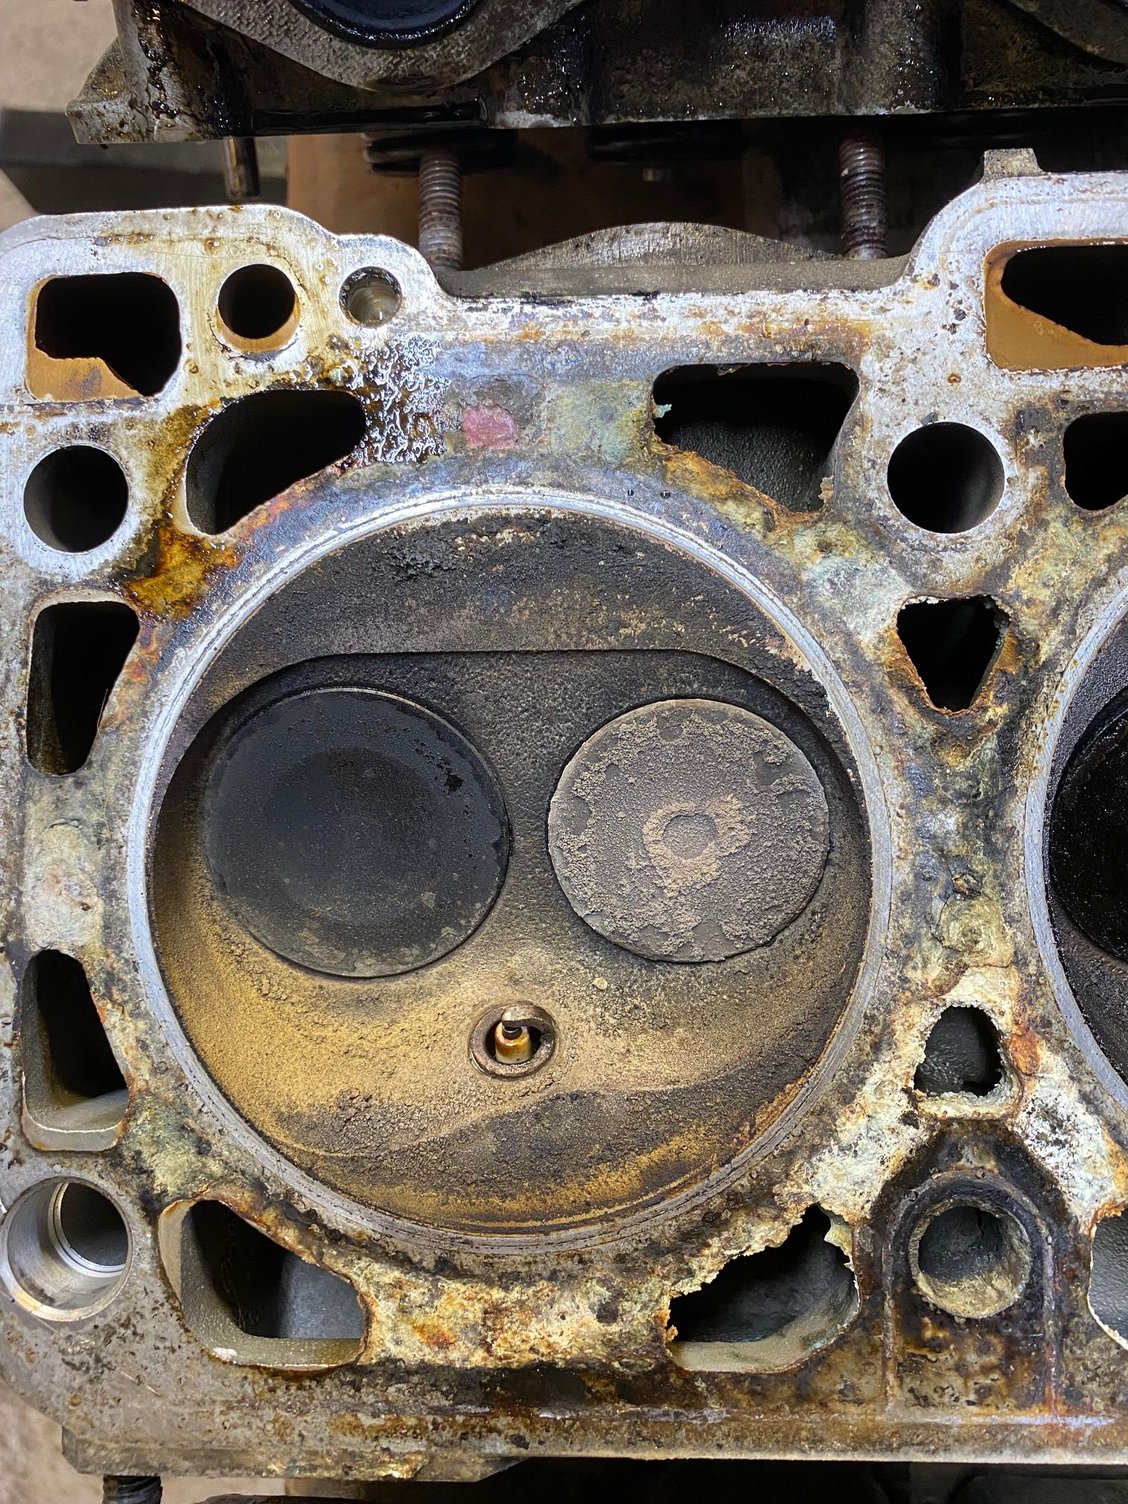
I'll try posting those pics again at higher res. The heads are exactly as they came off about 10 mins before I took the picture. I haven't touched them.
Now that we have some pics we can actually resolve you have my blessing to give Specsavers a miss today- I was going to post a pic of their location and telephone number but I thought that might be pushing the humour a tad!
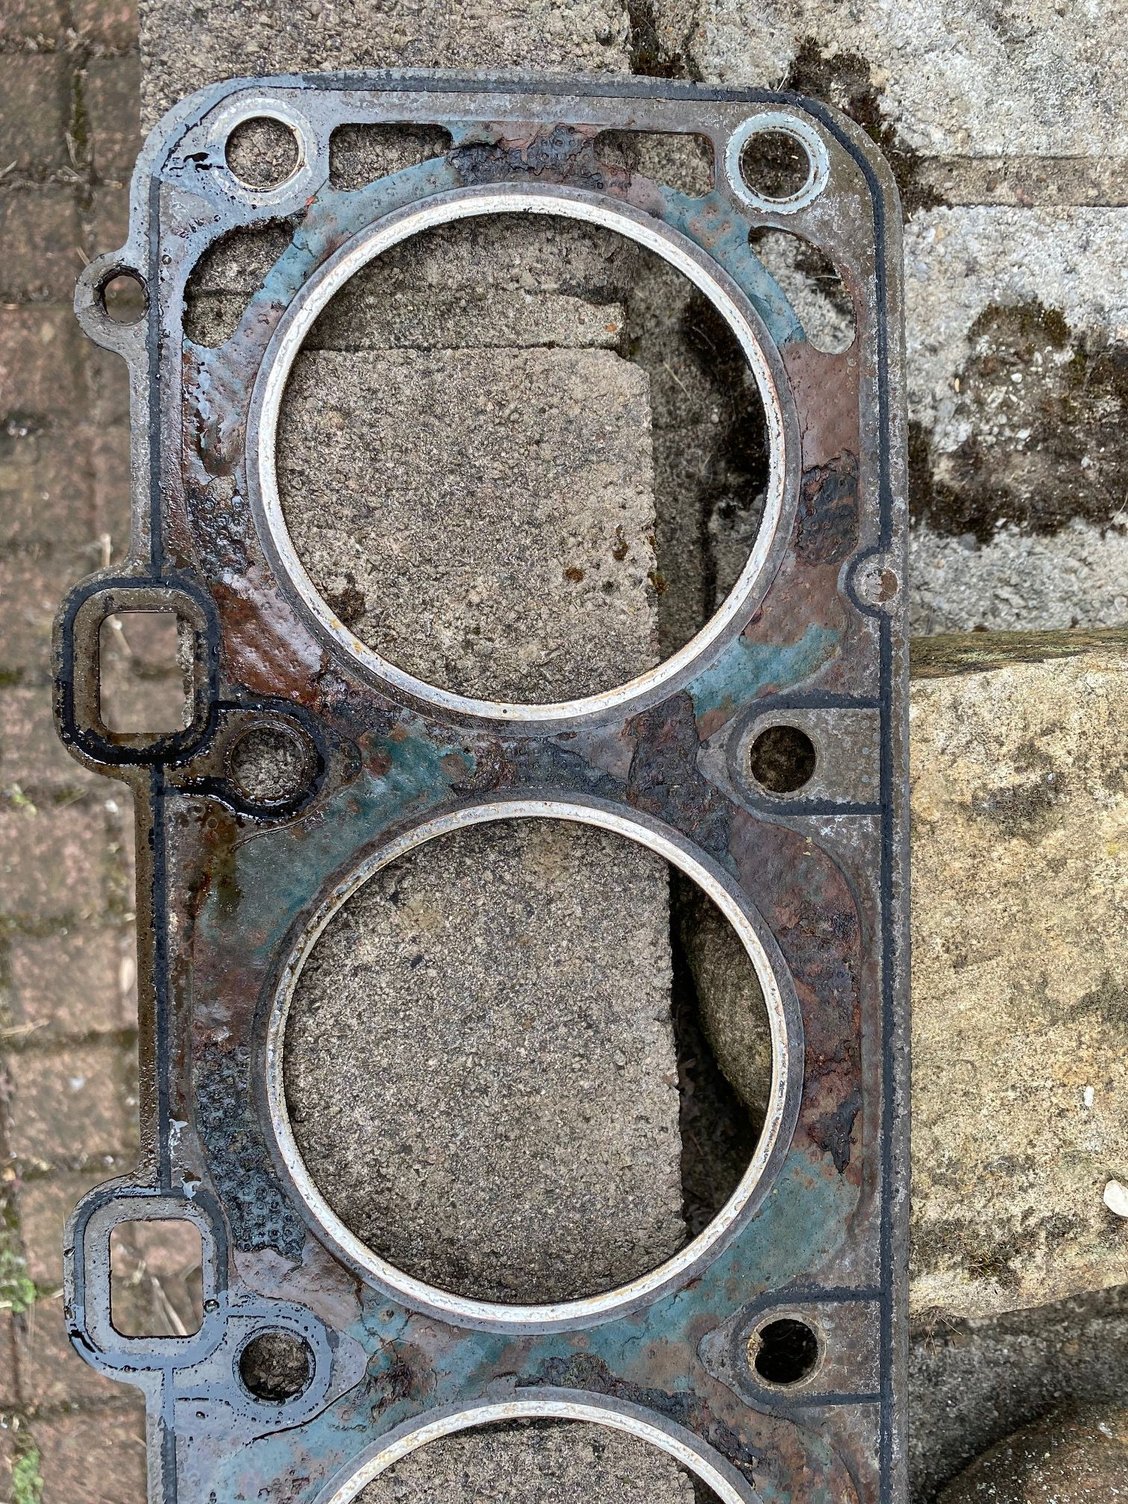
Your head gasket is in surprisingly good condition in and around the bounds of the photo. If you get chance and feel so inclined, it would be good to get some photos of each head and both sides of the gasket for both banks. Take the pics in good light preferably with a white background- considering the latest photo posts they will probably be very good resolution.
At the moment I cannot relate cylinder number to the pics posted but i presume your focus is on cylinder No4?
Whatever cylinder it is the staining on the machined head surface suggests that degraded coolant had penetrated the fibrous part of the gasket sealing the concentric circle outboard of the fire-ring circle. At the moment I cannot see any obvious signs of fire ring failed on the head gasket surfaces but the dis-colouration on the combustion chamber needs to be explained. I have no clue what tha tis but hopefully our friends Stateside may have some opinions when they wake up.
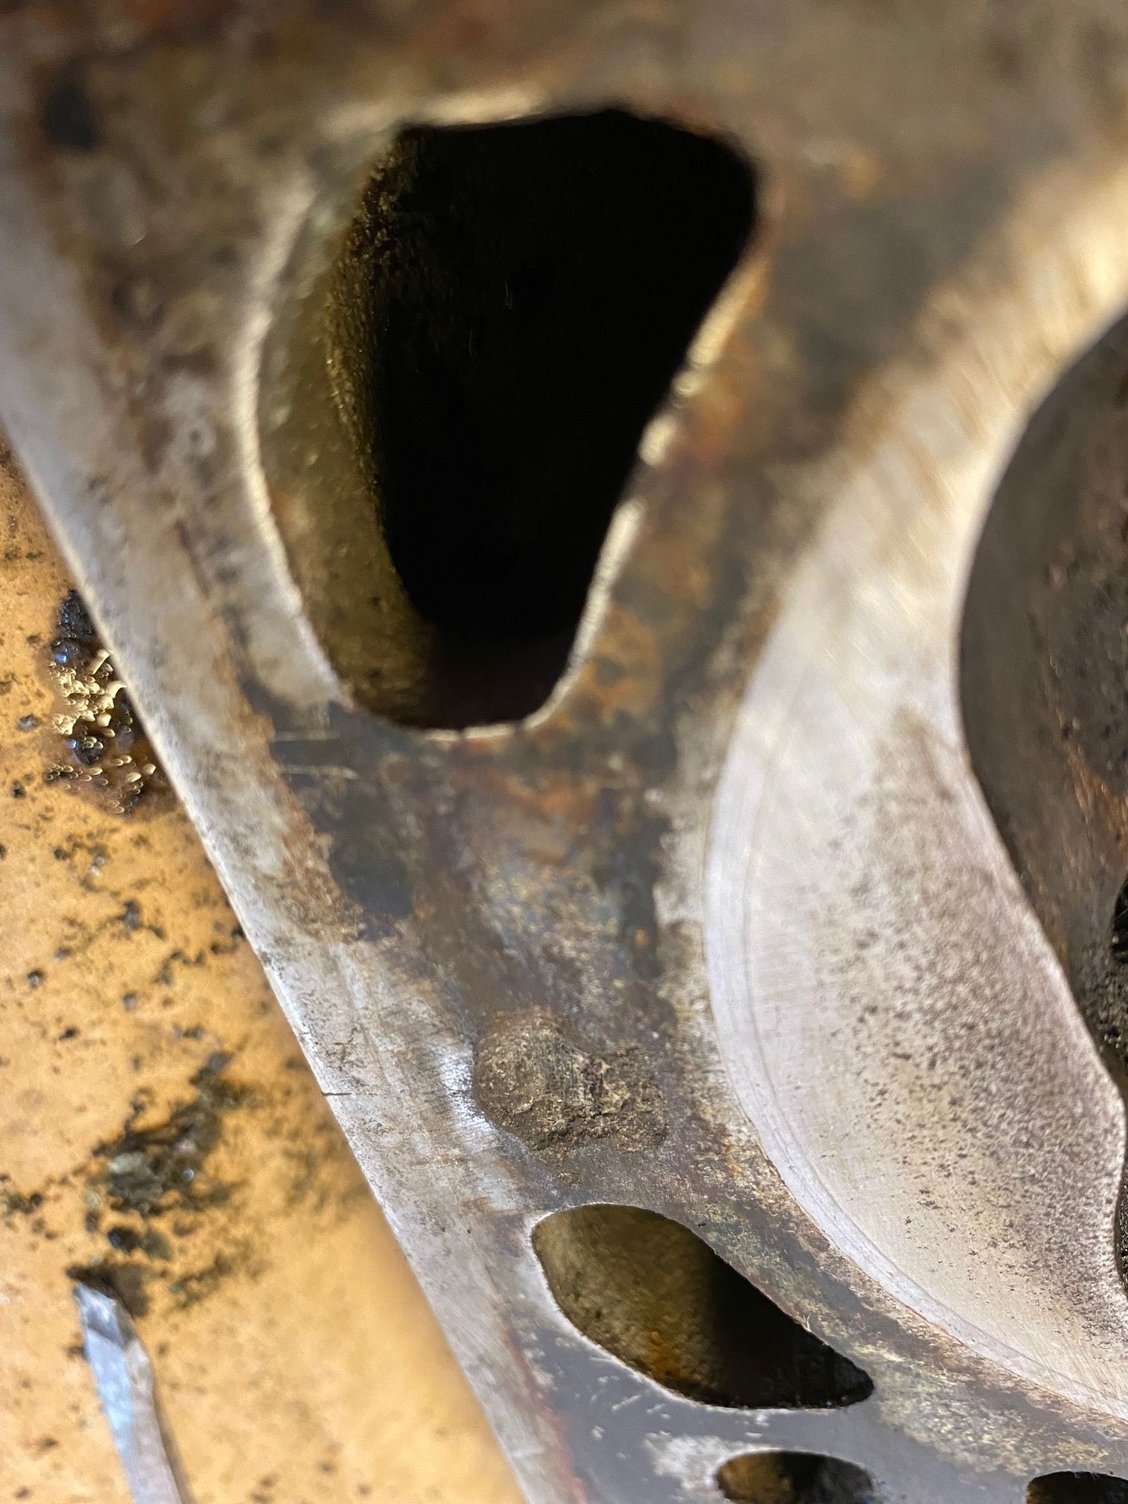
Well this might settle the "are they going to the machine shop or not?" argument. There's definitely some damage visible after a 10 minute clean. It's not the easiest thing to photograph but that's an area a few mm across and maybe 0.5mm deep into the head surface...
Bear in mind that Cylinder 4 had some SeaFoam in it for a couple of days so the staining could just be that. Cylinder 7 was also low (150psi vs. 180ish on all others except 110 on 4)
Last edited by thepurpleblob; 09-05-2021 at 09:01 AM.
Well this might settle the "are they going to the machine shop or not?" argument. There's definitely some damage visible after a 10 minute clean. It's not the easiest thing to photograph but that's an area a few mm across and maybe 0.5mm deep into the head surface...
Bear in mind that Cylinder 4 had some SeaFoam in it for a couple of days so the staining could just be that. Cylinder 7 was also low (150psi vs. 180ish on all others except 110 on 4)
A classic example of pitting corrosion- look carefully and you can see the little holes- if you cannot see them off to Specsavers with you right now!
Pitting corrosion in a flanged joint = crevice corrosion! I am sure there will be more!
Any update on the condition of the corroded heads yet?
Whereas the heads can be skimmed the intent of this operation is to recover from warpage not golf course type divots! Minor corrosion can be taken out by skimming but the type of thing we are seeing ominously consistently these days tends to be deeper in places than the 0.3mm or whatever it is that is available.
Presumably you have yet to define a problem that might explain your perceived misfire this thread is centred on?
Did you get any sugggestions regarding that staining on the piston?
Progress is slow due to work stuff. I hope to get them down the machine shop early next week to see what they can do.
I'm where I am due to uneven compression readings. I hope to resolve that - and some oil leaks. If that gets the uneven running sorted then great. I'm trying to fix the problems I can see.
Some of the engine wiring is very rough so I'm going to replace that while I'm in there.
The bits that do not pass electricity or have the insulation missing are the wires that needs replacing if that helps any
Yeh - bizarrely named "Junior Timer" connectors. They're easy to get in the UK.
The only thing that's hard to get (or at least at a sensible price) is the 14-pin connector.
Be careful- there is a Powertimer connector spec and there is a Junior Powertimer connector spec- ours is the latter. There should be no need to replace the 14 pin connector- just heat the pins to desolder the cable and re-use them noting that terminal 14- the wire to the starter solenoid uses a bigger termnal to accomodate the 4mm2 cable.
I understand the 14 pin connector, should you need one, is relatively easy to get hold of


 09-05-2021, 07:50 AM