When you click on links to various merchants on this site and make a purchase, this can result in this site earning a commission. Affiliate programs and affiliations include, but are not limited to, the eBay Partner Network.
Thankfully my 1978 starts happily every time I turn the key. Problem now is fuel pump amp draw. I noticed a hot smell and some haze coming from the fuse block in the passenger footwell. The fuel pump fuse was smoldering but not burning through. I made a fused bypass and measured amp draw. About 30 amps but the 25 amp fuse didn�t pop. That explained the smoldering. This car has two new fuel pumps from Roger. One under the tank and one in the passenger rear wheel well. Tank has been removed and cleaned. In tank screen has been replaced. In line fuel filter has been replaced. Rear fuel pump is drawing 20 amps and wheel well fuel pump is drawing a more reasonable 9 amps.
Any suggestions on how to approach this rear fuel pump problem? I'm wondering if I neglected to do something on what I thought was a simple fuel pump install.
How did you measure the 30A? I'd suspect that measurement at first... The smoldering but not blowing fuse is more likely due to poor contact between the fuse and the fuse holder than actual over current IMO.
What was the source of the fuses? are they a reputable brand? ceramic or plastic? Have you ever cleaned the fuse holders at the contact rings? Are the fuel pumps original, and are they relatively quiet in operation ?
My car is CIS, but 83 with a single pump. It spent 10 years in Saudi and operated fine until grit got into the pump. I also found later that the pump was of S4 (LH-jet) spec, but using an in line ammeter (as below) it drew 7A. After blowing 2 pump relays I saw actual sparks at the pump fuse . In response I developed some adaptors that allowed use of blade fuses (separate thread here) and have had no problems since. Two observations - I doubt that 2 pumps were ever necessary for NORMAL road use - perhaps in racing, and/or hot and high conditions, maybe. Secondly, seeing as an S4 pump happily drove my CIS system for years ( needing 75psi) despite being designed to drive ~45psi LH systems, almost any Bosch pump that will fit the existing connections should work.
Ammeter I use https://www.jaycar.com.au/auto-current-tester/p/QP2251 Listed as not available, but you get the idea. I add an inline fuse holder with bared ends to connect to bullet fuse connections. Battery in mine has lasted a VERY long time.
I suspect in your case there is wiring damage somewhere, or the fuse connections are bad. Going over all my fuse connectors with emery and Deoxit helped many circuits. If you look carefully at your CEB you will see that the fuse connectors will pull off , which makes cleaning easier.
See pics at https://rennlist.com/forums/928-forum/178665-convert-early-fuse-board-to-blade-sockets-5.html
Still only the one solder break/dry joint occurrence.
jp 83 Euro S AT 57k
I took the measurements with a clamp meter that measured DC amps. At the fuse block the circuit measured about 30A. At the rear pump it measured about 20 A and at the passenger rear wheel well pump it measured about 9 A. Those amp measurements seem to support each other. Both of the pumps are brand new and are the appropriate Bosch pumps. The existing fuses are old plastic ones. I just got a bunch of ceramic ones and will go through and replace fuses and clean all the contacts. I don't think it will fix the 20 Amp measurement at that rear fuel pump but I think it is certainly overdue. My Euro 78 parts car seems to have come with only one fuel pump. There's no evidence of an in tank pump and no break in the line to allow for one in the rear wheel well. I'm sure this one could run on only one, I'm just trying to keep it correct. I might try and put the old rear fuel pump in and see what the amp numbers are. I was just wondering if anyone had ideas for things that would cause the large amp draw in a new pump and a just cleaned fuel tank. Thanks to you both!
The 20A is close to 3 times what mine drew, so there is something wrong there. Try your old pump across 12V, but only run it a few seconds dry. A just cleaned tank might have dislodged some debris that is now loading the pump - try briefly reversing the polarity - thats how I got an obstruction out of mine when it stalled on grit. Are you sure the pump is working?
jp 83 Euro S AT 57k
I'd start with Alan's fuse service suggestion. Also look into proper grounding. The location of both FP grounds is always suspect to terminal corrosion. They're located behind the right rear interior quarter panel, near the tail. You could go after those grounds directly (more than likely need cleaning), or bridge both FP grounds to battery ground (for troubleshooting only).
Thanks for all the suggestions. I'll start with the fuse and ground cleaning. I'm sure it needs that anyway. I may throw together some sort of rig to test the fuel pump independent of the car. Happy holidays to you all.
The WSM gives pressure and volume delivery specs for the pumps - a CIS pump should give 65-75psi at the distributor, and around 1350cc/30 secs volume (varies a bit with MY) - relatively easy to test- disconnect the return line over the RHS cam housing, fit a hose to the connection, run to a container, bridge the pump relay. For pump testing I get several feet of 2 core flex, fit 1/4" male spade connectors at one end and a momentary switch at the other; remove pump relay, fit the spade connectors into 30 & 87 sockets; length of wire will allow you to turn pump on/off from out front.
On fuses, pull the top contacts off the board (1/4" spade females), clean the fuse seat with something abrasive, apply deoxit, retension the arm, put deoxit on the 1/4" male spade, refit the removed part with some to-fro action to improve contact.
jp 83 Euro S AT 57k
I cleaned all the fuse contacts and put in all new fuses. I removed the rear quarter interior panel and cleaned off the ground point for the fuel pumps. All that was probably necessary anyway, but the problem wasn't clear until I took off the new fuel pump to check it again. It obviously got a bump, probably at some point in my "care", but it wasn't obvious until I took it off to have a look at it. I put the old fuel pump back on and no more large fuel pump amp draw. Thanks again for all of your suggestions and help. On to the brakes next!
No, I think it committed suicide off the workbench when I wasn't looking or something. I know it wasn't like that when I took it out of the box. I wish it had been something interesting like stunt driving or off roading or bridge jumping.
Now that the fuel delivery seems sorted, I bled the brakes and have taken it out for a few drives. Each drive reveals something new to work on.
First drive I started lowering the window and "CLUNK!" the regulator roller gave out and the window dropped. Fixed that.
Second drive, I stretched it a little more and went about 10 miles. Surface street and a little highway driving. Stopped for gas. Hey! My fuel sender fix worked! Stopped a second time to talk to a friend. Then, headed back to the shop ! indicator light started flashing intermittently. It wouldn't stay on and none of the other indicators came on to let me know what the ! referred to. It seemed to come on more when I was waiting on a light and go off when I got up to speed but the pattern wasn't totally regular. It was only about a mile back and ! was off by the time I got there. Radiator flush and cooling system update will be my very next project.
The switch on that is kind of touchy. I have to push my brake handle down sometimes to get the light to stay off.
I can see a situation that the parking brake switch is 'wiggling' enough to make the CWL flash like you describe.
Yes, the 'parking brake' light on the dash should come on. But it might be fast enough that you don't see it.
Or I could be totally out in left field (wouldn't be the first time).
I’m going to transition over to a new discussion on top end refresh because this topic title no longer applies but I would like to ask one last question about an issue that came up at the tail end of this thread. The blinking central warning light. When I last drove I mentioned that it came on intermittently in the last mile or so from my shop. It would blink but no other lights came on to let me know what to do. I decided to flush and freshen up the coolant system just in case it was overheating and I didn’t know it. That has lead me further to a top end refresh, but I have a question about that central warning system. Here’s the background:
When the central warning light came on while driving, it was blinking. The manual says that when it blinks it is important and will require you to disconnect the battery to reset. But it came on and off intermittently in that last mile. Even though it was blinking, I could not see any other warning light on to indicate the problem.
All of the pod warning lights come on brightly on startup, the warning lights on the central console do not come on. I have yet to track down why on that.
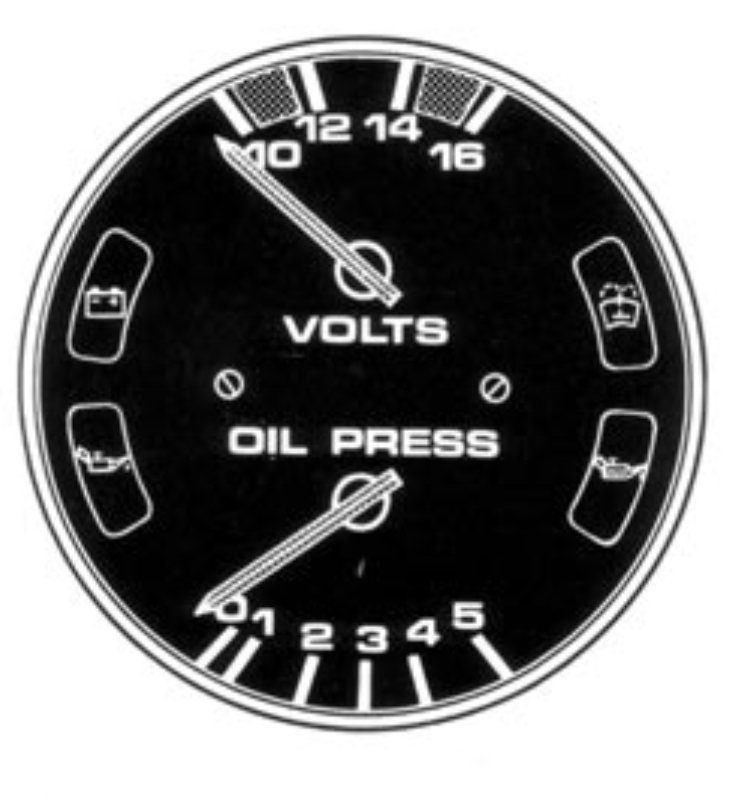
While flushing out the cooling system with distilled water, I would let it warm up each time I refilled it. Once, the blinking light came on again. This time the car was inside and I could see that the oil level warning light and the alternator warning light were on - but just barely. They were not on brightly like they are when I turn the key on. This probably explains why I couldn’t see any warning light when driving in the daylight.
I recently did an oil change. If anything, there is a bit too much oil in it. Oil pressure on start up and while driving looks healthy.
In the few times I have driven it, the voltmeter gauge has read about 12 and seemed to be dipping lower.
I’ve tested volts at battery resting, accessory on, and idle a few times and here’s what I’ve gotten:
12.56, 12.23, 13.11
12.5, 12.23, 13.5 (12.9 with lights on)
12.46, 11.94, 13.48
This all leads me to wonder about the alternator more than the blinking warning light. Could there be some connection between the alternator not charging and the oil level warning light?


 12-21-2019, 02:21 PM