When you click on links to various merchants on this site and make a purchase, this can result in this site earning a commission. Affiliate programs and affiliations include, but are not limited to, the eBay Partner Network.
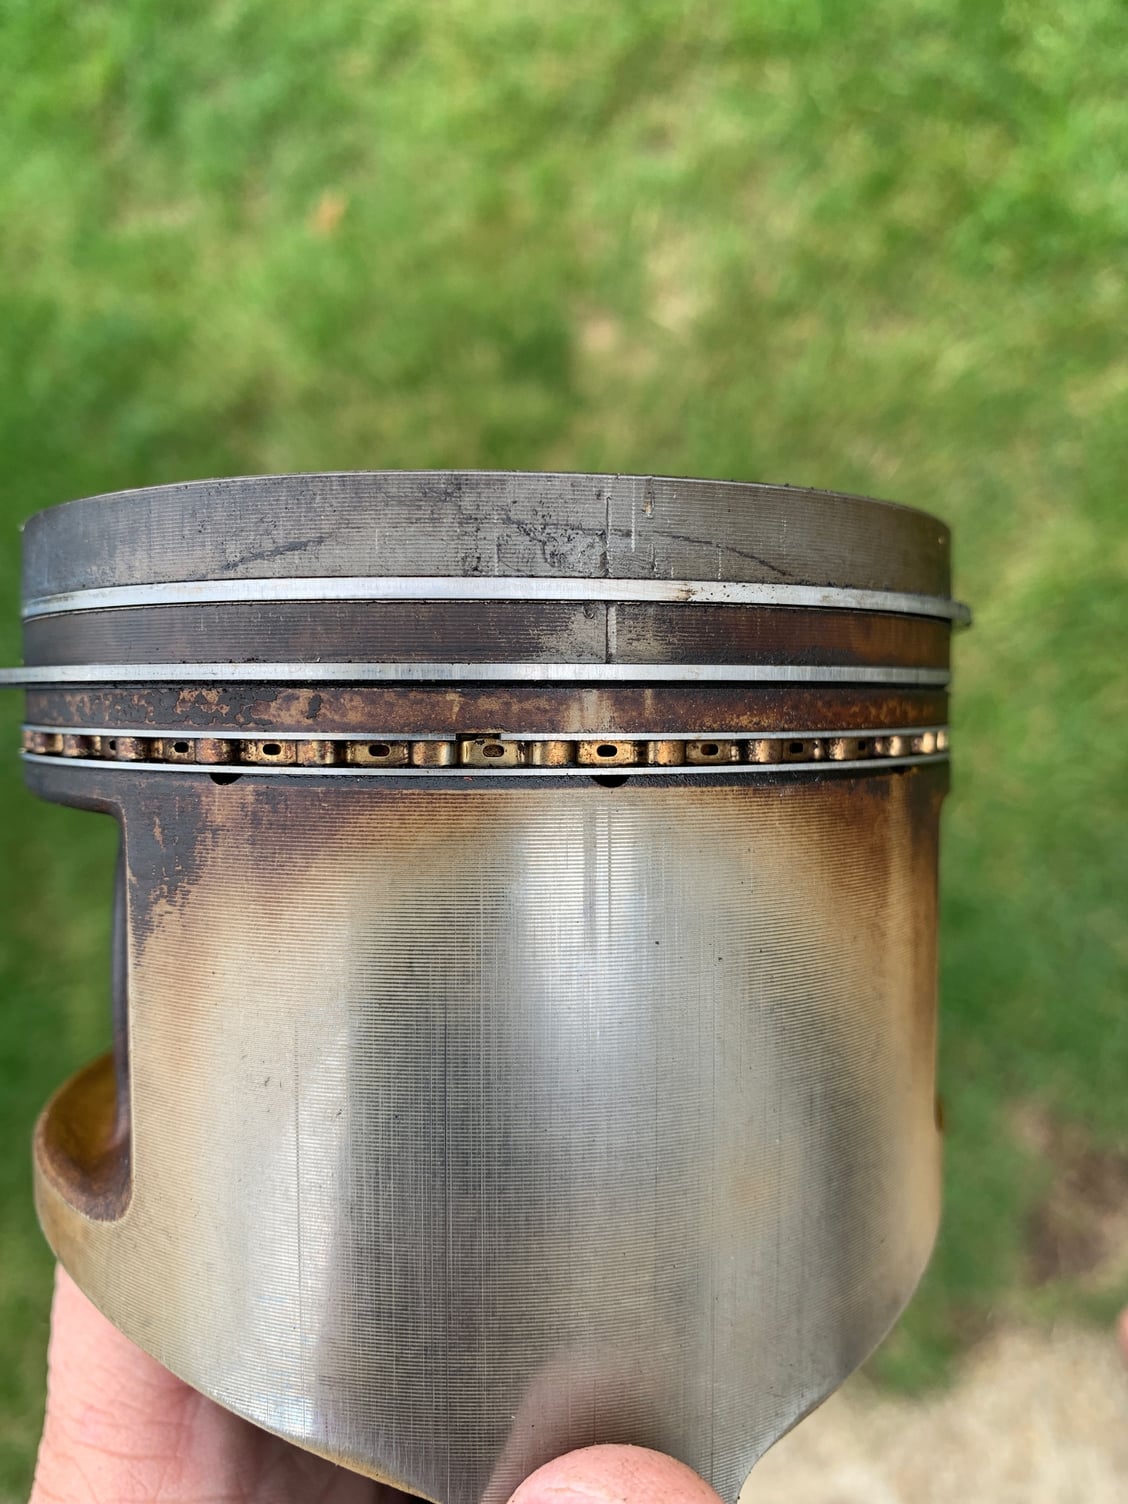
I’ve removed the pistons and whilst there are a few marks on the piston from cyl 4 the rings are fine. I can also assume some crap got into the engine at some point in the past.
I’ve not taken the valves out of the head but will do later this week before sending them off for a light skim and checking/replacing guides etc.
I’ll get the machine shop to check out the bores and give me options. Looks like my next job will be removing the studs then!
Any comments and guidance welcomed.
Cheers
There doesn't appear to be very much of the original iron coating on that piston, given the reflection of your finger on the aluminum.
One your machinist measures the piston to wall clearance and you compare that with the factory wear limits, you will know more about the path you need to follow.
I found it pretty easy to follow these instructions to get the studs out of the block,
use a Mapp gas torch and heat the area where the stud is screwed into,
Heat to about 250 F is needed to loosen the loctite
some PB will help loosen the stud but the heat will make them come out pretty easy
double nut the stud to remove it,
you can usually do two at a time,
set the nuts then heat the block, then unscrew them
NOTE use an old stud that you have cut 3 flutes onto at the tip of the first few threads to clean out the stud holes.
This will limit the chances of you making the threaded holes bigger than they were, and thus damaging the block.
NOTE dont use a tap or thread chaser on your block.
Carb cleaner and a bore brush are good to scrub the holes after you have chased them, then some compressed air.
Use green loctite to set the studs.
NOTE before you remove any studs measure them so you can return them to their original height above the deck/
NOTE use the slow cure 573 green loctite,
put the head on and tighten the bolts to 30 ft lbs to load the studs while the loctite cures.
NOTE as Greg points out if the studs are in good condition leave them alone
There doesn't appear to be very much of the original iron coating on that piston, given the reflection of your finger on the aluminum.
One your machinist measures the piston to wall clearance and you compare that with the factory wear limits, you will know more about the path you need to follow.
Thanks Greg
Sorry for the novice question. From reading other posts and your comment here - should the original coating give the piston a matte looking silver finish? If it has worn too much what are options apart from replacing? I seem to remember reading you not liking the re-coat option.....
Last edited by Chopperharris; 07-29-2019 at 10:23 AM.
I found it pretty easy to follow these instructions to get the studs out of the block,
use a Mapp gas torch and heat the area where the stud is screwed into,
Heat to about 250 F is needed to loosen the loctite
some PB will help loosen the stud but the heat will make them come out pretty easy
double nut the stud to remove it,
you can usually do two at a time,
set the nuts then heat the block, then unscrew them
NOTE use an old stud that you have cut 3 flutes onto at the tip of the first few threads to clean out the stud holes.
This will limit the chances of you making the threaded holes bigger than they were, and thus damaging the block.
NOTE dont use a tap or thread chaser on your block.
Carb cleaner and a bore brush are good to scrub the holes after you have chased them, then some compressed air.
Use green loctite to set the studs.
NOTE before you remove any studs measure them so you can return them to their original height above the deck/
If you really want to get carried away put the head on and tighten the bolts to 30 ft lbs to load the studs while the loctite cures
Thanks Stan - great advise as always.
Great advise - thanks.
I've been reading Greg's thread from years ago on the whole stud torquing procedure and wondered if there was a way of using loctite on the new studs, your method above explains how! Thanks.
For when the heads go back on properly I'm planning to follow the below procedure (thanks to yourself, GregBBRD, Lizard931 and others on Rennlist
With new studs from Porsche...
Prep:
1) Measure the stud heights
2) Soak old studs with PB for a couple of days
3) Add 2x Nuts to stud
4) Heat block with mapp torch in vicinity of where stud thread in
5) Unscrew stud with minimum effort and no issues whatsoever ;-)
6) Repeat for remaining studs.
7) Make a thread chaser (not tap!) out of old stud - clean a thread and use carb cleaner and air to remove any remaining loose debris.
Install new studs:
1) Use green loctite on stud threads going into block
2) Temporarily fit head and tighten nuts to 30ft/lbs - leave for 24 hrs for the loctite to cure
3) Remove head
4) Lightly oil stud threads with engine oil or Optimoly HT.
5) Fit gasket (the right way up) and refit head.
6) Use old Factory Workshop Manual method to torque down the (new) nuts, in the specified order.
Stage 1 - tighten to 20Nm
Stage 2 - tighten to 50Nm
Stage 3 - tighten to 90Nm
Leave for 1hr - then loosen nuts off, one at a time in the order specified in the manual, 90 degrees and re-torque to 90Nm.
Leave for 24hrs - repeat
Leave for further 24hrs - repeat
Nut order is (check manual)
8,6,1,3,9,10,4,2,5,7
Does that sound about right?
Thanks all.
Last edited by Chopperharris; 07-29-2019 at 10:25 AM.
I had my local engine shop remove studs and do a full measurement inspection of bores, piston etc. Much easier if you havent got the measurement kit and or want to concentrate on core skill stuff elsewhere on the car. They redid the heads for me with original valves but new guides and seals following pressure test skim and seat cut. They also polished the crank but looking at the photos of mine before I would have been happy to go without as this raised polishing gunk concerns after
Studs were a pain to replace (time and number of in outs) especially until I realised they dont go back to full depth. Use the double nut technique others have pointed out
D
I've been reading Greg's thread from years ago on the whole stud torquing procedure and wondered if there was a way of using loctite on the new studs, your method above explains how! Thanks.
For when the heads go back on properly I'm planning to follow the below procedure (thanks to yourself, GregBBRD, Lizard931 and others on Rennlist
With new studs from Porsche...
Prep:
1) Measure the stud heights
2) Soak old studs with PB for a couple of days
3) Add 2x Nuts to stud
4) Heat block with mapp torch in vicinity of where stud thread in
5) Unscrew stud with minimum effort and no issues whatsoever ;-)
6) Repeat for remaining studs.
7) Make a thread chaser (not tap!) out of old stud - clean a thread and use carb cleaner and air to remove any remaining loose debris.
Install new studs:
1) Use green loctite on stud threads going into block
2) Temporarily fit head and tighten nuts to 30ft/lbs - leave for 24 hrs for the loctite to cure
3) Remove head
4) Lightly oil stud threads with engine oil or Optimoly HT.
5) Fit gasket (the right way up) and refit head.
6) Use old Factory Workshop Manual method to torque down the (new) nuts, in the specified order.
Stage 1 - tighten to 20Nm
Stage 2 - tighten to 50Nm
Stage 3 - tighten to 90Nm
Leave for 1hr - then loosen nuts off, one at a time in the order specified in the manual, 90 degrees and re-torque to 90Nm.
Leave for 24hrs - repeat
Leave for further 24hrs - repeat
Nut order is (check manual)
8,6,1,3,9,10,4,2,5,7
Does that sound about right?
Thanks all.
Don't mess with the studs, unless they are rusty or you need to have the decks of the block surfaced. If you have only a few rusty ones, find a used block, steal some good studs and only replace the bad ones.
Do not "mix" different kinds of studs. "Early" studs are different than '85/'86 studs, which are different than the current production studs, which are made out of a softer material.
There are several different types of "green" Loctite. If you use the wrong one, it will "go off" before you get to the second stud, which makes putting on a head and waiting 24 hours a complete waste of time.
However getting the studs straight and pulled UP tight to the threads is of paramount importance....not just another idea, if you decide to do it!
It's actually the most important step of the whole process...the rest is just tools, a bit of heat, and cleaning. Labor. Getting the studs installed correctly requires intellect....and if you do it wrong, looking down the "row" of studs will show you how crooked they can get.
And if they are crooked, securely Loctite in, and you pull straight up, when you torque the head....well you can figure that out.
I've completely changed how I do this job, in order to get the studs pulled UP in the threads and perfectly perpendicular to the block deck surface, before the Loctite "goes off".
Ok - thanks, i appreciate the patience and guidance Greg. The whole point of this resto project is to learn and do as much of the stuff myself... if things go wrong that’s ok as it’s all part of the process. It does mean troubling folks like yourself though.... sorry about that!
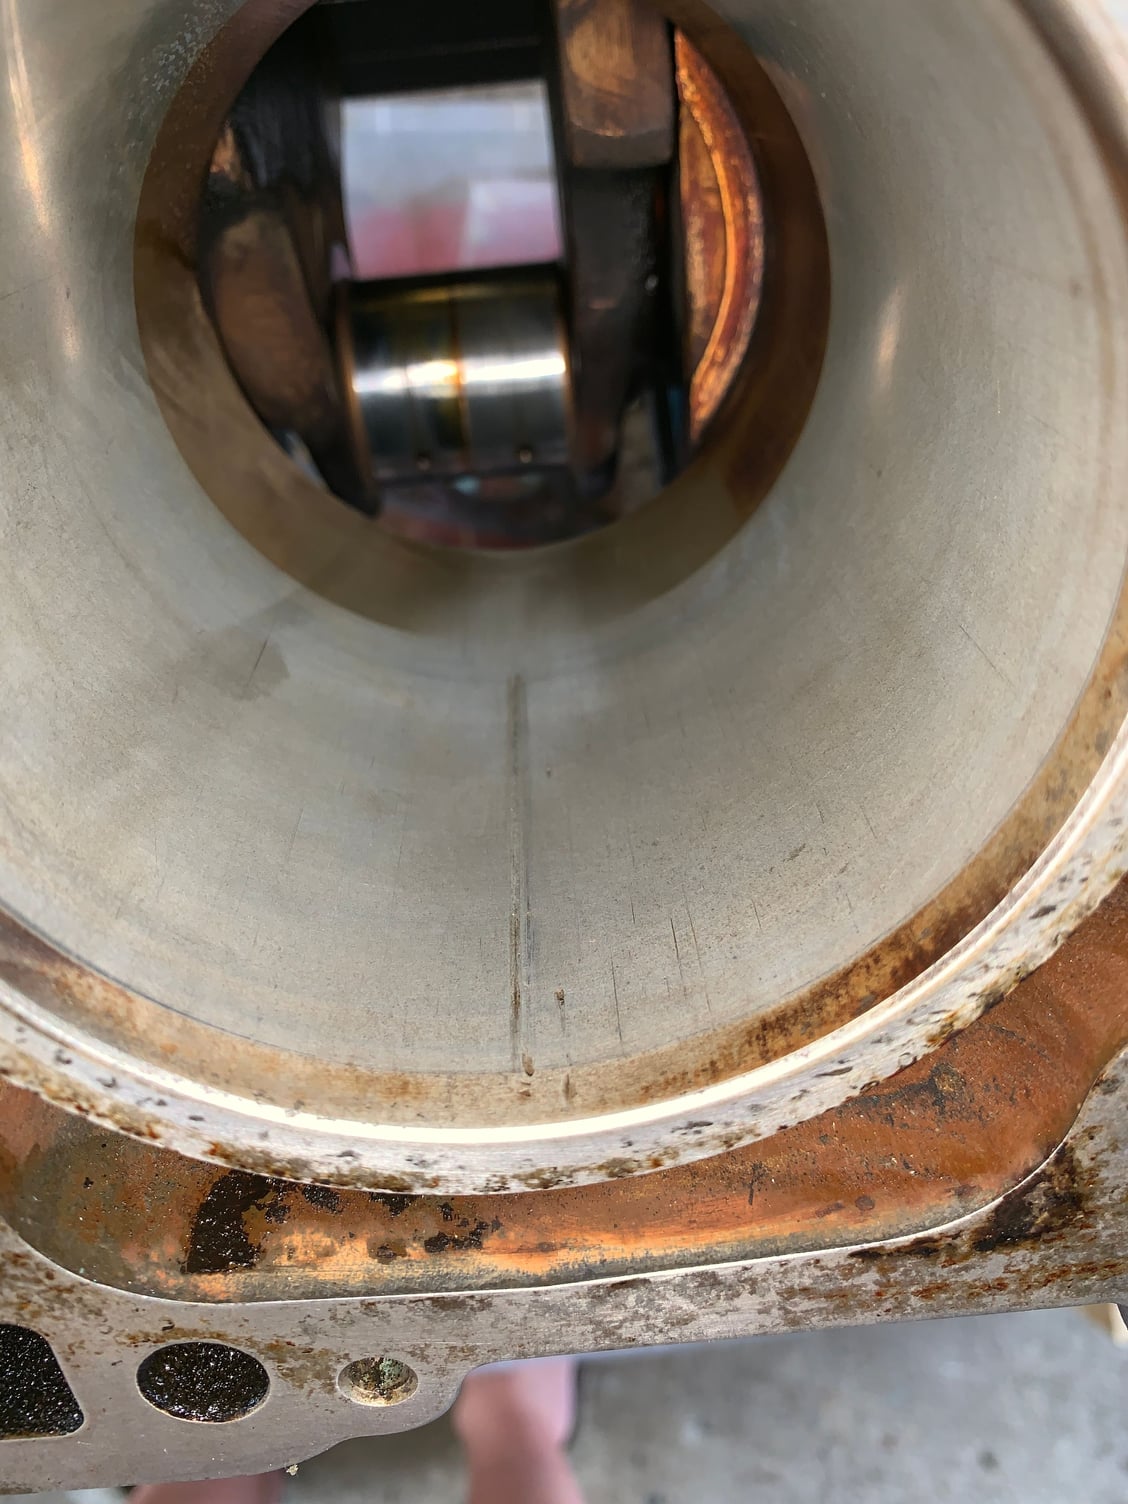
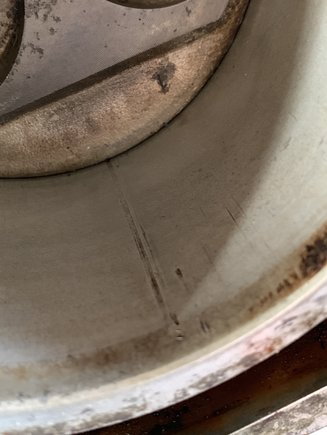
The studs are in good shape and I’d leave them if it wasn’t for this score in the bore... which I’m guessing will mean the studs need to be removed to sort via honing or, as a last resort, a liner? If I can remove them without thread damage and check they are the original length, is it deemed acceptable to re-used them?
If I used a slower curing Loctite would the method shared by Merlin work or is it safer not to use any given I don’t have the experience in the method you are now using.
Just trying weighing up my options and plan ahead vs jumping the gun.
I had my local engine shop remove studs and do a full measurement inspection of bores, piston etc. Much easier if you havent got the measurement kit and or want to concentrate on core skill stuff elsewhere on the car. They redid the heads for me with original valves but new guides and seals following pressure test skim and seat cut. They also polished the crank but looking at the photos of mine before I would have been happy to go without as this raised polishing gunk concerns after
Studs were a pain to replace (time and number of in outs) especially until I realised they dont go back to full depth. Use the double nut technique others have pointed out
D
Thanks - I’m going to speak to another engine shop tomorrow and see what they say.
Did you re-use the studs or replace them?
Thanks - I’m going to speak to another engine shop tomorrow and see what they say.
Did you re-use the studs or replace them?
I reused most of them as they were straight and showed no signs of necking but 2 had been graunched on removal so were replaced. Having said that I originally left them in when i dropped the block off thinking they could stay. Not sure why the shop removed them as we didn't deck it

 07-28-2019, 11:13 AM