When you click on links to various merchants on this site and make a purchase, this can result in this site earning a commission. Affiliate programs and affiliations include, but are not limited to, the eBay Partner Network.
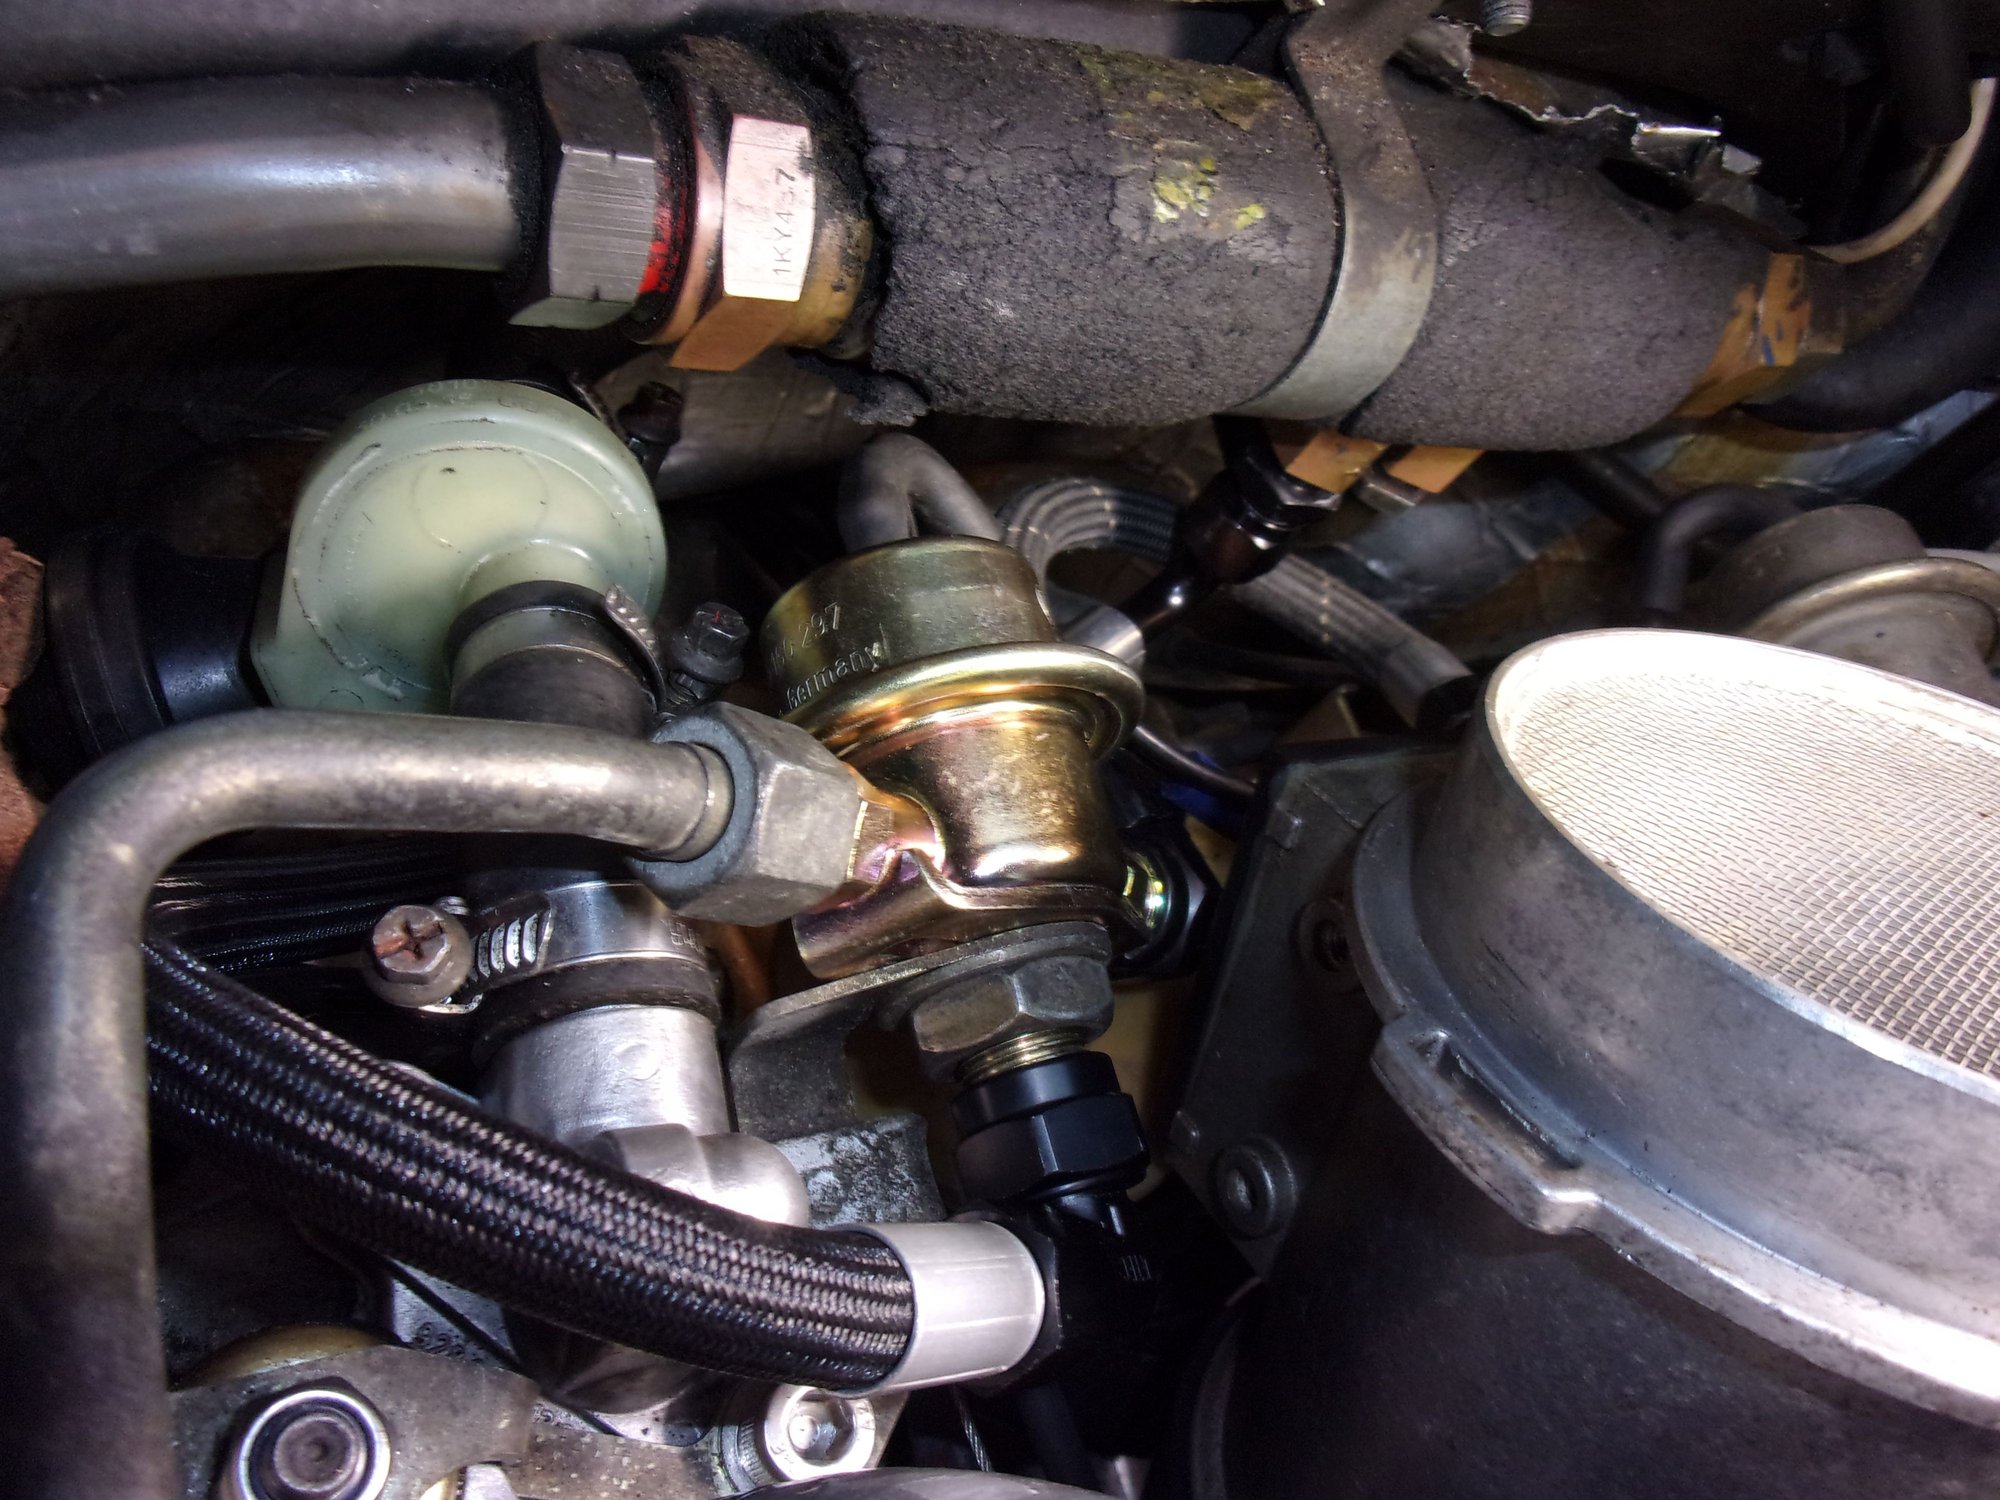
Im in the process of installing GB fuel lines (very quality work on the set by the way) and I seem to have hit a snag. I am trying to remove existing feed line part #928 356 081 02 which goes from regulator to fuel cooler and cant seem to break the 17mm fitting free. I was thinking maybe cutting the line to use a 17mm socket and 19mm wrench but if this wont work I will have no fuel line at all. Should I look at trying to remove the cooler to gain better access if so is there anything to watch out for? I have already cut , bent, and modified wrenches but no luck.
Removing the fuel cooler will release the refrigerant from the AC system. I suggest trying the "two wrench" trick to break the line loose. Take two appropriately sized line wrenches, one on the fitting and one on the fuel cooler, position them so that you can squeeze them together with both hands. This should break them free. Put a bit of anti-seize on the ball and threads of the new lines to prevent them seizing together and tighten them just enough to seal.
The return line and the feed line are very close to one another so I did customize a 17, and put a bend in a 19, I even cut a box end to fit over the line and onto the 17 nut. This sucker is frozen. I added some penetrating oil again we will see. Thanks for the info about the cooler, I suspected something like that may be the case.
When I did mine I removed the MAF to give me a little more room. I also used long open end wrenches and had to tightening first before loosening. Make sure that you hold the upper still as it is stationary and twist the lower. Best of luck.
I found a terrific idea from Sean on removing these connectors,
that is to use a line wrench type crows foot and an extension with a long 3/8 drive ratchet,
give the B nut a snap and this will usually break it loose.
I got it!!! I hate to admit this, Im actually cringing a little, I tried everything that thing was TIGHT started to even round the corners so I had to resort to ..... A vice grip of all things, normally a last resort for me but its off and new line is on. Just curious is the pic of yours what is the approved direction of the pros?
The vise grip may have deformed the B nut just enough to break free whatever schmutz was keeping it stuck. Pay close attention to this joint when starting back up to ensure the nipple didn't get deformed in the process resulting in a pesky fuel leak.
I got it!!! I hate to admit this, Im actually cringing a little, I tried everything that thing was TIGHT started to even round the corners so I had to resort to ..... A vice grip of all things, normally a last resort for me but its off and new line is on. Just curious is the pic of yours what is the approved direction of the pros?
Glad you got it. I'm not a pro but I will offer my advice: You need more tools
These lines are usually over-tightened, and not by the factory. They are ball-end flare fittings and don't need a lot of torque, just enough to securely seal-- as noted above. If over-torqued then the female connection expands and jams the nut, and getting them loose is a real pain.
An end-wrench only engages two flats on the nut, which will happily round. A box wrench is optimal, grabbing all six flats, but you can't use a box wrench on a tube fitting. You can use a flare wrench however, those grab four of the six flats and usually get the job done. You need a set of those in metric sizes in your tool box, and don't go cheap. Flare wrenches, being open on one side, won't be as strong as a box wrench and the cheap ones will open up and slip. This is a case where buying Snap-on or some other premium brand is a worthwhile investment.
And of course there is no room, even with the MAF removed, to swing a flare wrench, so what you also want is a set of flare crowfoots (crowfeet?). These are basically the head of a flare wrench sawed off with a socket for a 3/8' handle. (And again, not a good place to go cheap). You can use a simple ratchet, a flex-head ratchet, a flex-handle, an extension with or without a u-joint, etc. Lots of options.
You need all that stuff in the toolbox, because without it the fittings will just laugh at you. And of course having all that stuff (plus the vice-grips) means you won't need it-- the universe is funny that way.
I appreciate the advice and I looked up the crow foot feet tools that Stan and Jim had mentioned. This seems it would have done the trick, now..... maybe another 928 to give them a go. I do have a pretty good selection of tools but looks like I will be adding more!
Flare wrenches and flare crowsfeet are worth it. They will save you so much heartache. Good quality metric crowsfeet flare sets can be had reasonably on ebay using some time and patience.
[QUOTE=Geo55;15987104]When I did mine I removed the MAF to give me a little more room. I also used long open end wrenches and had to tightening first before loosening. Make sure that you hold the upper still as it is stationary and twist the lower. Best of luck.
I am having a little confusion here, I have an 86.5 and have upgraded to a 87 fuel pressure regulator (928 110 198 02) I assume in this post this is a picture of an 87 based on your signature but where this has a screw on fitting for the line at the location where it mounts to the bracket, mine has a nipple and a hose clamp. Nothing major Im sure just looking for a little clarification.
Thanks JD
... so I had to resort to ..... A vice grip of all things, ...
Worrisome. See below.
Originally Posted by ammonman
... Pay close attention to this joint when starting back up to ensure the nipple didn't get deformed in the process resulting in a pesky fuel leak.
The correct, operative definition of “Pay close attention” in this case must always be: bypass the fuel pump relay so as to operate the fuel pump. Operate the fuel pump to circulate fuel through the system. Use eyes, nose, paper towels to check for leaks. It may take several minutes of pump operation to provide enough evidence.
Originally Posted by jcorenman
These lines are usually over-tightened, and not by the factory.
I used to assume that every over-tight bolt was done after it left the factory. Recently I found two ‘91GTs with far-too-tight fuel line connections. One of them had never had the lines touched. These GTs had sequential VIN numbers. Ergo: at some point there was a gorilla on the assembly line tightening fuel lines.

 07-20-2019, 07:21 PM

 I suspected something like that may be the case.