When you click on links to various merchants on this site and make a purchase, this can result in this site earning a commission. Affiliate programs and affiliations include, but are not limited to, the eBay Partner Network.
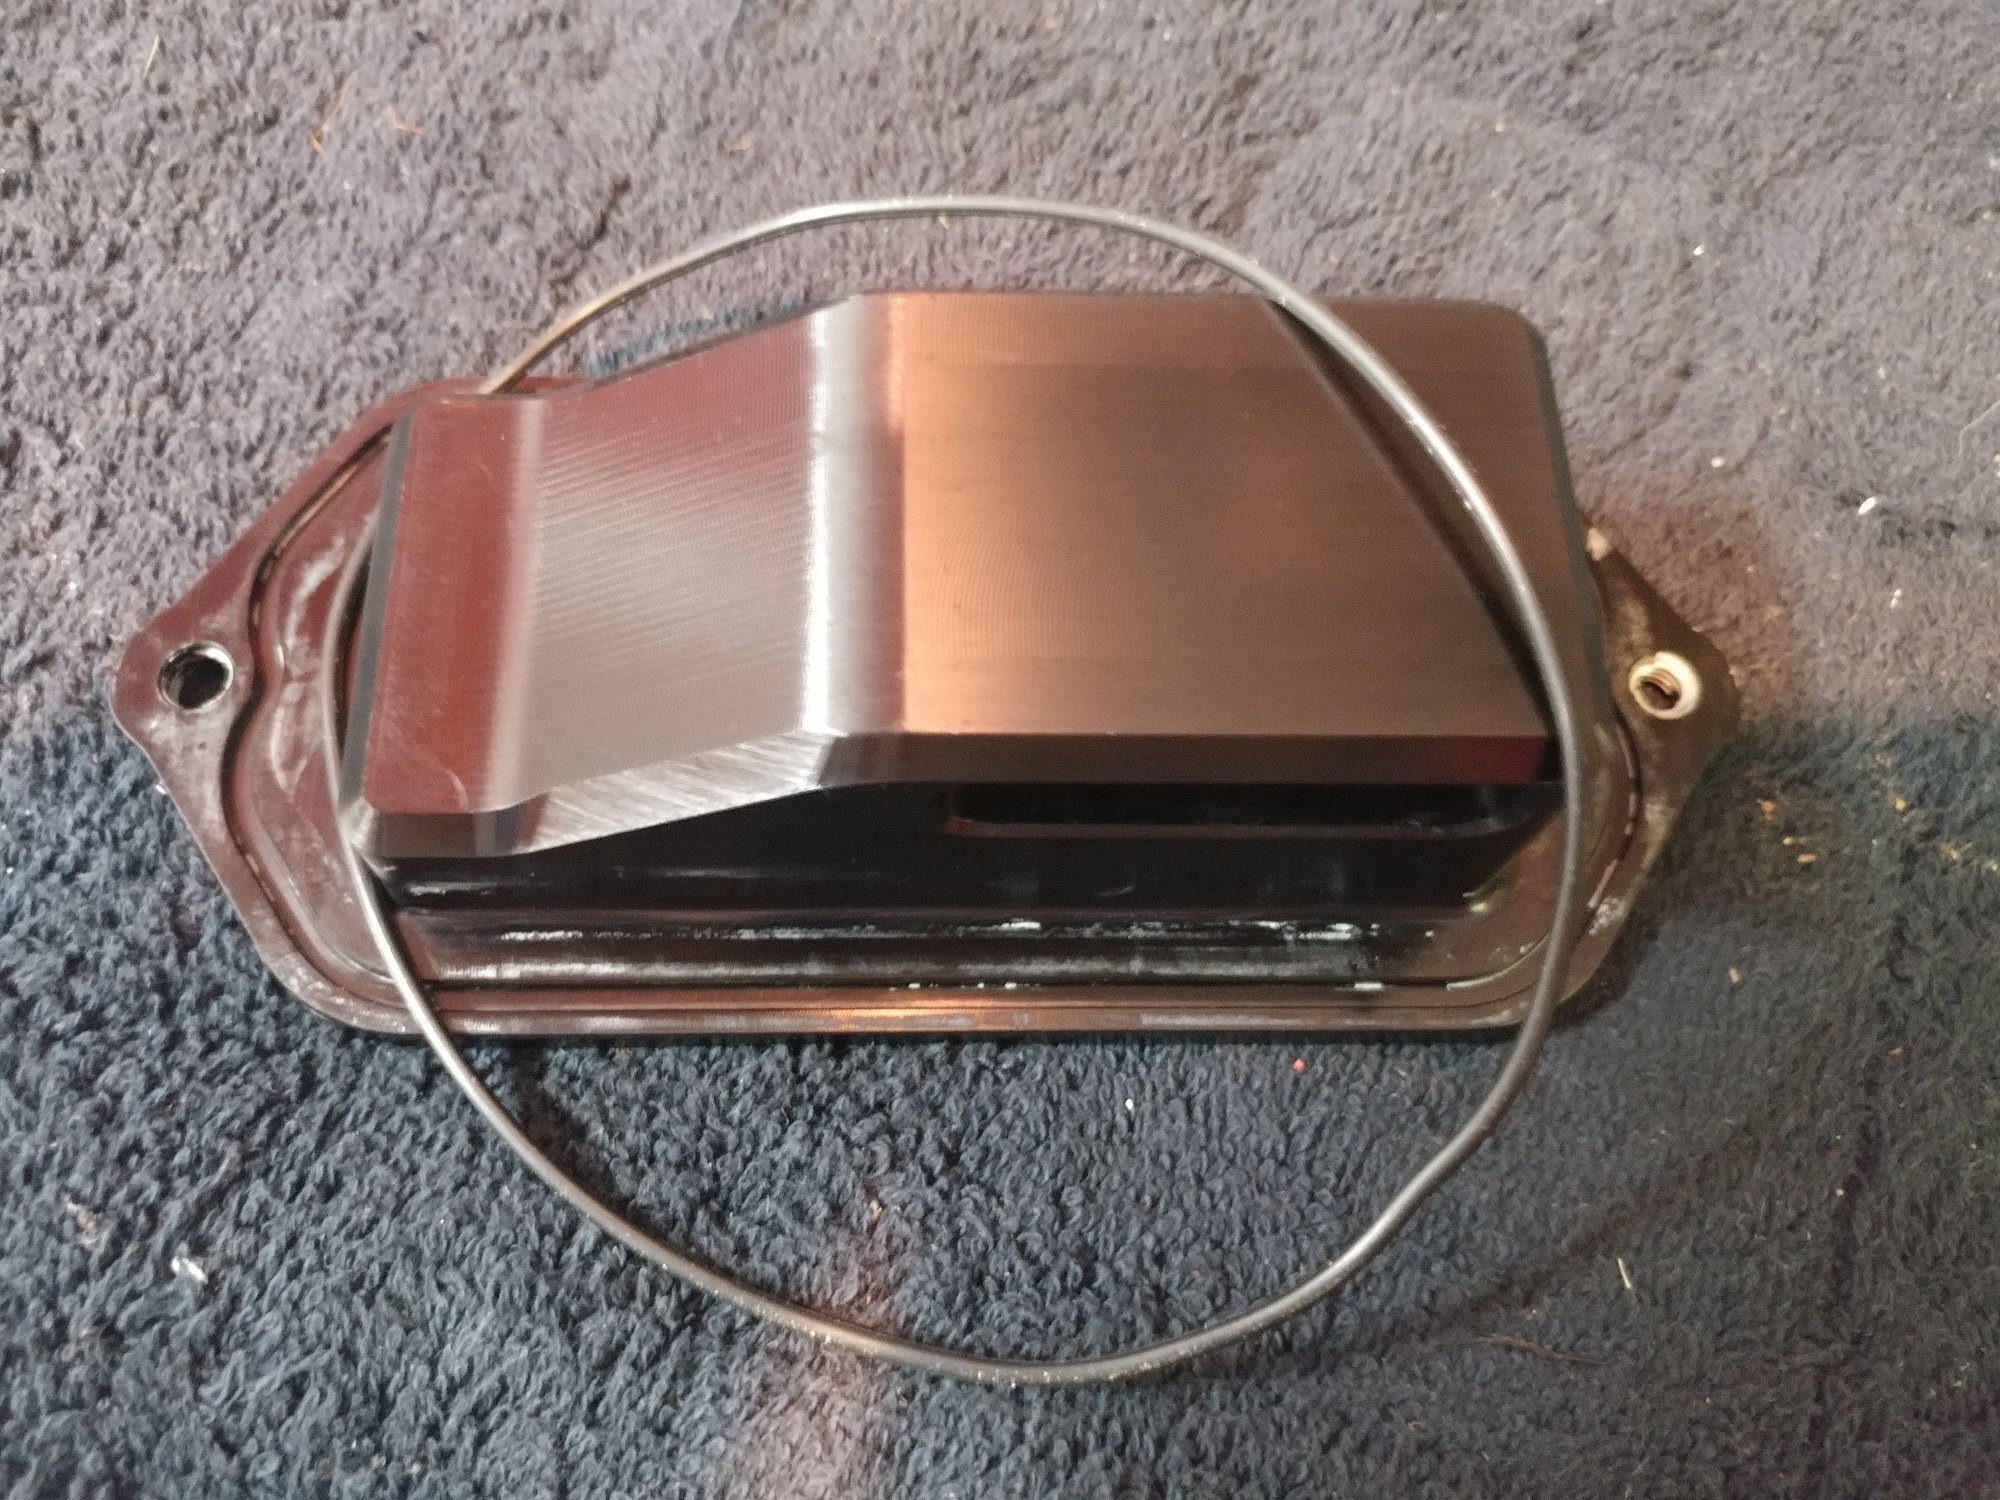
The pump should fit snug on the pins as it will walk once the system gets hot
I use a rat tail file to open the holes so the pump fits the pins and mates to the block without the gasket
then install the gasket with coat of blue silicone rtv on the gasket
then I use the Loctite PTFE non setting pipe sealant
on the new bolts
Note the coolant will migrate to the bolts over time that�s why they are corroded
PTFE will prevent the coolant from migrating
I did try a rat tail, but it needed a lot removed, so went to the drill. Initially it was clear by ~3mm, so the holes needed some serious expansion. Feels very snug now.
jp 83 Euro S AT 57k
The bolt corrosion is a head-scratcher, but it's way common so I'll keep scratching. As Stan suggests, the PTFE thread sealant is a great solution for keeping fluids in and getting the bolts out again next time. IIRC there is at least one and maybe two that pass into block cavities behind, and it's just easier to do all the bolts vs. mixing ant-seize on some and sealant on the others. I've also used Hylomar non-hardening sealant on the bolts with good results. I do adjust the tightening torque on the screws down some to allow for the lubrication that the sealer provides. Just be careful not to pack the back of the blind holes with whatever you use -- apply a very thin coating in the bolt threads only, not in the holes.
Got a lot done today, but not much fun, everything possible was a PITA. Fitted the pump up, got all the bolts in finger tight, before I recalled the anti-sieze needed to go on. Pulled the bolts up at 6.5 ft/lb with a wrench that tops out at 20ft/lb. Then I had lots of struggles getting the tensioner into place and keeping the belt in place. Again surprised how much force it takes to turn the RHS cam . Putting the new crank gear on, it seemed to hang up on something about 1/2" before it was home. Cleaned very thoroughly, found a tiny burr at one end of the keyway, and was able to work it back and forth a bit until it went home OK.
Since it has been standing a while now with no oil I was worried about the pump priming. Saw that somebody else had spun the pump with an external motor...so I put 3-4L in it, dug out an old 12V RC starter motor and applied it. After a few seconds the starter stalled and stopped. The pump rolled backwards. Applied starter again - same result - if I tried to turn the pump by hand straight after it topped, it was very stiff, so It seems to prime OK quite quickly.
Only small tidy up stuff to go now, as long as the alternator goes up OK.
jp 83 Euro S AT 57k
A bit more progress, but no banana. Tension set (Kempf), timing good, centre cover fitted. Alternator - that @#$%^& top bolt beat me again. Alternator is supported by a stand to keep it roughly in place, but..Can get close, but cant get the bolt to engage. The bolts holding the adaptor in place are loose so I can wriggle things around, but no joy. Cant see what the rear alignment of the alternator mount is like to the crankcase boss......After much struggling I decided to pull the bolt and try the alignment with a driver. Initially it stuck, then came out with a rush....and disappeared. Damn! Hopefully under the rad, not inside the fan shroud. Added to that my trouble light died with a splat as the lead shorted. New lead tomorrow. Maybe a new bolt tomorrow. M8x120 should be easy to find at the hardware store?
jp 83 Euro S AT 57k
Alternator all fixed and mounted now, finally! If only it didnt have to come off just so the centre cover can be removed! Is this different on the 32V engines?
Belts all on and tensioned, filled with oil. Hoses all in place. Coolant going in and a start (hopefully) tomorrow. On the end run now.
jp 83 Euro S AT 57k
Looks like you've been having almost as much fun as I have this year with assembly, disassembly, reassembly, etc
If you have an AirLift vacuum fill tool for the cooling system, not only does it fill the system with virtually no air pocket voids, but it's great for finding potential leak spots before filling the system only to find yiu have to drain it again. It let's you pull a vacuum on the system to see if it will hold. If it doesn't, an ultrasonic leak detector is great for helping to pinpoint the leak source.
Curious if that original cam gear you showed a photo of was a steel or aluminum version.
AFAIK cam gears were always alloy, just the coating type changed. The original oil pump gears were alloy, and changed to steel at some stage. Mine was steel, but was still past its useful life, as was the crank gear. There was actually a small chip off the edge of one tooth on the crank gear, not sure how that would occur. Probably only .020" wide, but .100" long.
jp 83 Euro S AT 57k
I don't think so. My original '79 square tooth cam pulleys were steel (magnet sticks to them), and when putting together the new to me (used) motor this summer, I sourced another full set of used square tooth pulleys so I'd have a set for my old motor and for the new motor.
The steel ones last a really long time and don't rely an the hardened anodized coating to wear well, which is why I stuck with them instead of going to the rounded tooth pattern and the anodized alloy pulleys. Once that anodizing is worn away, the pulley material starts disappearing pretty quickly from what I've seen, and I think you can see some of that on your old pulleys.
Sorry, wasnt thinking about the square tooth type gears. My steel oil pump and crank gears were both worn enough to need replacing at only 57k miles, and were nearly as bad as the alloy cam gears, which seems poor life to me, for steel.
Its all running now, nothing leaking out the bottom, finally. Hope thats the last time I have to do that in my lifetime. Learned that trying to get the LHS belt cover on when all the coolant hoses are connected (and full) is ugly! Also found that my smoke detector in the garage seems to be defective....and its only VERY old! New one coming.
jp 83 Euro S AT 57k
Back again with more tales of woe.
5-6 weeks ago I did the belt, cam gears, oil pump gear, front seal. Removed tensioner, cleaned, refitted with old gasket and goo(Loctite#3). Thread sealed the relevant bolt, refilled with oil. Reassembled all, filled with fluid, ran it up to temp, no problems. Around the block (<10mins), no problem.. 30min drive, get home, puddle of nice new oil on the ledge where the dipstick screws in, dribbling down onto the flat front part of the pan. Thinking it could only be the front seal, maybe cocked a touch, pull it all down, decide I need a crank gear as well, and will do the WP also, order bits, wait for a bit.
Redo the whole job with the extra new bits, new front seal, close it up, refill, run it up to temp, no leaks through several electric fan cycles. Do the 30min drive again, puddle of oil again. Put it back on the lift, wipe up all the oil, start it. Over 20 mins idling, several fan cycles, nothing. A few throttle blips - nothing. Sit on 1500rpm for several minutes, nothing. Let it sit for 2 hours while doing a school run, no leaks. Start again, another 20 min of idling, nothing. By nothing I mean no sign of even the slightest drop of oil - the gasket is sweaty but no more, some pan bolts are oily, but there are zero drops anywhere - nothing from the tensioner, nothing coming off the centre belt cover. All done lying underneath the front with the baffle off, good lighting.
Anybody else such one time oil leaks, or can suggest what might have happened please? Can the pan be pressurizing somehow and blowing oil out? Oil level is a few mm under the full mark. Moderate temps showing 5bar oil pressure for several minutes after startup.
Will lower it and repeat the 30min run again tomorrow, checking for oil every 10 mins.
Thanks
jp 83 Euro S AT 57k
Sounds like you might have some blowby happening from worn rings or something and might be building up excessive crankcase pressure when driving at normal RPMs, but not when idling. Do you have any type of crankcase ventilation system installed. I had a fairly simple crankcase vent installed but it wasn't stopping actual oil from blowing out the vent hose.
I did some research and found a nice and compact dual-chamber AOS from Verus engineering. I mounted the AOS itself to the firewall. I vented the crankcase line into one chamber of the AOS, I Y'd together cam tower vent lines from both sides into the other chamber of the AOS, then Y'd together the output lines from the AOS to an atmosphere vent line - no more oil being evacuated. I also have the 928MS oil control baffle installed. I plumbed the AOS drain line back into the oil pan return line (from the oil fill) and that has a one way valve so only allows the oil to drain back in when the car is turned off - positive pressure on that line closes the one way valve.
It also has a nice optional feature where you can T into a warm fluid line that goes to a sealed rear compartment of the AOS to keep it warm. This prevents the oil captured in the AOS from foaming or thickening and clogging up the drain back line or guts of the AOS. Rather than use a coolant line, I used the heat exchanger fluid line that's part of my supercharger setup since that fluid gets nice and warm. A failure on that line doesn't incapacitate the car like a failed coolant line would, just lowers the efficiency of the forced induction setup.
I have my original AOS vent setup as well as a Hans oil control baffle if you'd be interested in purchasing those two parts from me, but I think you're overseas so shipping might be something we have to factor in.
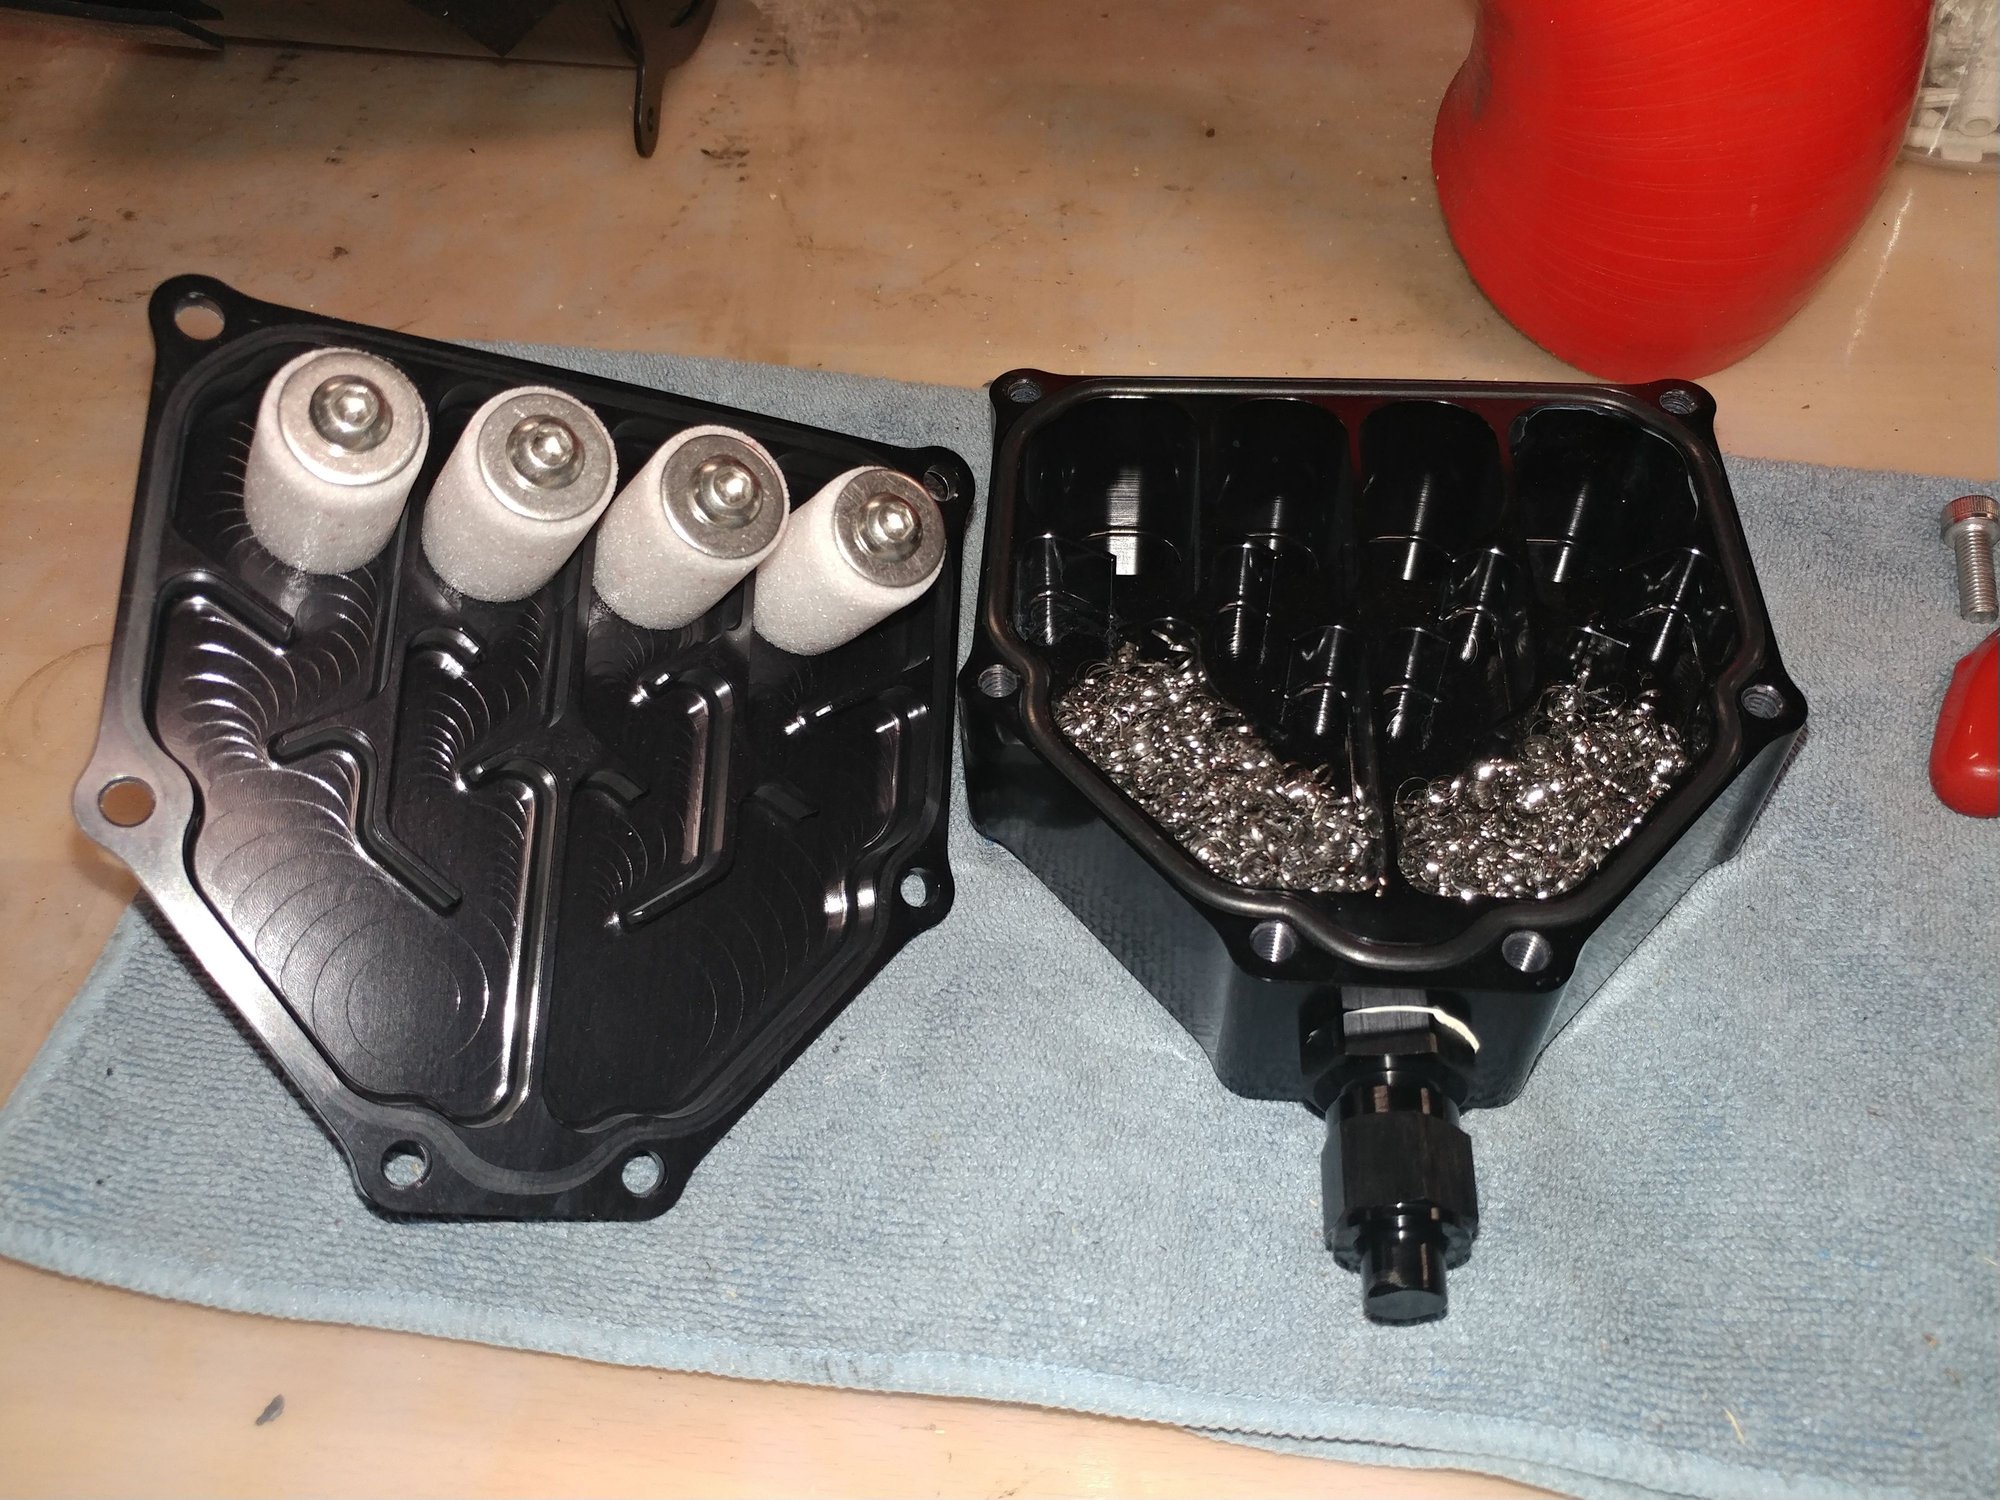
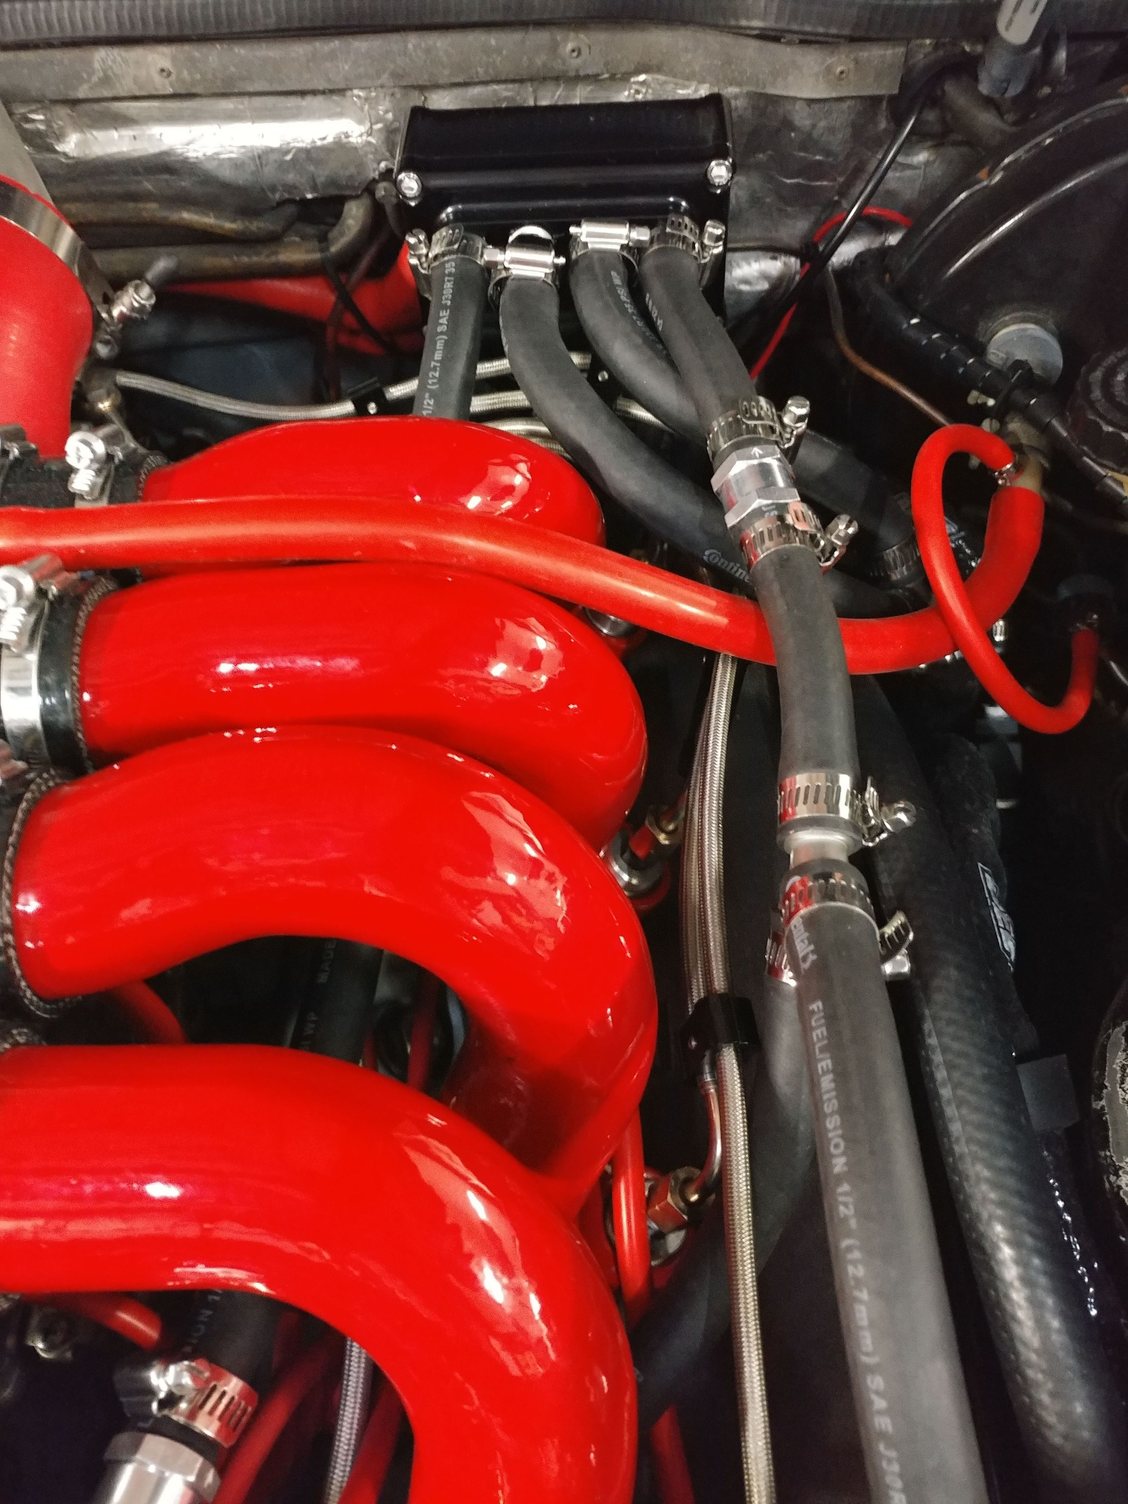
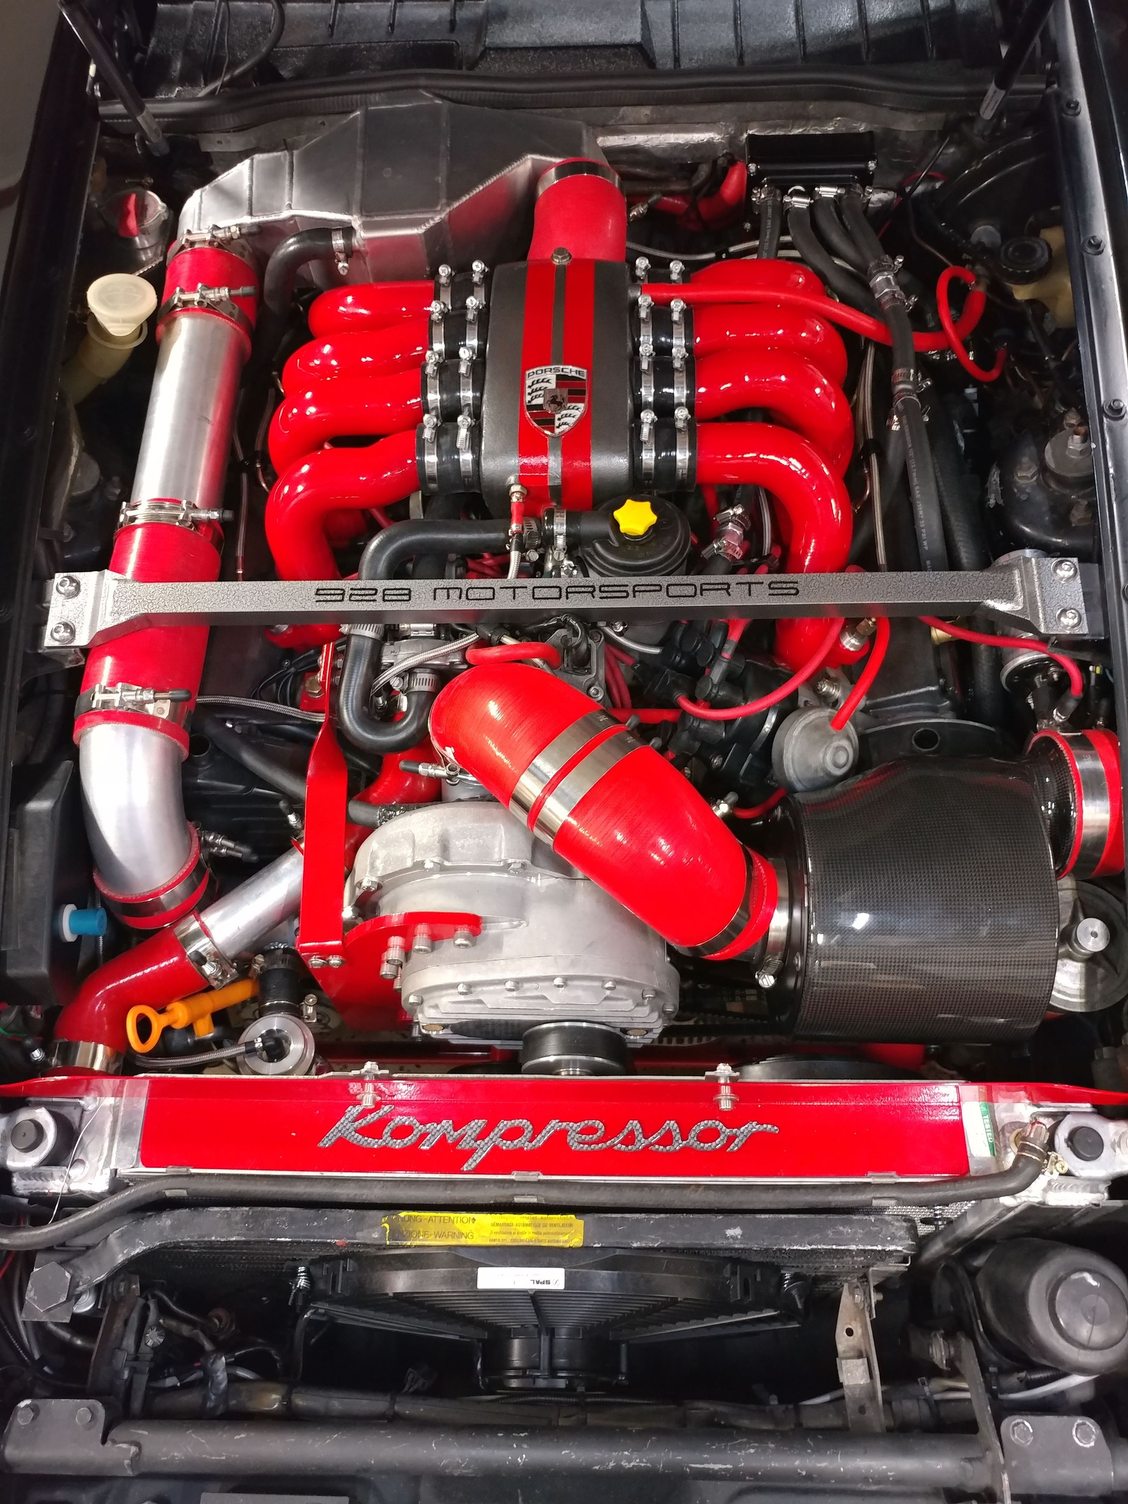
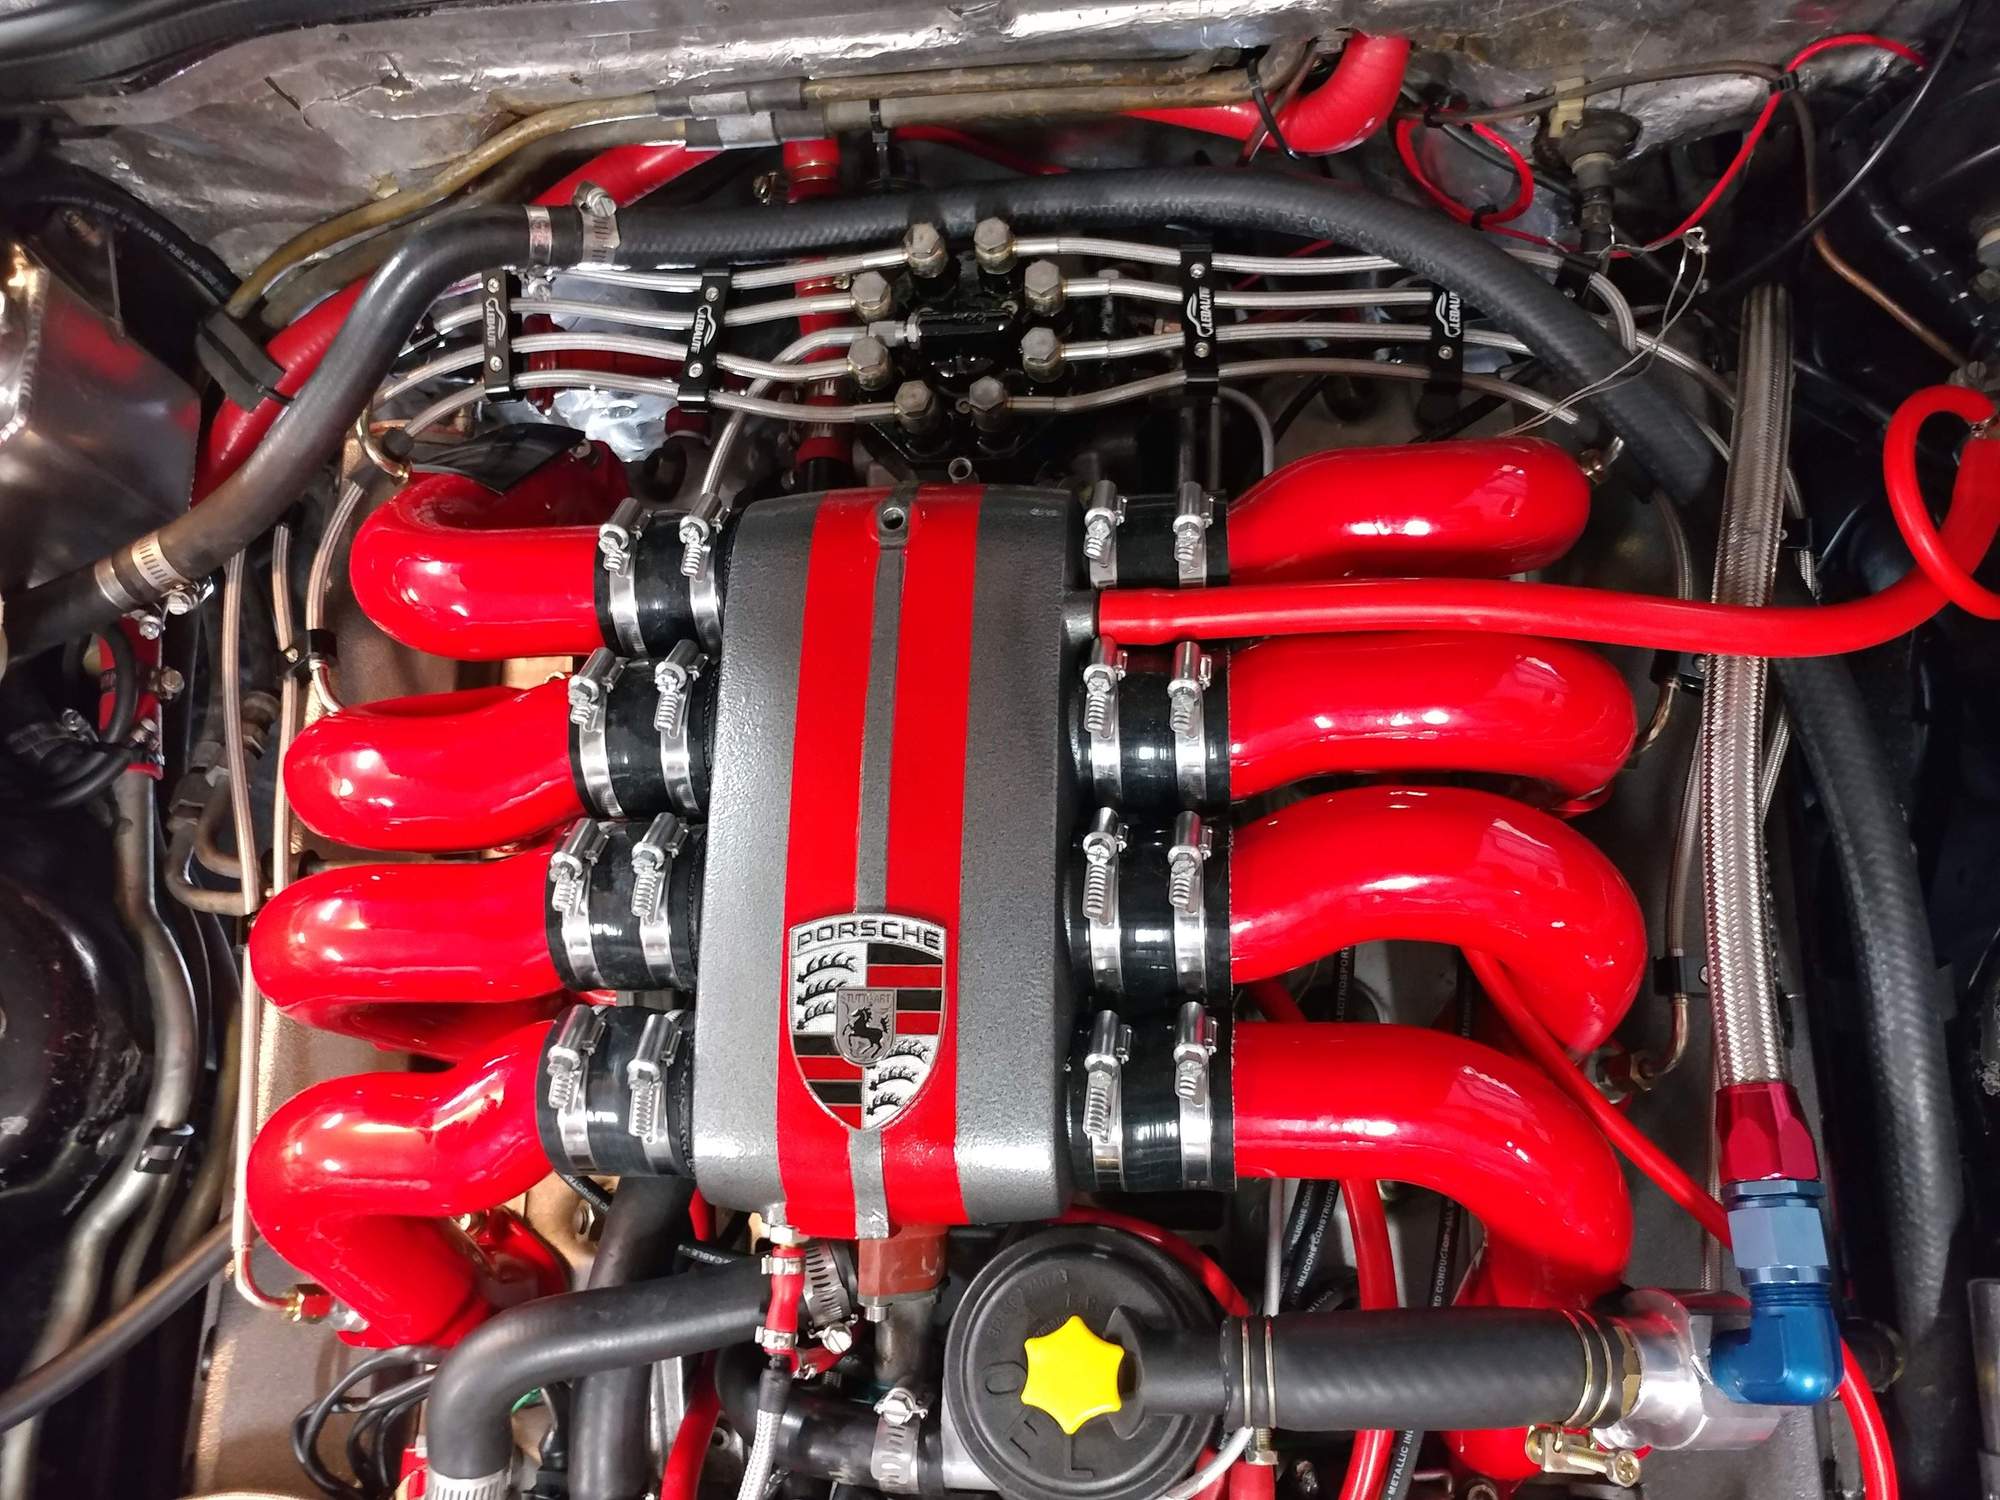
Here's my Verus AOS setup
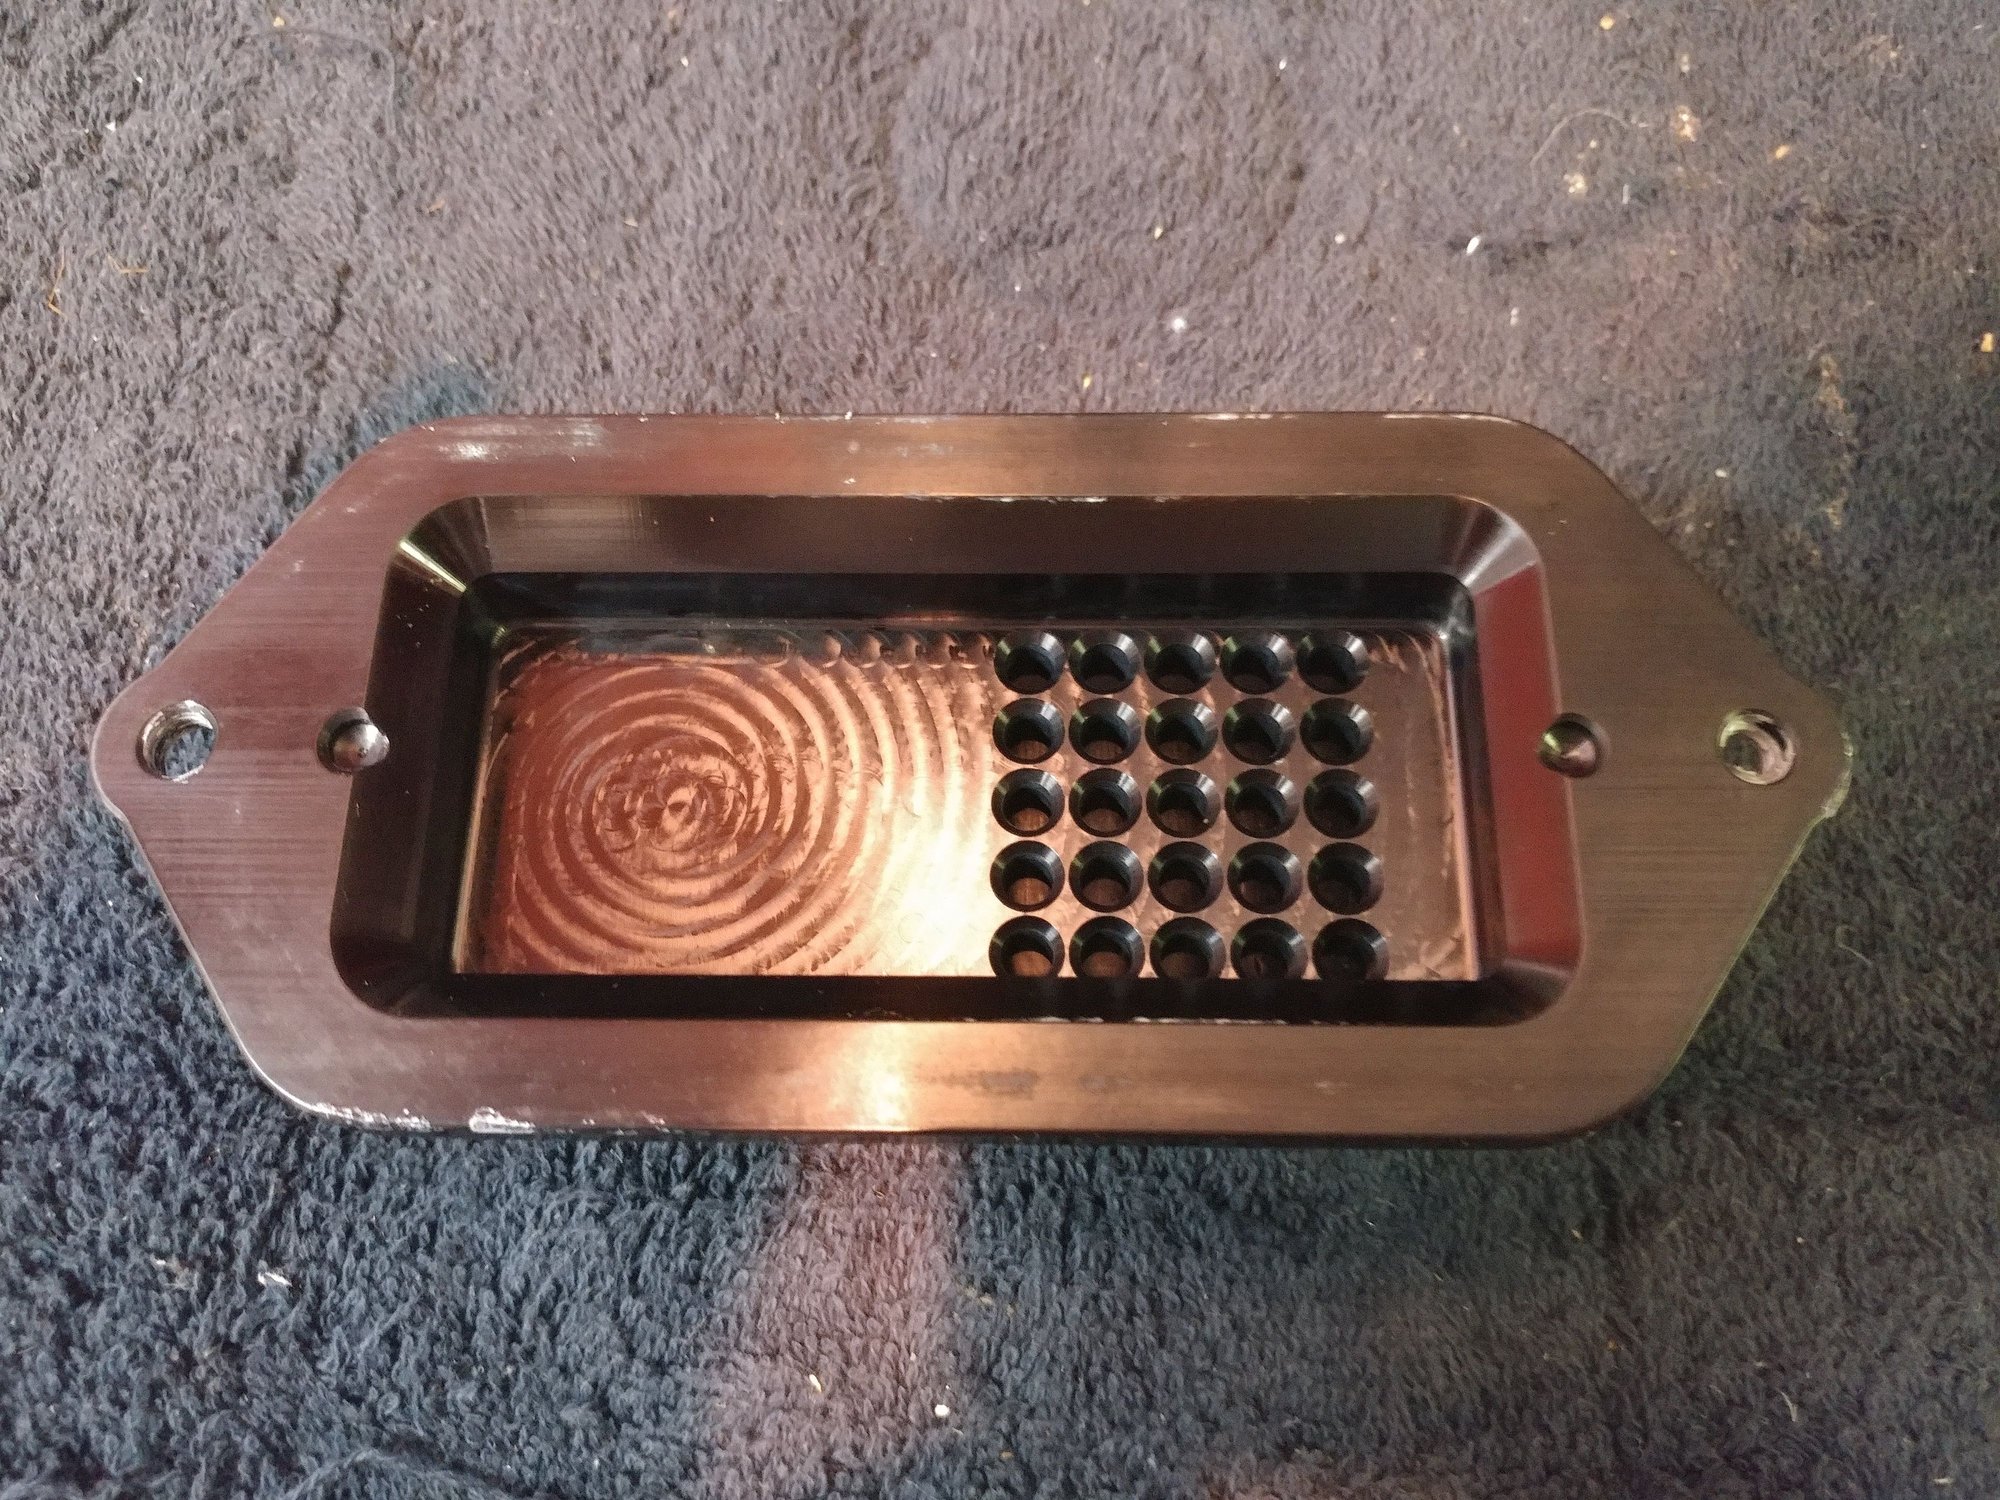
Internal chambers of the AOS - on inlet and outlet for each separate chamber
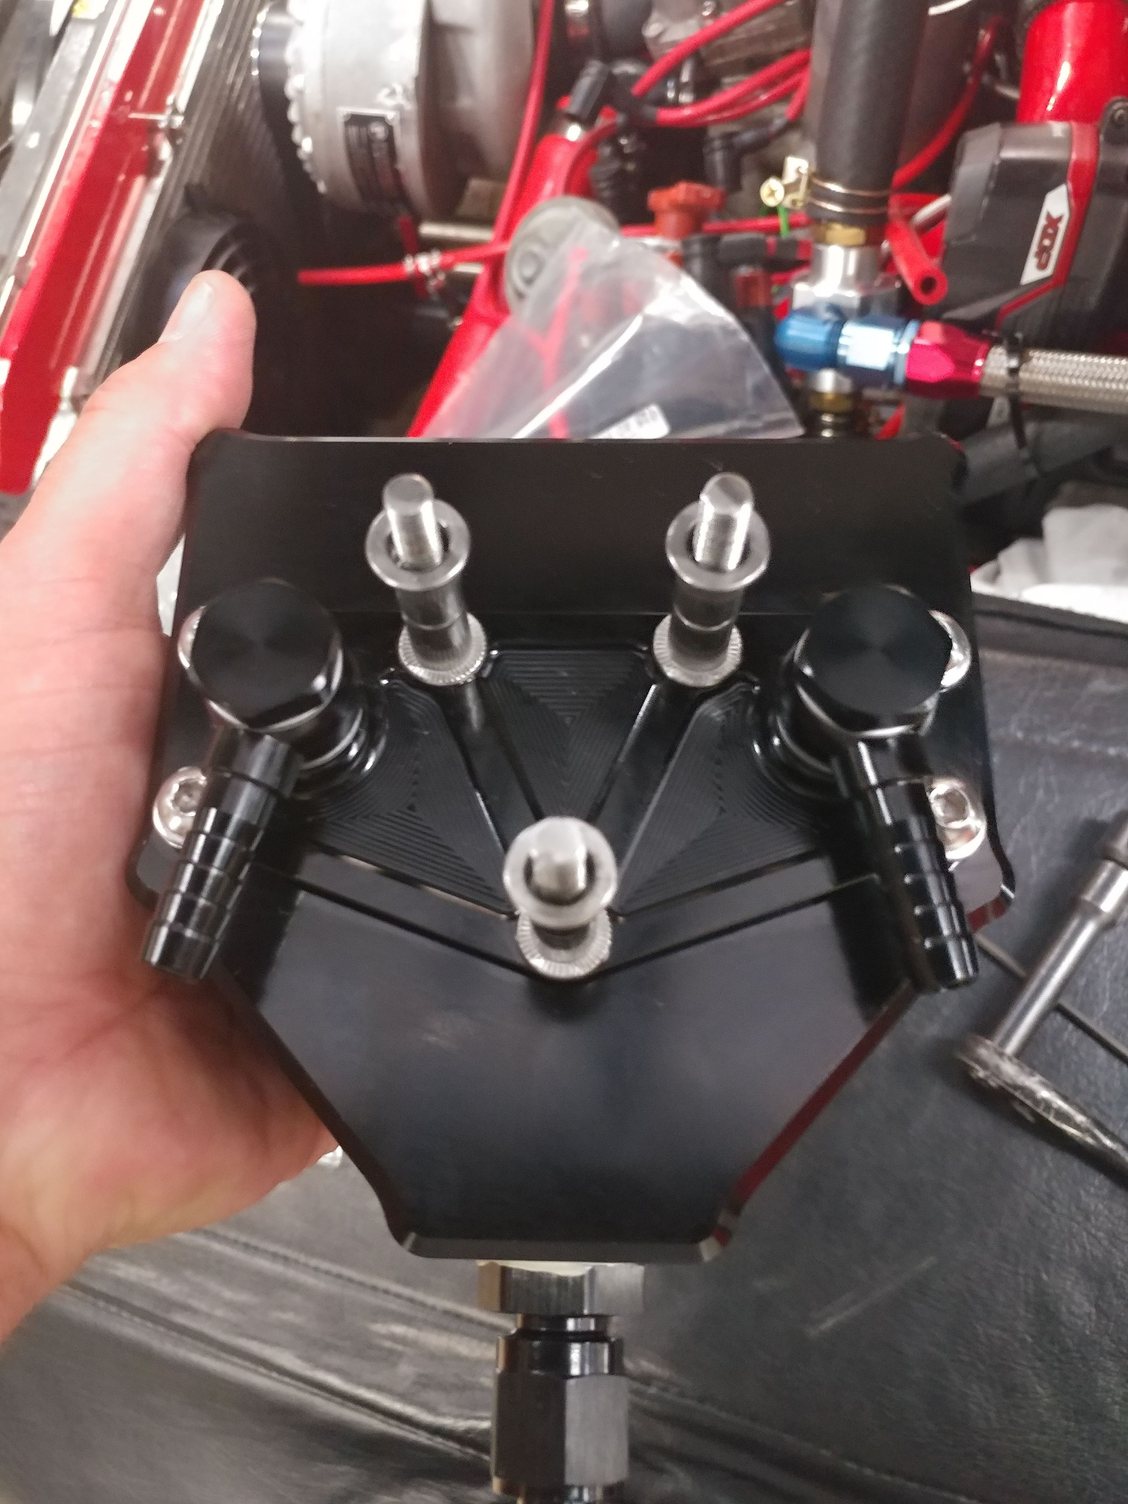
Rear side - shows the standoffs I used to mount it to the firewall and the rear heating chamber where I've plumbed in lines from the heat exchanger to intercooler fluid hose
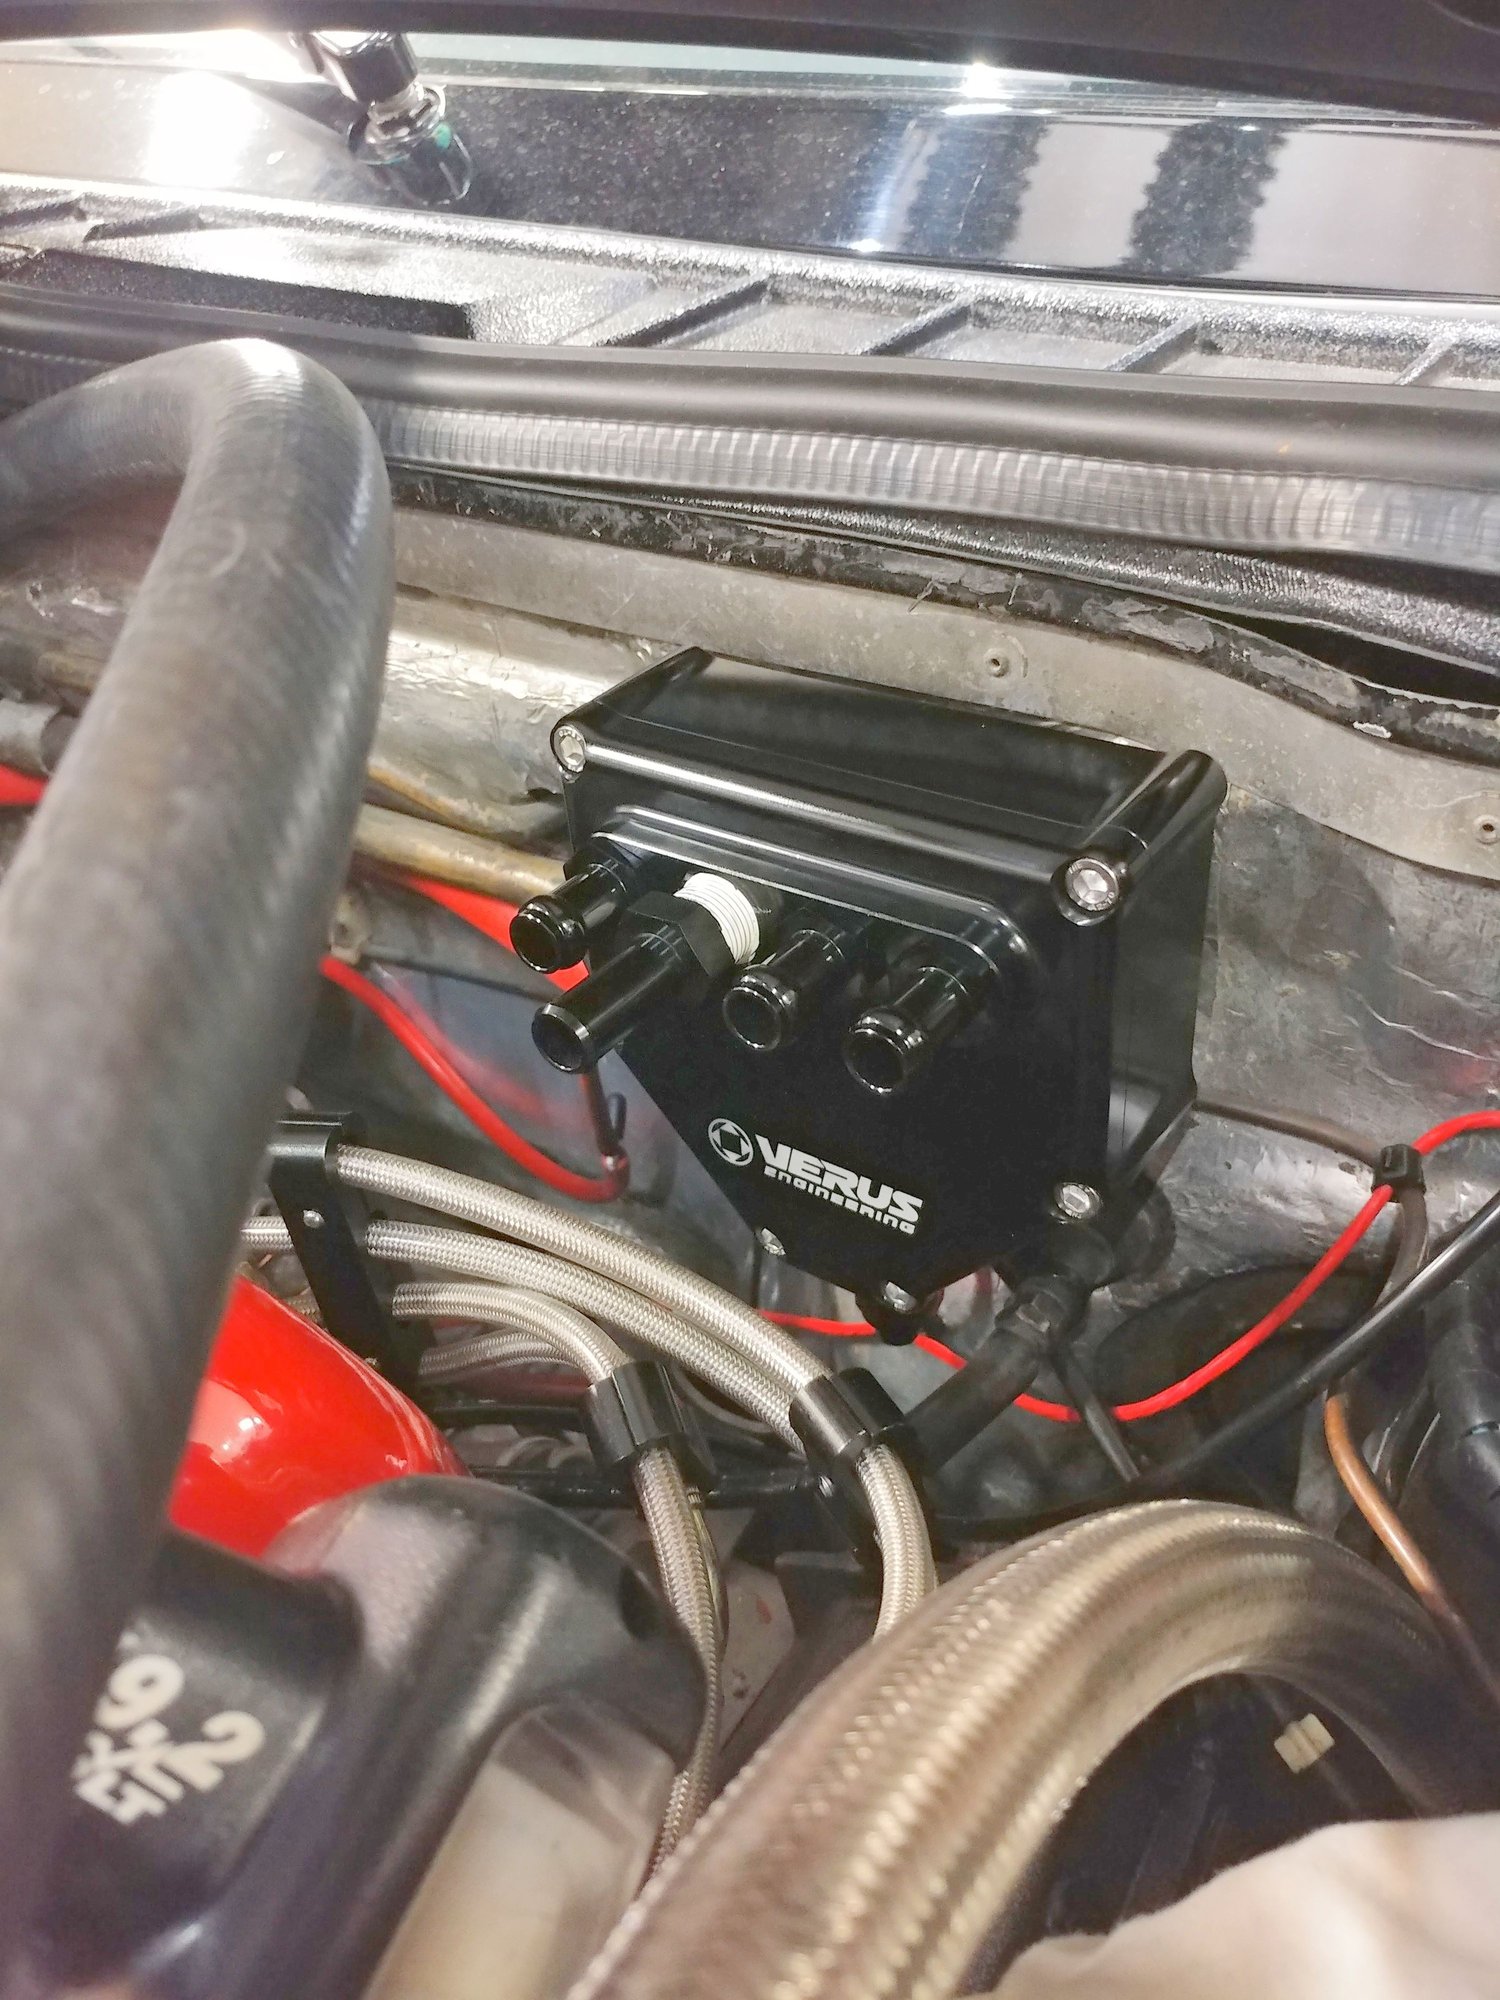
AOS unit mounted
Cam Tower 1-4 Vent line
Cam Tower 5-8 Vent Line
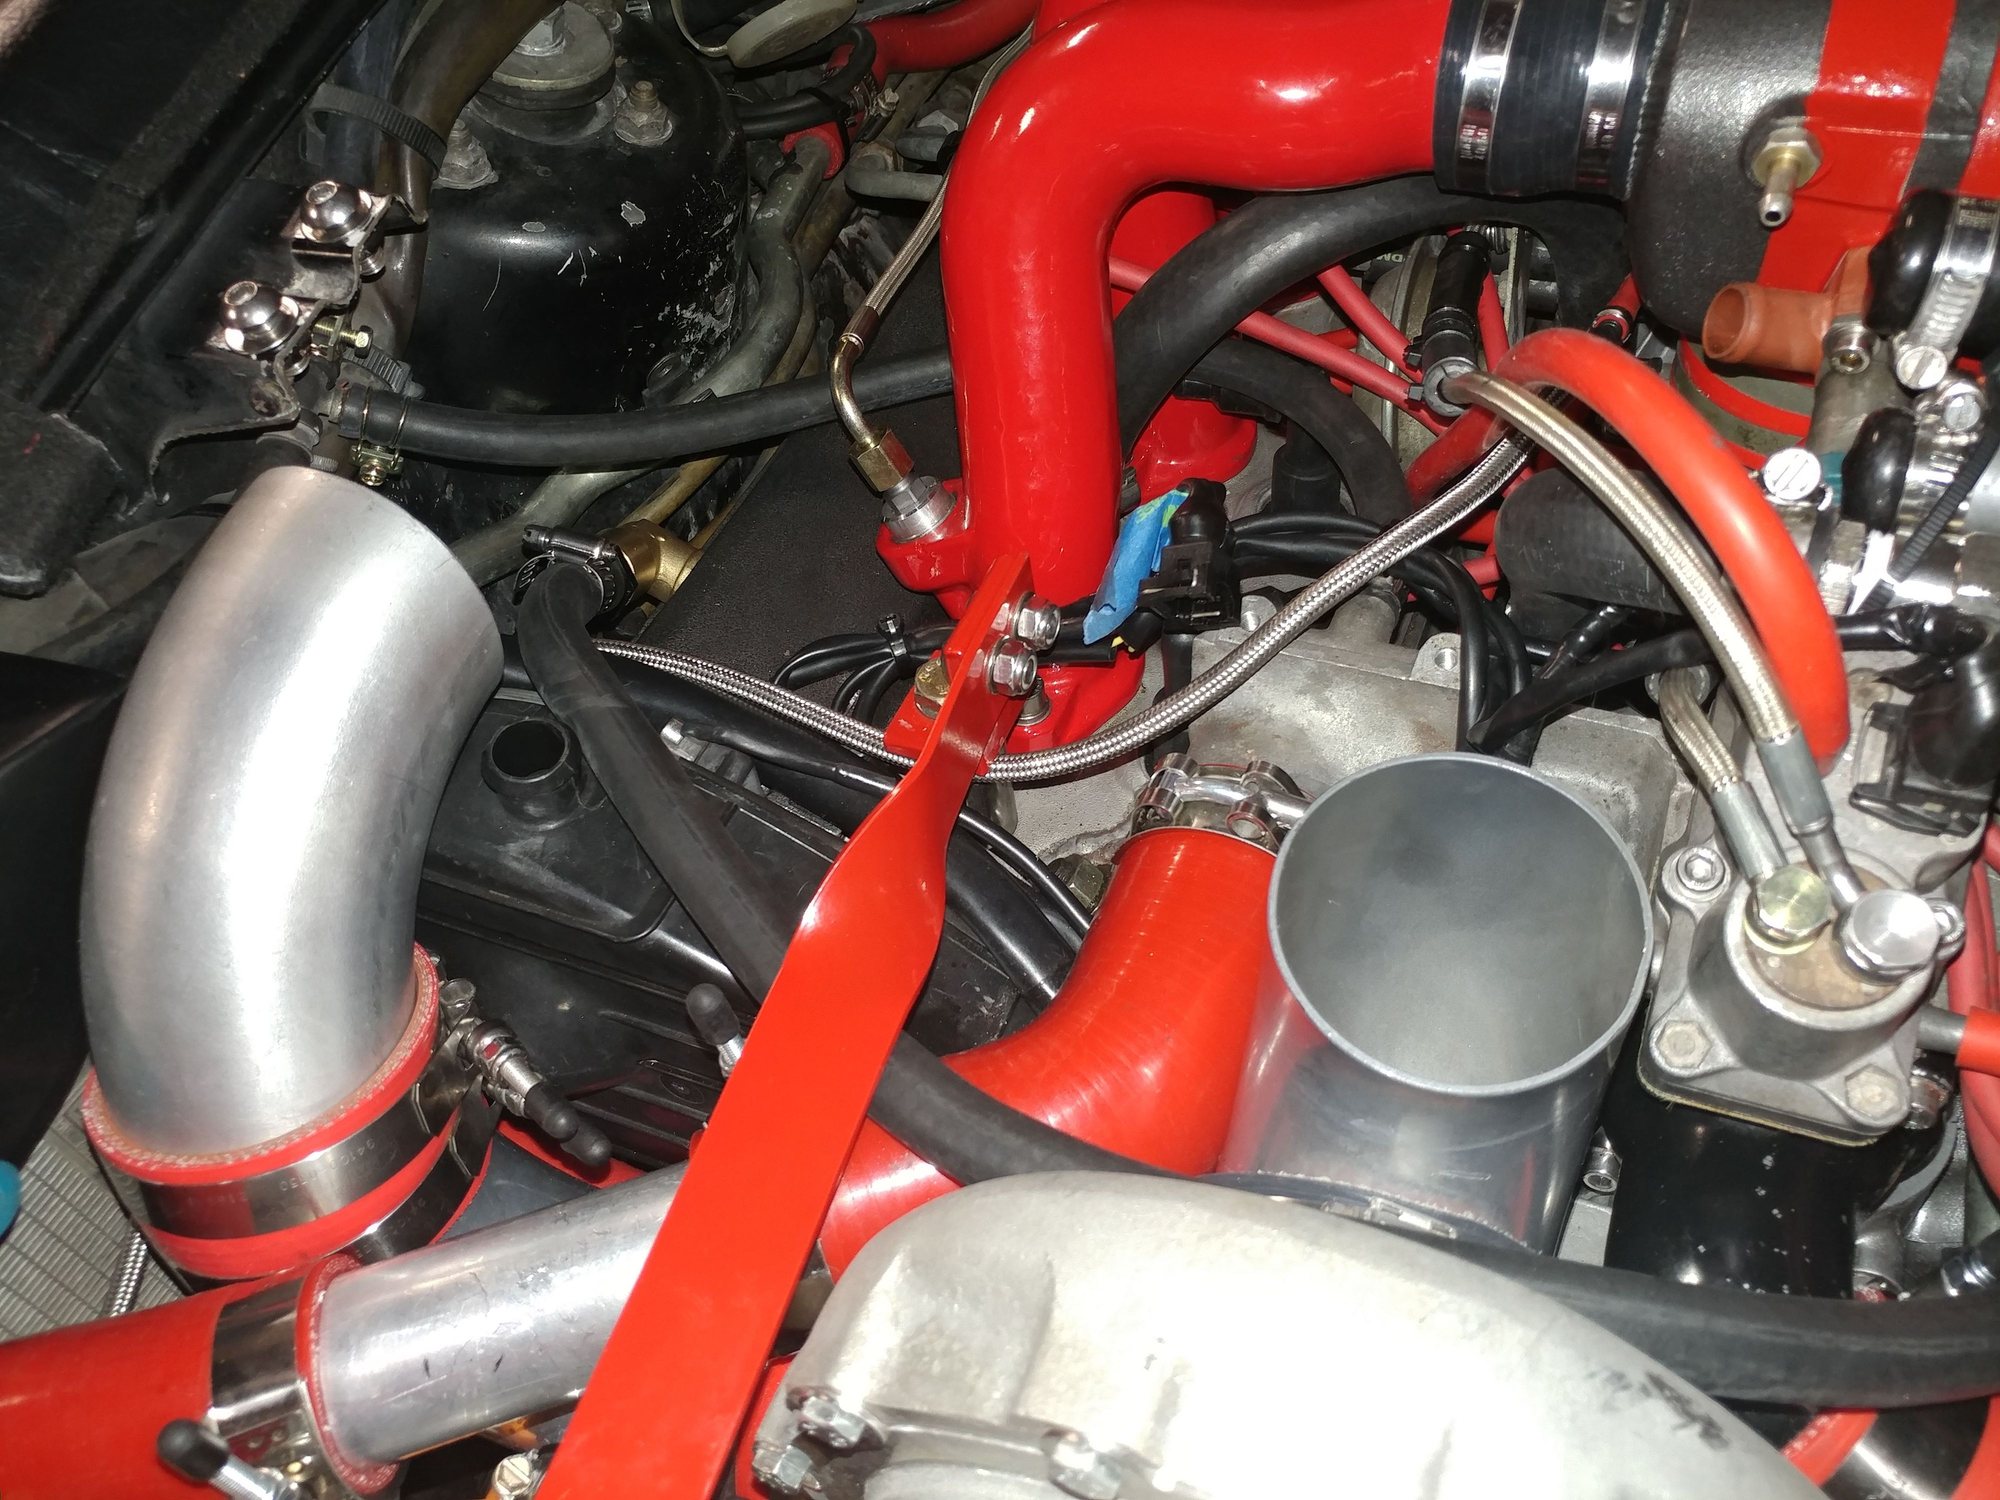
Tied in oil return line from AOS bottom drain
All lines plumbed into and out of AOS. Inlet lines also have 1 way check valves so any pressure or vacuum can't draw oil or the separation media back into the crankcase or cam towers. The 2 outlet lines from the 2 chambers Y-together and run down below the car. Any lines running above or near the header have been fire-sleeved to protect them.
Completed Install
Here's the previous venting setup I had and the spare Oil Control Baffle I'd sell. Crankcase pressure comes up through the line that connects to the oil fill assembly. 928MS sells a sleeve that fits under the oil cap and helps to separate the oil from the vapor - oil runs back into the pan. Residual oil gets further separated when the vapor goes up and out the silver assembly to the braided vent line under the car and residual oil runs back into the cam tower.
Baffle plate installs under the oil filler assembly. Seals with the included o-ring on the bottom side and with a factory gasket on the top side.
Wow, what a beautiful lot of work! Incredible!
In my case, there was no leakage before this latest disturbance of everything, so I doubt its an internal pressure problem. Currently thinking the oil is coming out the dipstick hole when on a steep decline - several of these unavoidable within a 1/2 mile of home. Going to try some way of improving the sealing of the threads - Oring maybe.
thanks
jp 83 Euro S AT 57k
Got it and thanks.
I think there is supposed to be an o-ring under there and there's also a gasket for the oil fill pipe and the oil pressure sensor right next to that if any of those were disturbed.
Pet only shows a gasket under the oil filler tube, but mine had a sort of Oring there, which was very flat, so it has a new one there now. Bit of a pain to pull that tube with all the belts in place, so I will try sealing the dipstick tube first and see how it goes, My dpstick tube had an ally washer under, so looking for a copper one now.
thanks
jp 83 Euro S AT 57k

 10-21-2019, 10:42 AM