When you click on links to various merchants on this site and make a purchase, this can result in this site earning a commission. Affiliate programs and affiliations include, but are not limited to, the eBay Partner Network.
Looks very good. I am impressed with the application and also the cover - the seams are straight and the cover fits.
If you are using contact cement, to get those little wrinkles out take a soft cloth and rub with a little pressure. Check out this guy doing a similar curvy covered piece on YouTube. He is a wizard.
Look up YouTube videos on steaming leather in....that will take the wrinkles down and smooth these out some. Looks good...great work!
Thanks I will take a look
Originally Posted by polecat702
Chris, What are you using for glue?
3M 90 contact adhesive, that works on the small stuff but will not be good enough for the quarter panels.
Originally Posted by chart928s4
Looks very good. I am impressed with the application and also the cover - the seams are straight and the cover fits.
If you are using contact cement, to get those little wrinkles out take a soft cloth and rub with a little pressure. Check out this guy doing a similar curvy covered piece on YouTube. He is a wizard.
Will take a look, the challenge with the rear console is that the leather is stretched rather than glued so the steamer may be the tool.
Yeah, leather definitely likes to do its own thing when stretched but you got it where it needed to go.
The foam was a good call. Do you have more info on that headliner foam at JoAnn?
On the glue, as you mention 3M 90 isn't the best but it works. It uses EVA as the adhesive. The pros generally use neoprene-based contact cement (Weldwood, Barge, HHR Landau Adhesive, etc) from a compressor/spray gun which I have not done - seems like a great way to get glue everywhere and ruin a spray gun. But from my limited experience you can brush it if you're careful. As with most of these things, the flammable toxic smelly messy kind (yellow) works by far the best. I use Weldwood in the red can because you can get it at Home Depot. Working on a small area at a time helps - the YouTube vid above shows one technique.
The foam was a good call. Do you have more info on that headliner foam at JoAnn?
On the glue, as you mention 3M 90 isn't the best but it works. It uses EVA as the adhesive. The pros generally use neoprene-based contact cement (Weldwood, Barge, HHR Landau Adhesive, etc) from a compressor/spray gun which I have not done - seems like a great way to get glue everywhere and ruin a spray gun. But from my limited experience you can brush it if you're careful. As with most of these things, the flammable toxic smelly messy kind (yellow) works by far the best. I use Weldwood in the red can because you can get it at Home Depot.
I don't have any more info on the foam, I just asked if they had some foam for a car interior and they directed me to the headliner foam at the back of the store. They said they had headliner contact adhesive but I did not investigate.
So I was going to get the above adhesive as you already noted and brush it on, however, given it is rarely above freezing here I was concerned about finding somewhere safe to apply it.
Does the Weldwood Red have the same temperature profile?, on the forums I read it seemed like the products you could find locally would not stand up to a hot interior.
From my reading, HHR is the gold standard (I have not used it). But I'm pretty sure Weldwood red and HHR are the same stuff except HHR has more solvents/thinners for spraying. The blurbs from DAP (maker of both) even sound the same: "High heat and water resistance when dry", "resists the effects of heat, water, weather, grease, oil and household chemicals" (from the Home Depot website for the Weldwood). I've used it on all kinds of projects and it's incredibly strong. Rob Budd even cites it in his DIY dash covering instructions. I would not hesitate to use it on my interior. Just be sure the piece is where you want it when you press it down.
the Weldwood you buy at Kmart HD and Lowes is similar to the stuff in the blue and white can ,
you need fresh air and 60 degree temps for it to work well,
I use a heat gun to help it set up when its cold out
Regarding that video linked, the producer has a LOT of good info for those who are doing any upholstery work, either fitting a cover or from scratch.
I stumbled across Cechaflo when I was looking into what it would require to repair my 928 interior, and promptly lost a day while watching video after video...
Now I'm tempted to make a pattern off of the passenger seat that isn't completely trashed, and then try it myself, while learning some new skills.
It may not be up to Champagne's quality and style, but it'll be mine, and if I don't like what I make, it's on me to make it better.
This is all for after I get the engine running correctly, electrical sorted out, possibly get the rusty bits and paint sorted...
That all said, your interior work looks good so far!
Chris,
I have not had good success with the readily available Weldwood red cans, the upholstery always let go in the summer heat around here. I'm in Wenatchee, pretty much the same summertime conditions as you.
Andrew
Well the Winter project turns into a Spring project, good new is I have virtually all of the parts I need.
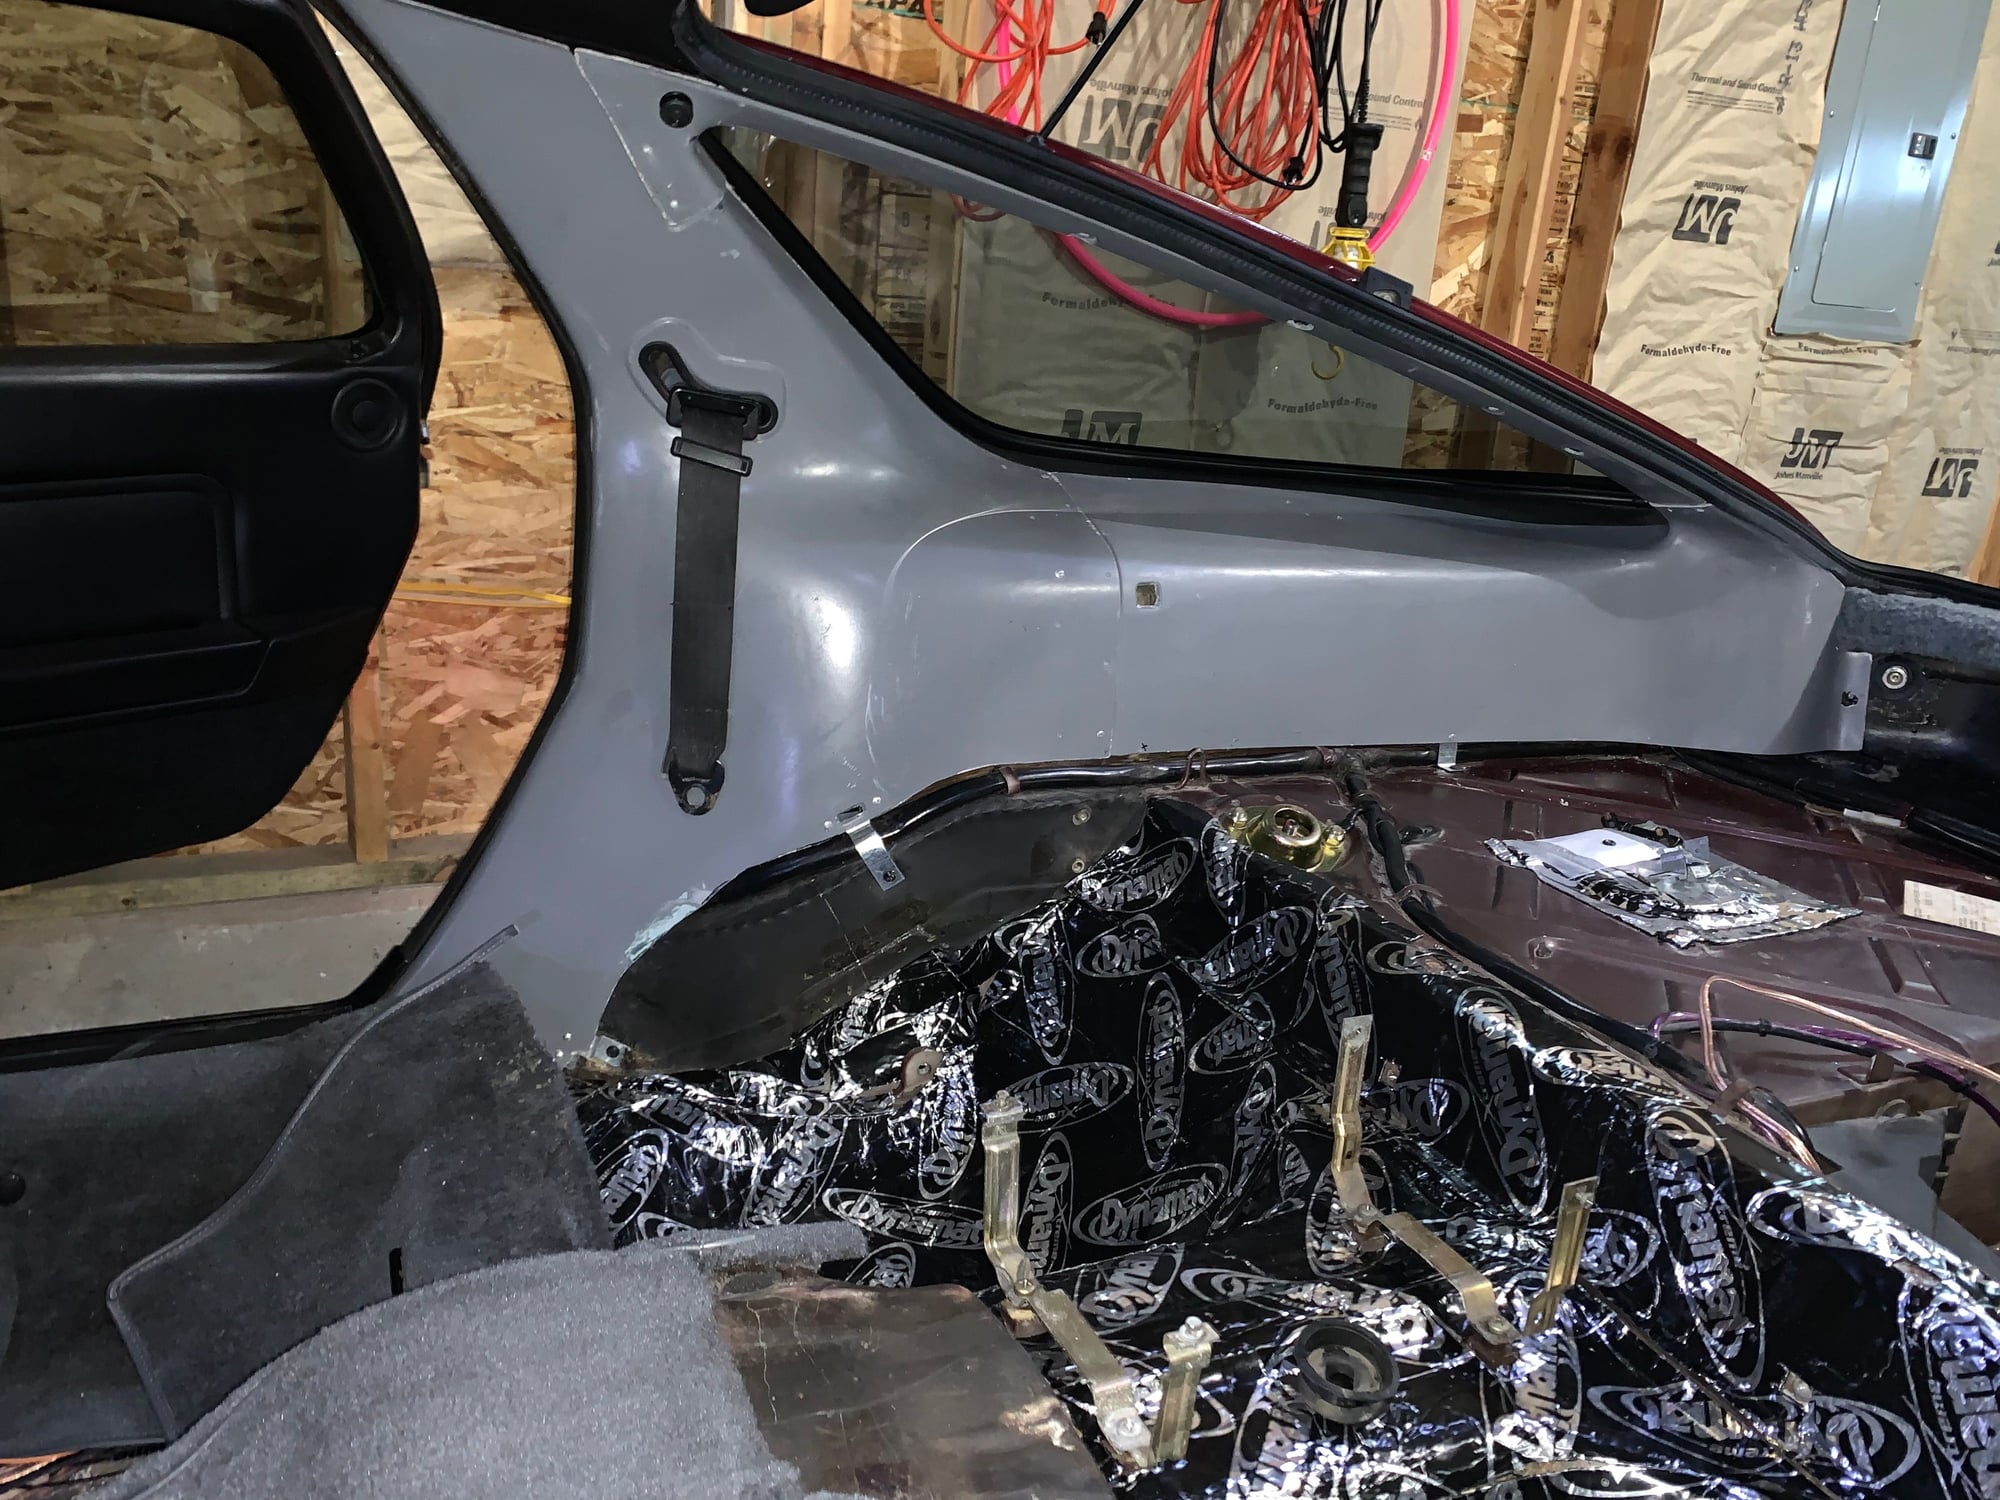
I took the day off work to make some progress, decided I would work on the interior quarters, It is tempting to assemble the quarters, recover and then fit. Decided to fit them first and am glad I did, it took me virtually all day to just get them to fit and the passenger side is still not quite right.
Anyway this is how they look now, still need to fit a couple of the brackets and finish riveting.
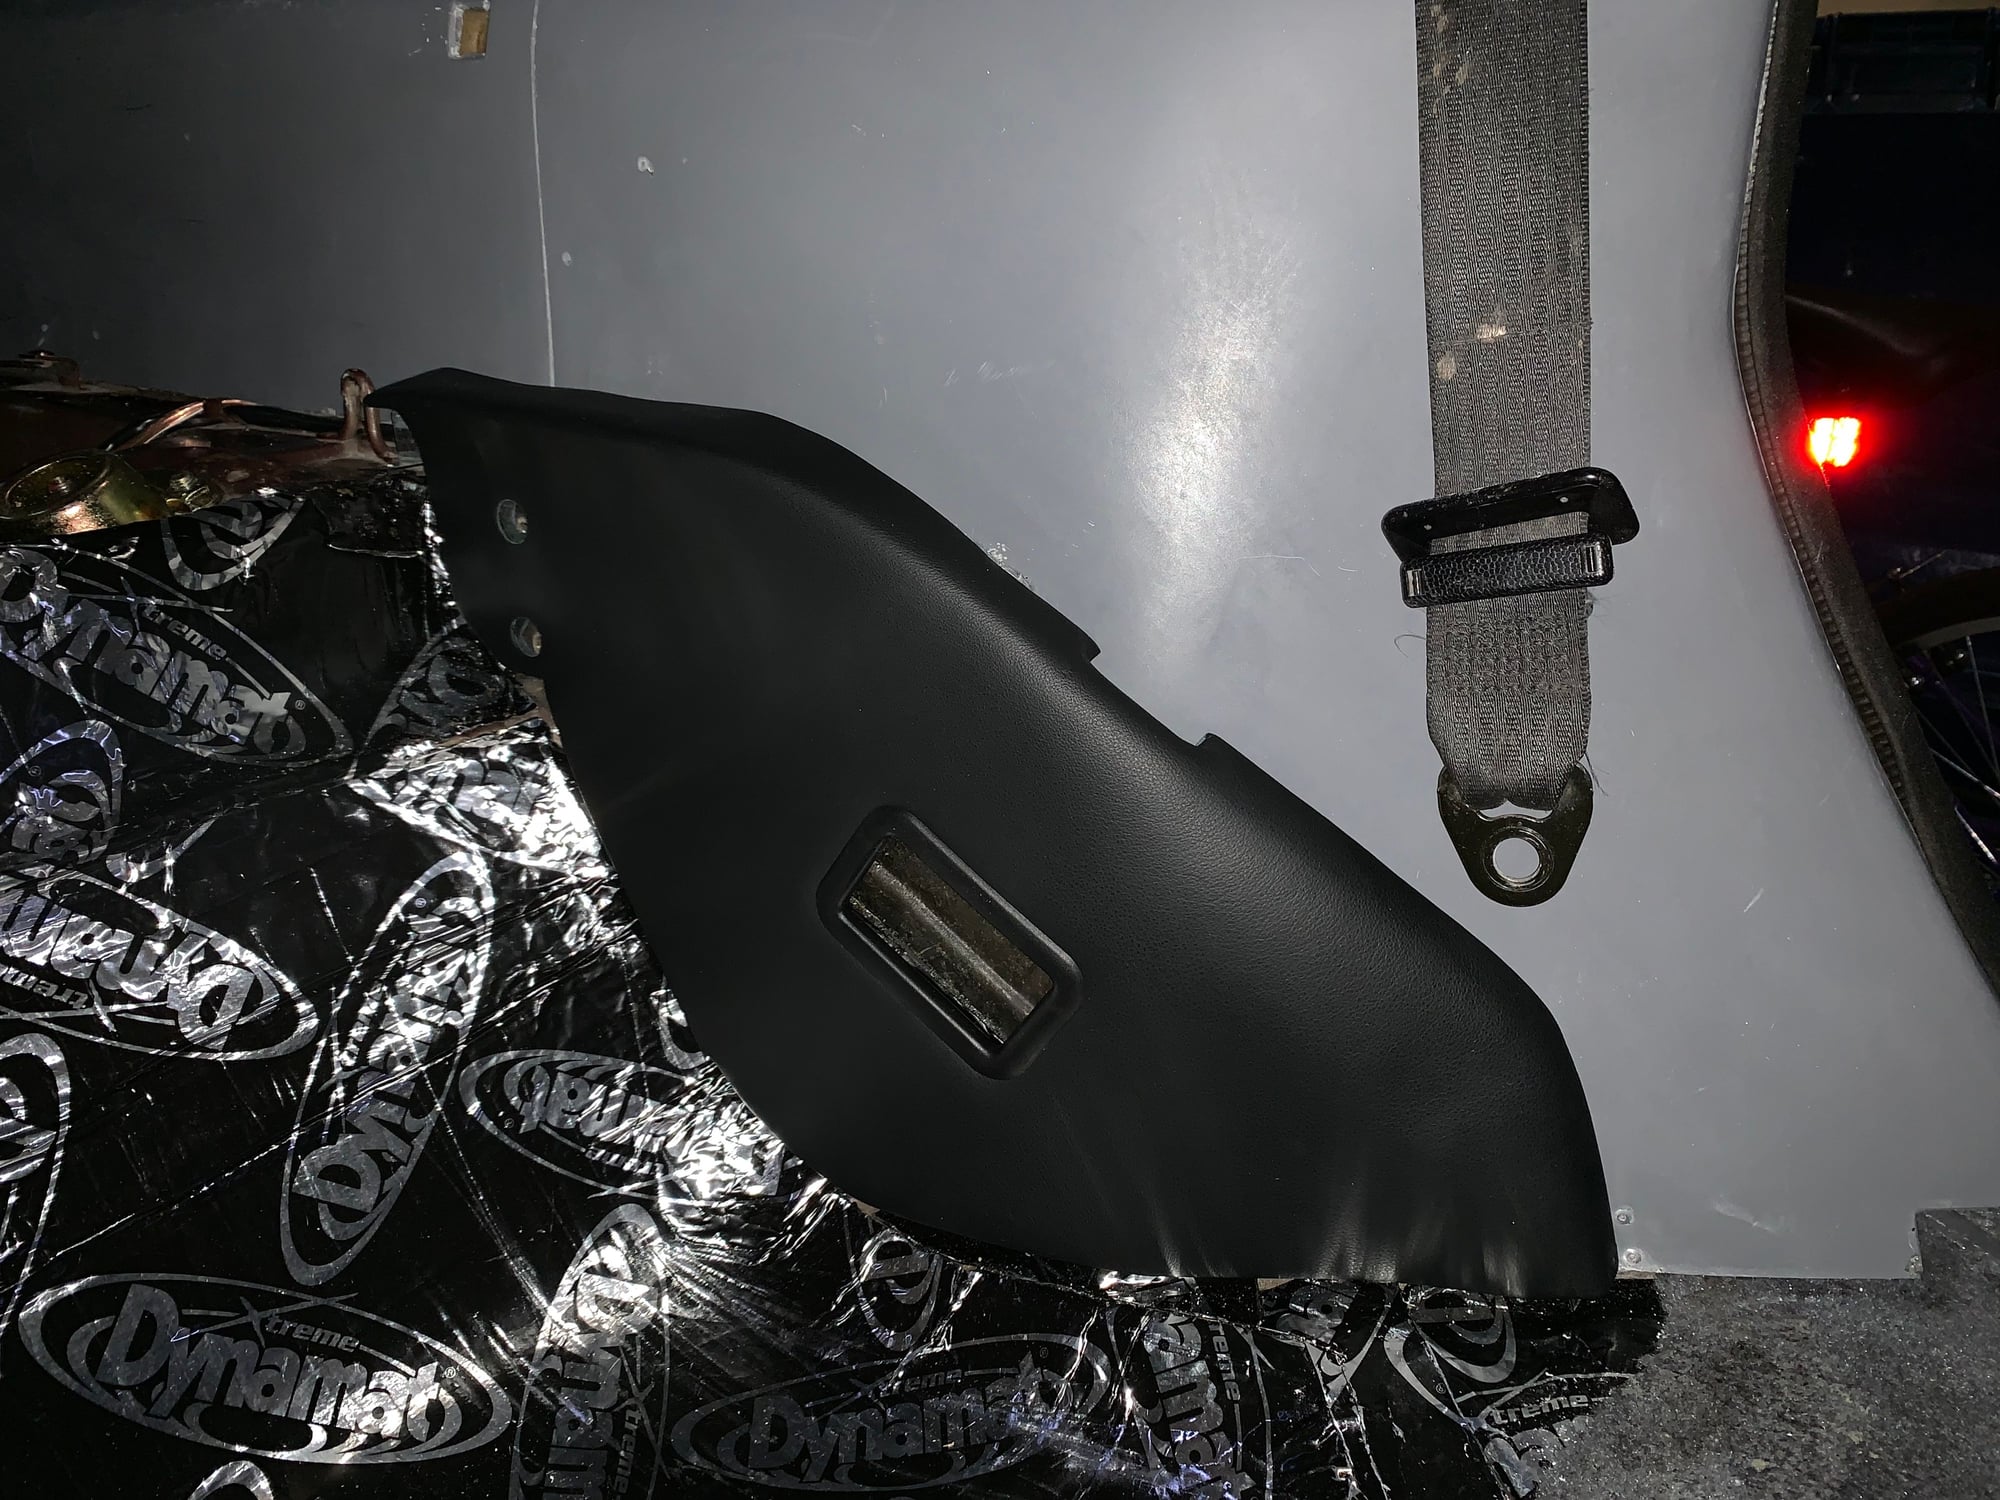
And to finish here are the recovered side panels in leather, and no not by me, these I had Rob recover, they are perfect! My panels were not great so got some burgundy ones of Ebay as cores.
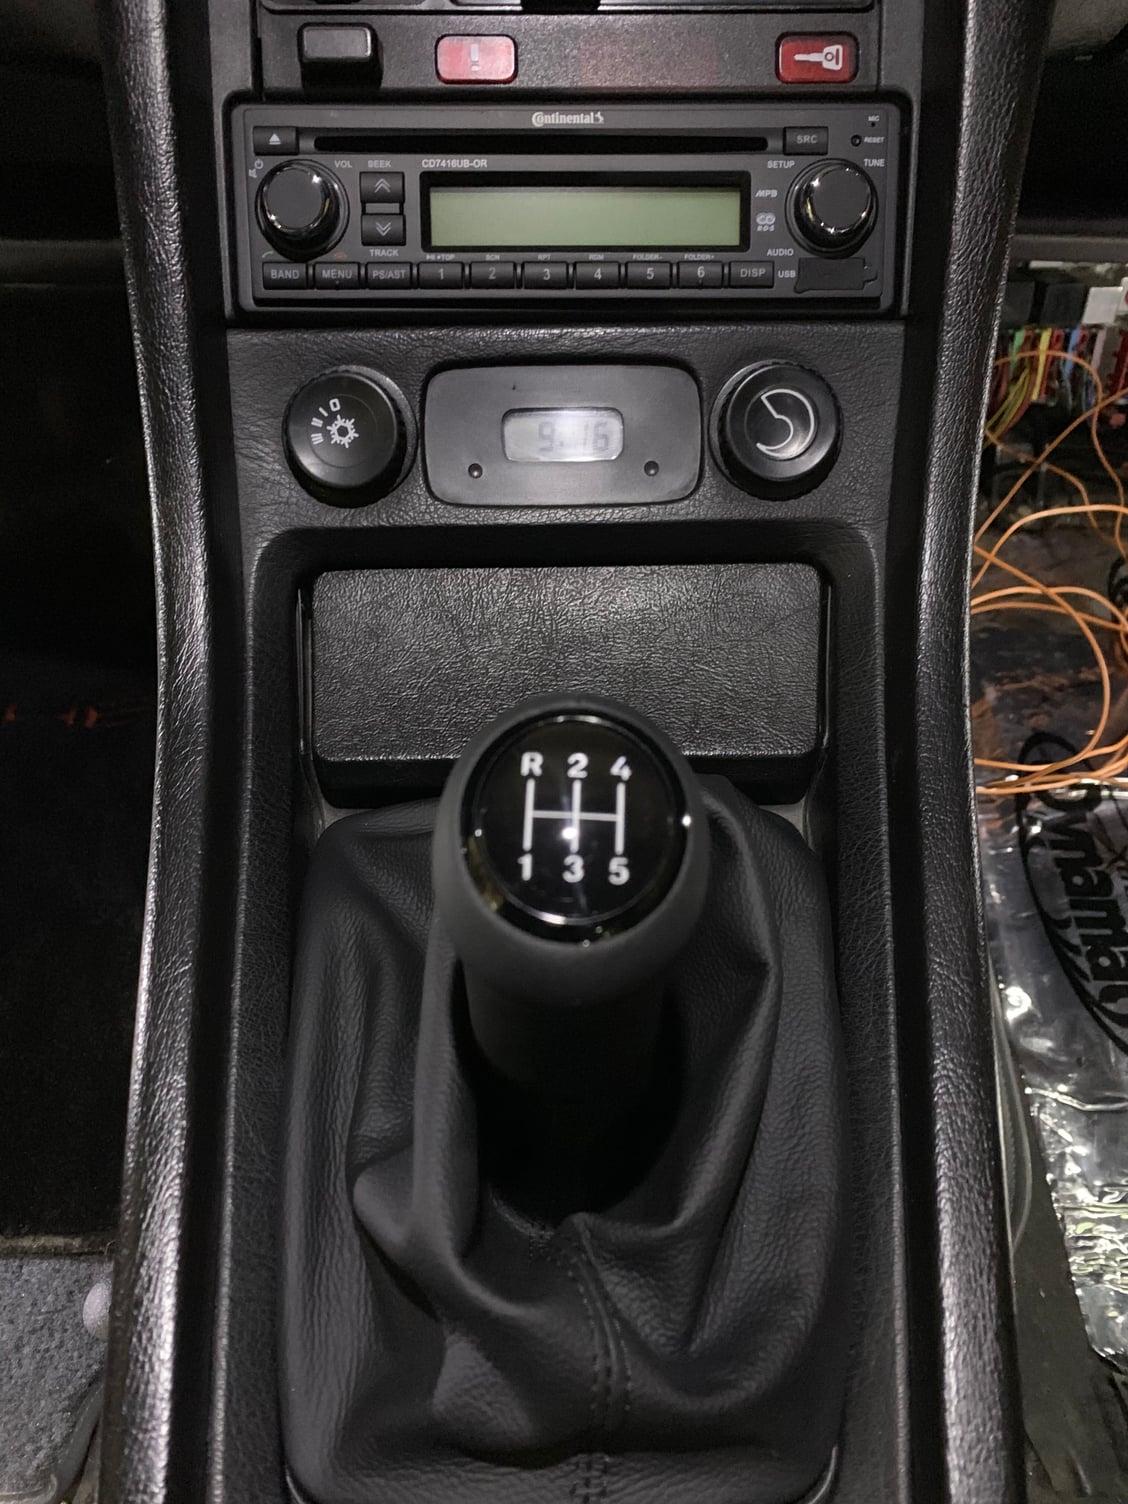
Decided to work on something that had more instant gratification, out with the Empeg stereo unit and in with the Continental. Obviously the Amp and speakers are not hooked up but simplified the wiring as the Empeg had a lot of wires.
Added the new shifter I got of Ebay from Germany.
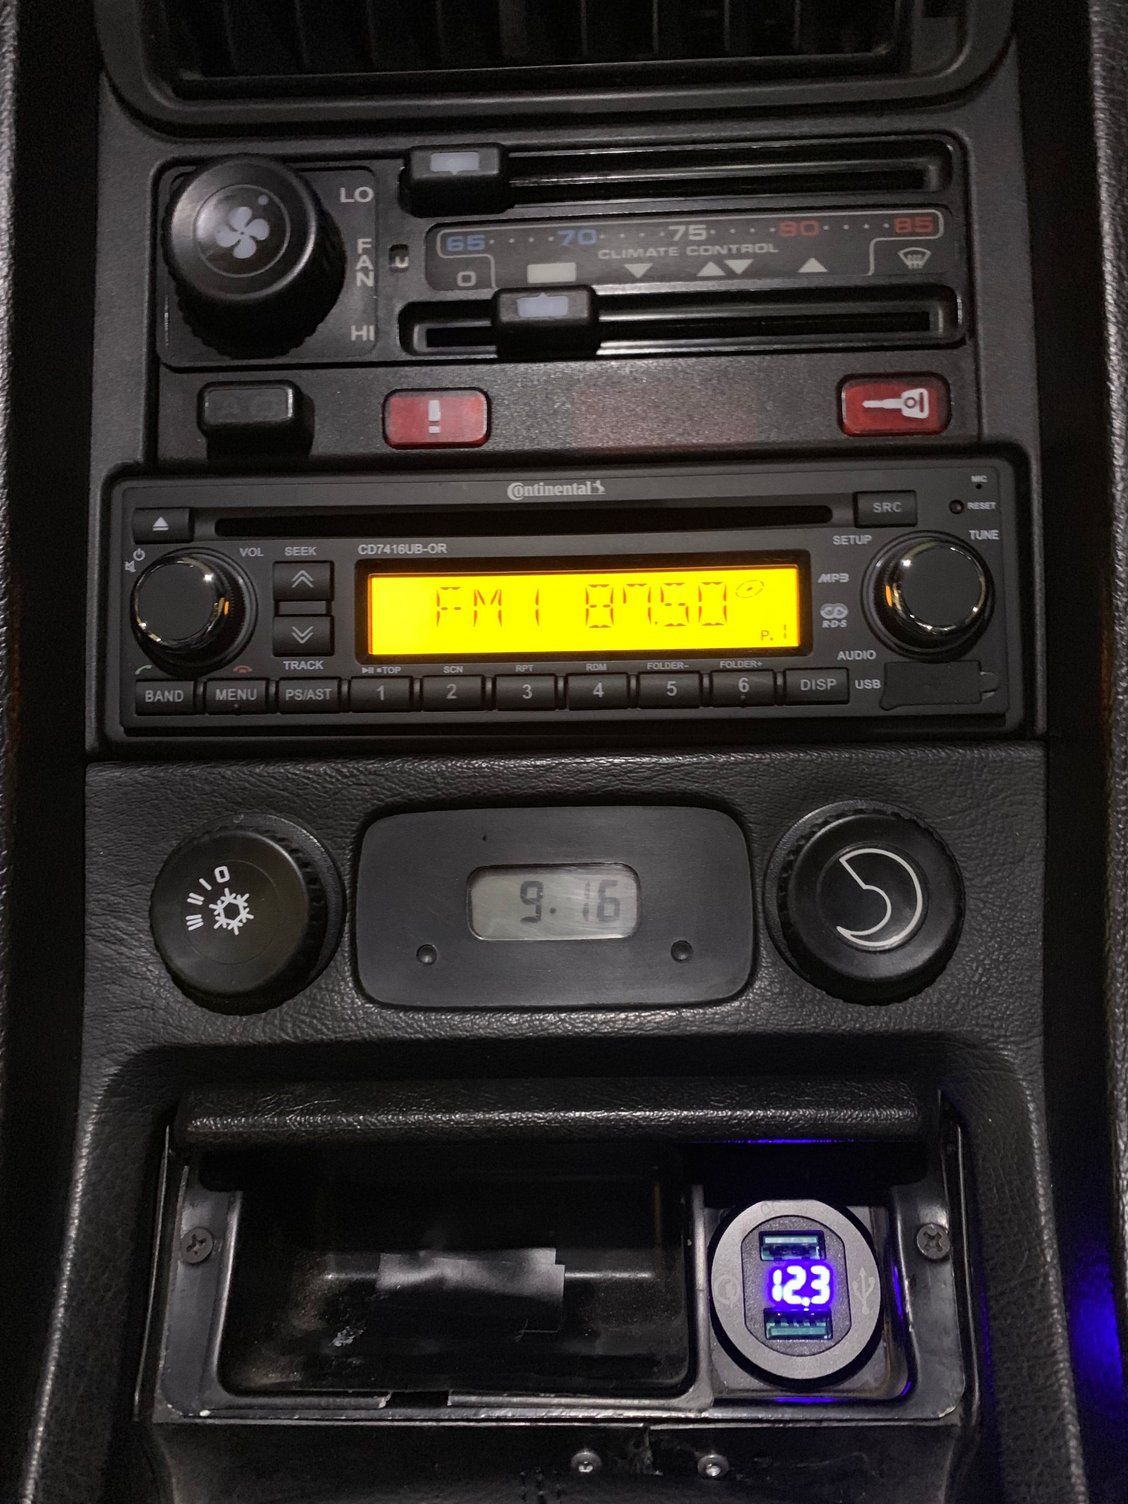
Many years ago I installed the AFM meter in the ash tray, it had been disconnected for years so removed that and installed a USB socket in place of the lighter. The volt meter is a little unnecessary but I wanted a metal USB holder and it came with.
Chris,
Would you be willing to share your source for the USB socket? Thank you!
Andrew
Yes of course, but an FYI, my lighter socket was not in good shape so I removed it rather than simply plugging in a USB adapter. Pretty tight fit but it works.

 02-18-2019, 07:46 PM