When you click on links to various merchants on this site and make a purchase, this can result in this site earning a commission. Affiliate programs and affiliations include, but are not limited to, the eBay Partner Network.
Reply
Ah, good to know we did that in retrospect. I was only focused on cleanliness. This is why I am fortunate to be able to rely on help from specialists like you. :-)
Now, back to the topic at hand relevant for the PO. Does the intake have to be coated on the inside? Porsche did coat it, and I just assumed coating or not on the inside didn't matter because of all the oil. I'll try to find some time to talk some of my materials specialist friends next week to see what they say.
A little more disclosure. Red Flash's intake (and cam covers) were done with Cerakote by Tru6 LLC. This was the 'bake-on' form of the product as opposed to the rattle-can form. Both insides and outsides were done. This stuff, even though it's a very thin film, is extremely resistant to everything and basically only comes off with a very sharp chisel.
With this surface coating, and by extension I assume also the rattle-can form or any form of ceramic coating, it's important to protect threads. The stuff is tough enough to chew-up taps and thread chasers.
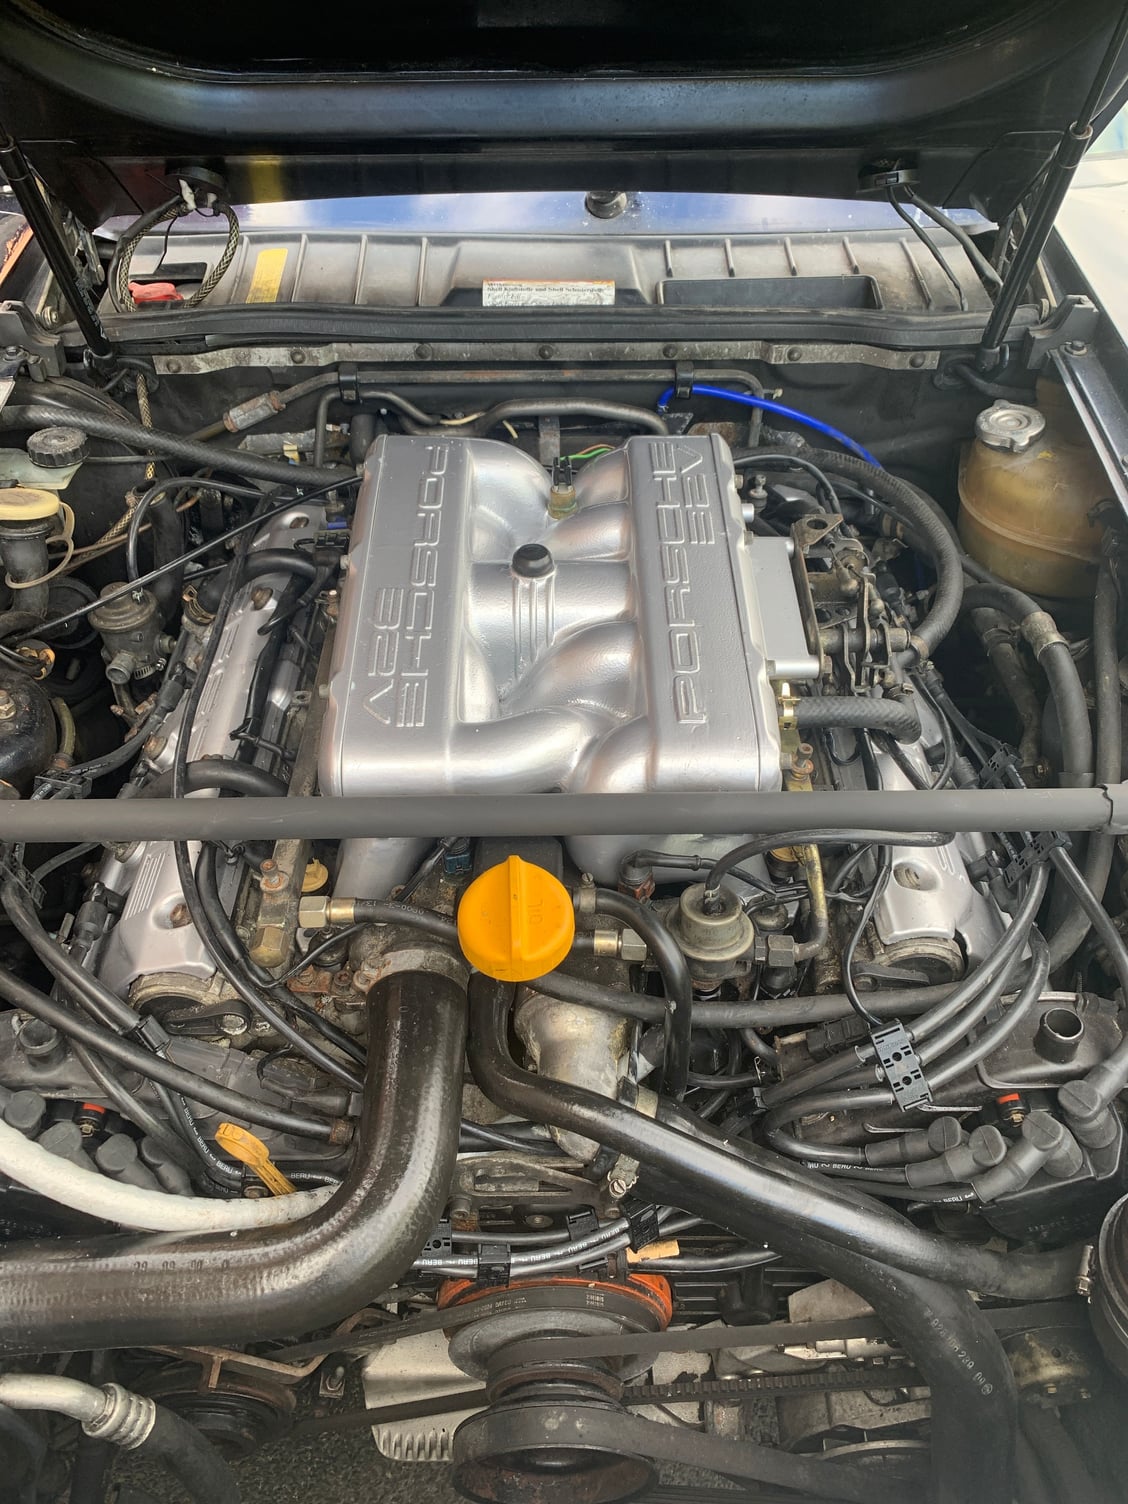
Well it has been a long road but the end is near, thanks all for your help.
When it comes to the cause of the fire, I have unfortunately found that I may well have been the culprit. Almost 10 years ago, I posted on Rennlist about vacuum lines going under the intake, and back then I struggled to get an injector o-ring to seal (https://rennlist.com/forums/928-foru...connected.html), it turns out that back then I tore the upper o-ring and the car has been a time bomb ever since, amazing it lasted to so long to be honest. Lesson learned!
Interesting ideas and concepts herein. However, may I opine? Let me state I have not seen any immediate flash corrosion of these manifolds after being media blasted, and I have done several so far. The notion of blasting media hiding out inside is misguided. There is no place for media to hide out. If you have ample cfm of air, a good lightweight blasting media, and have not introduced chemicals to aid in removing of these these coatings, and it's not a GTS manifold, you are in luck. If you have introduced chemicals and have a typical small compressor (and small is relative) in your garage, you likely will not be blasting too many intake manifolds very well. If your S4 manifold is taking you more than 45 minutes to blast, maybe it's time to find a professional media blaster, not a sand blaster. I've got a current thread here showing this process...feel free to explore.
One thing to note, I had mine blasted with plastic bead on the grounds that if it did make it to the engine, it would melt hopefully.
Nonetheless, after blasting I used an air line to blow out any remaining dust before power coating. Still find it odd that all of the gasket faces are coated, but I’m not going to change it!
Thanks for your assistance and input up to this point. I have finally got around to finishing this job and now have the engine running again and all seems sweet so far..
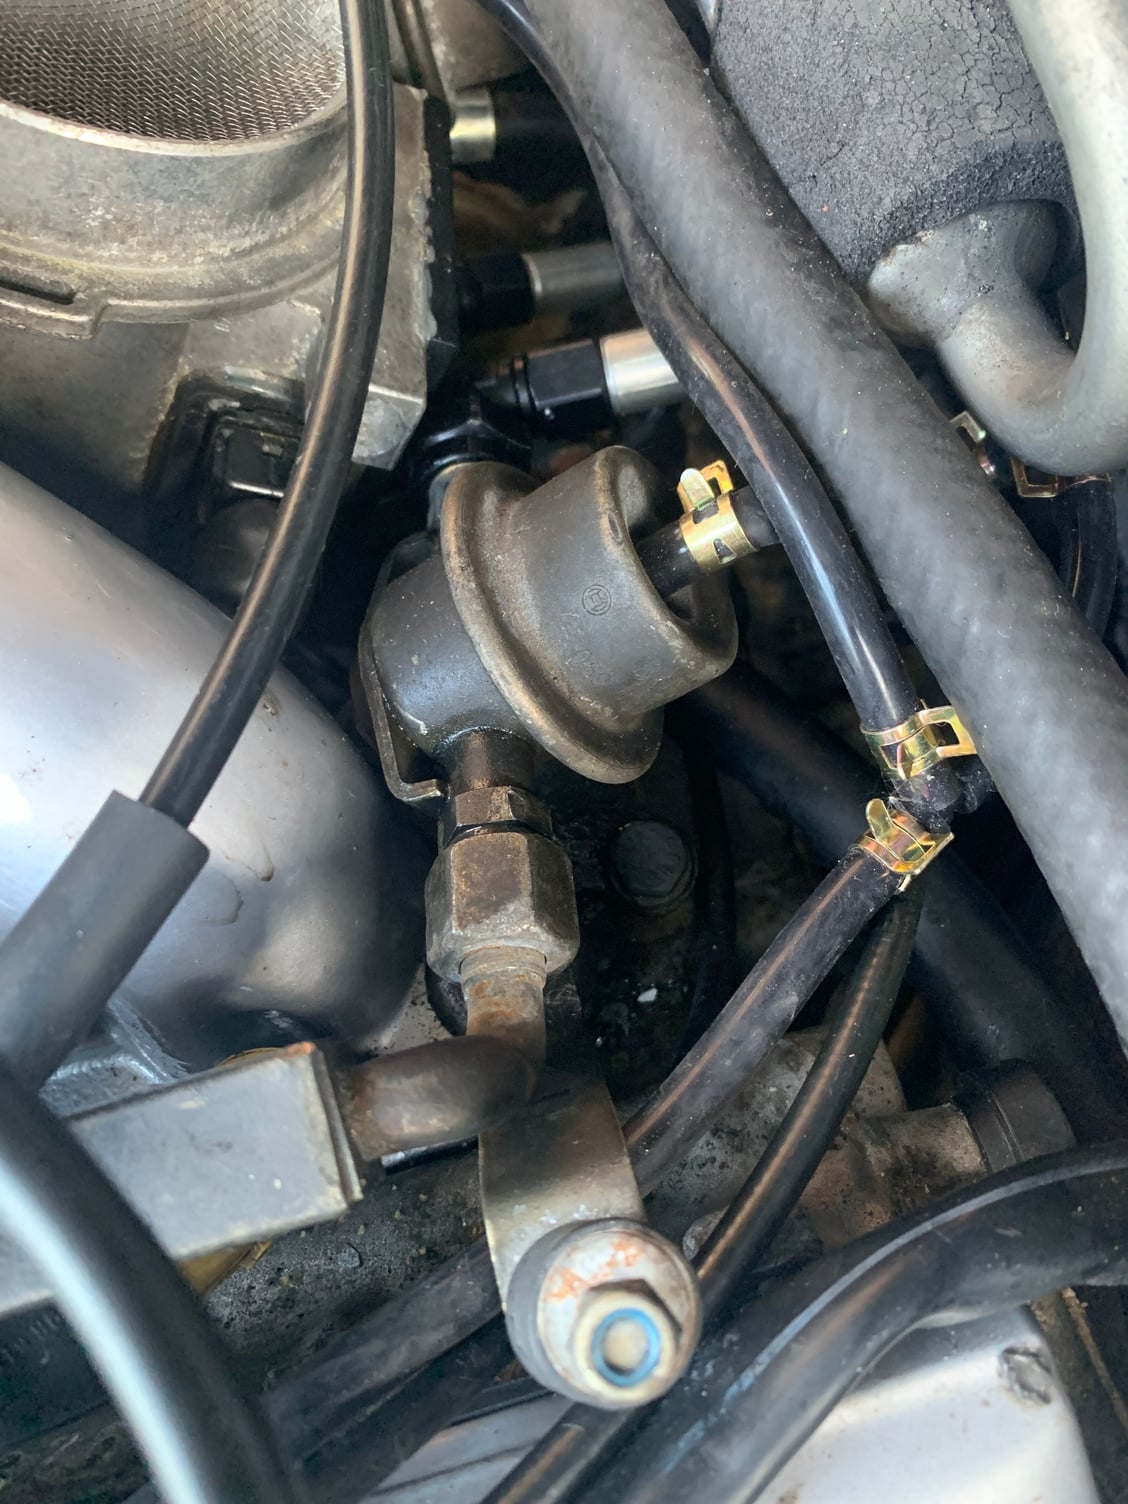
One thing I have found however is that I have a very small fuel leak/weep from this connection, and I have tightened it as tight as I *think* it should go. Any helpful tips on how to sort this one?
Nice work, I would loosen off clean the fitting, movie it around a little and then re tighten, normally works on the compression fittings when tightening more is not working. I also see you have the air pump hose off, i would block off if your not going to refit.
put a coat of loctite 574 on the ball face areas ,
and some anti seize on the back of the ball area where the B nut will push and on the threads.
NOTE based on this picture you could also need to replace the damper,
as it could also have a inlet that appears that it could to be cracked next to the body of the damper
Stan, thanks again for the advice. Backing off the fuel rail mounting nuts, lubricating the joint, then re-tightening the joint first, before the mounting nuts has sorted the issue, luckily the damper is not cracked...
Now onto fluids, new set of tyres, and a UK MOT test.. when our lockdown ends!
I am now faced with a dilemma, I have a small leak from the water bridge on starting the car up.. I stopped short of doing this when the intake was off because I found the bolts to be very tight, and wasn't even sure if the car still ran after the fire.
Now I have a running car with a leaking water bridge. The car being a 1991 car means one of the water bridge bolts is very hard to get at, so if I want to tackle it, I might have to remove the intake again.
Do you think I could just remove the intake mounting nuts, loosen off the fuel rails, and just lift the intake a bit to get onto the difficult bolt?