When you click on links to various merchants on this site and make a purchase, this can result in this site earning a commission. Affiliate programs and affiliations include, but are not limited to, the eBay Partner Network.
So latest quandary reassembling my S2 engine is the head studs. The machine shop removed them when they cleaned and inspected the blocks but left them loose for me to replace. Studs look good enough to reuse but even though I have the right lengths in the right holes, a couple of the 198mm studs are sticking out noticeably more than the others. very noticeable when the head is placed in position. I thought to clean out the thread with a tap but of course the thread depth requires an extra long tap. Anyone else come across this problem before or am I missing something like a fitting under the head nut..
Warning if you use a tap to clean out your block,
it will turn into a coffee table.
I suggest to use an old stud that you have put 3 chines into at the first 3 threads,
Note use a grinding wheel to cut the tip of the stud 3 evenly spaced cuts
this will act as a tap and the threads will be clean.
NOTE you will need to dry fit your head and HG and then snug the nuts to figure the correct stud depth,
this is something you should have done before the studs were removed.
I've found that the "cut stud" will not always remove enough of the old Loctite to allow the studs to get in deep enough.
Buy a thread chaser and TIG a 6" 3/8 drive extention onto it.
For stud removal,
use a mapp gas torch to heat every stud surround ,
do one or two at a time, about 250F is a good temp to shoot for.
If you dont have a thread chaser with welding capability,as Greg suggests
using carburetor cleaner or acetone and the stud trimmed as I mentioned will work just fine.
NOTE measure the installed stud height to the deck before you remove any studs from the block,
its best to keep the studs going back into the hole they were removed from.
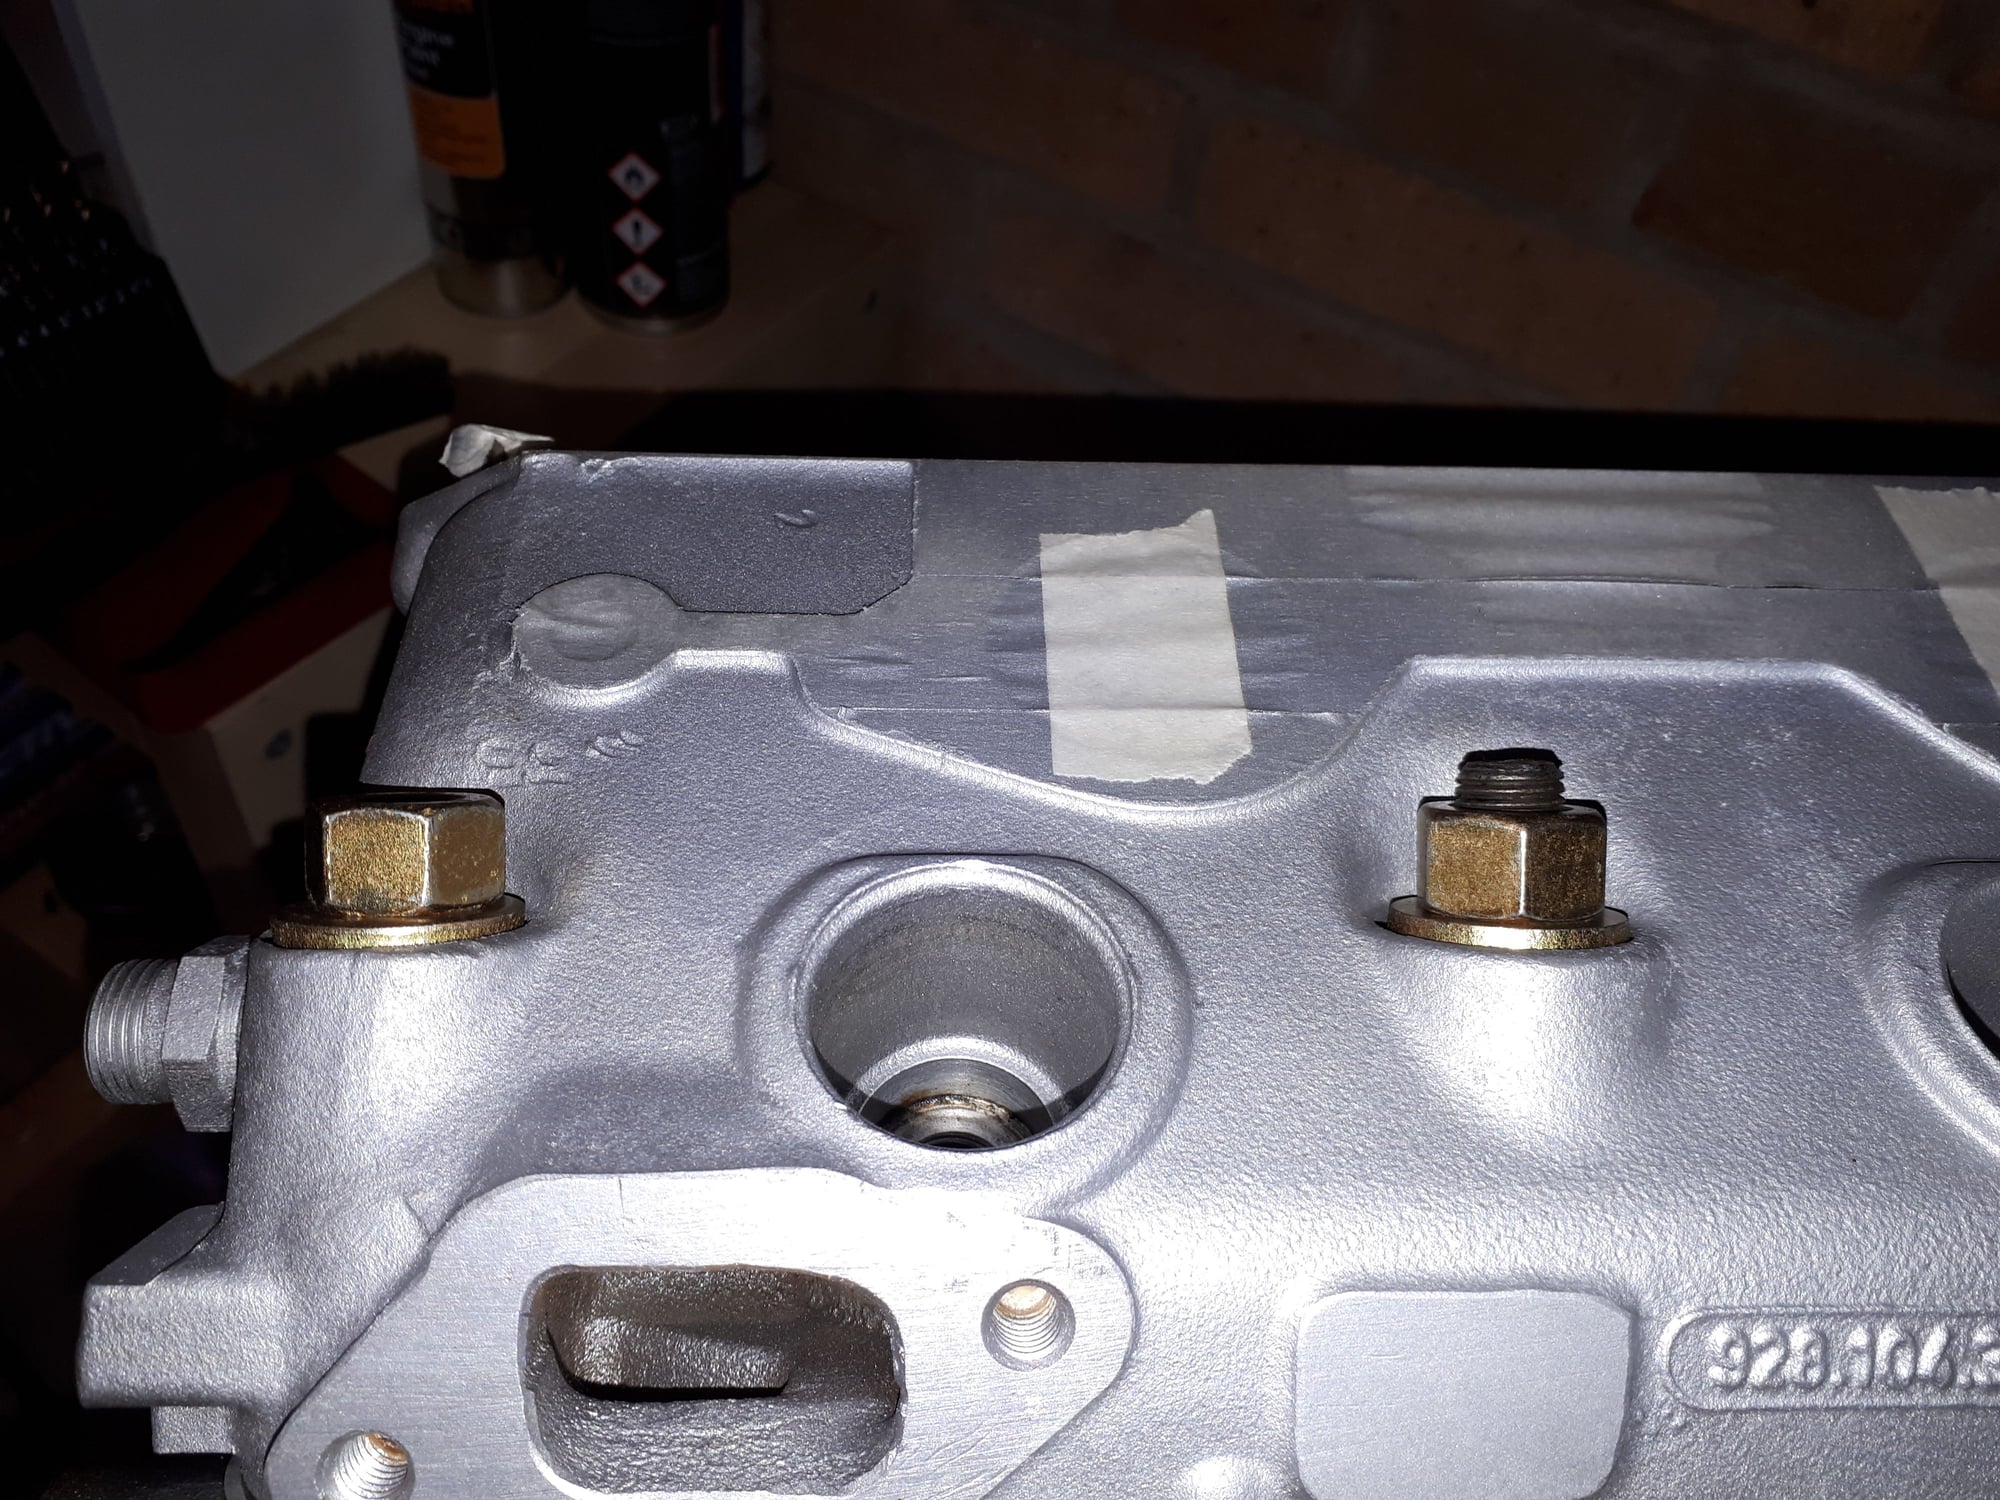
So update on my head stud issue. The shop took them out so I have no idea which went where but they are all to spec according to PET ie 18 off 193mm long and 2 off 142mm long. I sacrificed one to make a tap using my grinder and have run this through the stud hole where the stud sits proud. Nothing much came out and the height mismatch remains. I have measured the hole depths, the one in question measures approx 116mm from memory whereas one of the others is more than 120, I think 126 from memory. I presume all studs need to go to full depth so as to apply the initail torque. I am stumped. Here is a photo of the problem. Exists in 3 of the stud positions....
what your looking for is the stud to protrude about 2 to 3 threads above the nut when its tight.
SO you dont run the stud fully into each hole just because you can.
NOTE the red loctite will hold the studs in place once it cures
in your picture the stud on the left is too deep into the block,
and the other stud on the right could be screwed in about 1 to 2 more turns
Aha! Didn't know that. I thought the torquing of the studs before putting the head on meant they went to full depth. Thanks again, this has solved my latest assembly hiatus
D
1. Install only one stud.
2. test fit head
3. Get that one stud so that a couple or three threads show when the nut is on.
4. Take head off
5. Get ruler, put blue tape on there that matches installed height of known good stud
6. Use ruler to install all the rest like that.....