When you click on links to various merchants on this site and make a purchase, this can result in this site earning a commission. Affiliate programs and affiliations include, but are not limited to, the eBay Partner Network.
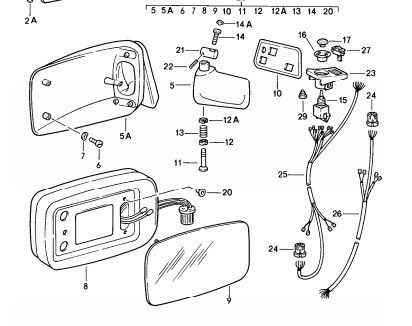
So my 1984 928S passenger side mirror is literally hanging by a thread. It’s only kept on by the electrical wires but the housing is completely loose and unconnected. No idea how this happened I just noticed it one day! I’ve looked at the parts diagram a dozen times and can’t figure out what to do.
Last edited by John Burns; 12-05-2018 at 12:10 PM.
Reason: Photos
You are going to need to disassemble the mirror completely including de-pinning the electrical connectors. Then remove the base from the car threading the wires though it and then you can reattach the base to the mirror assembly. Then rethread all the wires back through and pin them back in as you took them out. The two parts are held together by a hollow "screw". Pretty simple once you have it a part to see how it all goes back together.
Put a pad towel whatever over the side of the door under the mirror.
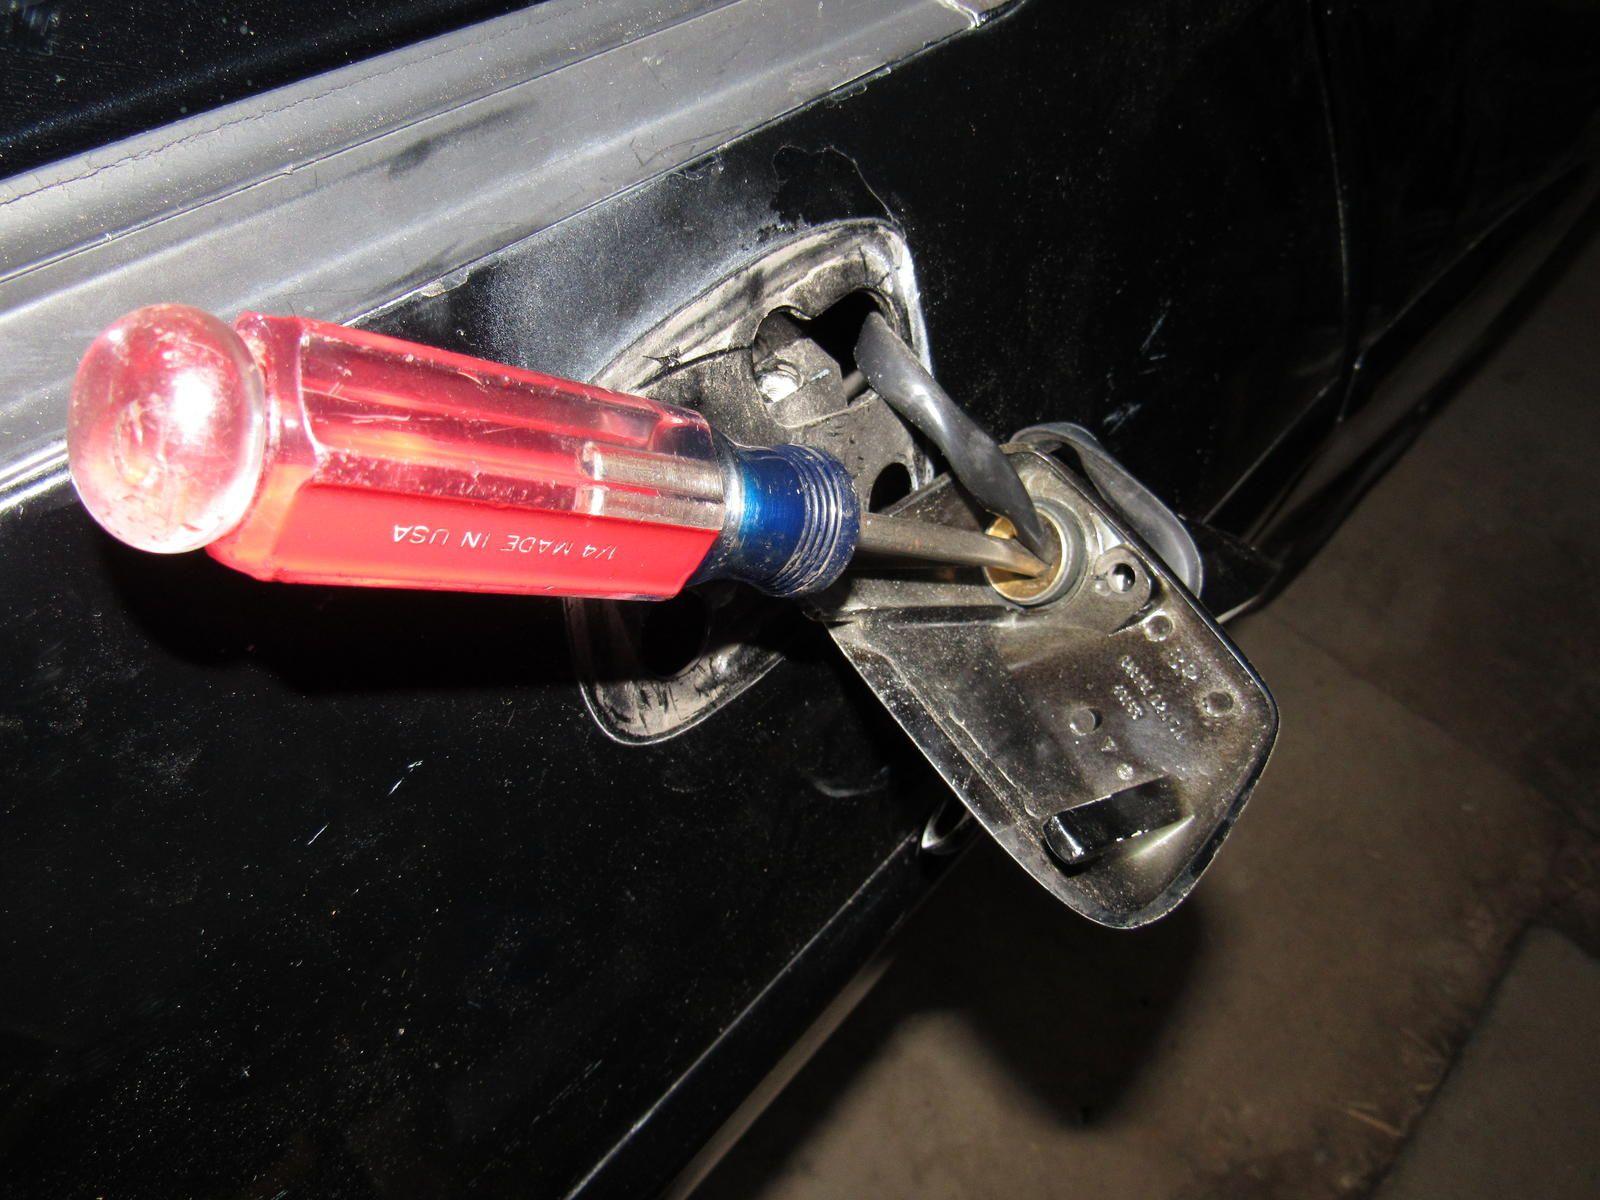
I was was able to get the bolt back in without un-wiring but it was a chore. The hollow bolt has screwdriver slots in the end that’s inside the base. Remove the two Allen bolts to access the bolt head. There’s a spring you’ll be compressing as you get to push and turn that bolt to get it started into the threads in the flag section. The threads are pretty fine and they are aluminum pot metal, so work carefully.
It’s safer doing it SeanR’s way. You’ll still need to protect the door.
So you mean it just needs to be taken out and rescrewed, I don't need to order any parts? Is there any manual or video about disassembling this so I can try it out?
two allenbolts secure the base to the door. Follow Sean's guidance in disassembling the wire pins from the connector shell. Good idea to take a few pics so the wires can go back into the right places.
With the two mirror pieces base and flag on your padded bench, you'll see the bottom end of the hollow bolt with the wires passing through. Get the wires out of the bolt so you can use a large flat-blade screwdriver to push and turn the bolt, engaging the threaded end of the bolt into the threaded hole in the flag section.
There may be a case for adding a SMALL AMOUNT of thread locker at the end of th bolt so it doesn't come loose again on its own. I was rotating the mirrors regularly to cover the car, and the reglar turning eventually loosened the bolt. A drop of nail polish was my choice of threadlockers, so I could add a little acetone to get it to release later if needed.
Most people won't have the tool to de-pin the connector and I was able to fix this without doing so.
Remove the flathead screw in your photo holding the mirror base to the door.
Use a flat head screw driver of the right size to engage the splines inside the hollow bolt to retighten it. You will have to compress the spring and turn a little at a time to prevent damage to wiring. Use Loctite.
It is one of the dumbest designs ever that the wiring connector for the mirror wires doesn't fit through the hole in the door that's under the mirror base.
If you do end up depinning the connector, so you can fix it on the bench out of the car, you have the opportunity to rectify this situation for future access and ease of repair. I found a screw together multi wire barrel connector that was small enough to fit through the hole in the door. I connected one side to the wires inside the door and the others to the mirror wiring and can now pull the mirror from the door without unpinning the connector. There is also enough wire length to route it better so there's no chance of the window catching it and jerking the wires apart.
I was able to disassemble and reassemble it. Had to do it two times as it popped off the first time - you really have to screw it in tight all the way. It's also quite difficult to get it threaded initially, took me like 30 minutes of trying and failing. I did scratch the paint in a few places, I need a new paint job anyway, but even with the blankets I would advise taping off blankets on all the car body around where you're working to prevent scratching. Thanks again!


 12-05-2018, 11:54 AM