When you click on links to various merchants on this site and make a purchase, this can result in this site earning a commission. Affiliate programs and affiliations include, but are not limited to, the eBay Partner Network.
Sounds like a plan. From memory it is just a slip fit over the steel tubing at the front. I do seem to remember reconnecting it from under the car by feel more than actually seeing it. I also remember putting a small plastic zip tie over the union so it wouldn't come off as easily in the future.
The way I found out my rubber line became disconnected was pronounced shift hardness, to include chirping rear tires when pushed hard. Thought it was because of the weight reduction the 928S (aka "the Coke Car") went through over a year of work. To my chagrin was told it was because of the disconnected vacuum line to the transmission, which I found at the front. This was when the car was still an automatic before the 5-speed conversion.
Good luck with the work!
I can tell you've done this before
I knew on my first test drive after replacing all my fuel lines that vacuum line had come loose, I did this about 5 years ago after an intake refresh and had the same hard shifting symptoms. It was a real bear getting that line reconnected last time so I kind of knew I was in trouble. Last time the cloth covered line was still poking out of the firewall so it was only difficult, not impossible, to reconnect from the top of the engine. This time I'm not so lucky...
I’ve had to replace the vacuum flex hose between the rigid vacuum pipe (above the torque tube) and the vacuum distributed in the engine bay several times. I have large hands and could manage it without too much issue. There’s nothing wrong with the stock setup. You need to have the car up high enough to work underneath so that you can see and/or feel the end of the rigid pipe. You may have to remove the pass side heat shield (easy couple of bolts). Use silicon high temp flex hose and try to have sufficient length/slack to keep the hose away from the exhaust pipe.
in other words; once you are under the car and can see/feel the rigid pipe, you can figure out the means to attach a new flex hose. I didn’t need and tools to do this.
What year car were you working on?
I've got the car up on a lift and can't see or feel the hard line you mention. My car is an '85 S3?
Regards,
Last edited by Otto Mechanic; 01-11-2019 at 04:50 AM.
Scott you may also have to remove the bolts on the center heat shield so it can be moved.
it would be wise to also disconnect the O 2 sensor first ,
then push it through the chassis wall,
then you slide the center heat shield back enough to feel this metal line.
Scott you may also have to remove the bolts on the center heat shield so it can be moved.
it would be wise to also disconnect the O 2 sensor first ,
then push it through the chassis wall,
then you slide the center heat shield back enough to feel this metal line.
Hey Stan -
That was the re-enforcement I needed; you wrote "heat shield", so did a few others, but I've been reading "firewall" the whole time and wondering how I might possibly remove the firewall? I swear I've stared at this for a few hours now; raised it, stared. Lowered it. Stared some more. Tried sticking my hand places it shouldn't have been. Swore. Continued staring.
It finally dawned on me which heat shields people have been talking about and where they are. I should have it apart in the morning...
In the end I removed all three heat shields over the exhaust blocking me from getting my hands over the top of the torque tube; driver, passenger and center. I only took the driver's side off because it made it easier to remove the center and I didn't have to completely remove the center, just the front two screws on either side.
After that I could reach in, find the cloth tube by feel and reconnect it to the plastic line running off the vacuum distributor next to the throttle. I expect I'll need to do it again after I get a short roll of that 3.5mm cloth covered hose everyone talks about since the original is deteriorating and it's also a little too short, which is probably why it keeps getting unhooked. Now I know the secret, it's all of a 15 minute job. It takes more time to raise and lower the car than it does to fix it.
No need to dither with anything in the engine bay, everything is accessible from under the car.
Thanks to all for the help, sorry I didn't understand what folks were talking about at first. Next time, when I replace the cloth hose, I'll take pictures. I lost my iPad at the supermarket last week and won't have a camera until its replacement arrives next week.
Well, I've done it again, this time while removing the intake to refresh the water bridge, which was a successful operation after I found and fixed an coincident failure of my MAF with the extensive help of others on this board (a different adventure).
Again I had hard shifting following the repair/refresh and assumed I'd pulled the trans vacuum line apart. Knowing it to be a 30 minute job at the outside I left it for awhile. Today, in preparation for moving the car and lift to my new shop, I decided to take care of it.
After removing the passenger and central heat shields I revealed the suspect connection to the woven cloth line, only to find it was connected.
I'm reluctant to remove the airbox and intake to check the vacuum distributor end of the circuit before at least asking if there might be another cause to investigate first? I've never replaced the 4 inch cloth line, it may be the source of my problem? It is, after all, 34 years old. It isn't hard for me to get at.
Aside from the 6 way (7 way?) vacuum distributor under the intake, might there be a problem with the transmission itself that I could check? One that would cause the hard shifting under acceleration, or is this definitively a vacuum problem?
I’ve had to replace the vacuum flex hose between the rigid vacuum pipe (above the torque tube) and the vacuum distributed in the engine bay several times.
I do have access now, I finally figured out which heat shields you were talking about, not your fault, I just didn't understand the very clear instructions. I fixed that
Now I need to replace that braided cloth hose but can't find specs or a part number in the PET that might give me specs. Does anyone know the size, length and composition of that braided cloth vacuum hose?
Last edited by Otto Mechanic; 01-20-2020 at 10:37 PM.
I purchased some metric vacuum line kit from 928 Motorsports and ran the whole thing down to the modulator valve then covered it with abrasion resistant covering. Actually covered it first.
Odd. I was able to reconnect the vacuum line (well, a new line because I didn't trust the old hose for beans) without dropping the shields. If I recall I had to lay on my back, driver's side, head facing rear of car, arm up around torque tube and I was *just* able to get two fingers around the hose and pull it onto the stupid pipe.
It was however a contortionist's nightmare. I think next time I'll build a micro-robot to crawl in there and do it.
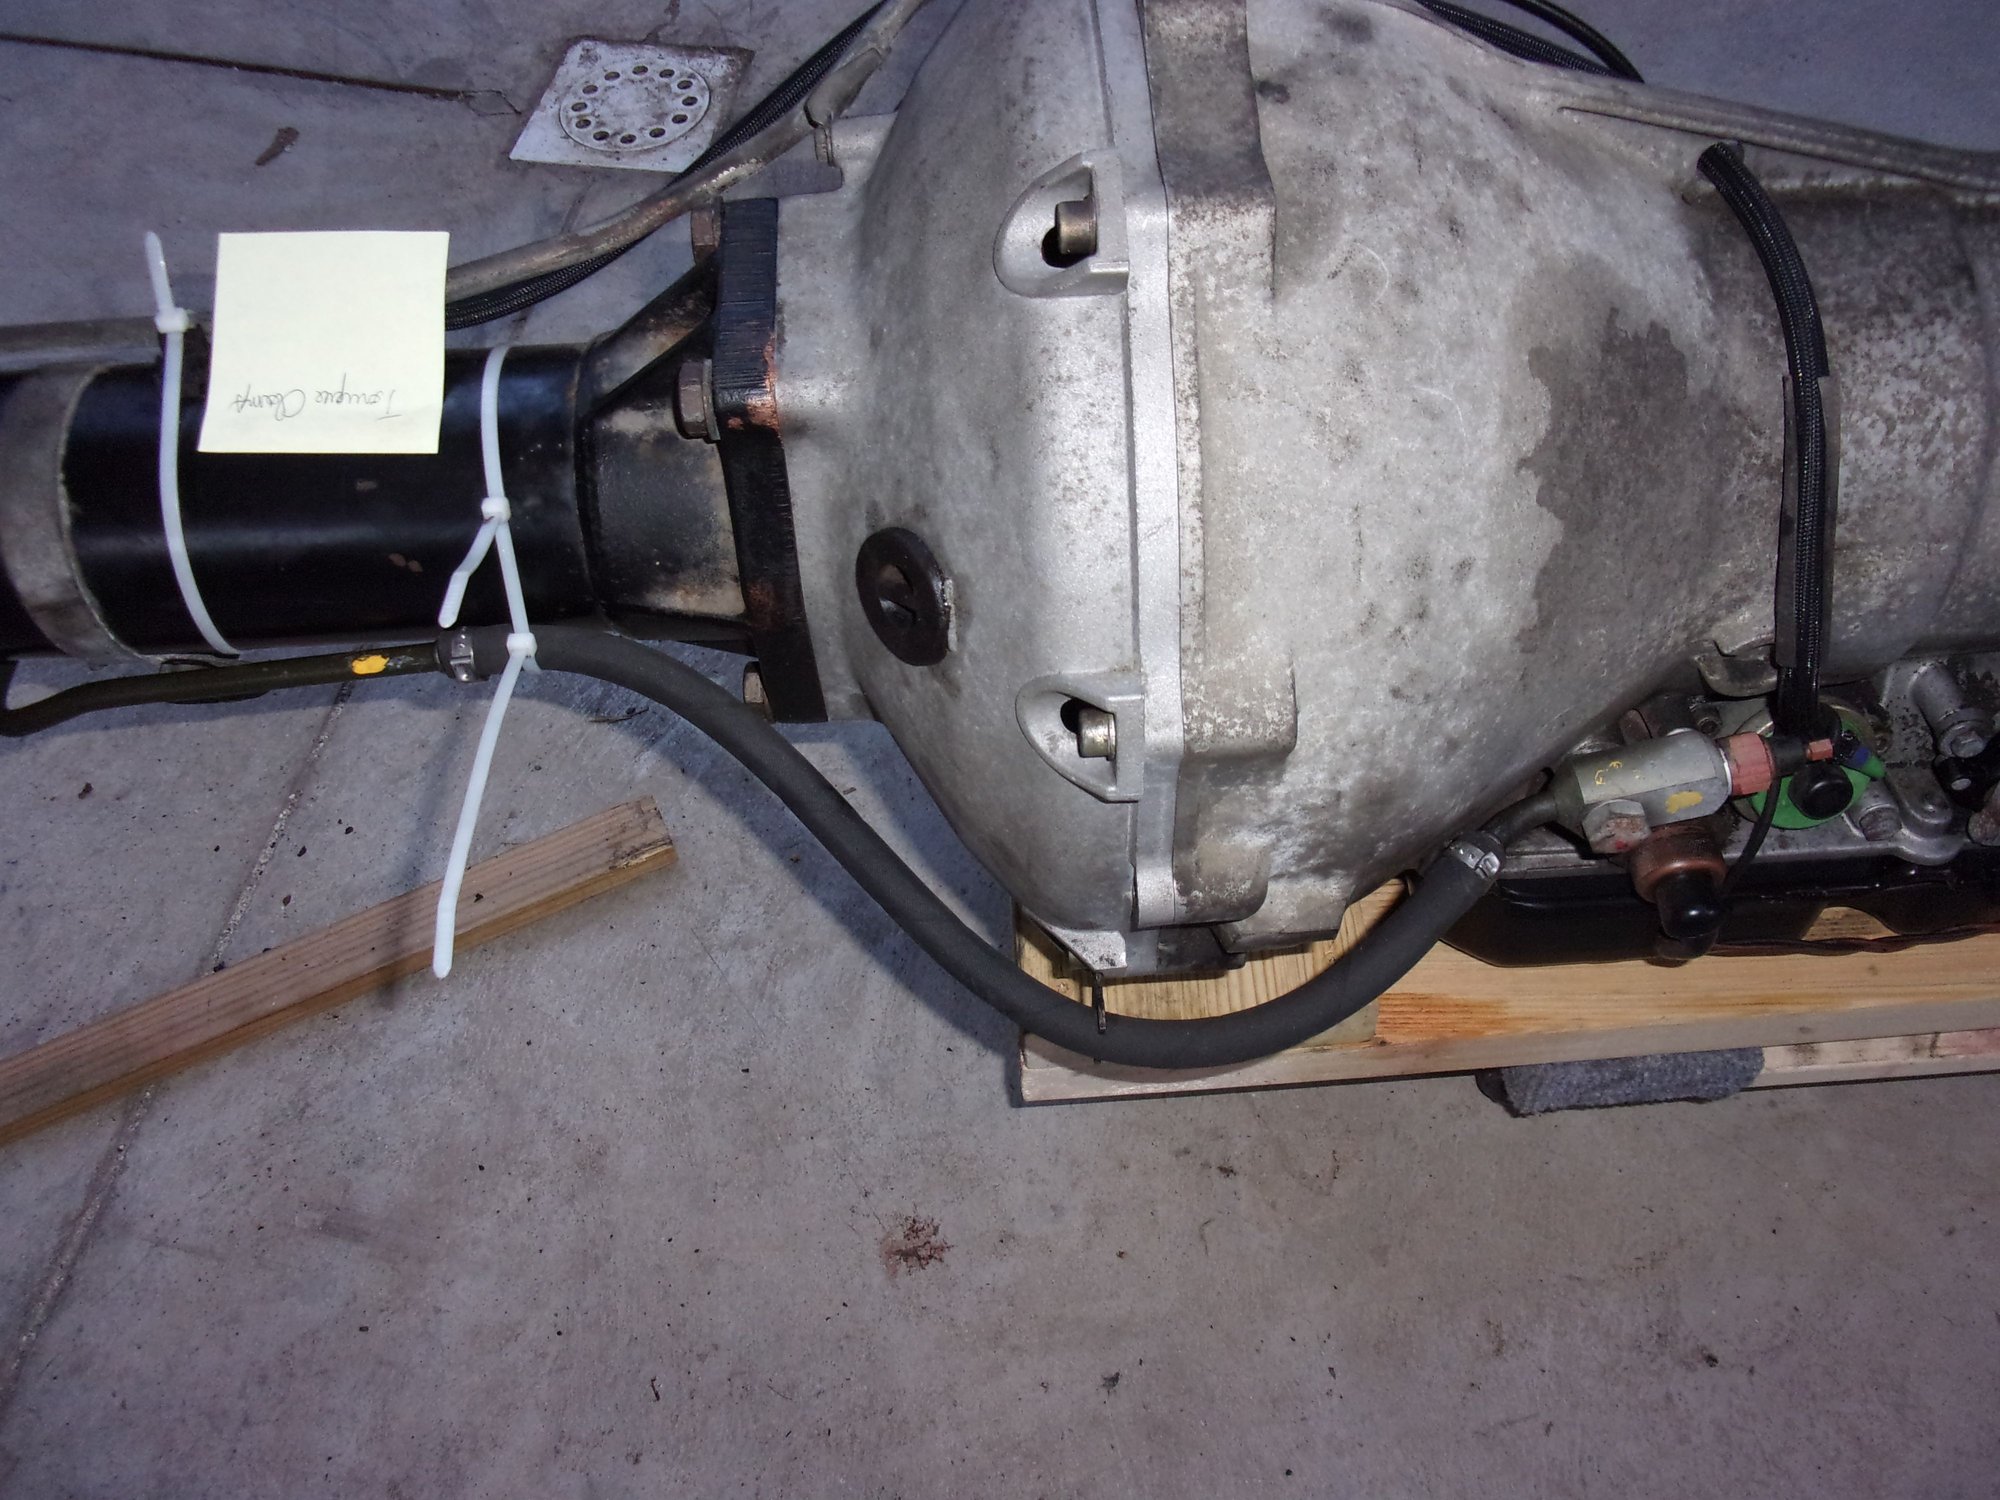
I can imagine. Its much easier for me to remove the two sheet metal screws that hold the starboard heat shield on, then remove the four sheet metal screws that hold the central shield running along the torque tube, it only takes a few minutes up on a lift (and that may be my secret) and you have easy access to the braided rubber/cloth line that runs between the hard poly/silicone line coming through the firewall and the hard (aluminum?) line running back to the transmission modulator.
I found the 3.5mm braided line at my local NAPA store (not really local, about 30 miles from me) and bought two feet of it for $6.50. I'll replace the line between the firewall and the hard line at the bow end of the torque tube first, starboard side. Next I'll see if I can reveal the braided cloth line running from the stern end of the torque tube into the modulator and replace it. I'll also give a shot at testing vacuum at the modulator. Once both of those lines are replaced, if I still don't have vacuum at the modulator I'll take the intake off again and check the connection at the vacuum distributor next to the throttle.
I've sent out a set of injectors from my parts car for cleaning and flow testing, UPS just told me they can't find the address for Witchhunter, which surprises me. I attached their address on a note outside the box before I sent it to the UPS store with my wife, maybe someone transposed some numbers. Once I get them back I'll install them and check the vac. distributor since I'll have to have the intake off anyway to replace the injectors. Sometimes I bless the day I bought my parts car...
Thanks to all, Forgotten, Mr. Zach and Geo for the help and advice!


 11-25-2018, 01:48 PM