

My first intake off/refresh job, 1986 S3, worklog.
 09-20-2018 | 01:57 PM
#1
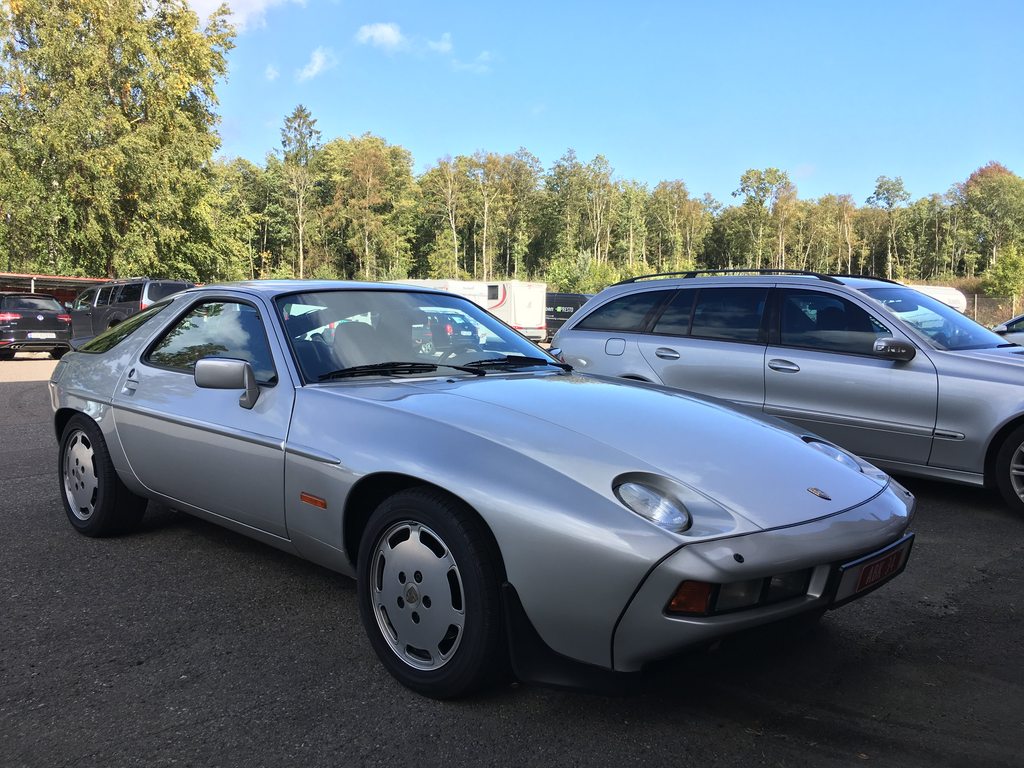
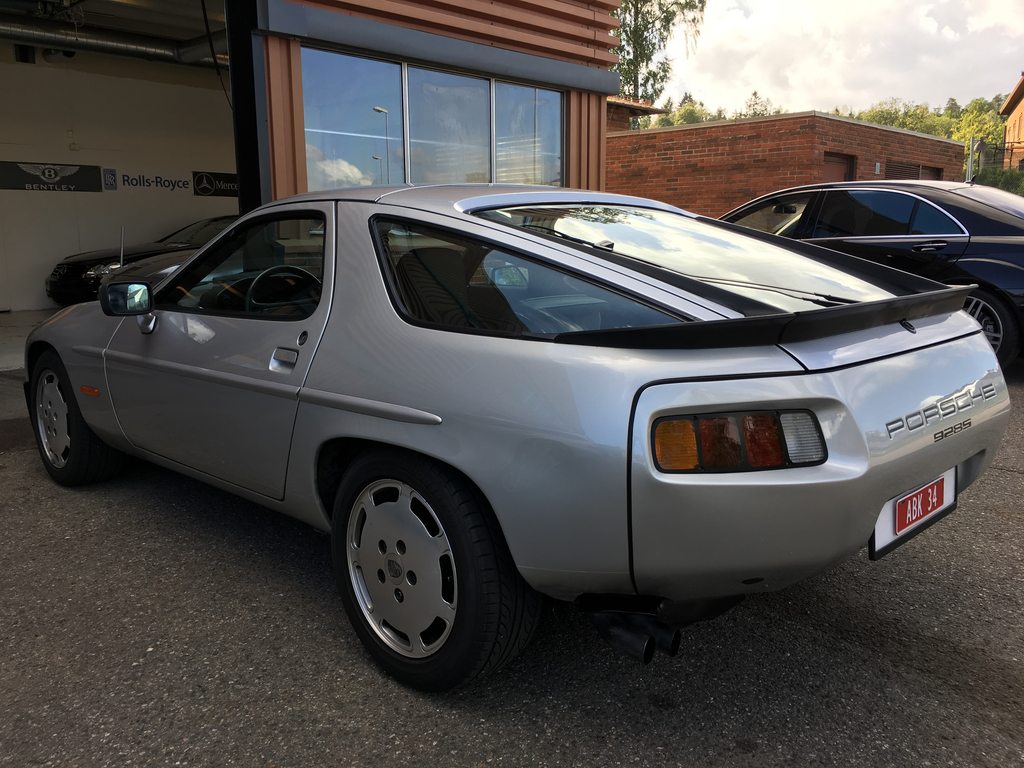
So the background for this job is that I aquired my 86 S3 with only 57000km on the clock, but also with no service records at all. In this thread I'll post photos of progress, problems I encounter, and ask questions if there is something I need to find out. It will be a nice worklog to look back at, and hopefully it will also help others in the future, going for the same job or having some of the same issues that this car has(read below).
I have just buttoned up the car after my first round of service, including the following:
Replaced engine oil and filter
Replaced auto transmission fluid, filter and gasket. + replacing K1 spring.
Replaced differential fluid.
Replaced timing belt, tensioner roller and bearing sleeves, water pump. Set correct timing.
Replaced thermostat incl rear gasket
Replaced coolant
Rebuilt power steering pump, new pressure line, new reservoir, new fluid.
Replaced all aux belts
TB/WP job went fine, I had done it once before, on my GTS, so now everything went just a little smoother and faster than the first time. Rebuilding the PS pump was also very interesting, and very satisfying that a sub $10 kit fixed the pump and the car is now very easy on the steering and no noises. What I haven't done yet, but I have all the parts, is replacing the fuel lines. This is next on the list in addition to the intake job. Not sure yet if I should do the fuel lines first, or at the same time as the intake.
Anyway, the reasons that I am doing the intake, is mainly because of two things. The car idles high when warm (fine at around 850 once it starts cold, but gradually gets up to 1100-1150rpm when warm).The other issue is that the gear shifts are very hard and uncomfortable. Servicing the transmission didn't help anything on this problem. So I am guessing some kind of vacuum problem. It will be very interesting to see what unveils below the intake when I get it off. Another reason to do it is that the intake parts are flaking off paint very badly, and I have another very nice intake set that I will replace it with.
If anyone have any tips or good advice before I begin, please feel free to post! All help appreciated for a first timer like me.
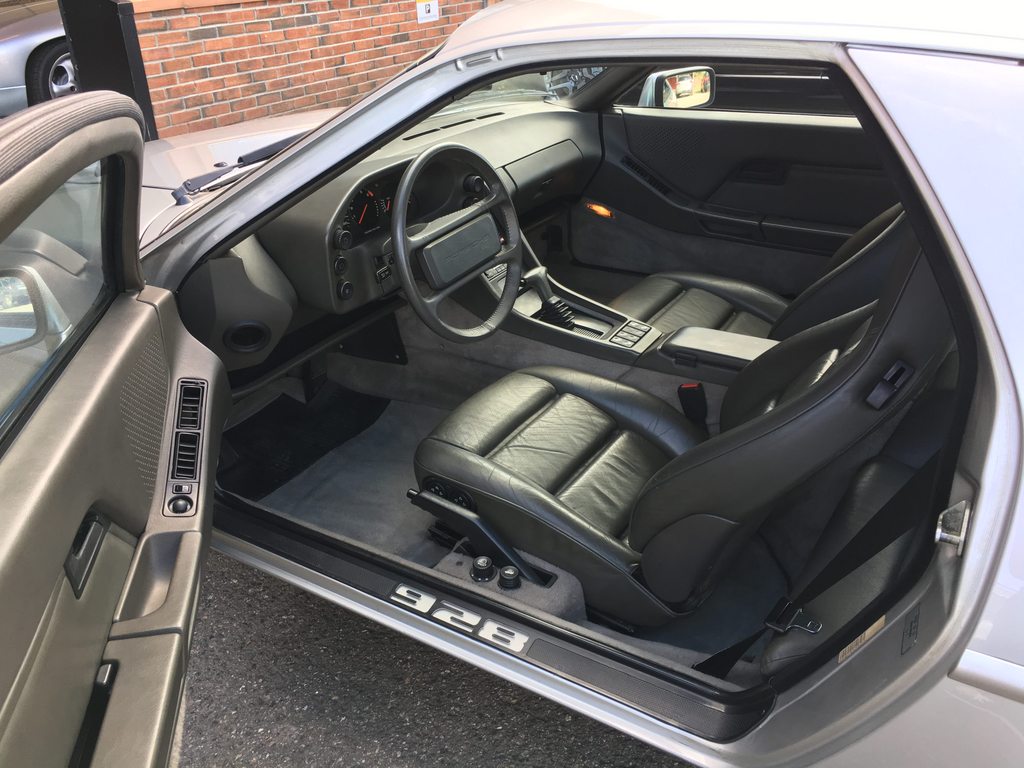
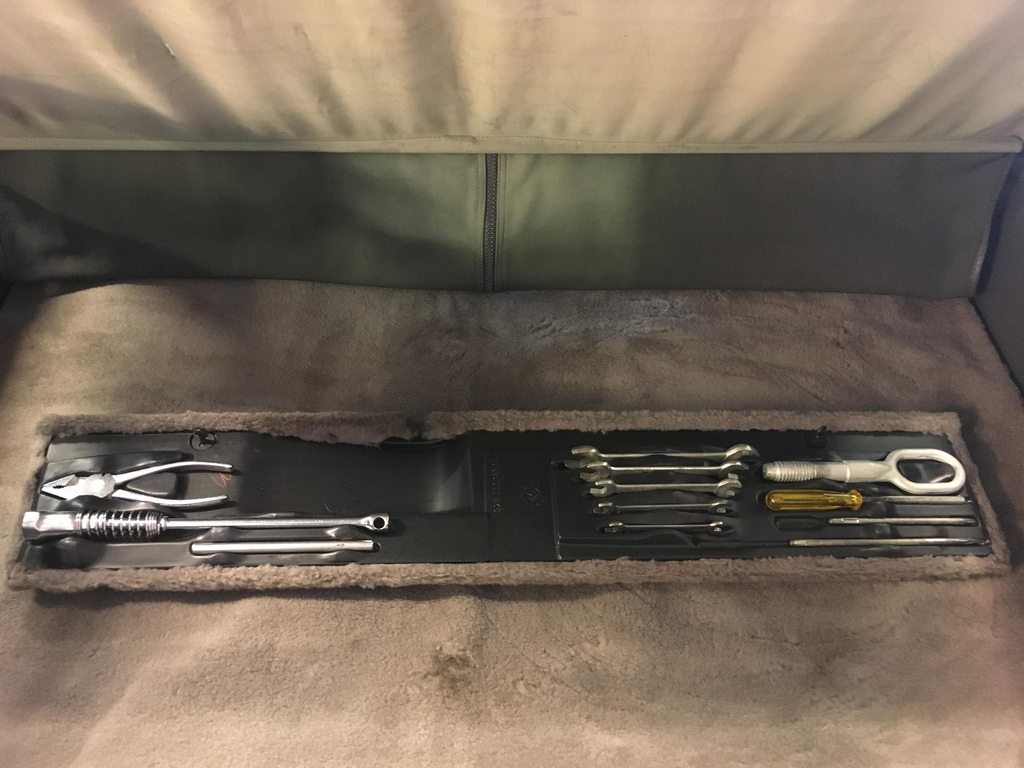
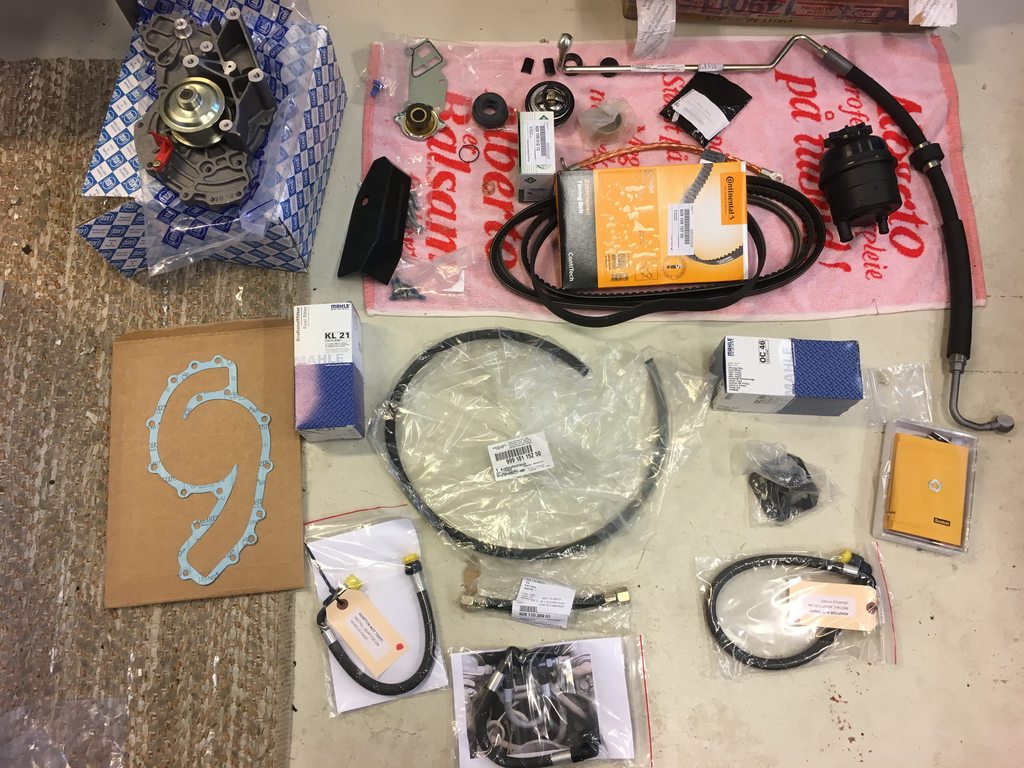
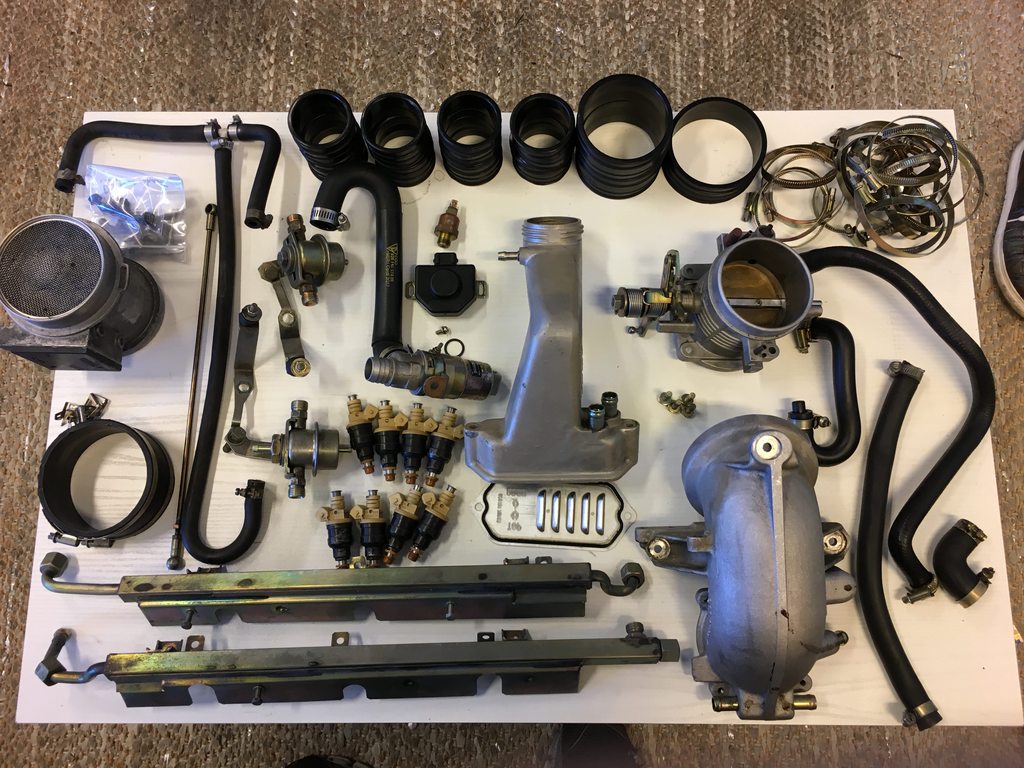
To make it a bit more interesting, here are some photos of the car. Then some of the maintenance I have done so far. and some parts that are either going in or has already been installed.
Service:
Attachment 1349292
Attachment 1349293
Attachment 1349294
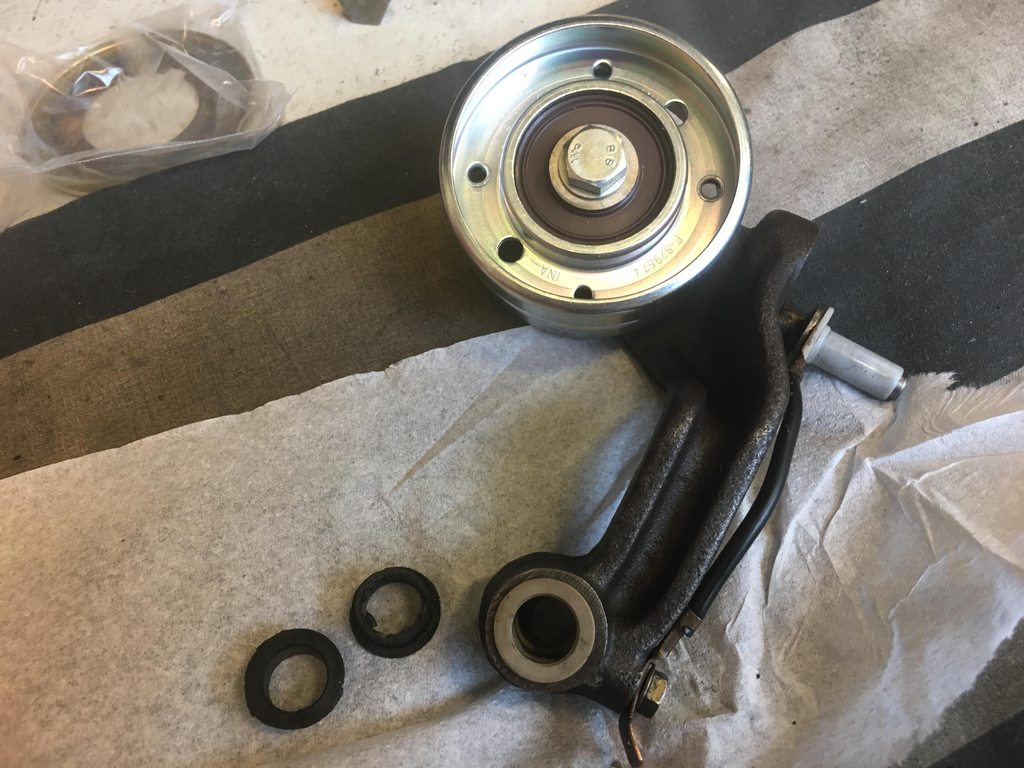

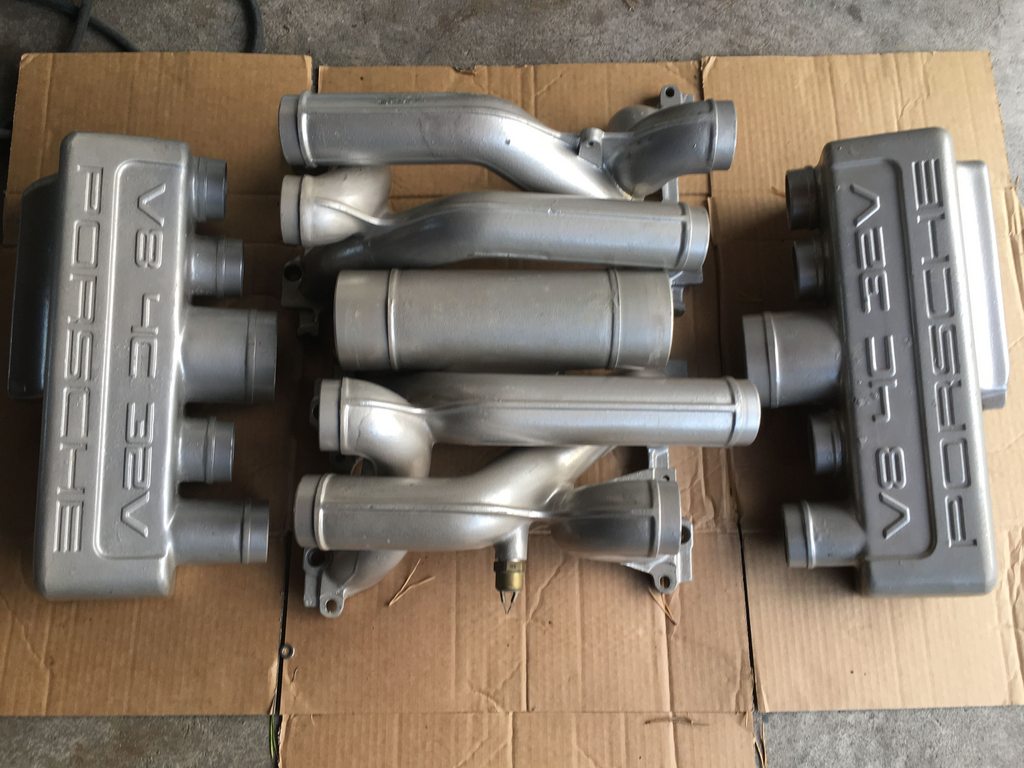
"new" intake parts:
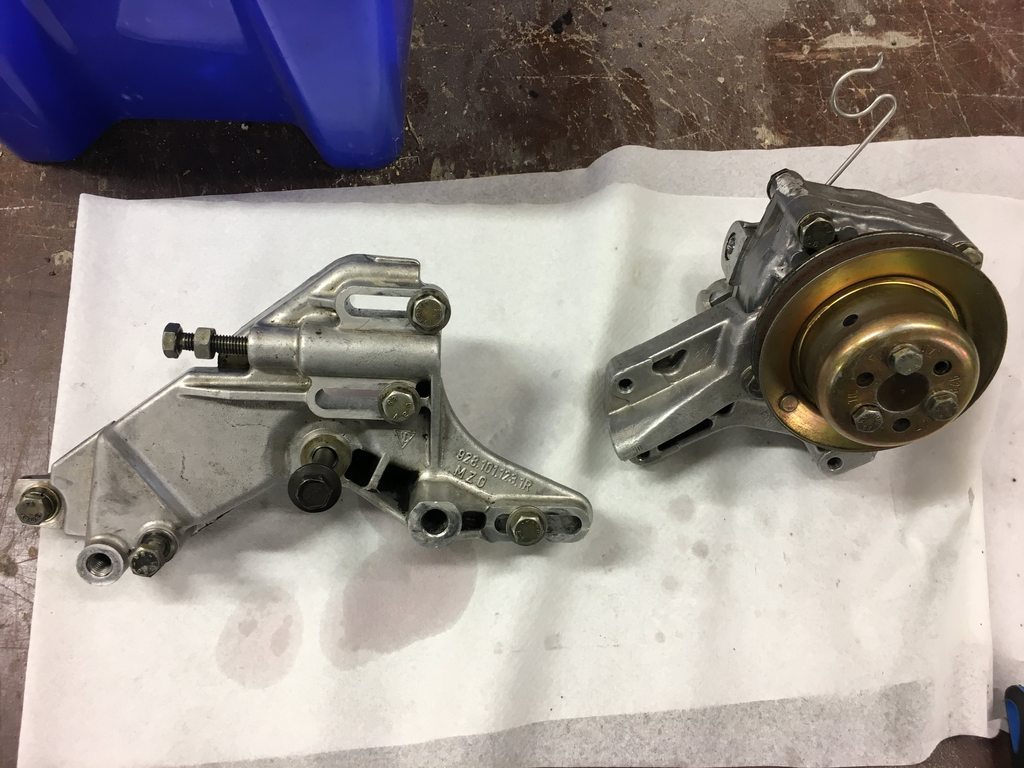
and some of the other new parts:
I have just buttoned up the car after my first round of service, including the following:
Replaced engine oil and filter
Replaced auto transmission fluid, filter and gasket. + replacing K1 spring.
Replaced differential fluid.
Replaced timing belt, tensioner roller and bearing sleeves, water pump. Set correct timing.
Replaced thermostat incl rear gasket
Replaced coolant
Rebuilt power steering pump, new pressure line, new reservoir, new fluid.
Replaced all aux belts
TB/WP job went fine, I had done it once before, on my GTS, so now everything went just a little smoother and faster than the first time. Rebuilding the PS pump was also very interesting, and very satisfying that a sub $10 kit fixed the pump and the car is now very easy on the steering and no noises. What I haven't done yet, but I have all the parts, is replacing the fuel lines. This is next on the list in addition to the intake job. Not sure yet if I should do the fuel lines first, or at the same time as the intake.
Anyway, the reasons that I am doing the intake, is mainly because of two things. The car idles high when warm (fine at around 850 once it starts cold, but gradually gets up to 1100-1150rpm when warm).The other issue is that the gear shifts are very hard and uncomfortable. Servicing the transmission didn't help anything on this problem. So I am guessing some kind of vacuum problem. It will be very interesting to see what unveils below the intake when I get it off. Another reason to do it is that the intake parts are flaking off paint very badly, and I have another very nice intake set that I will replace it with.
If anyone have any tips or good advice before I begin, please feel free to post! All help appreciated for a first timer like me.
To make it a bit more interesting, here are some photos of the car. Then some of the maintenance I have done so far. and some parts that are either going in or has already been installed.
Service:
Attachment 1349292
Attachment 1349293
Attachment 1349294
"new" intake parts:
and some of the other new parts:
Last edited by paalw; 09-21-2018 at 06:10 AM.
09-20-2018 | 02:51 PM
#2
Rennlist Member
That is a beautiful car. My only recommendation is to try to get a copy of Mike Frye's S3 refresh guide. It is a fantastic write-up specific to the 85-86 model years. Also, Scott Yoo documented his refresh on his S3 and that was also immensely helpful.
Good luck!
Good luck!
09-20-2018 | 03:29 PM
#3
Nice! I'm right behind you doing these things to my newly acquired '87 S4 Auto. After cleaning up the ATF reservoir, just like you did, I thought I would cover over the fill level gauge area with some good tape, after the fluid level is set. No sense getting that cleaned up, forward facing measuring window dirty with road grime. Need to check the level, just pull off the tape and then replace. Just a suggestion...
09-20-2018 | 05:13 PM
#4
Rennlist Member
I assume you'll be replacing your ISV? It's certainly much easier with everything off the top of the motor, but when you put it back on, try to visualize how you would access the various clamp screws if you needed to take it back off once everything is back on the car. In my experience these things are a pain in the a$$ and it's not really too bad to do on the car...as long as the clamp screws are clocked properly. If they're not, you're taking it all back off again...
09-21-2018 | 06:19 AM
#5
Not sure about that yet. What is the purpose of the ISV (idle stabilizer valve??)? How does it detoriate, age or use, or both? My car only has 57000km, and the idle is very stable. Just that it is too high when warm.
I haven't touched the idle adjusting screw yet either, so I don't know what position it is in. But I guess with my issues (ok cold, high warm) that is not the place to find the solution?
I haven't touched the idle adjusting screw yet either, so I don't know what position it is in. But I guess with my issues (ok cold, high warm) that is not the place to find the solution?
09-21-2018 | 12:33 PM
#6
Rennlist Member
The S3 version of the ISV is an analog device, overly complicated at least according to my brain (at least compared to the PCM-controlled newer versions) and is a wear item. It's essentially a little motor that constantly adjusts how much the valve should be open based on signals from the LH computer. The motor wears out, eventually. I have had some poor luck with replacements, although the one I have now seems to work. For now.
There are a lot of inputs to the LH to make it decide what to tell the ISV. So, your problem COULD be the ISV, or it could be something else. If it's stable but just too high when warm, then I think I would tend to NOT blame the ISV, although I could be wrong. What happens when you turn your AC on or off in a warm condition?
There are a lot of inputs to the LH to make it decide what to tell the ISV. So, your problem COULD be the ISV, or it could be something else. If it's stable but just too high when warm, then I think I would tend to NOT blame the ISV, although I could be wrong. What happens when you turn your AC on or off in a warm condition?
09-28-2018 | 10:11 AM
#7
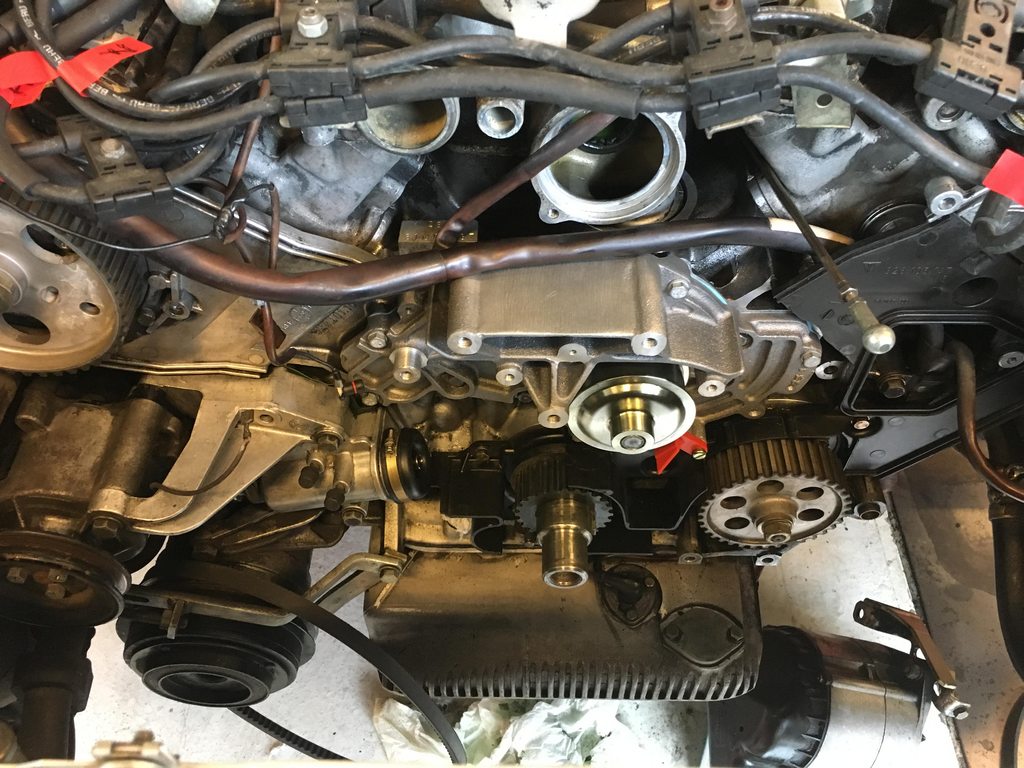
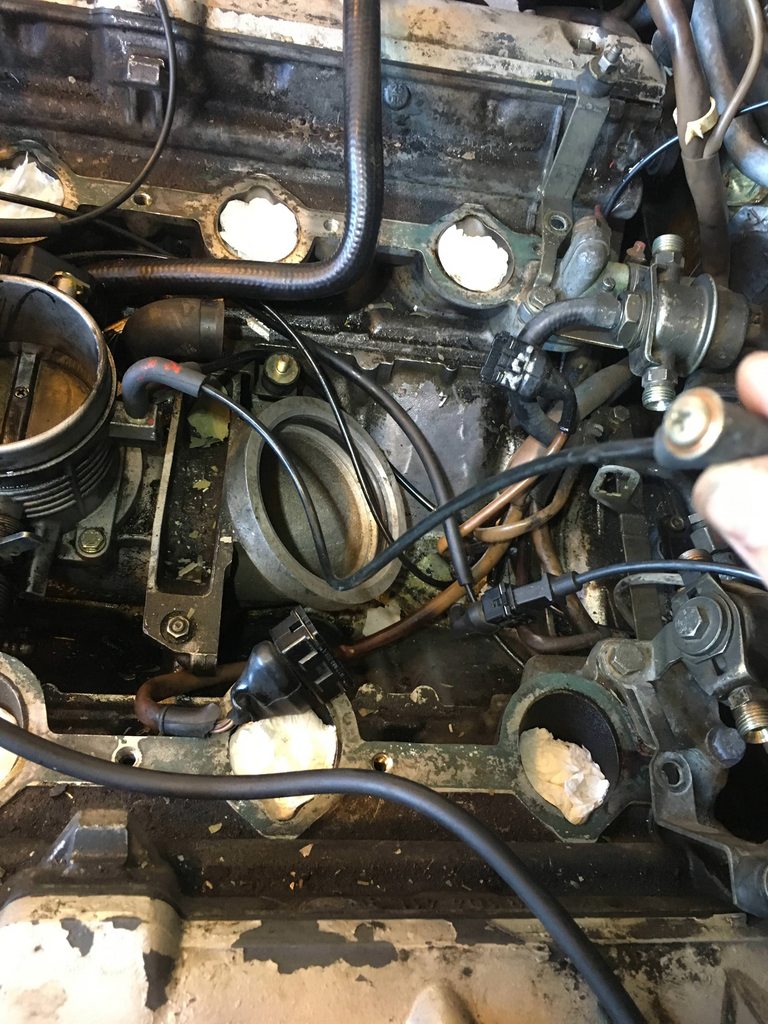
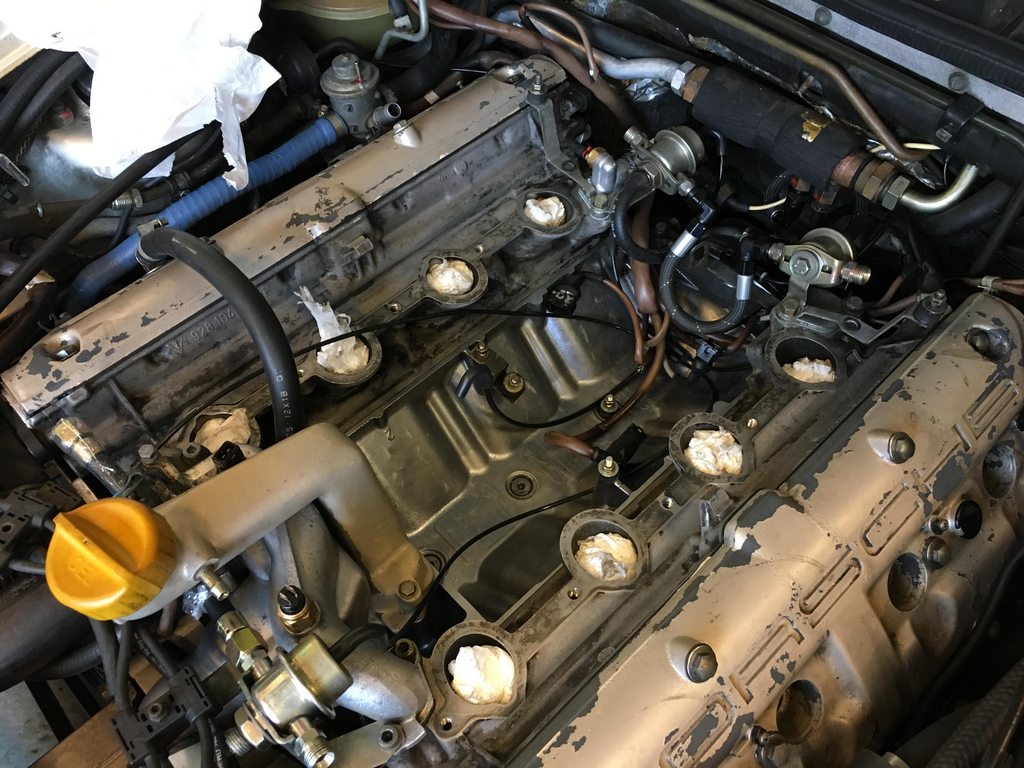
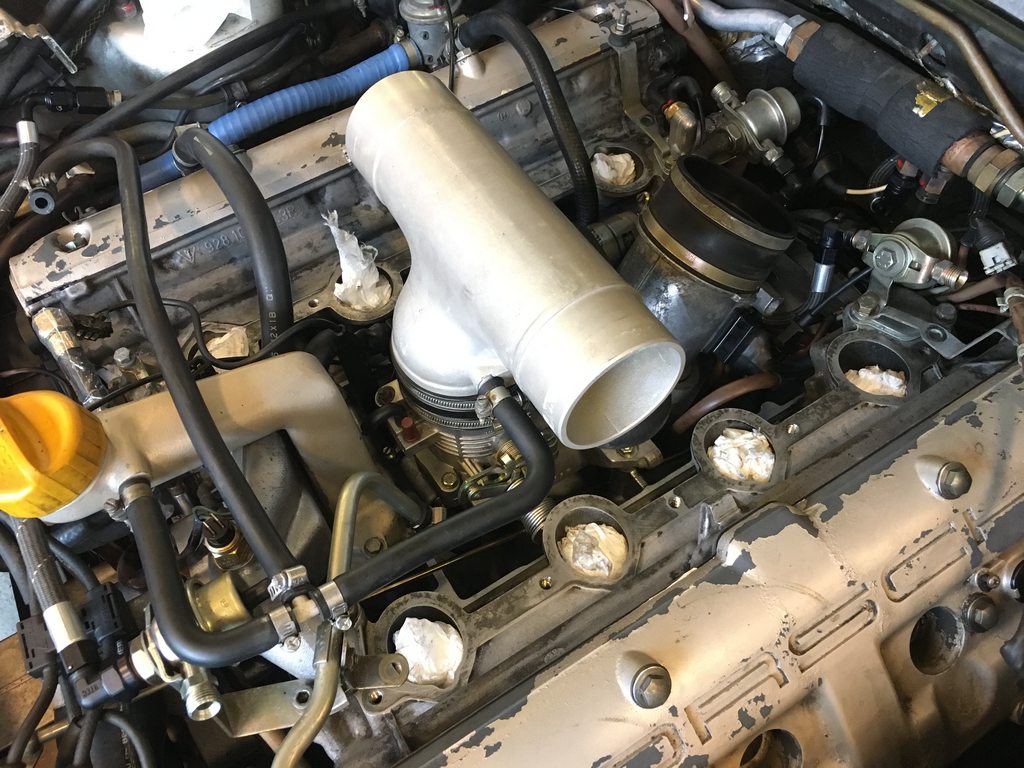
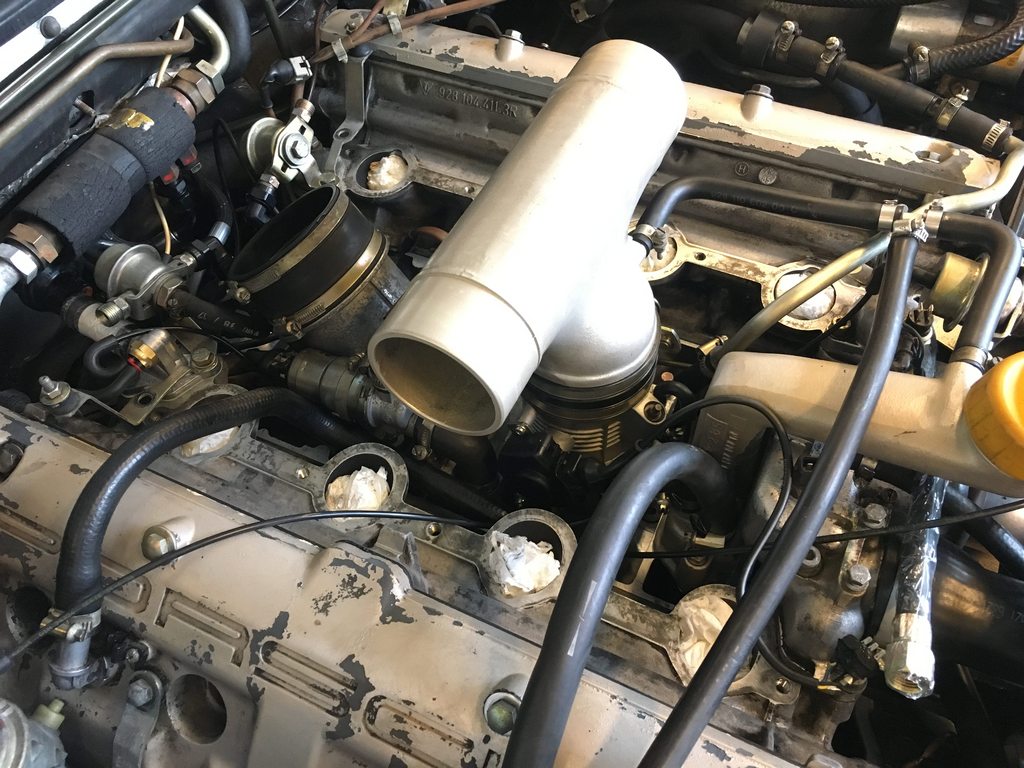
I have been busy since last update here, I removed the intake with help of Mike Fryes guide, everything is well explained there so it wasn't hard at all. So when I got under the intake, I eventually found out that the vacuum system was routed totally wrong, lines missing, lines not connected, 2 of the connectors on the 7-way was just open, and the main feed was coming from the wrong place. I had to make an own thread to make myself understand what was going on, if you are interested in the details you can find it here: https://rennlist.com/forums/928-foru...s3-engine.html
Status now is that I have more or less removed everything I will remove, except a couple of fuel lines. I have cleaned most of the parts I will reuse, and I am waiting for new parts to arrive. After I've gotten a picture in my head of how everything down there is supposed to look like, I'm feeling confident that I'll be able to put it back the way it should be. And hopefully that will also solve my high idle and hard shifting. The way it looked down there I am surprised it idled and shifted at all
I will not be replacing the ISV at this time. If the motor in the ISV is the thing that kills it, it is probably ok at 57000km. And I think my problems were vacuum related. Of course there could be other stuff too, we will see...
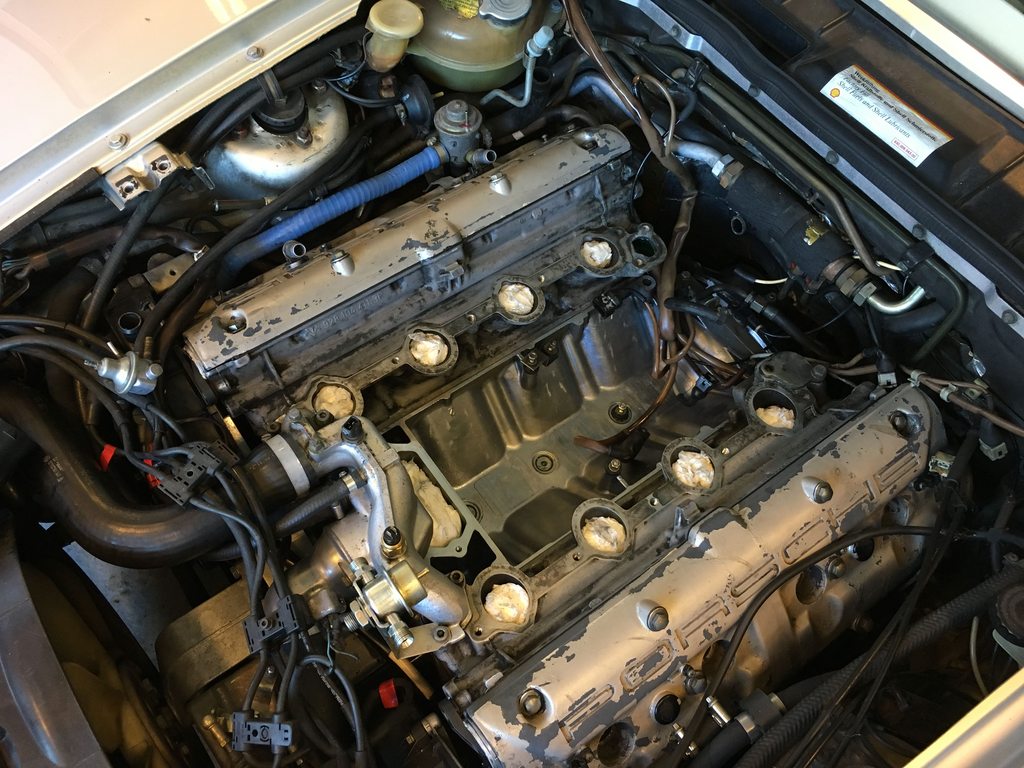
Some photos of the process.
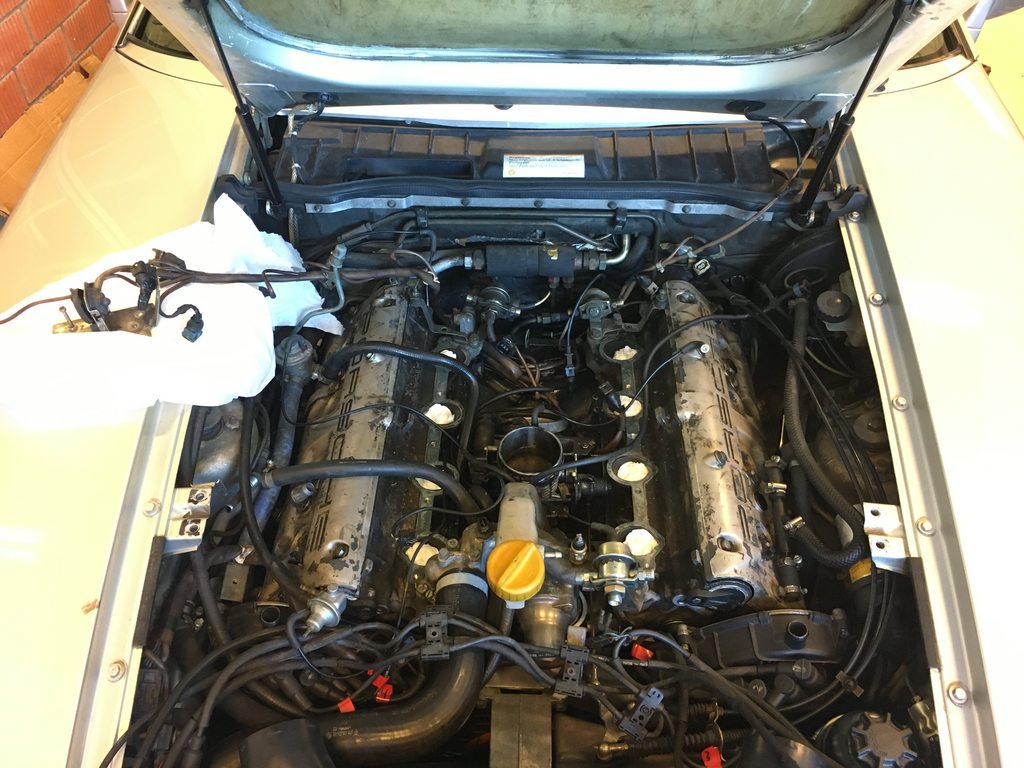

Status now is that I have more or less removed everything I will remove, except a couple of fuel lines. I have cleaned most of the parts I will reuse, and I am waiting for new parts to arrive. After I've gotten a picture in my head of how everything down there is supposed to look like, I'm feeling confident that I'll be able to put it back the way it should be. And hopefully that will also solve my high idle and hard shifting. The way it looked down there I am surprised it idled and shifted at all
I will not be replacing the ISV at this time. If the motor in the ISV is the thing that kills it, it is probably ok at 57000km. And I think my problems were vacuum related. Of course there could be other stuff too, we will see...
Some photos of the process.
Trending Topics
09-28-2018 | 11:45 AM
#8
Team Owner
its a fun puzzle just make sure that the new hoses have the clamps snugged up,
and I would replace that white 3 way junction it has a restrictor inside of it and they get brittle,
and install a new ISV if your old one is used it can short out the computer idle driver circuit, the brushes wear holes into the armature then they grab it so it wont turn
and I would replace that white 3 way junction it has a restrictor inside of it and they get brittle,
and install a new ISV if your old one is used it can short out the computer idle driver circuit, the brushes wear holes into the armature then they grab it so it wont turn
09-28-2018 | 01:37 PM
#9
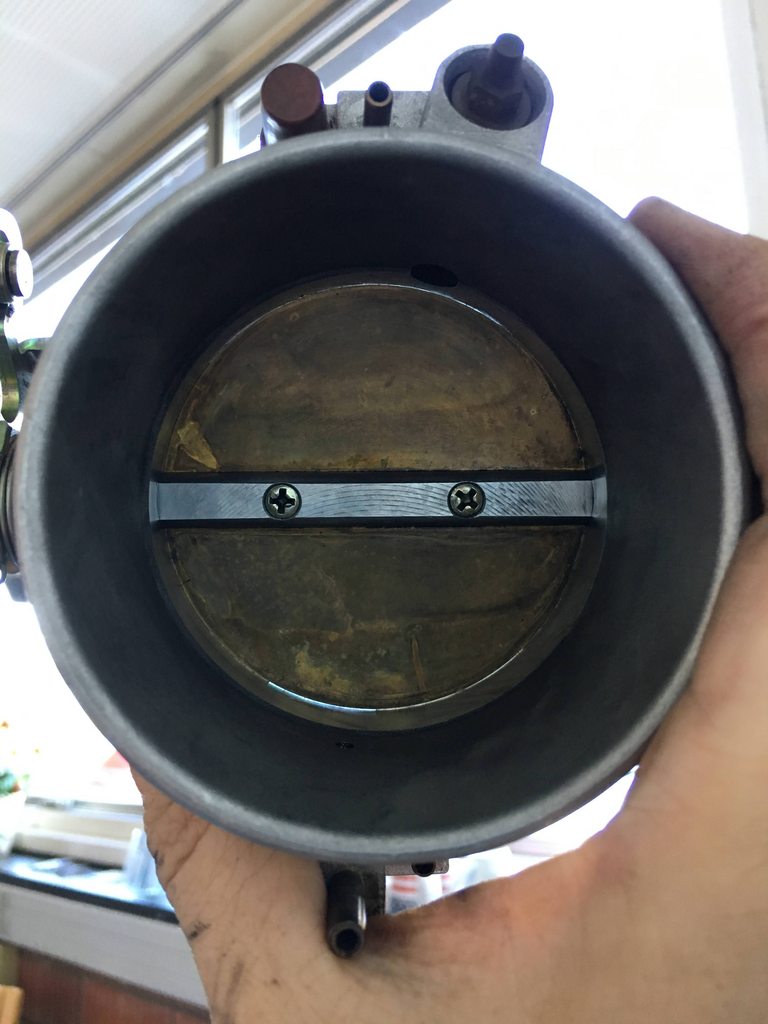
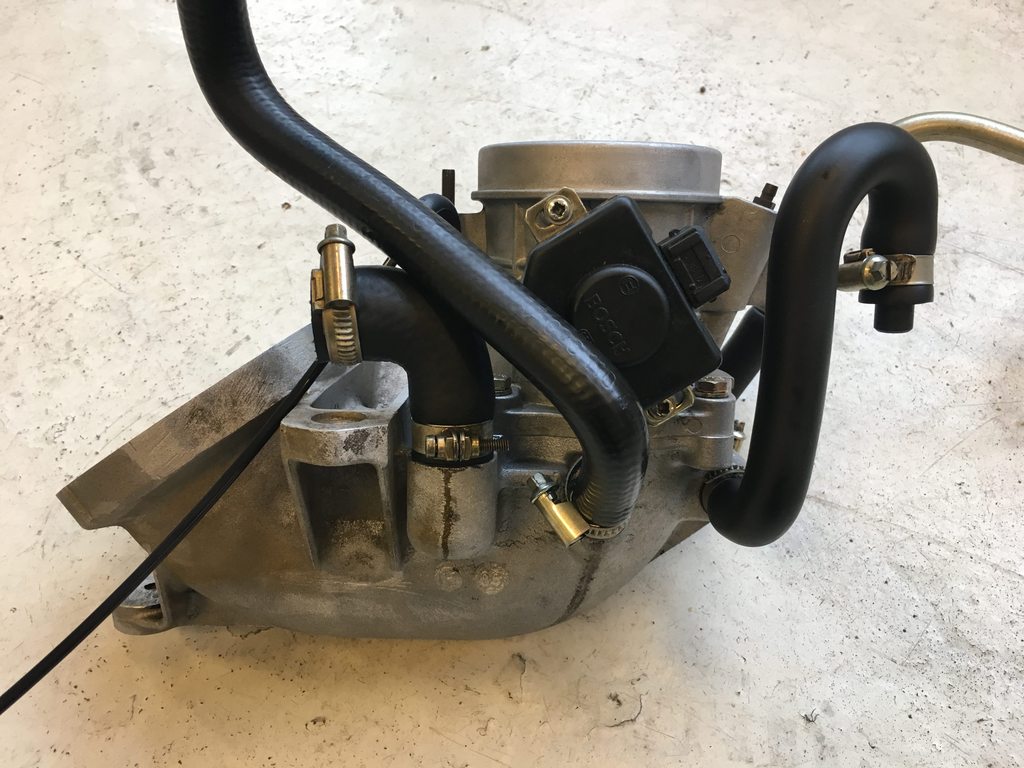
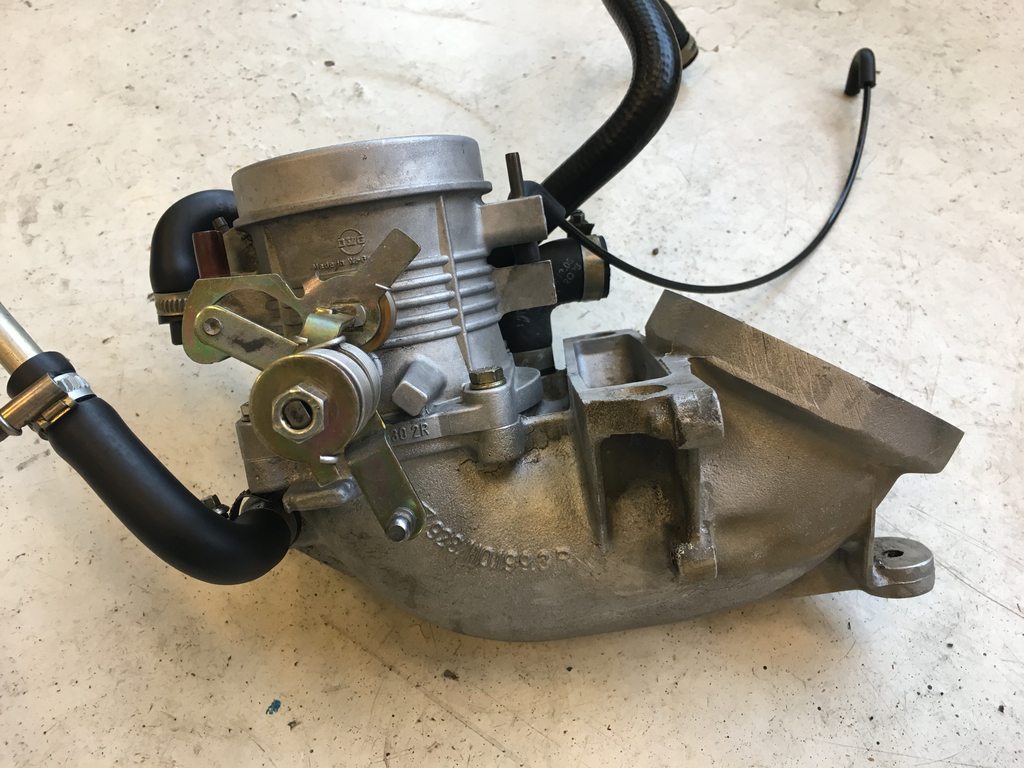
Another question. Is it supposed to be a small glitch in the throttle flap when it is fully closed? I can only see it when I put it towards direct sunlight, can't see in normal lighting:
 09-28-2018 | 06:47 PM
#10
Rennlist Member
I would highly recommend installing the additional Oil Filler Neck Baffle from Precision Motorwerks. Since doing this on my '85, my oil consumption has essentially gone to zero. And the last time I pulled the air intake side plenums, there were no oil pools inside.
 10-09-2018 | 10:20 AM
#12
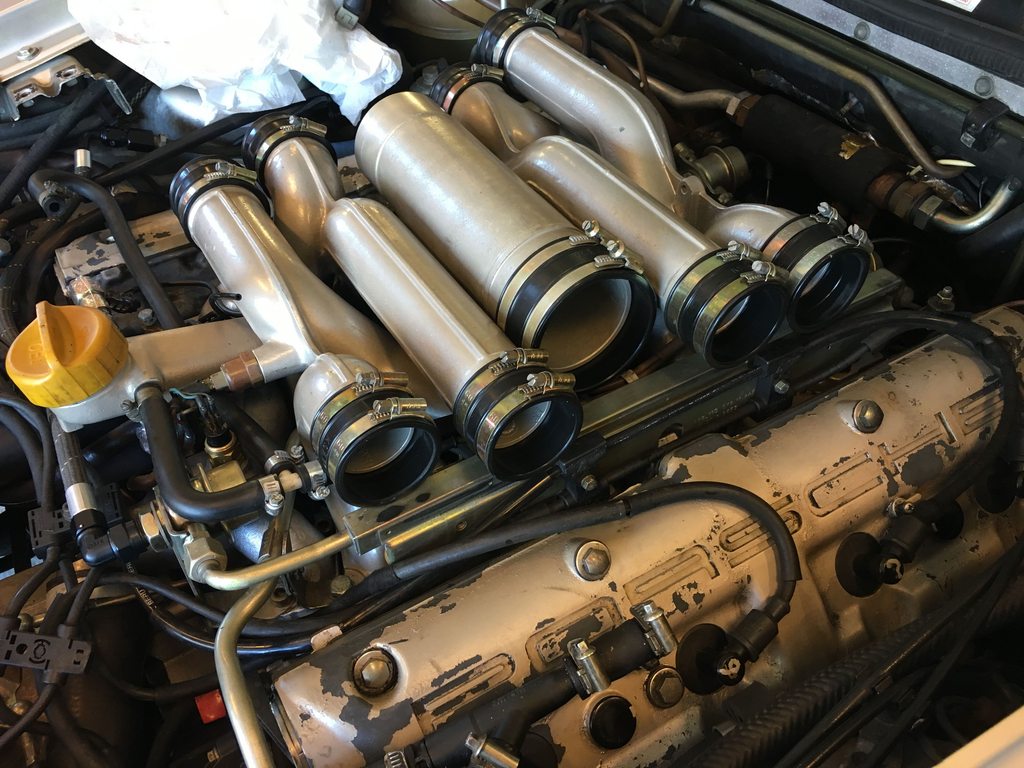
Time for a small update. I think I have everything under control, all new vacuum pipes and rubber, o-rings, fuel lines +++. Unfortunately no new baffle as they are not available here, and shipping cost and time is a lot.
If anyone sees something suspicious on the photos please shout out I am about to install the runners next.
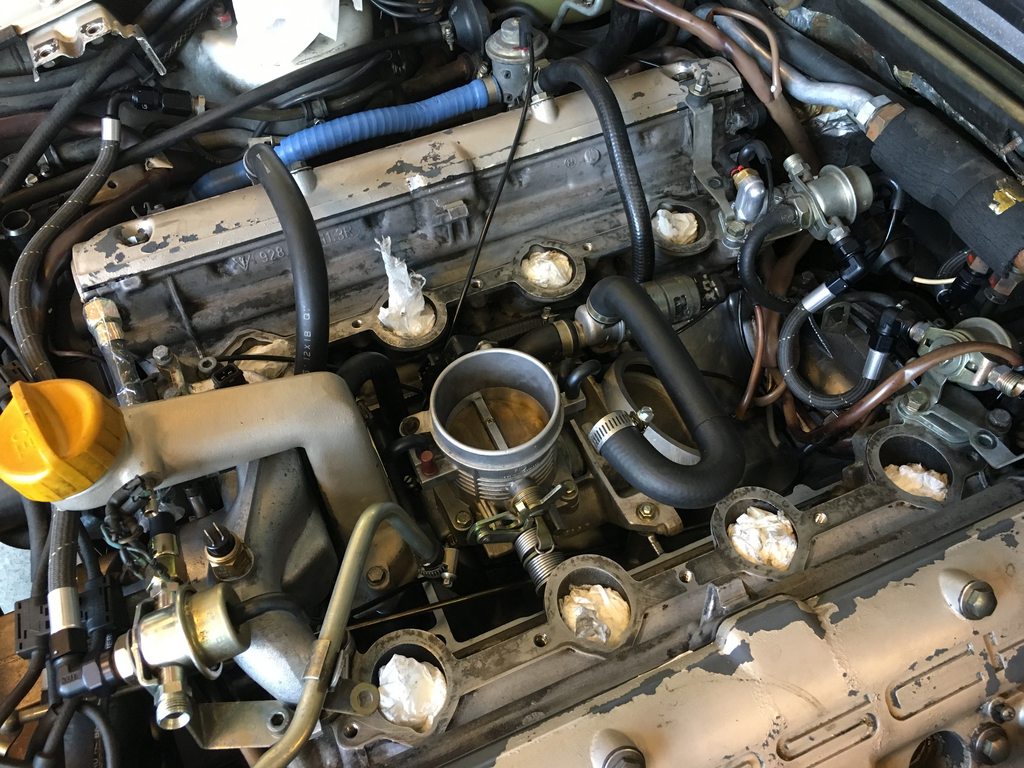
If anyone sees something suspicious on the photos please shout out
I am about to install the runners next.
10-09-2018 | 04:32 PM
#13

Very nicely, professionally planned out.
also;
1) test your fuel pressure regulator/dampners. If they (vacuum nipples) fail to hold vacuum, they should be replaced.
2) any vacuum controlled valves in the vapor recovery/air injection system should be tested and if they fail to hold vacuum, should be replaced
3) check your vacuum recovery charcoal canister for charcoal leaks
4) check your vacuum line beetween the vacuum source and the trans vacuum modulator if yours is an auto. Sorry forgot to check before responding here. It�s an aluminum pipe along the torque tube with rubber ends
5) check or replace temp sensors of course
6) your vapor recovery valves may be hard to get if they leak. The one normally fixed to the cross engine brace costs >$500. I can send you some pics of my work around if you have to deal with (expensive) leaking vacuum valves
7) WYAIT check and make sure that with the accel pedal at 75% full throttle you read the WOT micro switch closed. If not, check that the switch itself will close and if necessary, check that the throttle linkages are properly set. THIS IS MUCH EASIER WITH INTAKE MANIFOLD PIPES OUT. But still doable with intake manifold in (and center T out). Your WOT should be made to work.
8) dont forget your auto transmission flex lines. I�ll bet they are seeping. A hydraulic line fitter can press new flex ends on your pipes. Fluid weeping above the exhaust is a flameout source
Mike Pate
�86.5 with auto
10-10-2018 | 02:22 PM
#14
Thanks for the tips Mike. I am not at the level where you say check this - and then I go on and find out how, or know how from before. I also need it explained how to, lol. The only vaacum unit I have been able to test is the heater valve, which is pretty self explanatory how to test without instructions. If you like, please share details. But I think it might be a bit too late for my part now, as I am about to install the second fuel rail and button everything up.
Getting there. Note to self; remember to bypass fuel pump relay to check for fuel leaks after second fuel rail is installed.
Getting there. Note to self; remember to bypass fuel pump relay to check for fuel leaks after second fuel rail is installed.
10-11-2018 | 07:43 AM
#15
No fuel leaks found today, and after triple-checking everything I fired it up. Everything sounded very nice, cold idle was steady and a bit over 1000rpm (around 12 degrees celsius). Unfortunately I'll have to wait some days to get to properly test it, and see if warm idle and the gear shifting has improved.
Everything back where it belongs
Two of the best!
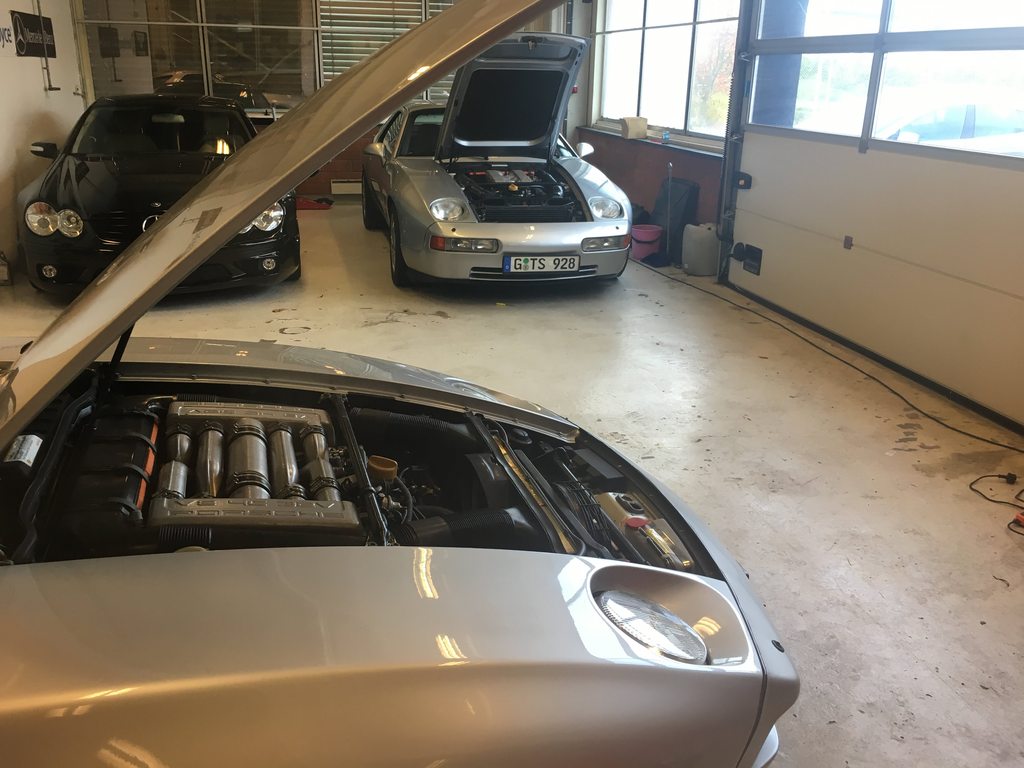
Everything back where it belongs
Two of the best!