When you click on links to various merchants on this site and make a purchase, this can result in this site earning a commission. Affiliate programs and affiliations include, but are not limited to, the eBay Partner Network.
I would suggest to replace both plastic pieces that go into the MAF boot,
they work harden and after being subject to many years of hydrocarbon products they are done.
new ones are pretty inexpensive.
HINT I got new plastic pieces then found brass pipe at the hobby store it was a press fit and .
I superglued the pipes into the pieces mine are stronger. my originals cracked and had holes in them
Get a tube of dreibond and use it on the oil fill tube along with the O ring, dont use the gasket.
Also Greg Brown makes a oil fill block off plate it gets installed with the water bridge off good idea to fit one here
I don't remember exactly, but I probably removed more parts when I cleaned the valley.
Like the FPR, FPD, hoses, knock sensors...
The more space you give yourself, the easier and better job you'll do.
With time and patience, I'm sure you'll get great results!
Last edited by Bertrand Daoust; 02-25-2018 at 10:10 AM.
The plastic "t" pieces may look fine, but as MrMerlin noted, they have spent a long, long time on that engine.
They have been exposed to lots of reasonably nasty stuff.
They are cheap.
Ask yourself:
Do I want to go back in there in 6 months to replace that little part?
FWIW, the plastic coolant pipes on the early Cayennes are known to fail. When I got my Cayenne, they were original at 10 years and 103k miles. So I knew they needed to be replaced.
When I took the old ones out, I could break pieces off of the ends by simply grabbing with my thumb and index finger and pulling. They were very weak and brittle.
I would think your pieces are in a similar state.
If you replace them (and I would if I were you), then just for grins, take a pair of pliers and see how much force it takes to break them. I'm going to guess it's "not much."
I changed those parts, but I recall the old ones seemed fine and could be abused without easily breaking - worthy of going into the "used parts" box. It's possible that a QC problem let in parts made of the wrong stuff, or the wrong plastic was specified for some time. Kinda like the difference between our good cables, and whatever they used for the knock-sensors, etc.
I changed those parts, but I recall the old ones seemed fine and could be abused without easily breaking - worthy of going into the "used parts" box. It's possible that a QC problem let in parts made of the wrong stuff, or the wrong plastic was specified for some time. Kinda like the difference between our good cables, and whatever they used for the knock-sensors, etc.
It appears they used a soy-based plastic for the knock sensors.
So today I had to work on the Suburban (exhaust manifold repair clamps...for the infamous broken bolts).... But last night I did make some progress cleaning the valley. I used a can of brake cleaner and while it worked well, I decided I didn't want to breath in the fumes from a dozen more cans. So...I bought a Harbor Freight steam cleaner. Seems to be almost identical to the McCulloch that has very similar reviews. So for $100, minus 20% coupon...it's mine. It should work well on removing oily grime (and a million other uses around the house). My only concern is it might turn out to be a great way to strip the intake or cam covers, so I'll not use it those....or, maybe I will and if it strips the paint, then I don't have to waffle on whether to powder coat or not - and will have discovered a low impact and low cost way to strip these magnesium parts.
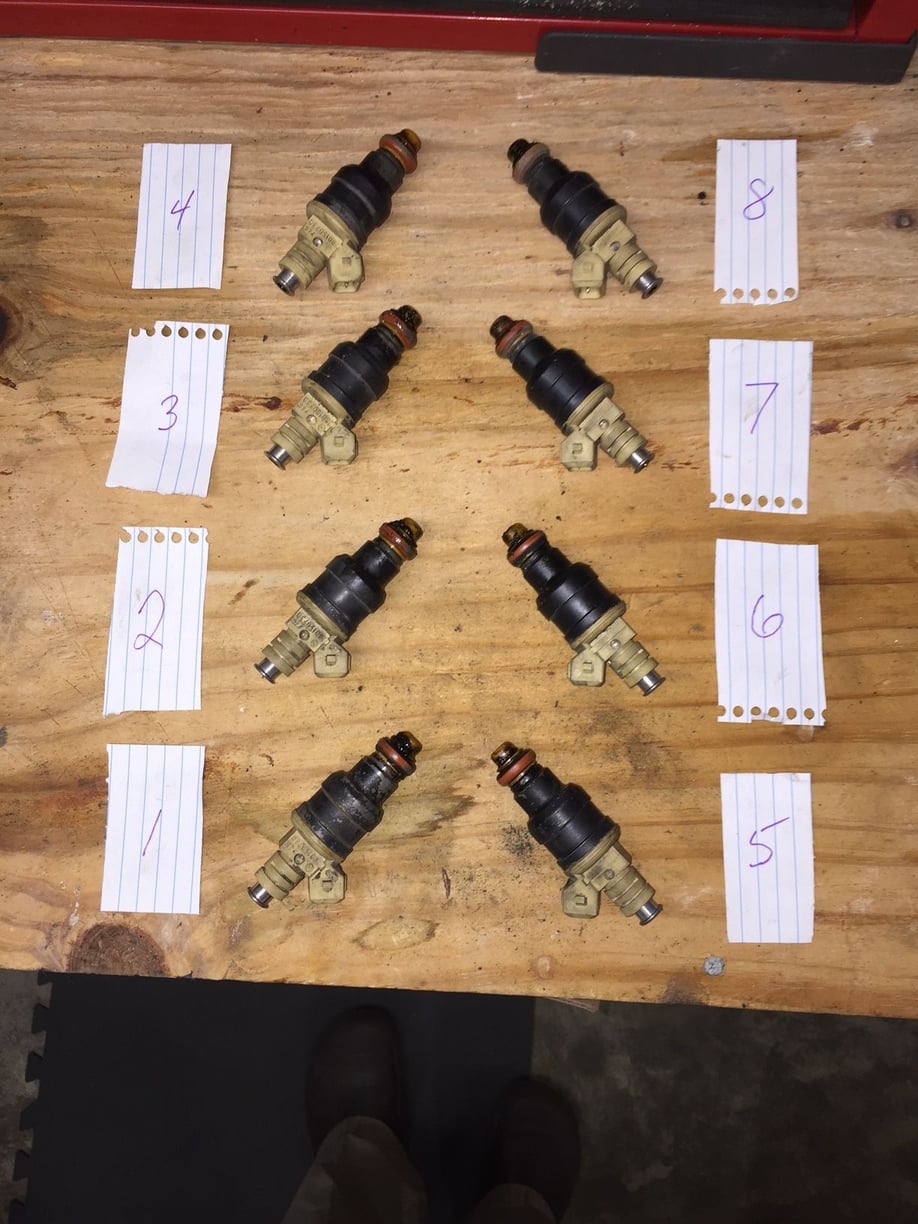
Grimy injectors, WitchHunter, TPS, ISV, and lots of cleaning to do
The injectors and everything inside the intake are way more oiled than I expected - I know about the oiling issue and Greg's block off plate, but until seeing it with my own eyes I didn't really grasp the magnitude. Lots of cleaning to do inside the intake runners, etc.
The injectors came out as shown below. Later I wiped them with a rag and put them in baggies with intent to send them to WitchHunter. I just read their to/from shipping information. Some of it made me think of a certain Seinfeld episode. How much insurance are folks here buying...enough to cover the value of old used injectors, or enough to buy new injectors if they get lost?
Note: I think I recall the PO of my car saying he replaced at least one fouled injector. #1 came out much easier than the others and it looks like it's had a harder life, so maybe it's the one. The car sat for two long periods of about 7 months each. I don't know if any attempt was made to clean the injectors. I sense these injectors have never been removed, so I think the offending injector(s) were replaced with working used one(s).
WitchHunter states they prefer all the seals remain on the injectors, so I'll put back the rail seals.
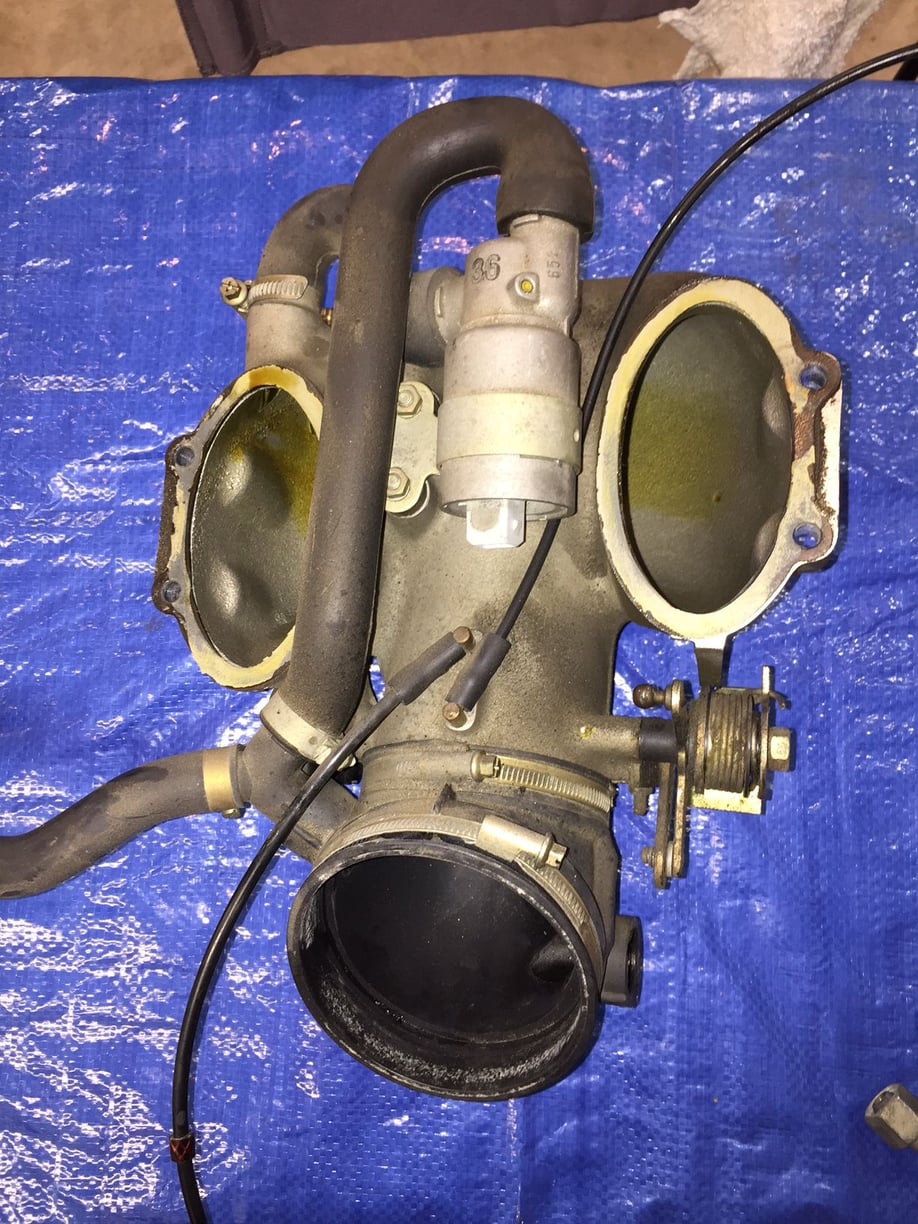
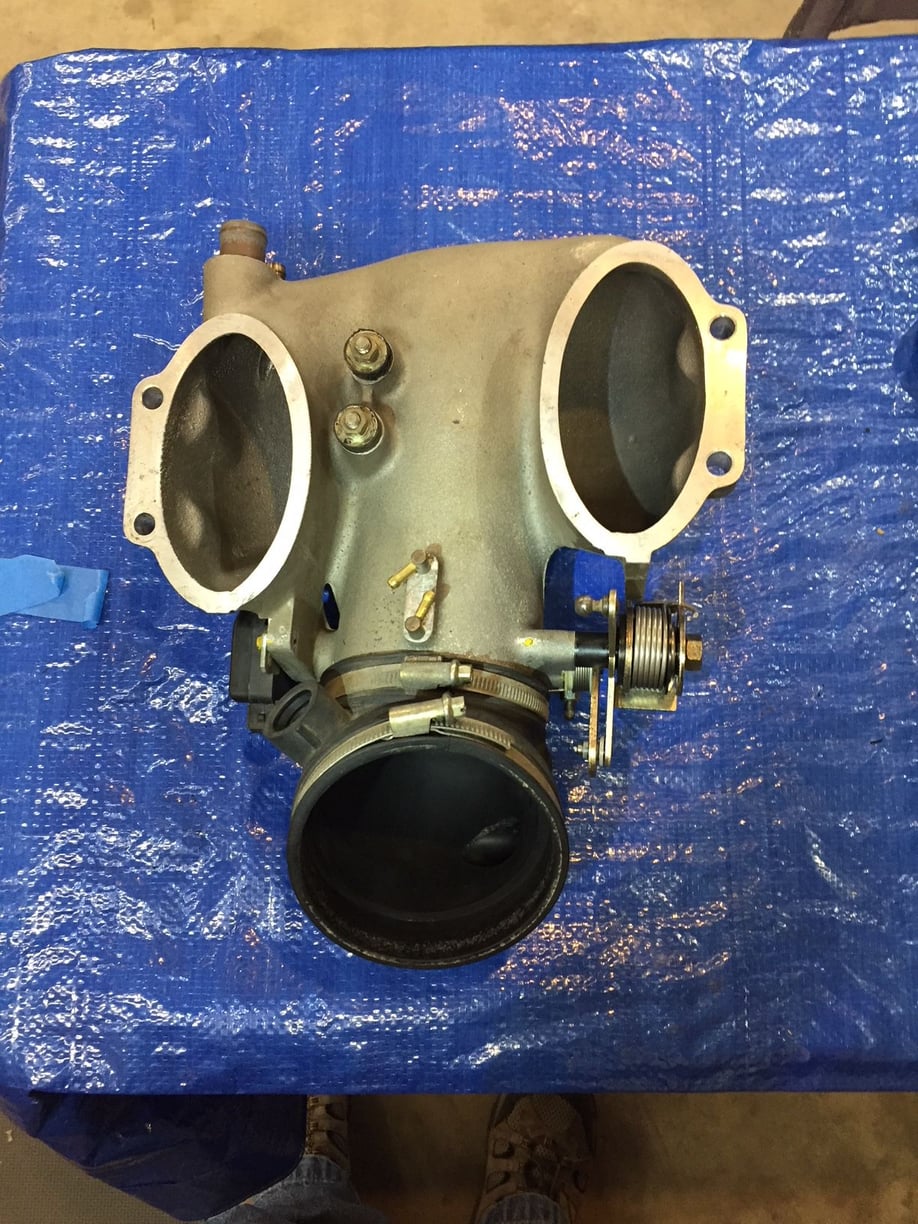
Removing the throttle body was easy. It took me awhile to see the old gaskets. Lots of oil. Makes me wonder why I don't see consumption on the dip stick. TPS clicking as it should. I kinda don't want to replace it because it ain't broke and sounds like installing a new one can be a bit touchy. Feel free to remind me I don't want to have to go back in here again. Also feel free to remind me how much it costs.
ISV: I'm inclined to test it and lube it and keep using it. I recall that while this is in the most impossible to reach location, it can be cleaned and is reliable. I understand its simple spring-loaded electromagnetic function. Not many moving parts to wear out. Hoping the majority here will say clean it, test it, and if it works put it back.
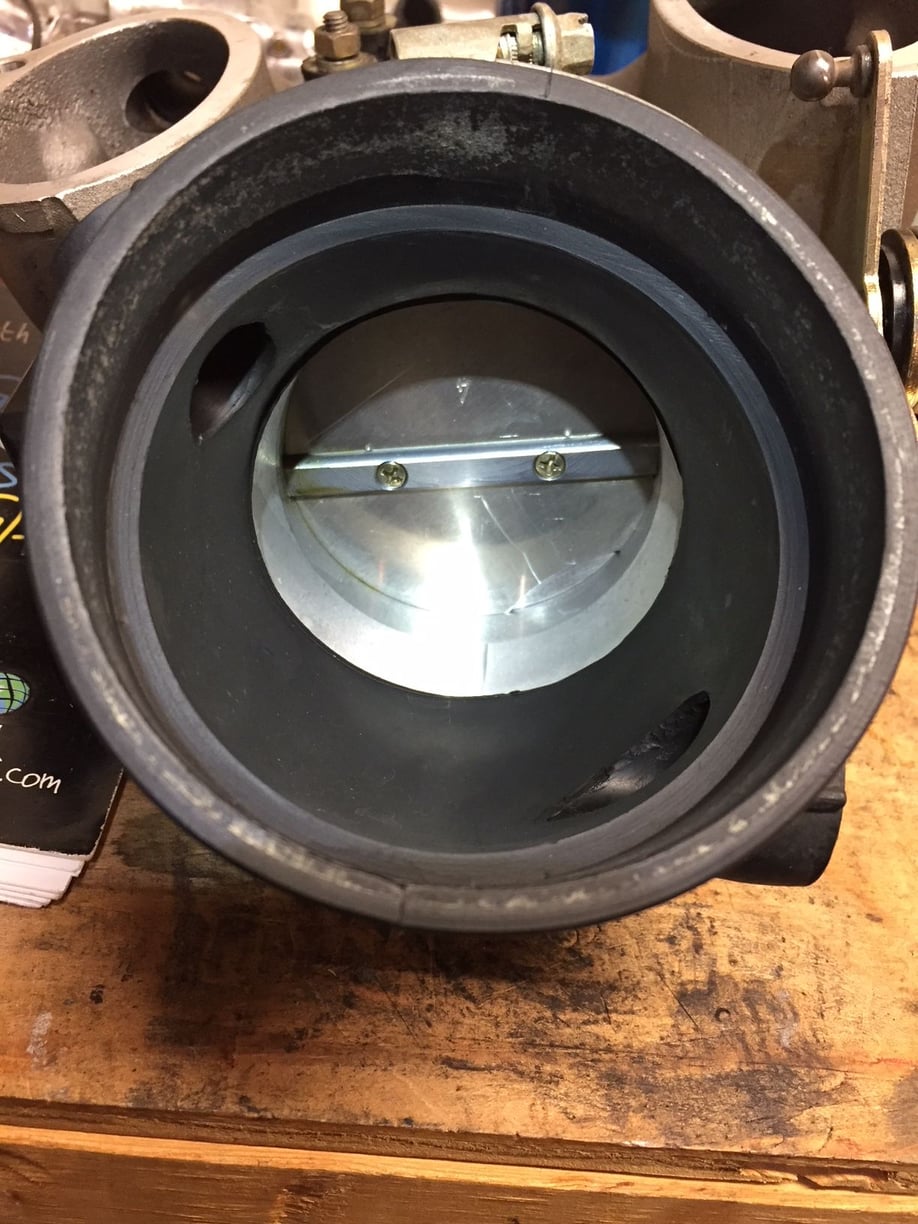
I haven't seen the Hex head stop that Stan said might have fallen out. I didn't find it in the valley yet either. Not entirely sure what I'm looking for or where to look for it. But...my throttle plate seems to be working and closing fine.
I think Stan was referring to a stop on the flappy valve actuation system. Mine had no stop, and nothing in the valley, either. I made one from a cut-off bolt head, and an offset hole. It presses onto a split pin. Not too far - check. Without the stop, with sticky deposits, and with the PO's gentle driving, my valve was stuck closed.
My ISV seemed good, so I put it back in. My TPS seemed good and coupled with anxiety of getting a new unit adjusted properly, I left it alone. Whenever possible, you know, it is best to change only one thing at a time. The full intake refresh is a huge violation of that guidance, so I use that as justification, too. It may all be my own rationalization, so you must do your own!
Curt...I like how you think. Rationalization has never sounded so....rational. I'm also a fan of Occam's razor - and not changing too many things which make it almost impossible to tell which thing I changed (insert expletive) things up. I've also discovered jobs like this take half as long the second time, and even less the 3rd, so I'm not too concerned about having to go in again. I do want to replace the flappy actuator and make sure the ISV is working well. I don't want to split the intake again...not until I decide to powder coat.
I make good progress in 1 or 2 hour chunks, once or twice a week. It's inefficient and feels like picking up a book, reading a little, and setting it down for a week. It takes awhile to get in the groove again.
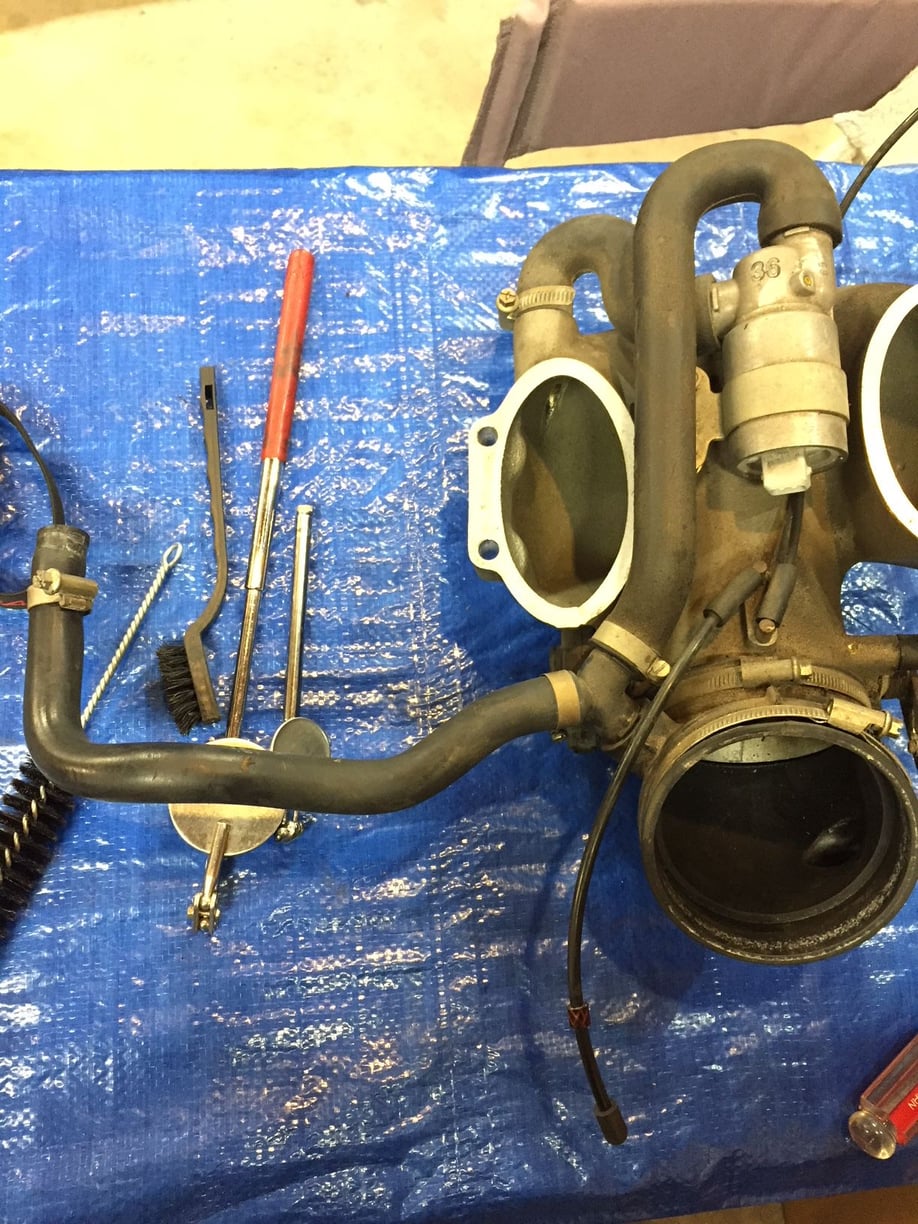
Looks like removing the intake side plates will be necessary to clean all the oil out. All of these separations and pulling of injectors, removing the intake seals, etc., has pealed paint off the intake. So it's time to start looking for the right powder coater in this region. I want to find one who has experience with 928 intakes.
Cleaning consumes so much time....but almost new looking parts look nice. The ISV passed the 9V battery test, but was gunked up so I cleaned it with electrical parts cleaner and WD-40. Cleaned up the throttle body and lubed it.
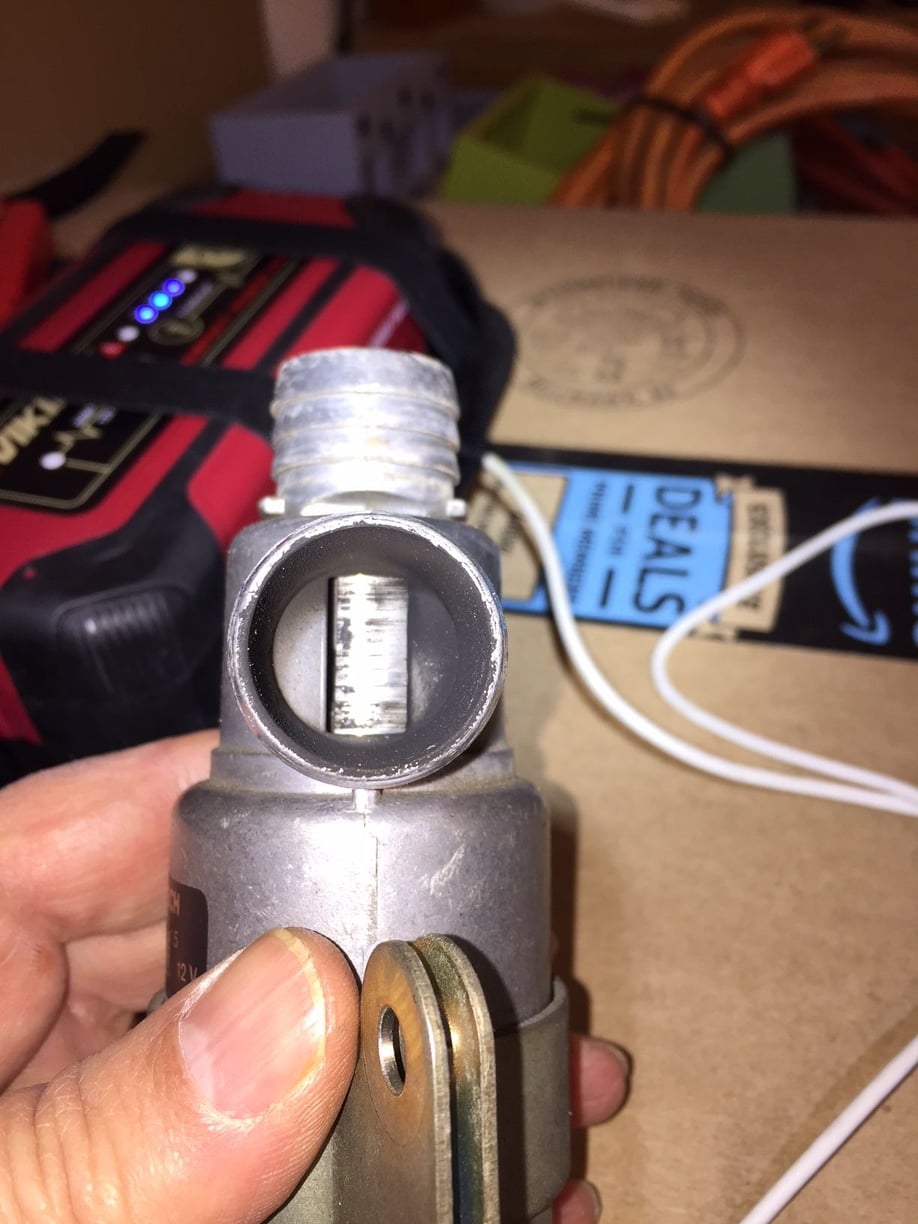
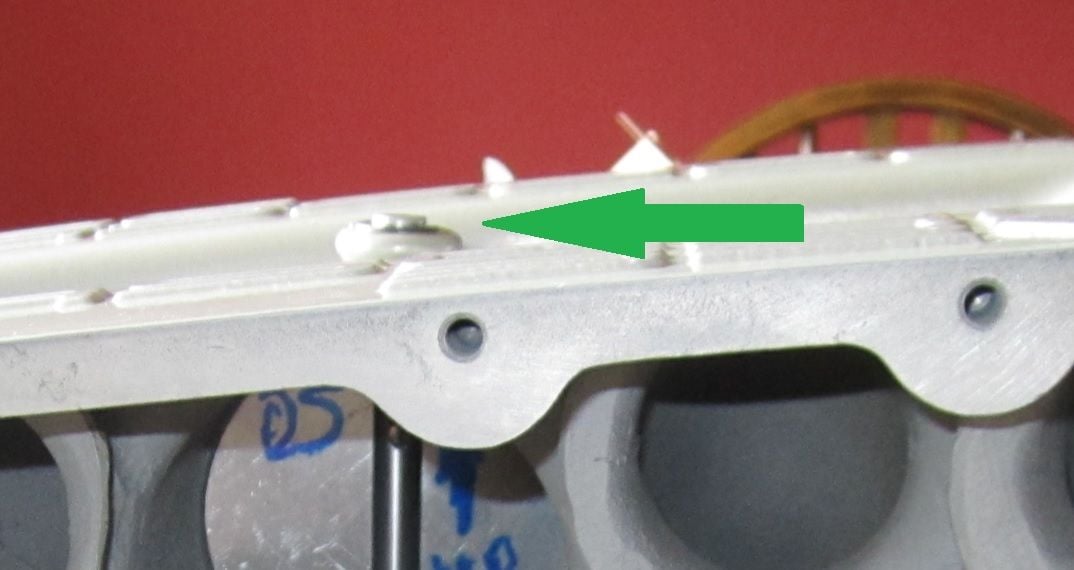
This photo shows the absence of a range stop on the rolled pin on the intake flappy mechanism. Like others I didn't find the original stop in the valley, and as Curt speculated I don't think it ever had one. The rolled pin shows no markings left by stop pressed on to it. I tested the flappy actuator and after about 2 pulls on the Mity-Vac the flap snapped open abruptly. I repeated this test 4-5 times and each time the valve seems slightly wedged/stuck until it snaps open when sufficient vacuum is applied. The actuator holds vacuum (still gonna replace it). Still plan to make stop from a hex bolt head.
How should the flappy behave when vacuum is released? When I abruptly release the vacuum the mechanism rotates slowly to the closed position, with the spring seeming weak and barely adequate to return the flappy to closed position. Should it return quickly to closed position?
Using a mirror I could see the flappy is clean on both sides, with slight oiling around the circumference.
My main reason for new flappy bearings is to replace the originals after powder coating. I hadn't realized that one or both originals may be toast. Are new bearings the cure for the slow return?
Originally Posted by worf928
Yes.
Perhaps it needs another wind of the spring?
New flappy bearings? (Forgive me for not re-reading the thread...)
Dumb question, but are you testing your flappy with the intake upside on the bench? If you are, it may be closing slow because it's resting on the flappy shaft. It happened to me... When I was testing my flappy after putting in new bearings I had the intake sitting upside down on a table with a towel underneath it so I could operate it with my might vac. The flappy was closing super slow and then I realized it was because the intake was resting on the shaft . Doh! When I put the intake upright, it worked like a champ. I freely admit I'm not the coldest beer in the fridge...


 02-24-2018, 11:11 PM