When you click on links to various merchants on this site and make a purchase, this can result in this site earning a commission. Affiliate programs and affiliations include, but are not limited to, the eBay Partner Network.
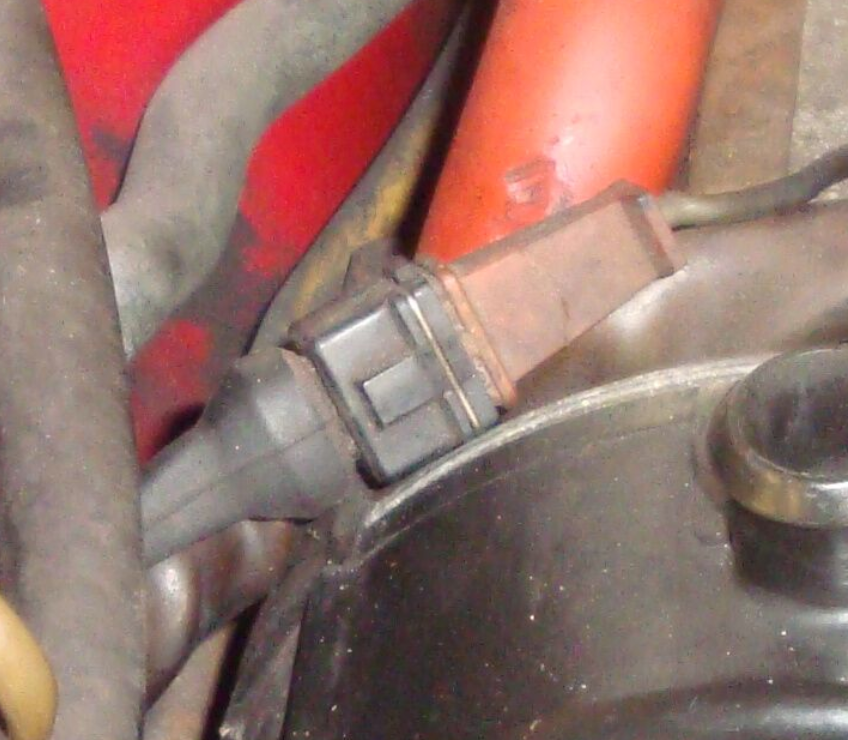
I am in the proces of cleaning the engine parts and i just worked on the wire harness. Its actually in quite good shape, but one of the connectors just died in my hands. Its the orange one, anybody knows where i can find a replacement for it? Is it still available or should i just replace it with modern stuff. ('79 euro manual). thanks in advance!
That end of the green wire can be replaced using a 2way male but as all ready stated the difficulty is accommodating the coax - but it can be done. JDS was making these for a time but the killer was the unavailability of the connection at the distributor end. We could not get enough cores to make it happen.
__________________
Does it have the "Do It Yourself" manual transmission, or the superior "Fully Equipped by Porsche" Automatic Transmission? George Layton March 2014
928 Owners are ".....a secret sect of quietly assured Porsche pragmatists who in near anonymity appreciate the prodigious, easy going prowess of the 928."
i have done this replacement. its like doing a knock or hall sensor. there are a few good vids out there on how to properly attach the pin to the shield cable
I used to do this for a living, but it's kinda hard to explain, I'll try. Coax connectors usually terminate in a BNC, TNC or other twist-loc insulated connection, which retains the same impedance as the cable. In our case, this is not the way they do it. The segregate the coax from the central connector and the two wires then terminate into the Bosch pin clamp found on most other Bosch connectors. First thing to determine is if you have enough slack. You will want to cut back about 3-5" from the current termination to start over. If you have that much, proceed as follows to prep the wires.You should start with a coax wire stripper, but if you don't want to invest in that, a very sharp Exacto can be used.
Cut the coax wire off about 3-5" from the old connector. You are working with small materials so go slow and be careful. Fit the new rubber flex condom over the coax wire, and slide it down a foot or so. Use the coax stripper and adjust it for the right diameter or slightly larger than the sheath of the green cable. Make your cut ~3/4" back from the end. If you are using the Exacto, cut radially by putting the coax on a flat metal surface, hold the Exacto over the cable sheath perpendicular, and roll the cable while moving the Exacto to make a clean cut, without tearing into fine shield wire underneath. If the stripper cuts right, you can pull the green sheath off, leaving the braided shield wire beneath intact. If you used the Exacto, you can now cut the sheath axially to the end, and remove it, leaving the braid underneath.
Now comes the hard part. Just as un-braiding hair has to be done from the end, so braided wire has to be done from the end. I use a 90deg dental pick, but one can also use a ice pick, or other pointed tool to un-braid the fine wire shield. Place the end of the cable on a flat or notched surface. Try not to let it roll around, if you can get a notched channel to work in, that's better. Using the dental pick, beginning near the cut end(not the stripped end), begin pulling the fine braid wires toward the cut end, thus un-braiding them. work about 1/4", and then turn it over and do this again. Work back and forth so the braid comes apart into strand groups, and don't leave any small stragglers behind. completely un-braid small segment, by small segment so you are left with two long strand groups back to the stripped section. The inner insulator and the center conductor are now exposed about 5/8".
Center conductor treatment is next. Slide the two strand groups backward and fold them over the green sheath, to work with the center conductor. Use a standard stripping tool and strip back about 1/4" of the center insulator. Leave almost 1/2" of center insulator beyond the end of your un-braided shield wire. The Bosch connector pins can now be crimped onto the center conductor. Now bring the two strands of un-braided wire together, and work them back forward. I put a dab of Glyp-tol, or super-glue on the base of the braided wire to keep it from migrating forward and shorting to the inner conductor. Let it dry. Others have used some small short piece of heat-shrink, if you have the right size, you can put it over the pin and shield braid after it's been crimped, and segregate it from the center conductor.
Once both are crimped, and maintain segregation, you are ready to put them in the back of the plastic connector. There is a small metal tab that locks them into the connector, and it is angled outward from the pin. Make sure this is not flattened, or the pin will backup in the plastic housing, and not engage with the socket on the other end. Stuff the two pins into the plastic housing, and make sure you have the orientation of conductor and shield in the right place. Once you get them in the right slot, use a small needle nose plier on the open end to pull them into place. You should hear them snap in and lock. Push back on the pin to test they are in the latched position. Now, move the condom strain relief up into place, and you're ready to use.


 01-24-2018, 06:40 PM


 George Layton March 2014