New Product - Fuel Tank Threaded Sleeve FIX
#18
Great news! This repair works on all 928, 944, 924, and 944/924 turbo models. This may work with more tanks as well. The replacement sleeve is a final solution to a very common porsche fuel tank issue. I will definitely be letting everyone know about this product.
Thank you!
Thank you!
#19
Basic Sponsor
Rennlist
Site Sponsor
Rennlist
Site Sponsor
Thread Starter
That is great news Devin - any pictures?
__________________

Does it have the "Do It Yourself" manual transmission, or the superior "Fully Equipped by Porsche" Automatic Transmission? George Layton March 2014
928 Owners are ".....a secret sect of quietly assured Porsche pragmatists who in near anonymity appreciate the prodigious, easy going prowess of the 928."

Does it have the "Do It Yourself" manual transmission, or the superior "Fully Equipped by Porsche" Automatic Transmission?
 George Layton March 2014
928 Owners are ".....a secret sect of quietly assured Porsche pragmatists who in near anonymity appreciate the prodigious, easy going prowess of the 928."

#21
Basic Sponsor
Rennlist
Site Sponsor
Rennlist
Site Sponsor
Thread Starter
#22
So does the red seal go inside the tank and another seal on the outside?
#24
This works perfectly for my 86 944 n/a. Just received it today and had it in in about 15 minutes. Very nice work. Thank you again!
Yes the seal is on the inside. I went through where the fuel sending unit is. Took a wire hanger down and out. Worked the insert in place by wiggling and using a long screw driver. Once down I used my index finger to pull in place. I also had to use the screw driver to spin the tab up a little bit to line up, then when pulling I spun it counter clockwise and it easily pulled in place to thread the fuel strainer on.
Yes the seal is on the inside. I went through where the fuel sending unit is. Took a wire hanger down and out. Worked the insert in place by wiggling and using a long screw driver. Once down I used my index finger to pull in place. I also had to use the screw driver to spin the tab up a little bit to line up, then when pulling I spun it counter clockwise and it easily pulled in place to thread the fuel strainer on.
The following 2 users liked this post by Lt198821:
Bertrand Daoust (04-14-2020),
SeanR (04-14-2020)
#27
Tried your email with @ and .com but it bounced back.
https://928srus.com/products/fuel-ta...d1c90806&_ss=r
https://928srus.com/products/fuel-ta...d1c90806&_ss=r
#28
Chronic Tool Dropper
Lifetime Rennlist
Member
Lifetime Rennlist
Member
Pull the insert deeper into the tank nozzle. Also, the very early cars use a slightly smaller nozzle adapter, so you will need a later one to work with the new insert. The smaller adapter almost slides into the late-sized insert.
#29
Rennlist Member
Looks like my thread has finally let go. Roger are these currently available. I will send you an email but it sometimes bounces so i will start here. However my strainer is just spinning in the tank at the moment. How do I get that out? There seems to be resistance. Also with this kit does the sealing surface still reside with the plastic face?
After some thread searches it seems it should pull forward once spinning. Past a small lip. Is there danger of cracking it?
Thanks
After some thread searches it seems it should pull forward once spinning. Past a small lip. Is there danger of cracking it?
Thanks
Last edited by grepin; 05-02-2021 at 03:12 AM.
#30
Rennlist Member
Looks like my thread has finally let go. Roger are these currently available. I will send you an email but it sometimes bounces so i will start here. However my strainer is just spinning in the tank at the moment. How do I get that out? There seems to be resistance. Also with this kit does the sealing surface still reside with the plastic face?
After some thread searches it seems it should pull forward once spinning. Past a small lip. Is there danger of cracking it?
Thanks
After some thread searches it seems it should pull forward once spinning. Past a small lip. Is there danger of cracking it?
Thanks
The hydraulic seal is formed between the strainer flange and the tank boss front face that must be kept clean and intact. The tank insert does not play a part in the sealing process - it simply acts to provide an anchor to provide the clamping force needed to compress the seal ring between the strainer [or pump] and the fuel tank outlet boss.
I did think about fitting a clamp before trying to undo the in-tank pump recently but figured that since it was torqued correctly and had been out of the tank a couple of years earlier it would come out no problem- well I sure got that wrong! Bottom line- anyone attempting to remove the in-tank pump or strainer should fit an external clamp to induce some compressive force onto the insert that otherwise spins- it works!
I have just been through this pain during my recent overhaul project and to get the strainer out without doing further damage you will need to fit a clamp around the outer section of the boss. This is not as easy as it first seems in that there are 4 small raised castings - I cut these off best I could in-situ. The next problem I found was that the boss has two sections with slightly different OD's- this prevents the clamp from seating evenly and induces the clamp to slip along the boss as it is tightened.
At this point I decided to remove the fuel tank before doing anything else so a good opportunity to clean, inspect and replace as appropriate some of the fuel and vent lines in the general area and also helped facilitate replacing the fuel pump wiring harness back into the rear hatch area. To get the tank out there is a section of hose that passes through a bulk head wall that vents the main body of the tank back to the filler neck- initially could not figure out why the fuel tank would not drop out until I realised what was impeding progress- the WSM makes no mention of this!
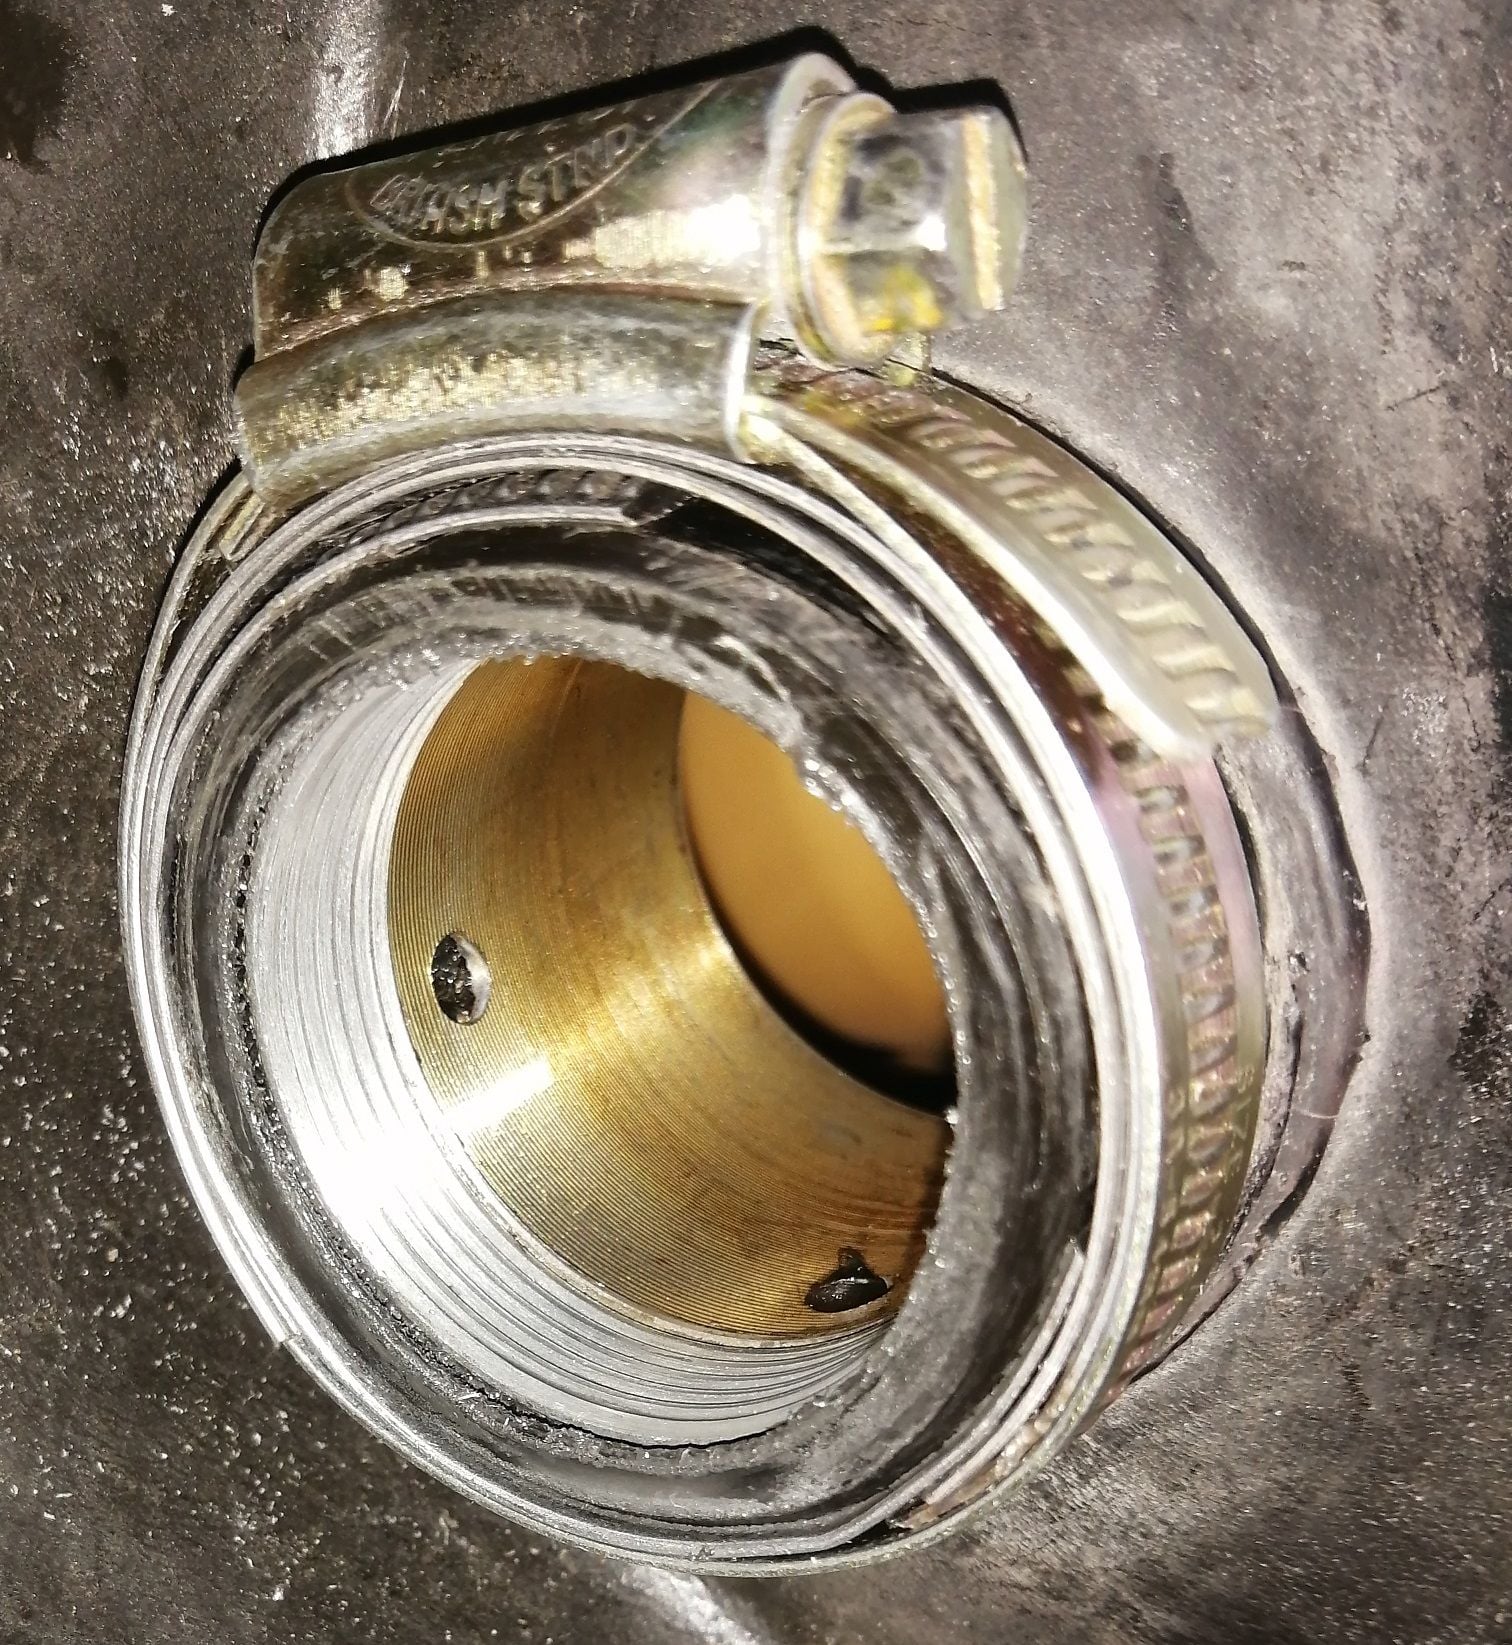
To overcome the clamp slippage problem I made three stainless packers to increase the diameter of the outboard most part of the boss with a view to stopping the clamp snagging on the inboard section. I also had to ease a bit of the plastic on the inner most section of the boss underneath where the worm drive gear sits.I figured there was only one orientation postion to seat the clamp as per the photo.The shims were made from some old large but narrow stainless jubilee clips I had in my spares bin that were the same width as the surface they would now sit on. I sized these to cover an arc of about 330 degrees and offset the gaps "piston ring style". Once I had the clamp assembly in place I was now able to undo the "spinning" in-tank pump assembly no problem.
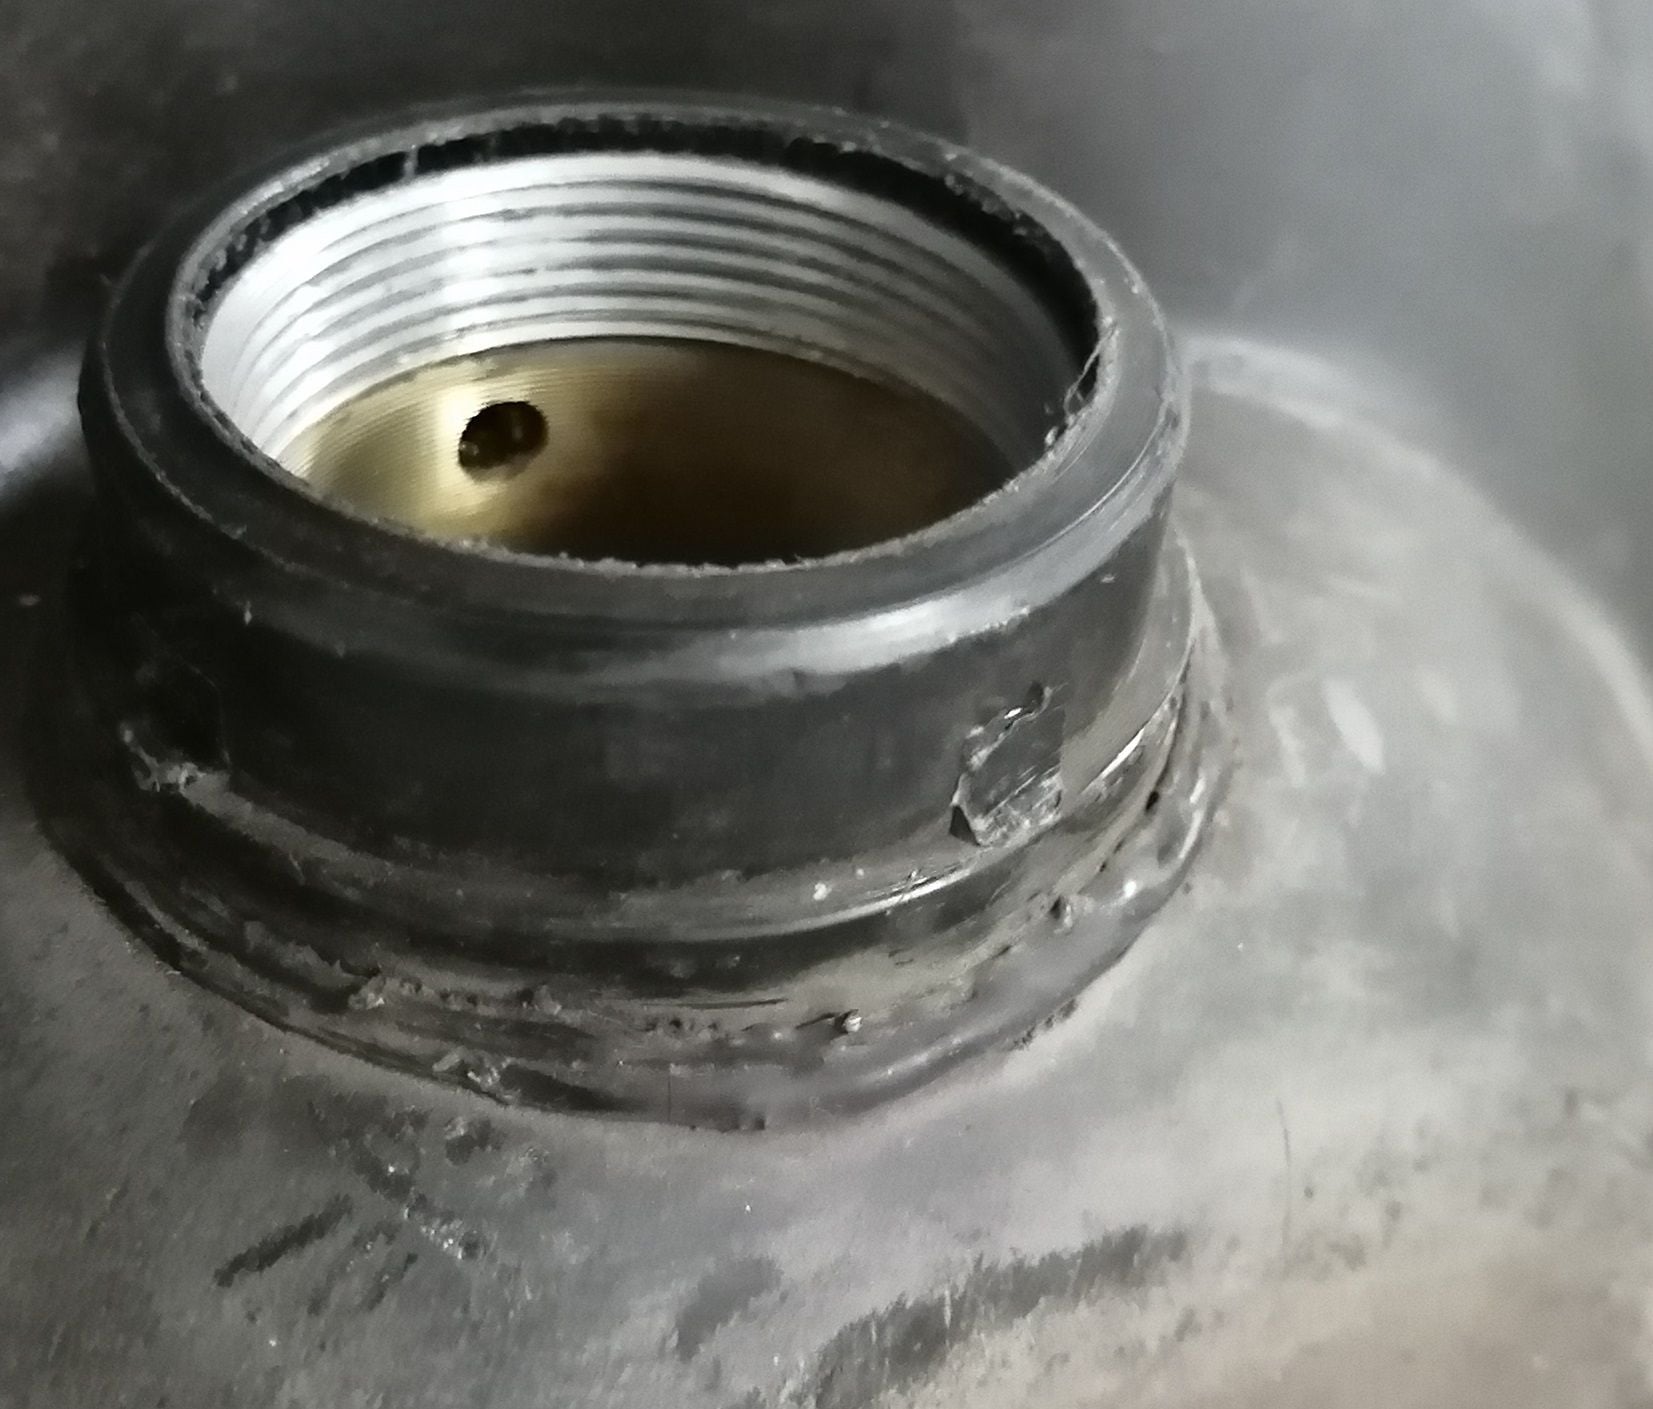
So now I had the tank on my work bench with the insert slightly protruding from where it should sit. I thus inserted an old in-tank pump mounting flange I had in my spare parts bin and used that as a drift to reposition the insert [that had been pulled outwards a little as it failed] to its correct position and then pushed it about 1mm further inboard than it was originally located such that I could then see a small gap between the insert and the sealing surface of the boss. I figured that would help as a visual cue to help me ascertain if the insert were to slip axially during the tests I now had in mind.
I now had to decide what to do with the tank long term. I did some research and found that the coefficient of thermal expansion for the tank material is considerably greater than that of steel so reasoned that with an external steel band clamp the compressive forces could only increase in service as and when the fuel heats up some. Did some simple calcs for clamping force the jubilee clamp would impose on the boss and compared to some stress/strain data I found for polyethylene and figured it should be possible to reseal the tank without using any adhesives or other accessories. I also figured that because of the nature of the tank material [i.e. plastic] it should also "flow" back into position over time under compressive stress such that the plastic will reseat on the knurled surface of the insert. The term "plastic" has a specific mechanical meaning.
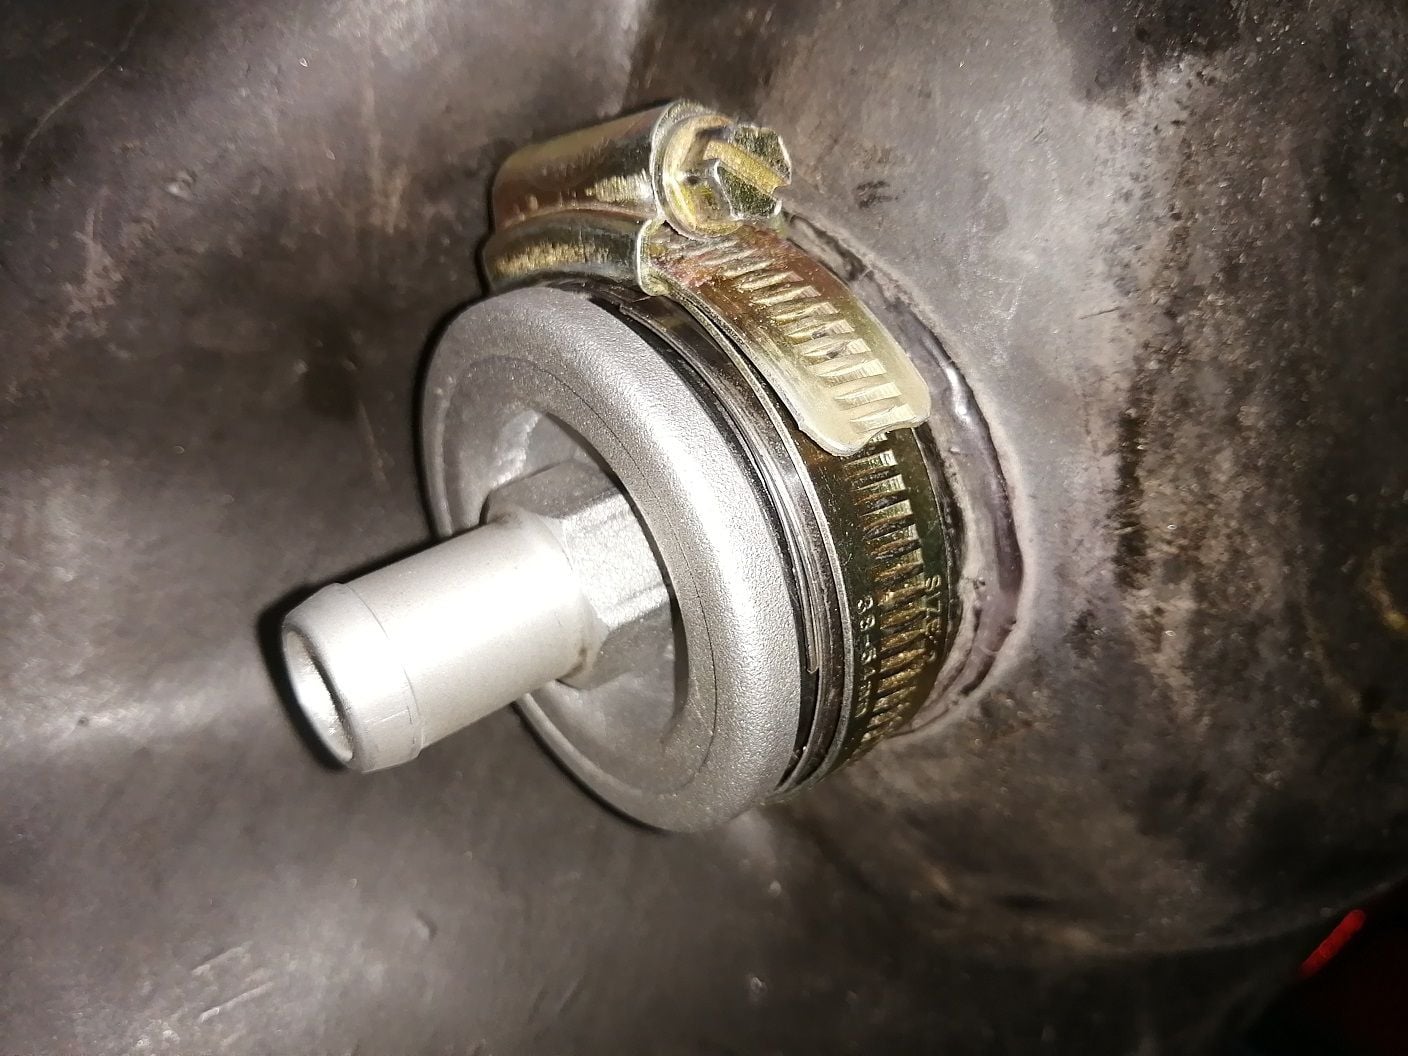
I then acquired a new Jubilee clip of the best quality I could find locally. I progressively torqued the clamp up over the three shims I made with the new strainer in place. Unfortunately I cannot remember the actual torque value I used but it was a specific value for a clamp of that specific size- 6 ft lbs comes to mind though. I then torqued up the strainer [using the old seal ring] in 4 progressive steps until the specified torque was reached and after each step undid the strainer to ensure no slippage had taken place- the test was successful. I then mounted the new strainer with a new seal ring and after sealing the nozzle poured some 10 litres of fuel into the tank and left it for a week. Put some tissue paper under the nozzle joint and from time to time checked to see if there were any signs of weepage- there were none! I then decided that the repair may be viable longer term and reinstalled the tank, mounted the fuel pump and ran the pump for 30 minutes using a jumper in the relay slot. Checked for signs of leakage- non spotted- so figured it was now OK to put into service. After the first 30 minute test run I pulled the fuel pump cover to look for any signs of leakage- non spotted. Over the coming weeks I will make regular checks weekly then monthly until I have full confidence in the repair.

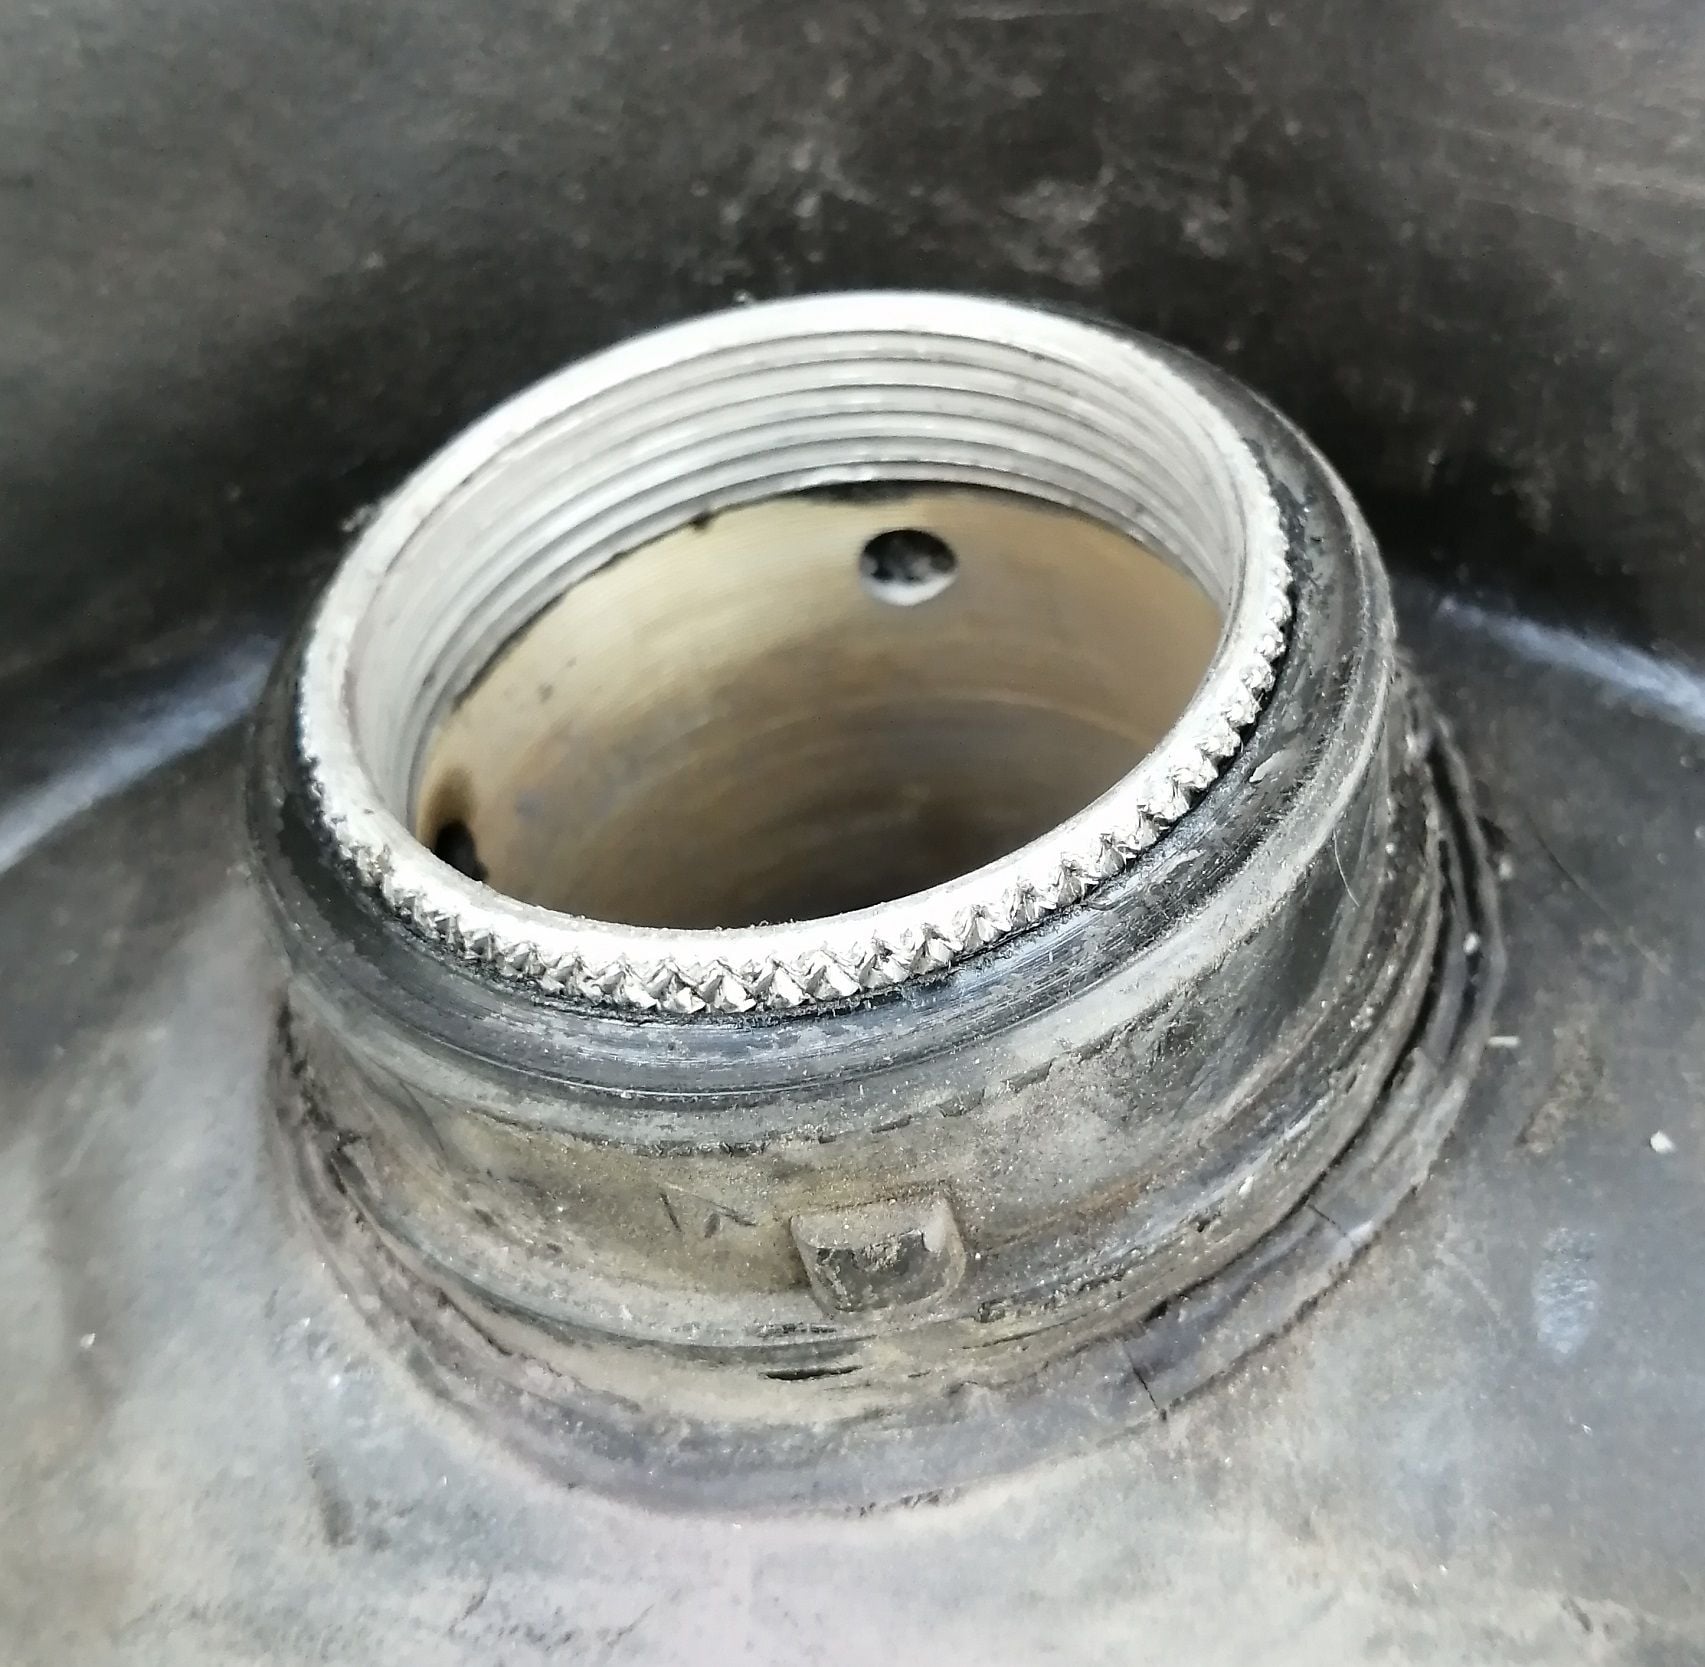
Insert protruding after the insert slipped

Insert pushed back into tank with 1mm gap and plastic flashes removed

Clamp fitted over packers

Strainer as currently fitted

