When you click on links to various merchants on this site and make a purchase, this can result in this site earning a commission. Affiliate programs and affiliations include, but are not limited to, the eBay Partner Network.
Wasn't too bad of a job. One of my tie rod nuts refused to move, so I ended up grinding it off. Two new tie rod ends on the way. It's not easy getting to the upper motor mount bolts on the right side with the exhaust there, but I eventually got it. Steering shaft was reluctant to depart from the rack, I'm a bit apprehensive about them going back together, but that's a future problem.
So, while I'm waiting for parts to arrive, I spent some time on Clark's looking at the procedures for the timing belt/water pump service and engine removal, since I'm pretty far down the engine removal path at this point. I decided it's not worth it, I'm going to leave it in for now and do the belts and pump in place. Need to order the parts and tool for that, too. The Arnnworx tool is the one to get, right? Anybody got one I can rent/borrow/buy, rather than me spending $170 on a tool I'm probably going to use once?
So, the plan is to remove the pan, replace the rod bearings and nuts, install a new (used) pan with a new gasket and new drain plug, which will hopefully take care of my oil leak. Then it's timing belt/balance shaft belt/water pump, then back together. Debating replacing the motor mounts since everything is out right now and they are probably original and 33 years old, but that's even more money, and I have to draw the line somewhere. Decisions.....
While you're in there, you should replace the engine mounts. You'll later regret it if you don't, thinking "man, I should have just bit the bullet and replaced those".
You're doing a great job thus far, keep up the good work!! The flat disc Fuchs wheels look great on the car!! How does the car drive after the new suspension? Be sure to have the car aligned after you install the crossmember and rack. Did you ensure that the steering wheel was somewhat locked in place before removing the rack or did you make an alignment mark on the steering shaft and rack? If the steering wheel is turned while the rack is out, there is a chance that it will not align out and you will have to pull the rack again and re-center the wheel and the rack and align it again.
Can't wait to see more pictures of the progress!! Also, any special option codes on the car?
While you're in there, you should replace the engine mounts. You'll later regret it if you don't, thinking "man, I should have just bit the bullet and replaced those".
Yeah.... The OE Porsche ones are the only good ones, right?
You're doing a great job thus far, keep up the good work!! The flat disc Fuchs wheels look great on the car!! How does the car drive after the new suspension? Be sure to have the car aligned after you install the crossmember and rack. Did you ensure that the steering wheel was somewhat locked in place before removing the rack or did you make an alignment mark on the steering shaft and rack? If the steering wheel is turned while the rack is out, there is a chance that it will not align out and you will have to pull the rack again and re-center the wheel and the rack and align it again.
Yes, I marked both the rack and shaft with a paint pen, per Clark.
Can't wait to see more pictures of the progress!! Also, any special option codes on the car?
I don't think so. It's pretty lightly optioned, doesn't even have a rear sway bar.
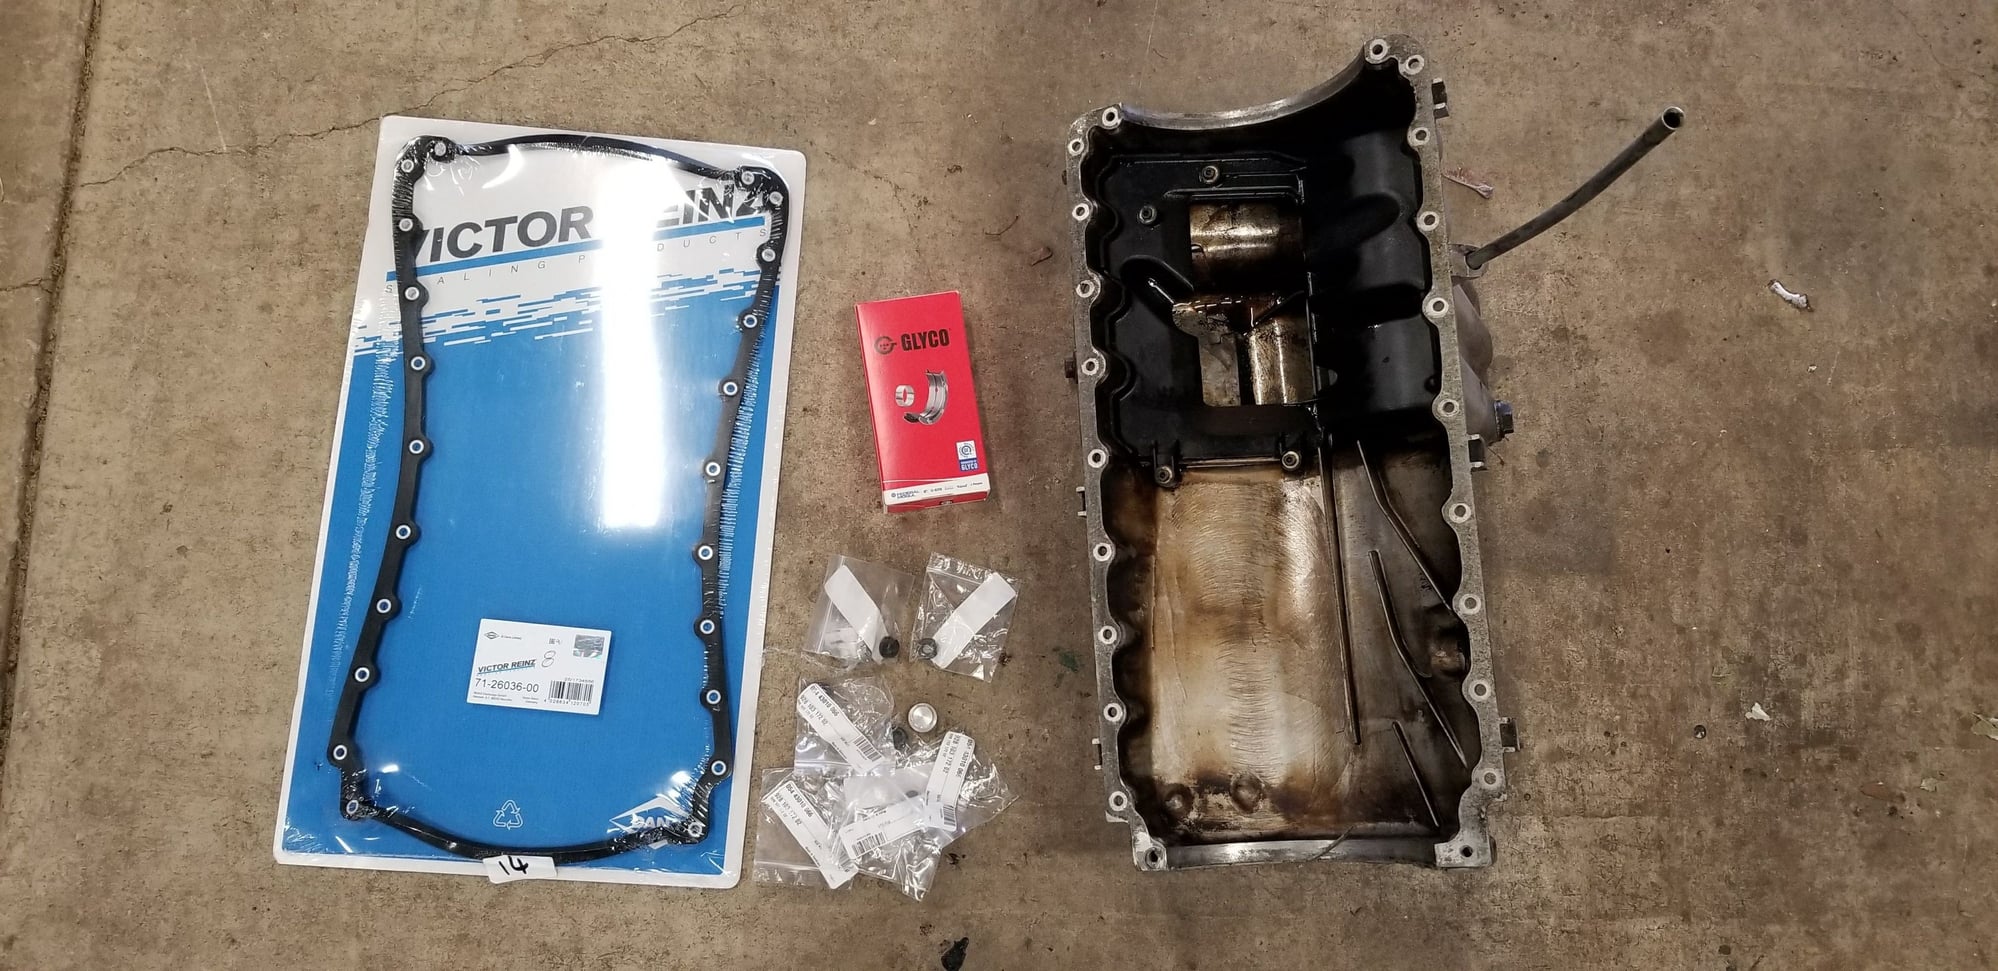
New (used) oil pan, oil pan gasket, rod bearings, rod bearing cap nuts, and new drain plugs.
The old oil pan came off without too much difficulty, so here's the soft underbelly of the M44 engine:
That oil dye is powerful stuff. I think I'll do a couple of oil changes once this thing is back together, just to make sure I got rid of all of it.
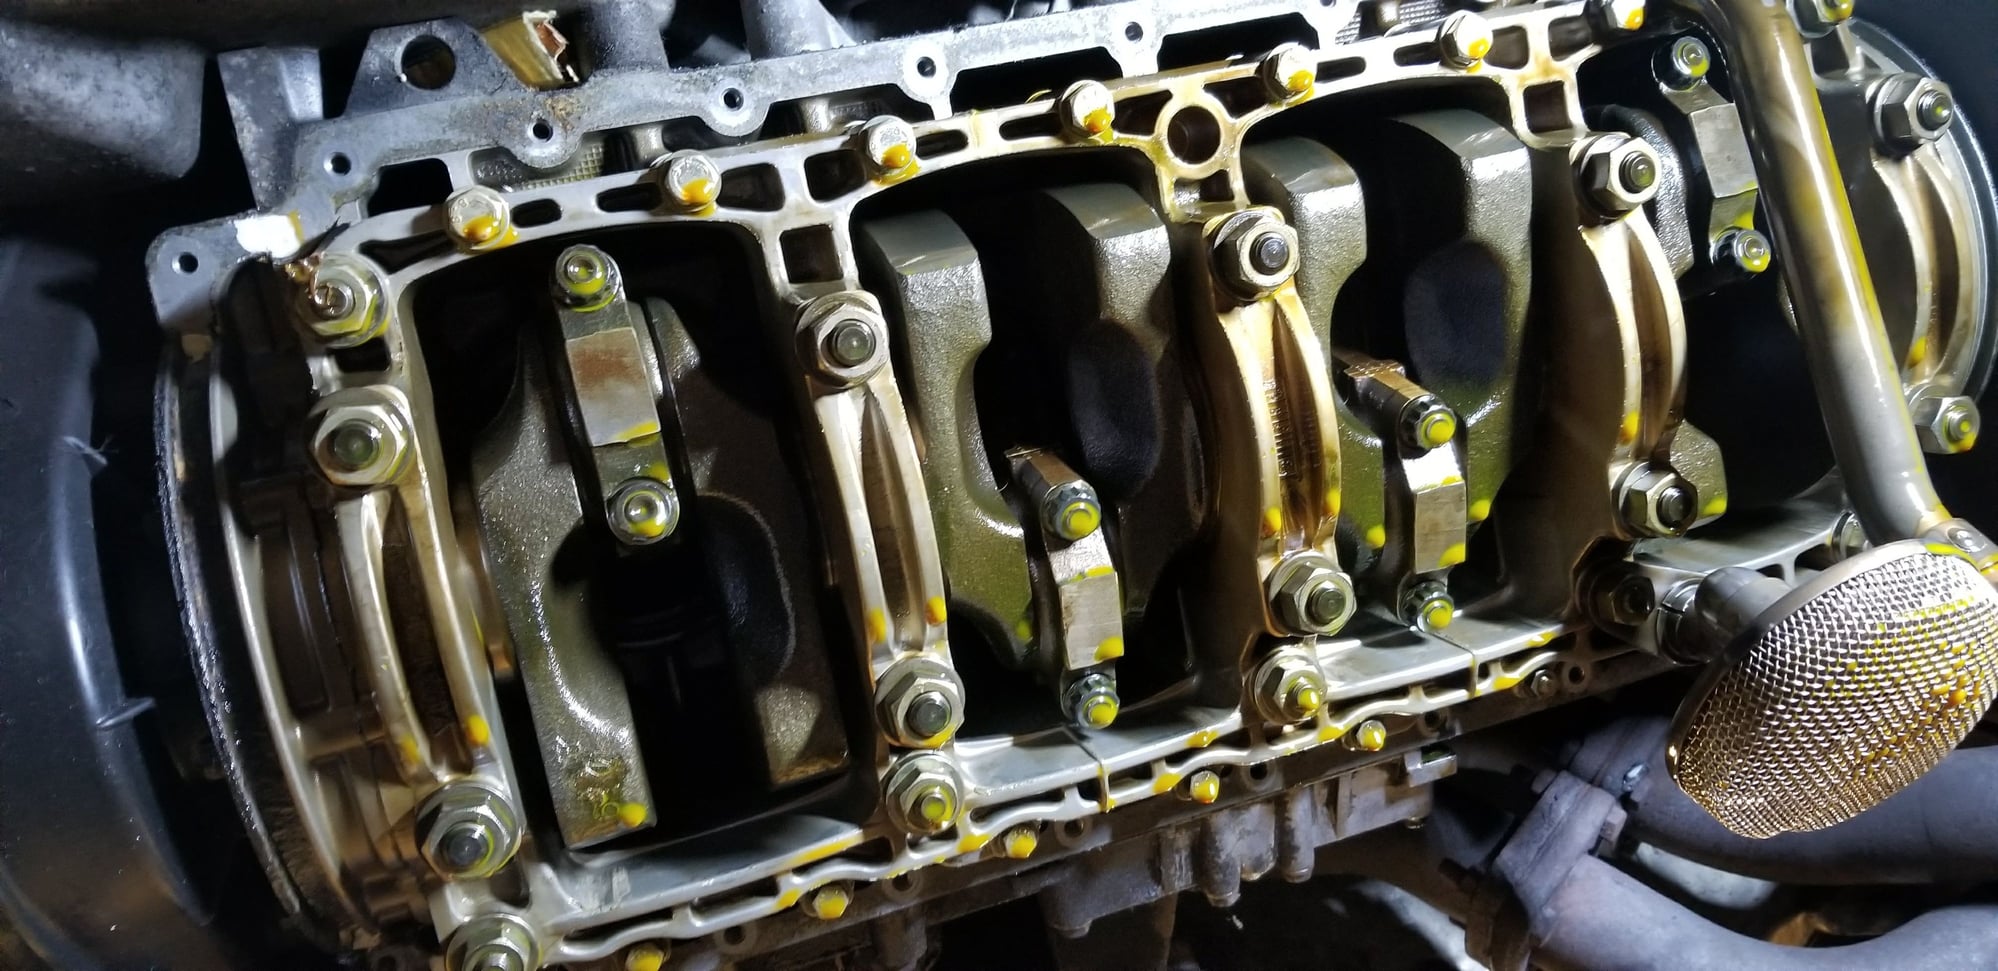
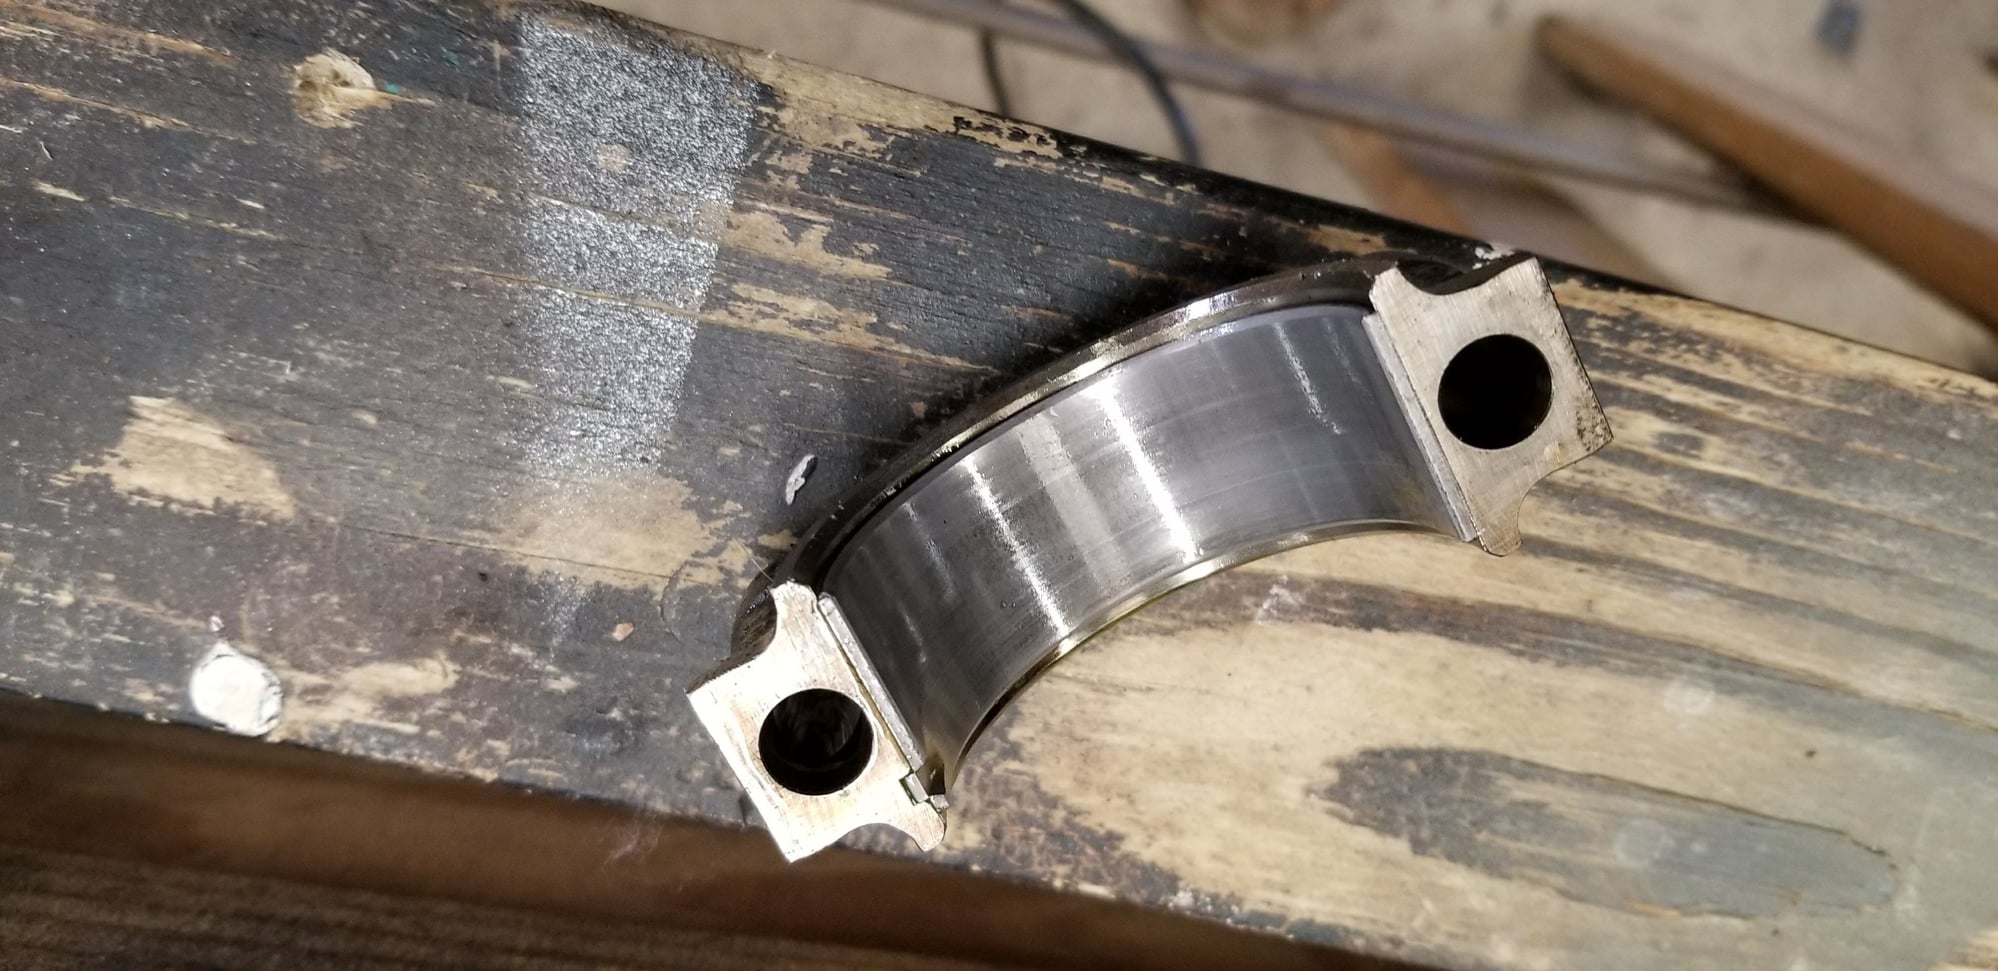
I pulled the #1 and #4 bearing caps off to have a look. Honestly, the bearings don't look bad at all:
I've certainly seen worse, but since I already have the new bearings and it's all apart, I'm going to just go ahead and replace them anyhow. The only reason I didn't do it yesterday was that I couldn't find any engine assembly lube.
Currently puzzling what to do about my AC. When I bought it, both lines going to the compressor were disconnected, so I'm assuming some kind of failure befell the system in the past. The lines have been just hanging there, so my plan was to just remove the whole system to save a bit of weight and clean up the engine bay a little more, and by removing the condenser, get a little more air to the radiator. Does anyone know if there's a way to bypass the compressor with a shorter belt to the alternator without buying a $200 bracket from Lindsey? I know you can't just run a shorter belt because you lose the tensioner with the AC compressor.
Nobody seems to be reading this, but I feel like I should keep it going just for my own records, so here goes.
It's been about a month and a half since my last update, and while I'm still behind schedule, I have accomplished a few things in the meantime. The new bearings are in and the new-to-me oil pan is installed with a new gasket. Hopefully that will take care of the leaks.
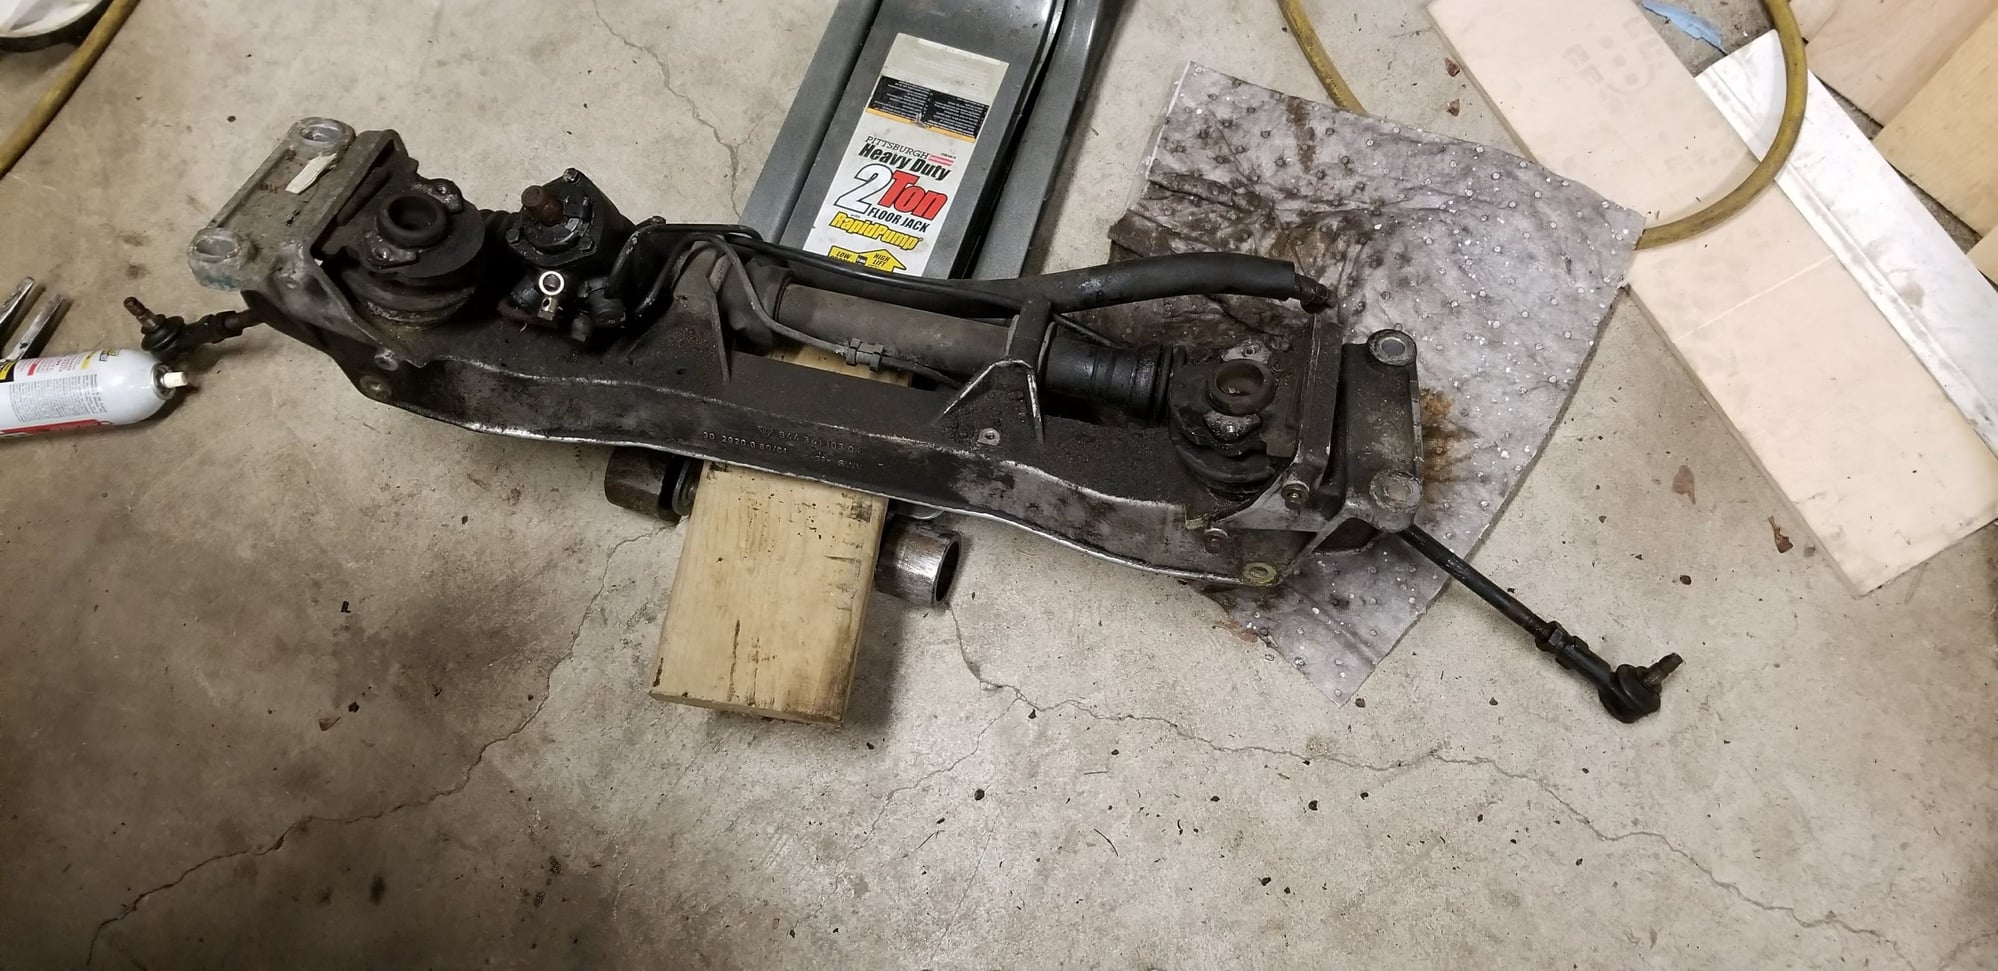
I did a few other jobs without taking many pictures, like installing new Meyle engine mounts. I know, I know, the OEM ones are best, but for $35 each, I figure they have to be better than the 33-year-old ones that were in there, and besides, the car will be lucky to see 2000 miles a year, so they should last a good long while. Once that was done, I replaced the crossmember, which wasn't too bad, and aligning the steering shaft was much easier than it was on the BMWs I've owned in the past.
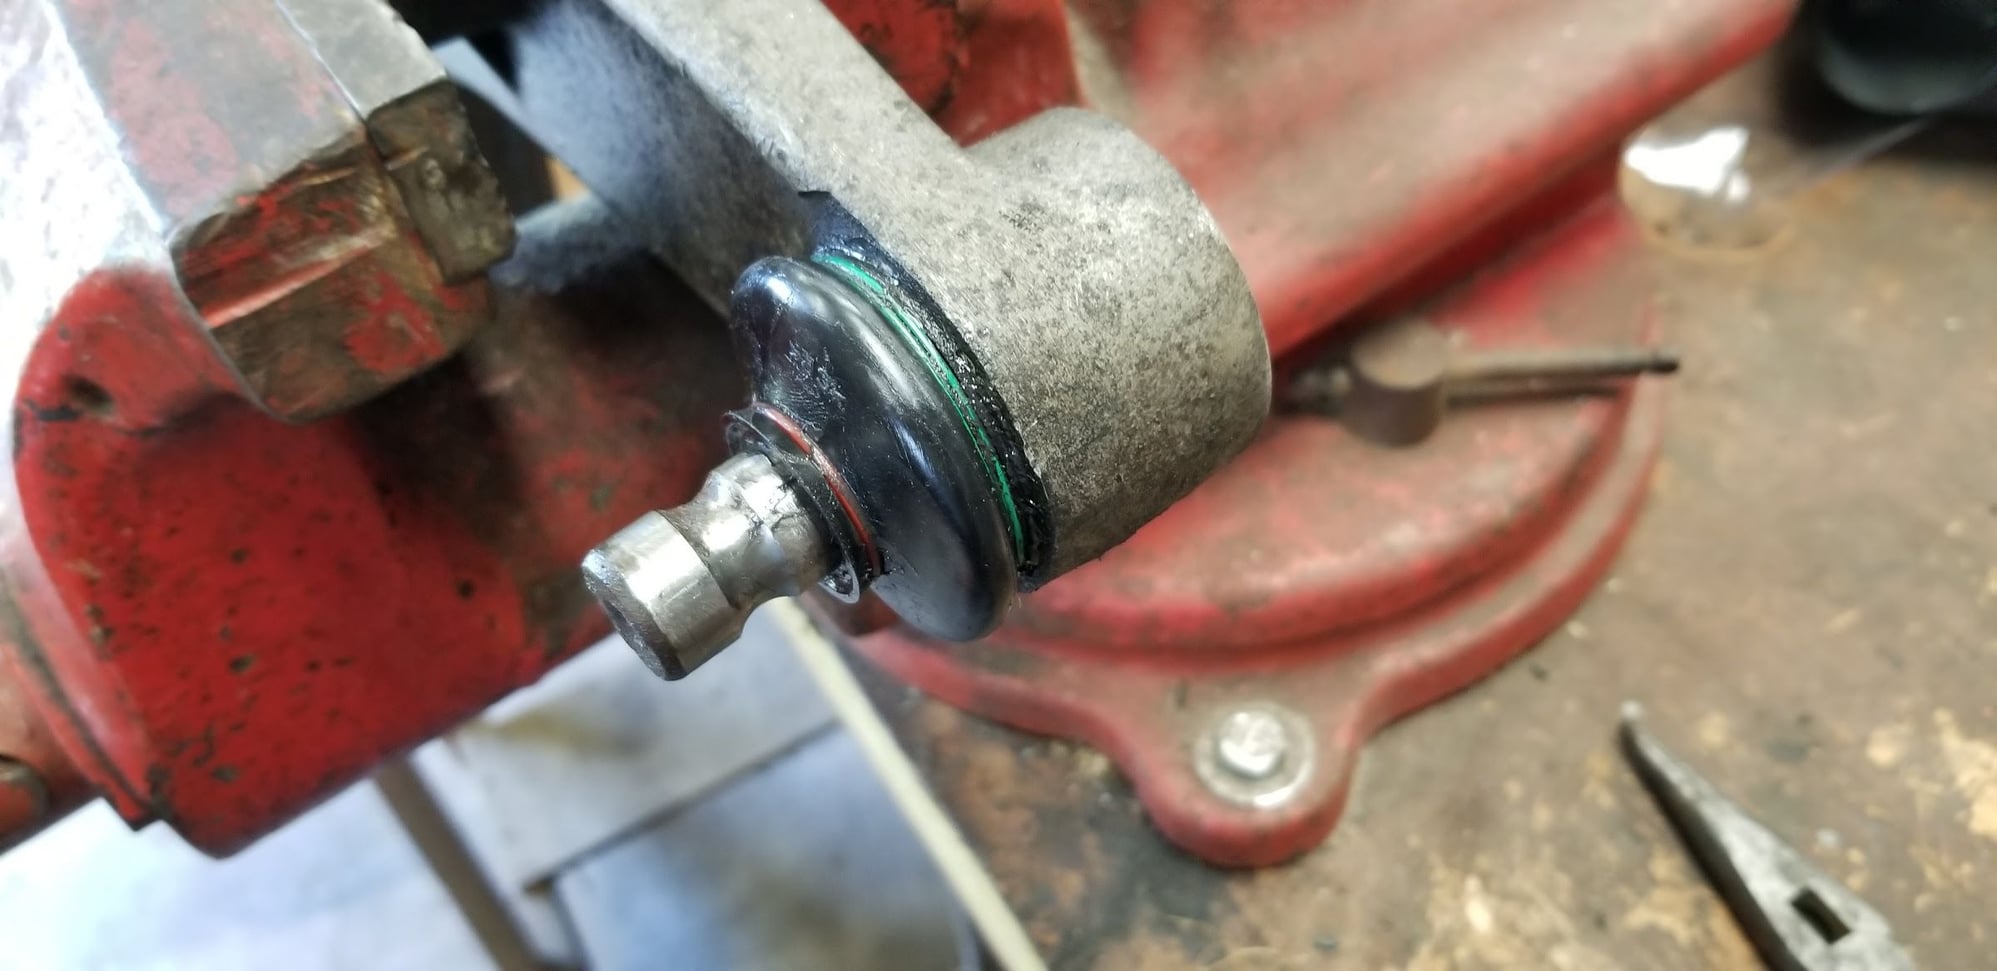
Normally, I'd replace all bushings and other wear items in the suspension while I'm at it, but budget constraints and the fact that new control arms for this thing are $600 each mean that I'm cutting a few corners this time around. There's always time to replace things later. For instance, at some point I'm going to put M030 sways on it, so I'm not going to bother replacing my front sway bar bushings right now. But new tie rod ends are cheap and easy, and while my ball joints seem to be in good shape, the boots were looking a little rough, so I cleaned them up, re-greased them, and put new boots on:
So, the crossmember and suspension are all back on the car, and it's on to the timing belt, balance shaft belt, water pump job.
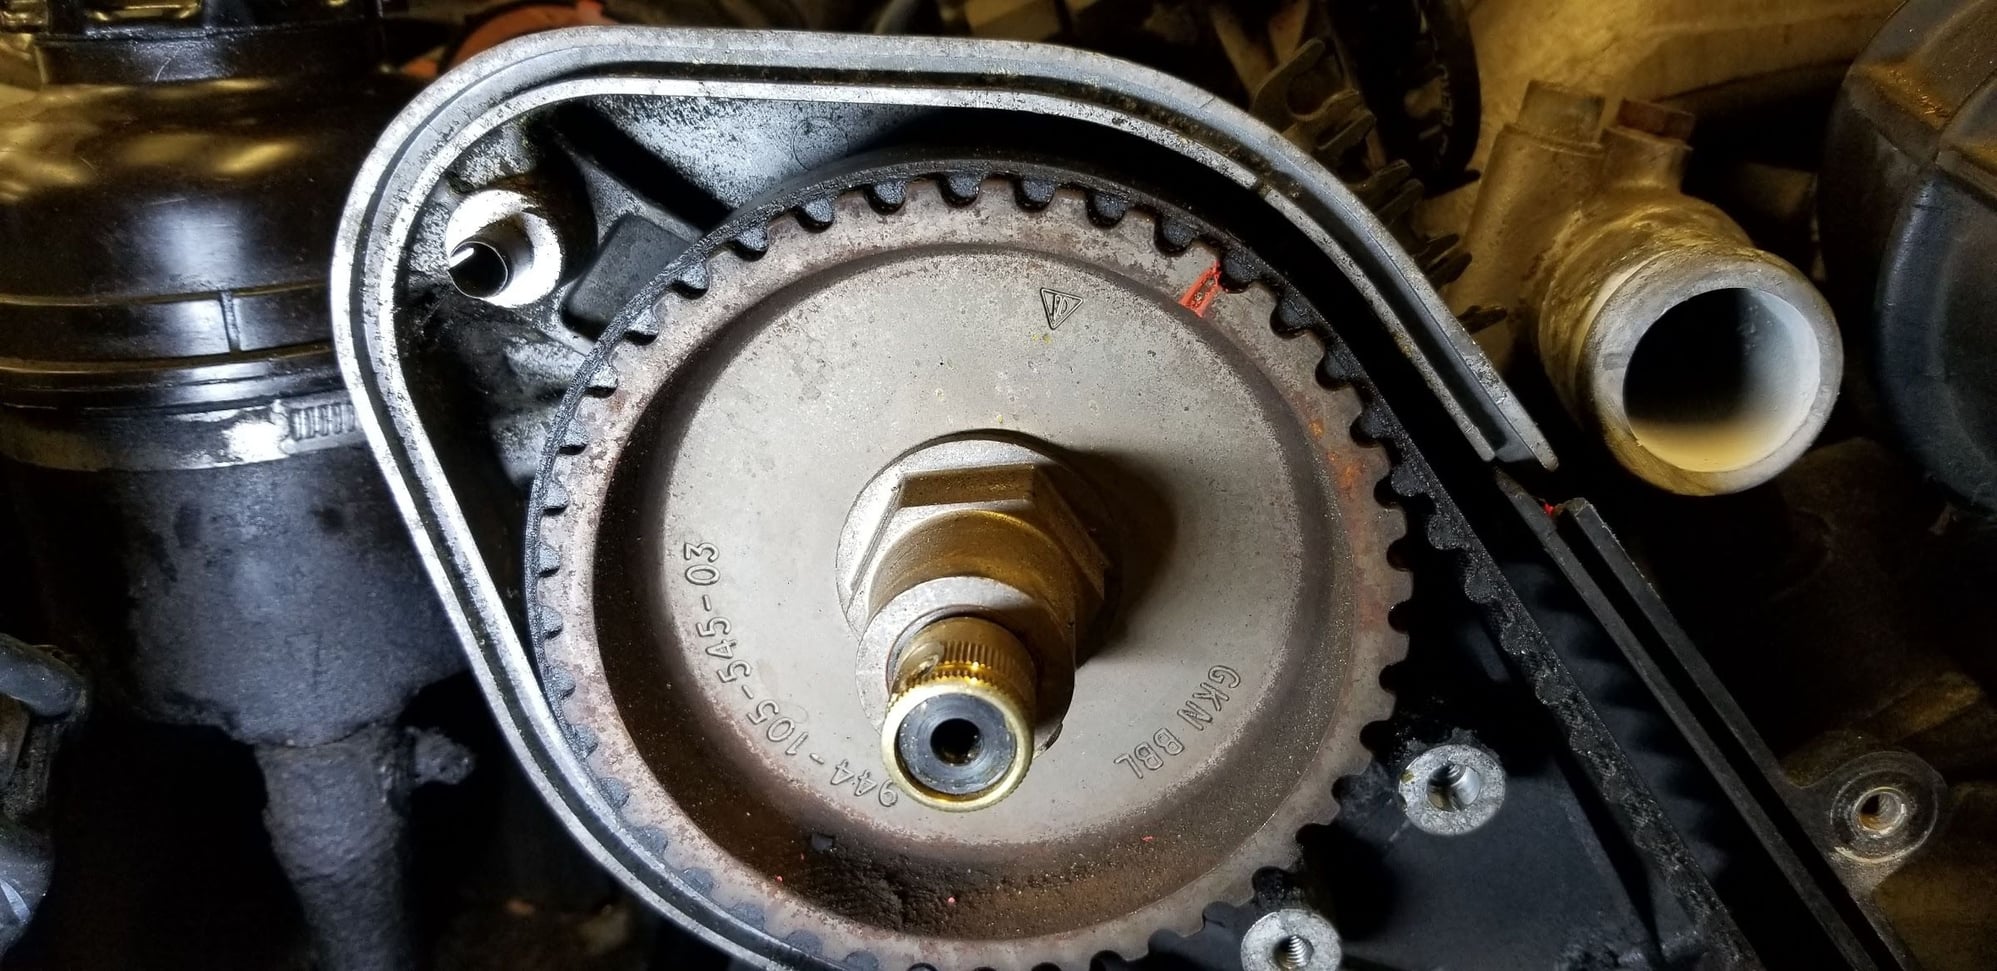
Setting the car to TDC in cylinder #1 was a bit of a hassle, since the "OT" mark is not visible on my flywheel, there's too much surface rust. However, by looking at the other mark from below, double checking with a dowel in the spark plug, and aligning the mark on the cam with the alignment mark, I'm pretty confident I have it in the right spot:
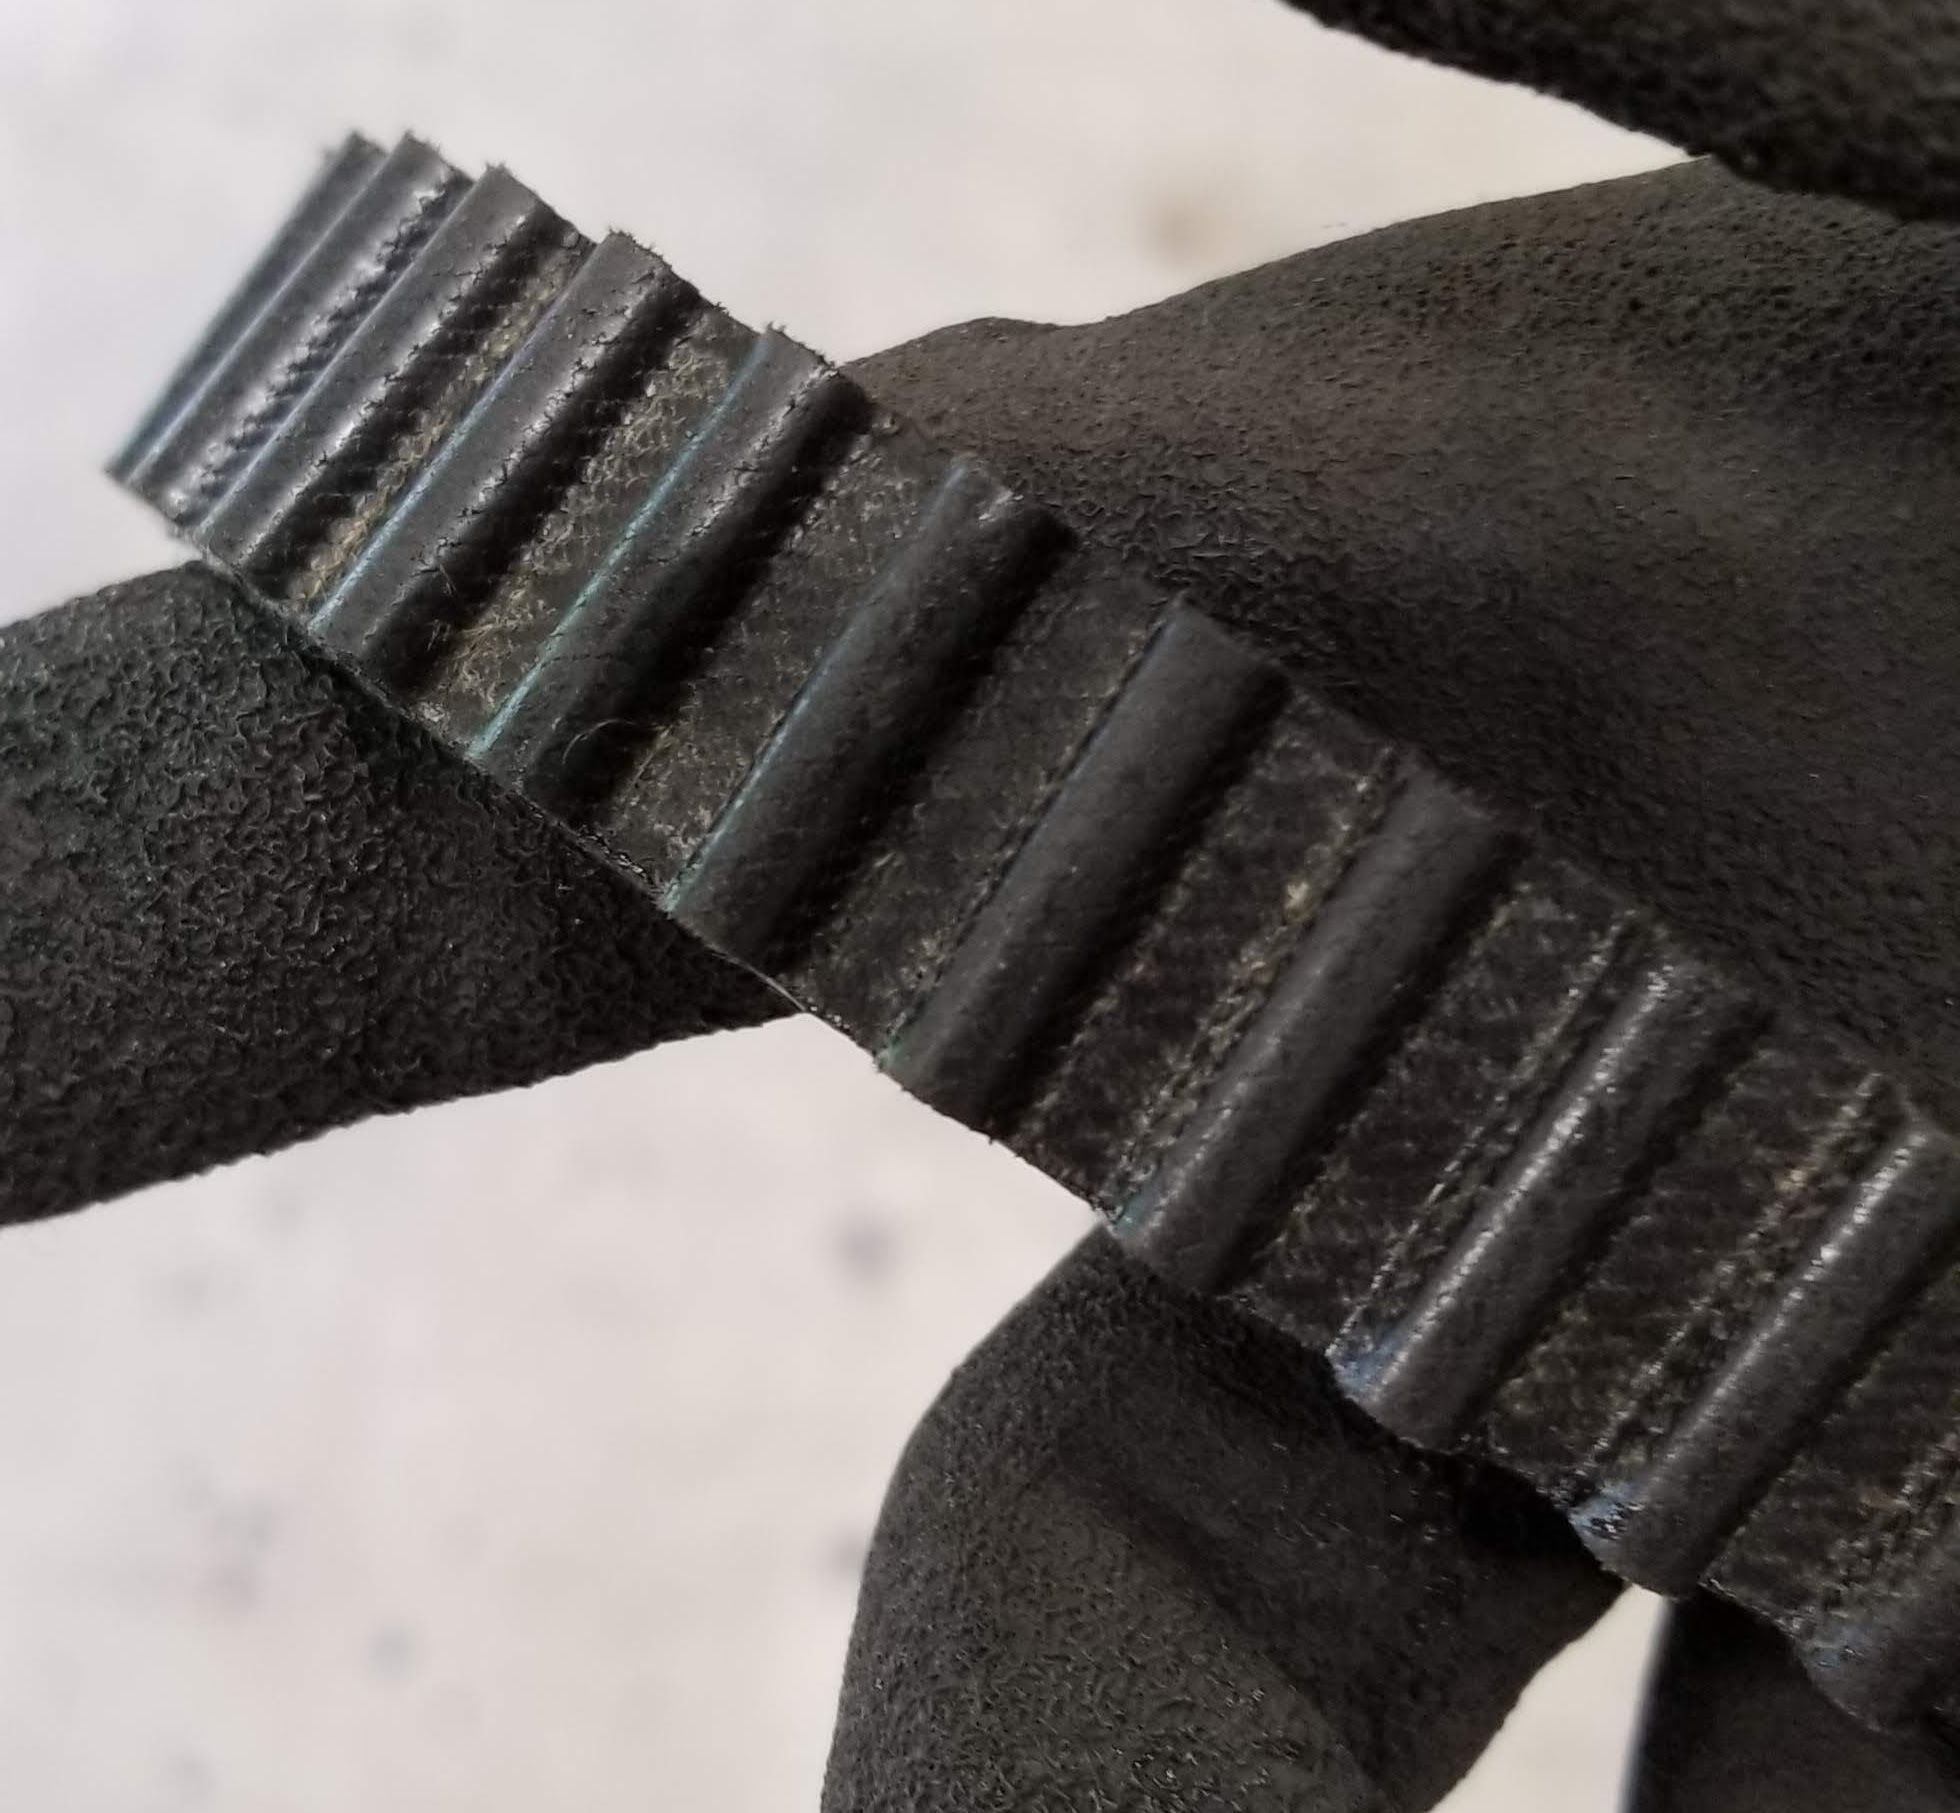
So, at this point, the belts and rollers are all off, and tonight I'm going to tackle the water pump. For what it's worth, the belts, which were supposedly replaced some time around 2014 or so, look absolutely perfect:
Regardless, they are getting replaced along with the tensioners, rollers, and water pump. So I should be good to go with this engine for a good long time.
Installed the new water pump tonight, which went smoothly. Updated to the new style:
I'm replacing all the coolant hoses while I'm at it. I got a Gates lower radiator hose from Rockauto, and it's almost-but-not-quite long enough to fit. I figure that because it's brand new, it needs a bit of a stretch. So I did this:
The top part is clamped to a hook around one of my ceiling joists, the bottom is clamped to the old water pump, to which I've tied a 5-gallon bucket with a 50-pound bag of sand in it hanging a few inches off the ground. I probably won't get back out there until Saturday, so it ought to have a nice stretch to it by then.
Great write up! Yes for checking timing all I ever do is the same (notch below at flywheel housing & the cam gear notch). Soft brakes suck. There was some sort of "Y pipe" delete from oem years back. Others can chime up. Look for it near the brake booster. Get rid of it and it might help.
Well, my hose stretching trick didn't work, I still couldn't get it to fit. For now I put the OEM one back on, but I''ll probably buy another one before I put the coolant back in.
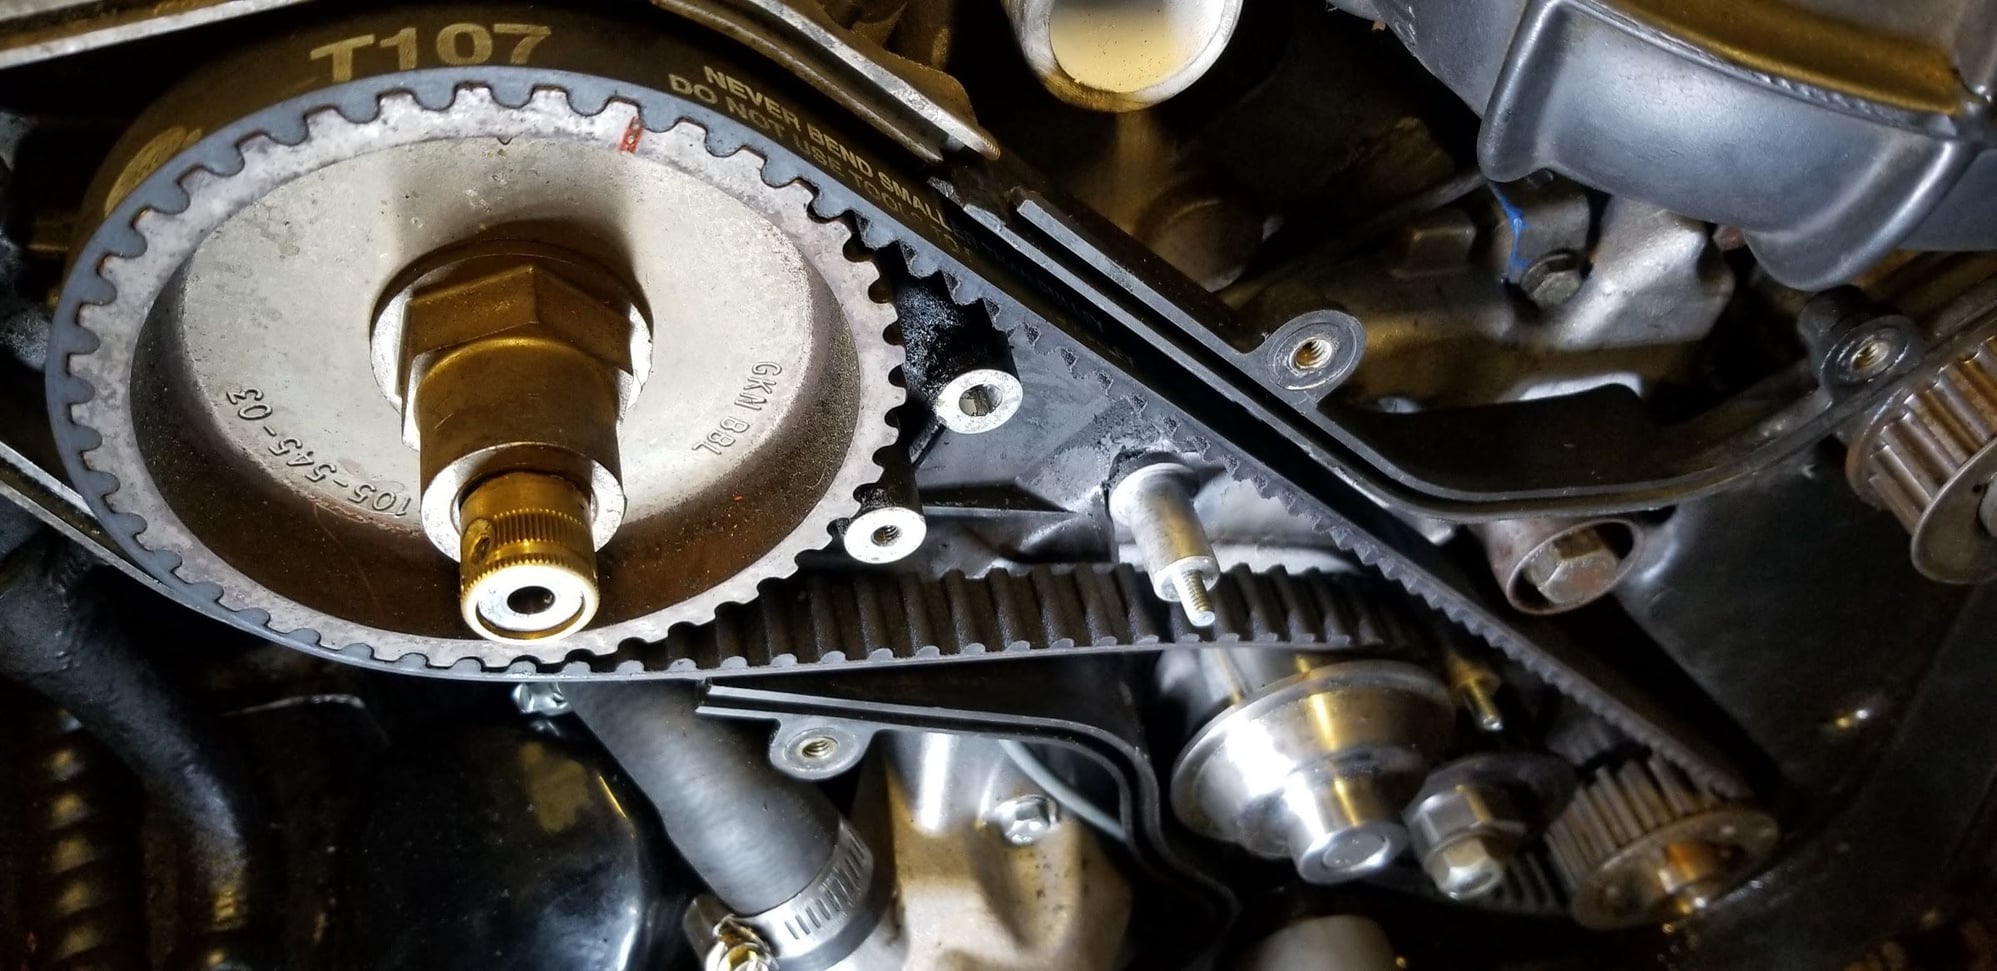
Started reassembly today. New timing belt is on, but it's a really tight fit. It's tight on the long run between the cam and crank pullies, and loose around the other side where the tensioner and water pump are. That will equal out once I take the flywheel lock off, of course, but then I'm worried that it'll be off a bit. Need to do more research on that. Here's what it looks like now:
Nobody seems to be reading this, but I feel like I should keep it going just for my own records, so here goes
Not true, just read this from beginning to end. I'm getting ready to do my timing belt as well. Do you think the flywheel lock is absolutely necessary? I would rather spend that money on other maintenance items like the tensioners and rollers.
Do you think the flywheel lock is absolutely necessary? I would rather spend that money on other maintenance items like the tensioners and rollers.
Honestly, I'm not sure. But this was my first time doing this job, and I figured better safe than sorry. I've heard of experienced folks not using them, but some people also check the belt tension by hand and call it good, so I dunno. I just didn't want to leave anything to chance.
The flywheel lock is necessary to remove the crank and balance shaft belt pulleys. The bolt is torqued down to 150 ft/lbs. You must lock the engine at TDC before removing the bolt, then leave the lock in until you have put all the pulleys back on and tightened the crank bolt back to 150 ft/lbs.
It's too tight of a fit between the back cover and balance shaft pulley to get the timing belt out and back in without damaging it.

 03-02-2018, 06:12 PM