When you click on links to various merchants on this site and make a purchase, this can result in this site earning a commission. Affiliate programs and affiliations include, but are not limited to, the eBay Partner Network.
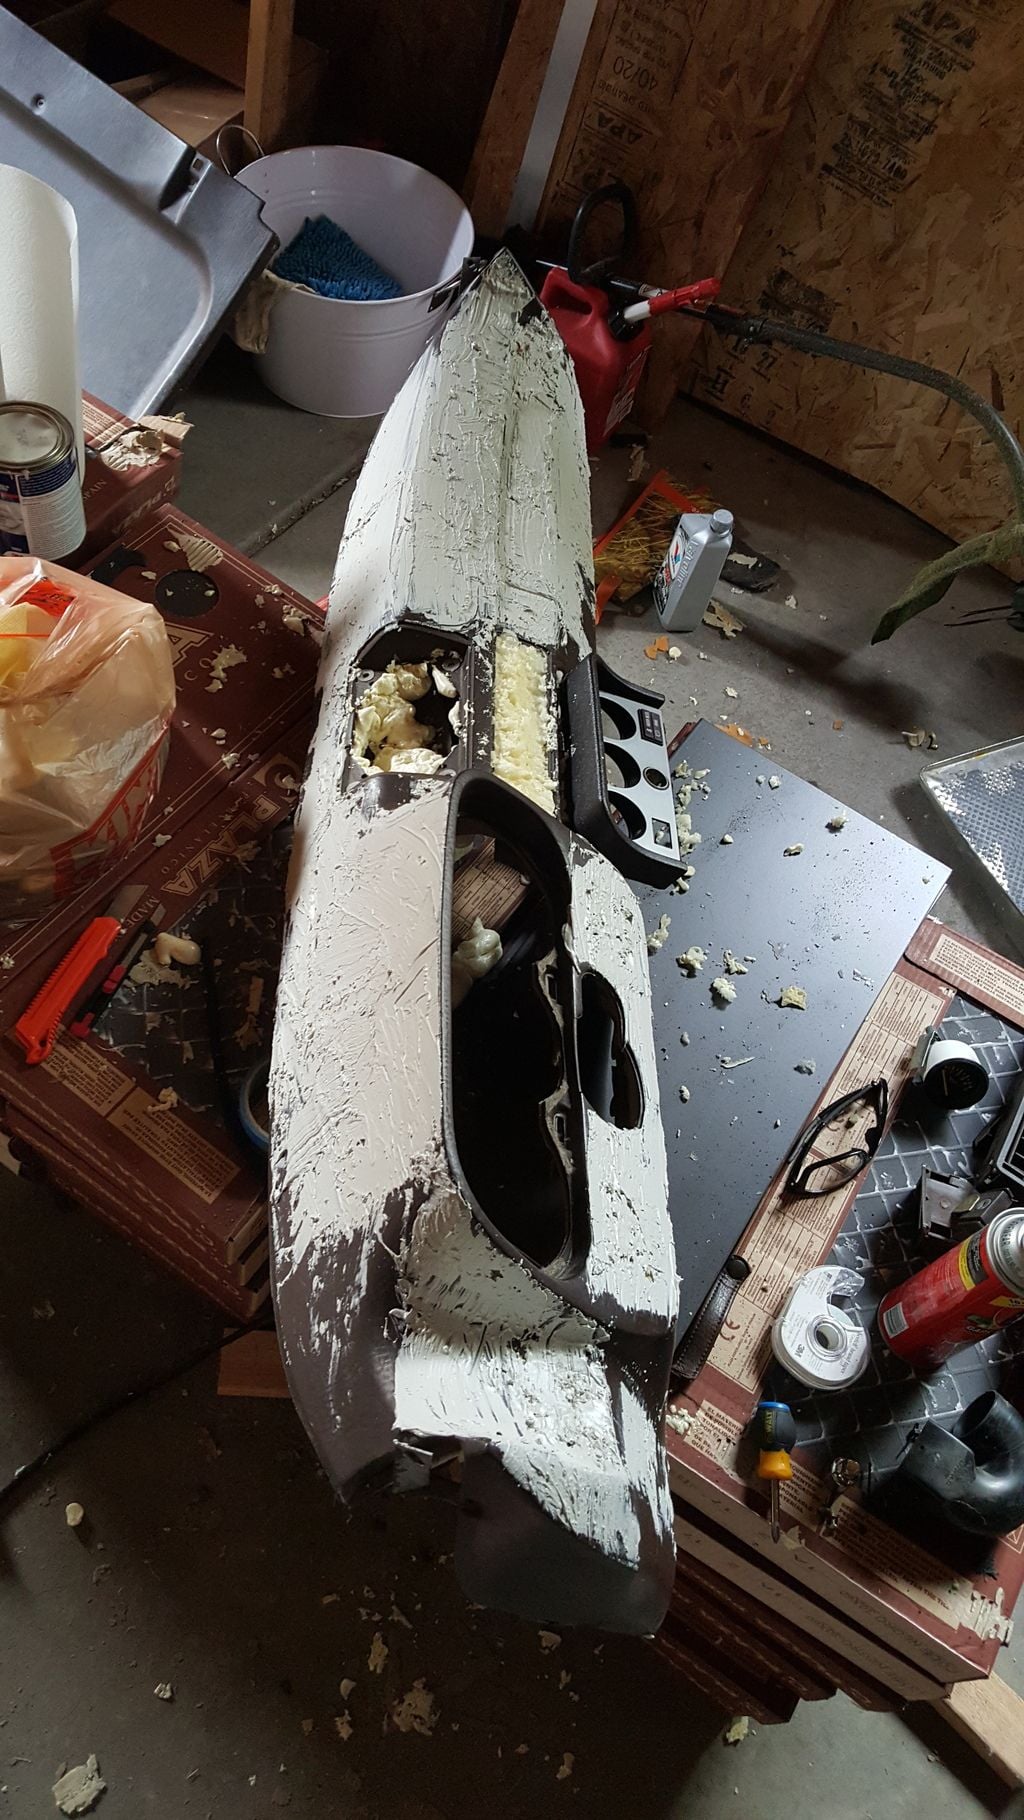
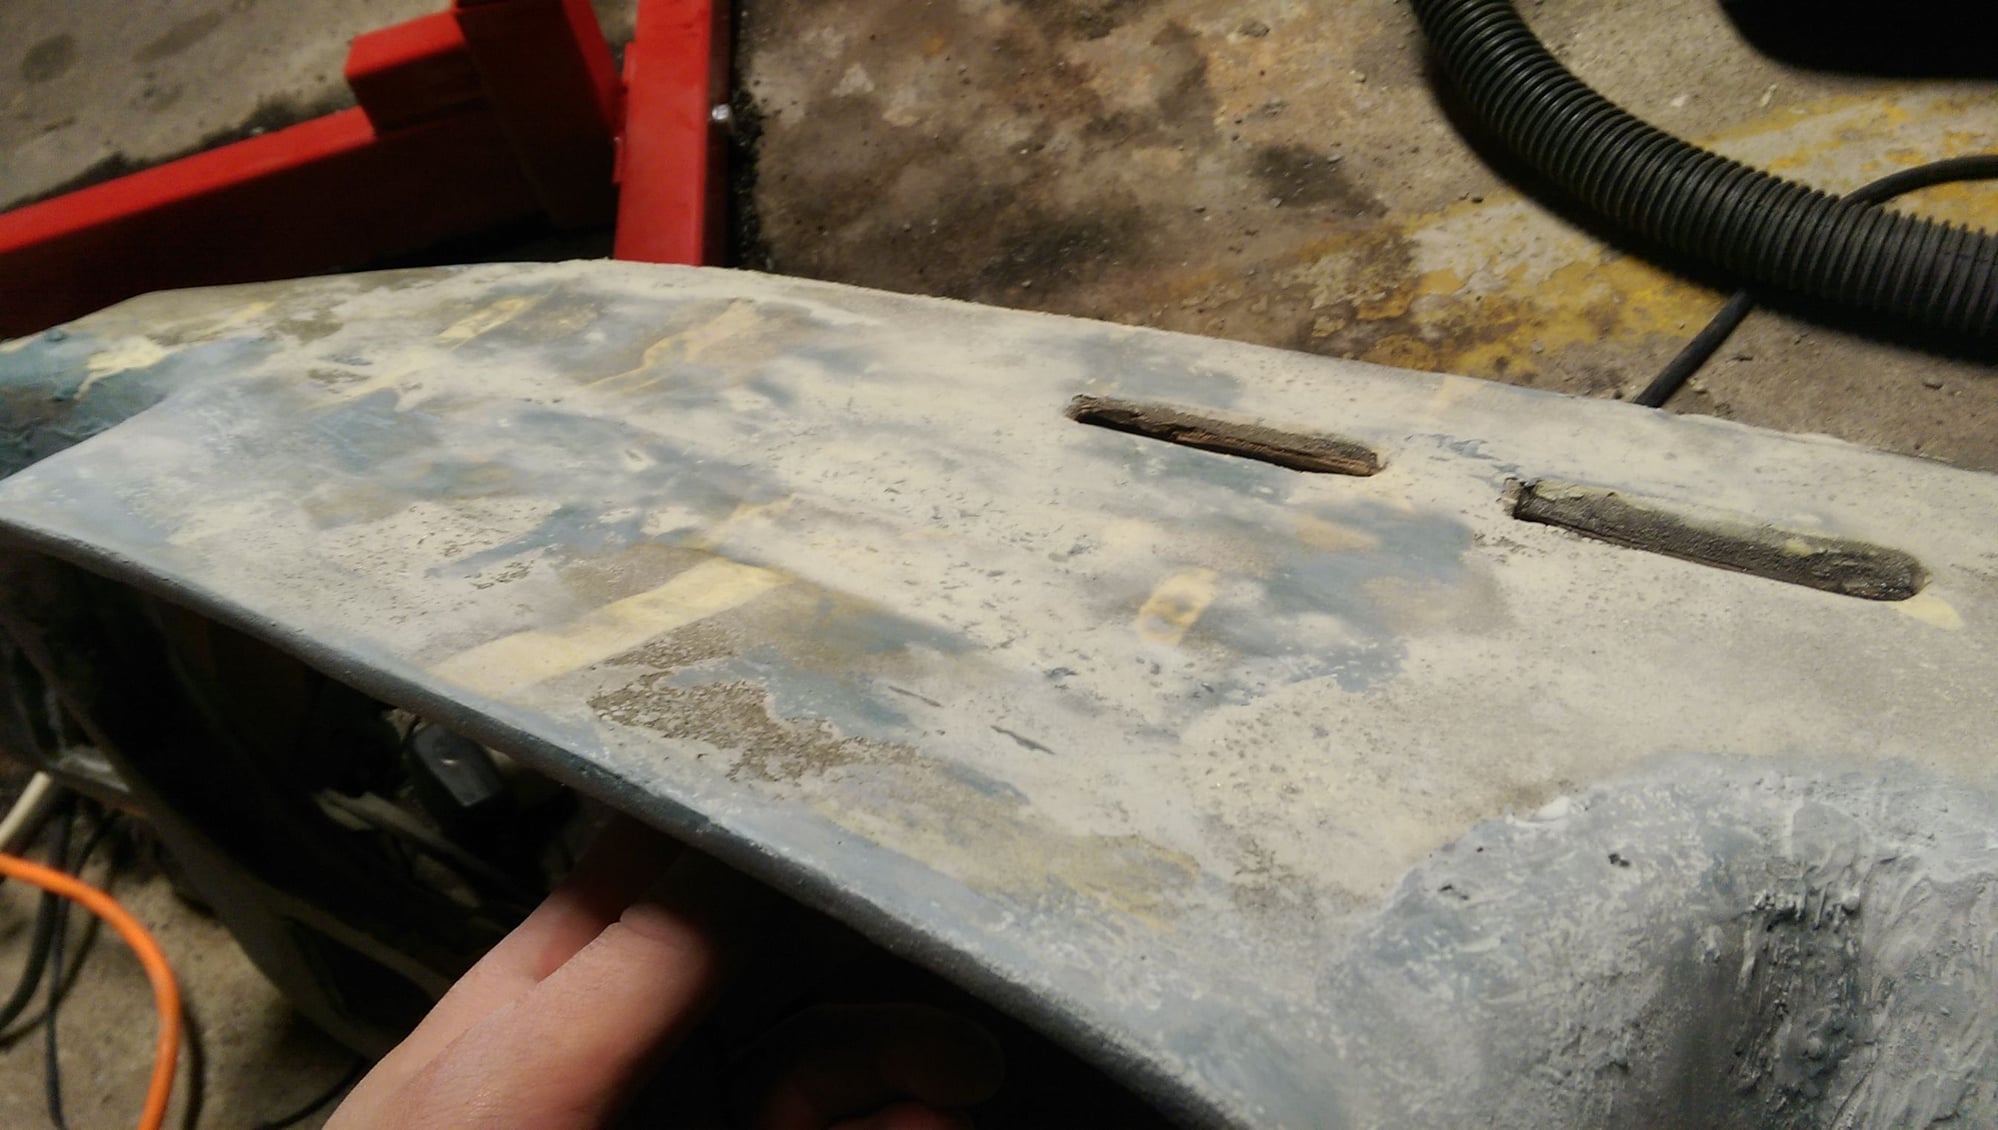
I got all the holes filled except the speaker hole. I need that hole open to be able to bolt it back up in the car for when I create the center console.
I smeared what bondo I had over it and then ran out. Hopefully this weekend I can grab more and get the foam I will need to sculpt the center console.
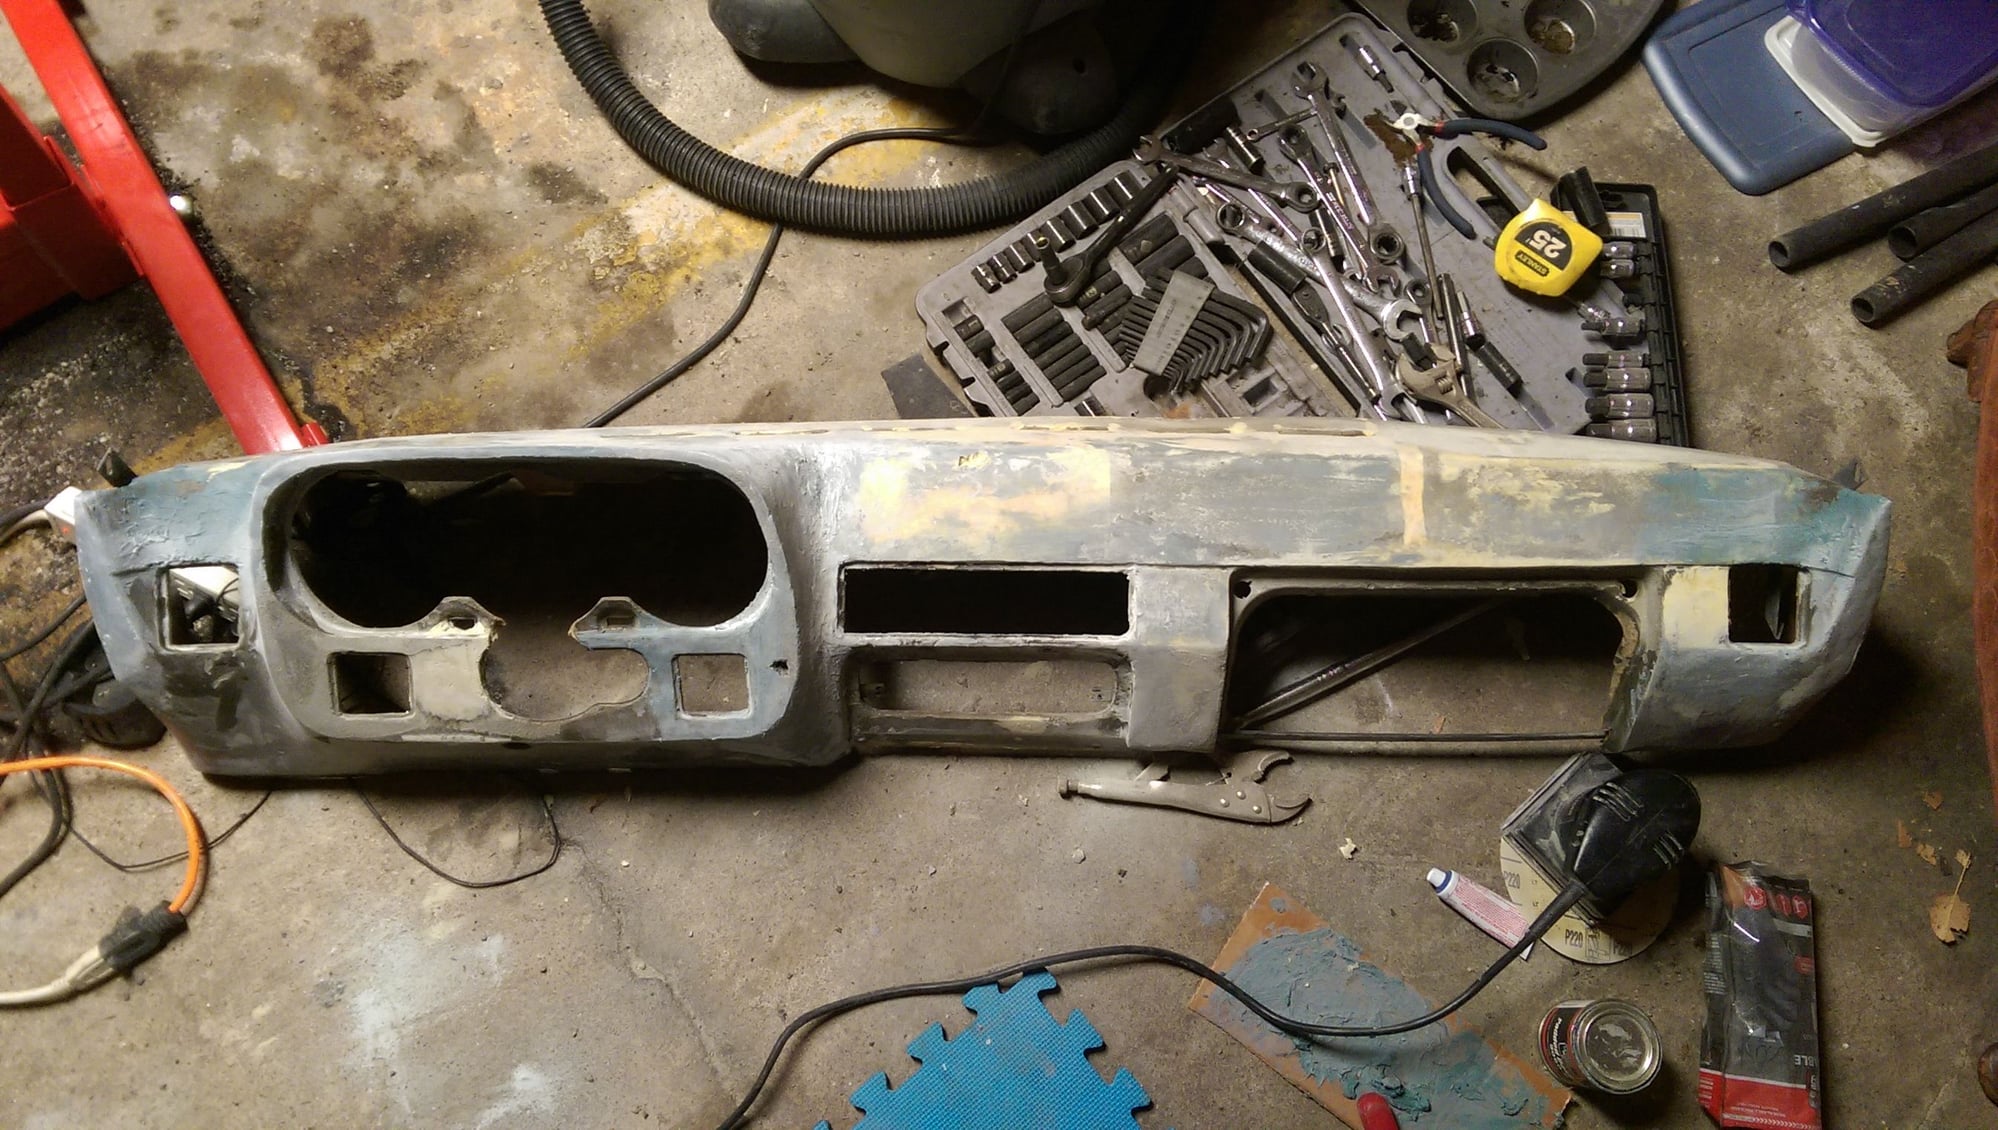
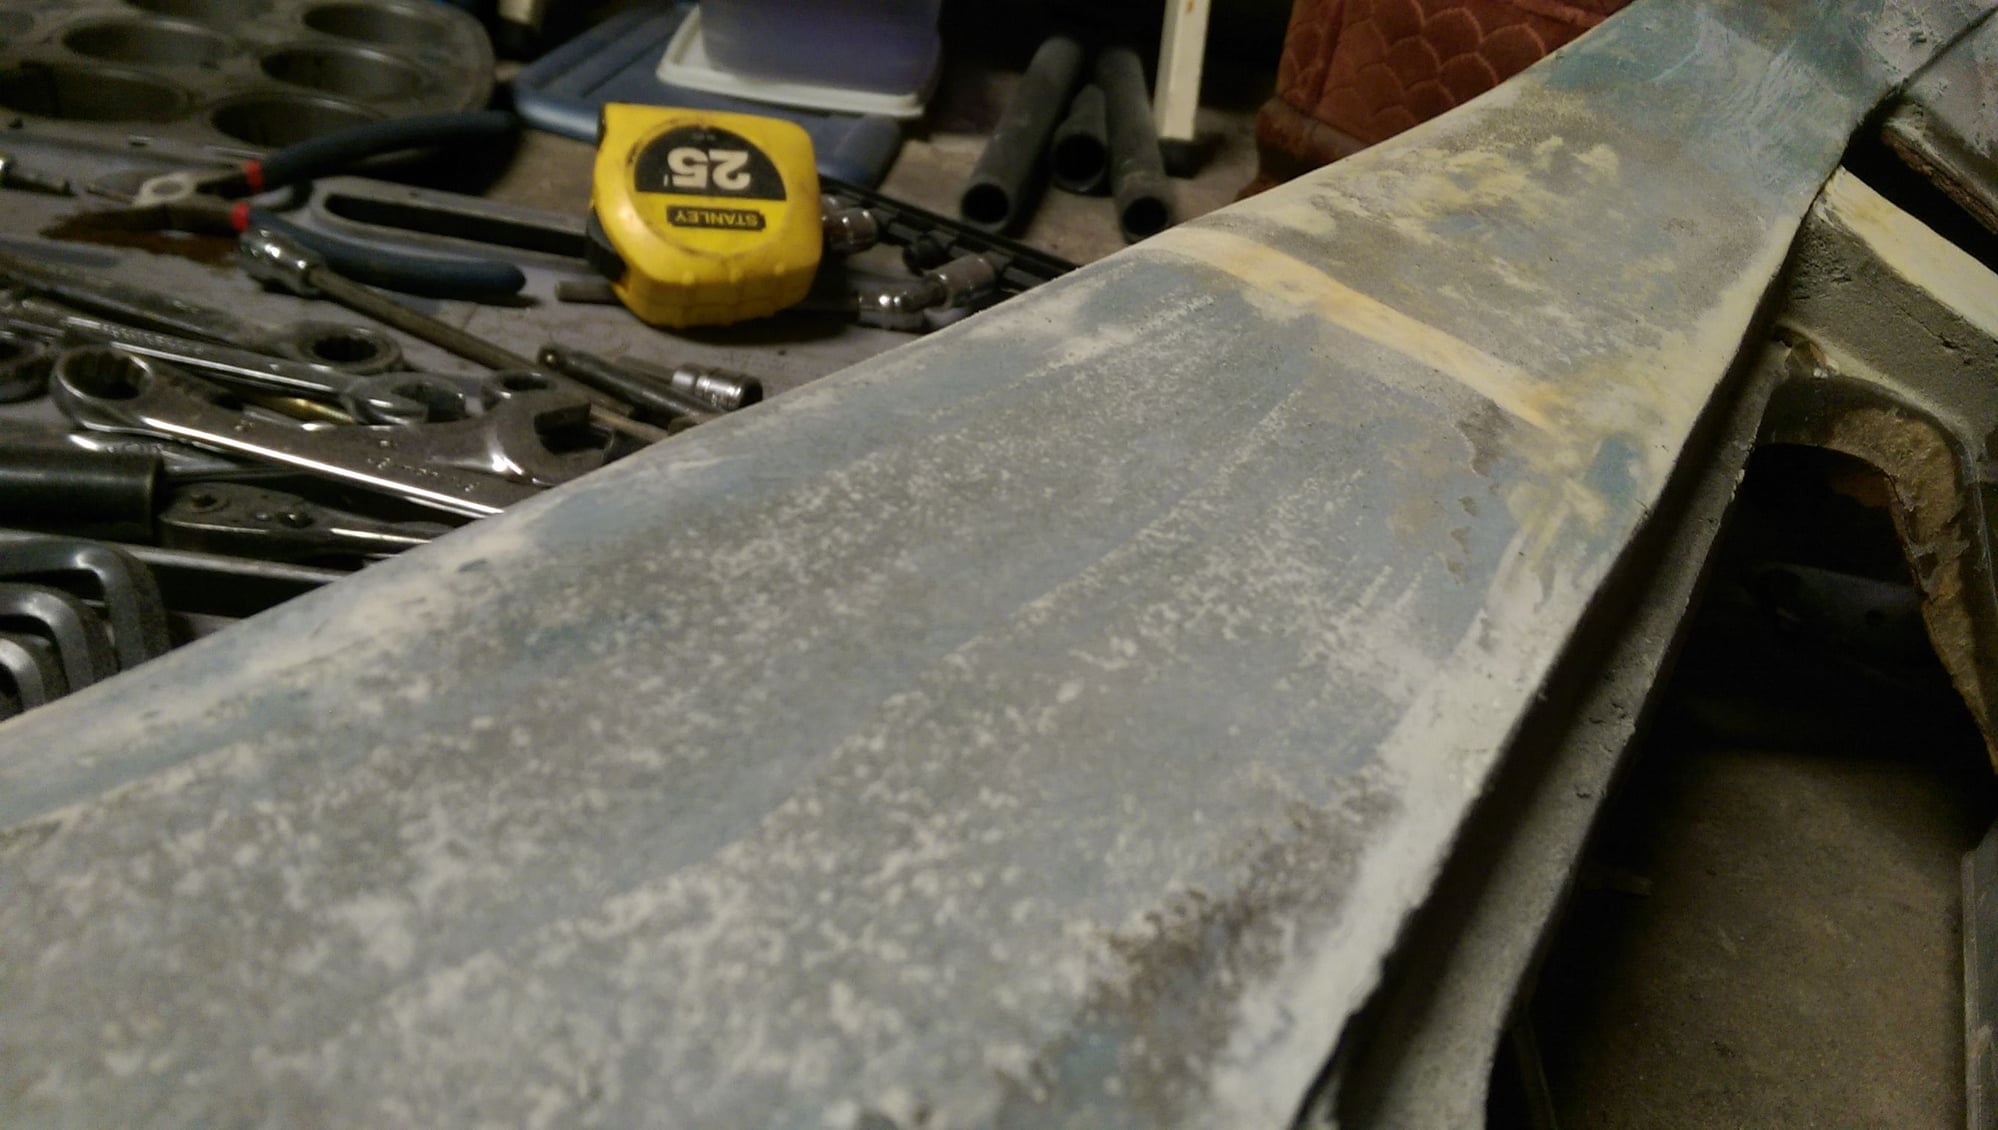
Here is where I got to:
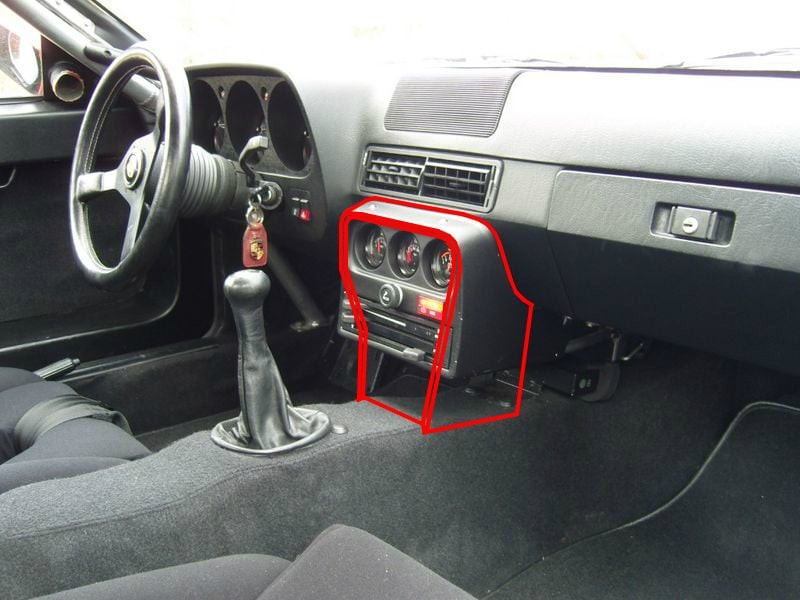
This is the shape I'm thinking about for the console (crappy photoshop on a beautiful interior pic found on google).
I'm tall and I need all the knee room I can get. That is why on the drivers side it will cut over to align with the tunnel.
That dash will be a buck to make a fiberglass mold from.
The bondo is just for shaping and smoothing it before I pull a mold from it to make a carbon fiber race dash.
How's that project going?
I got 2 yards of nice brown vinyl the other day for free, it was leftover from someone's couch upholstery or something. More than enough to do a dash. I have another early dash I prepped with expanding foam I want to try the vinyl approach one...it looks really nice.
It's not stretch vinyl will need to be sewn instead of heat-gunned, but it was free so I'll lazily take my time on it.
Mike,
It's holding well. It does look good. just doesn't look as good as I would have hoped.
The speaker cavity expanded a bit more, so it should have been left uncovered a while so I could keep sanding. It has a bit of a lump now.
Also, the stretches in a few spots and the ends gathered a little funny.
It looked a bit dull so I used vinyl paint on it.
The paint had a bit to much of a luster so I should have researched a more satin finish.
I plan on a second time around after I sort out some mechanicals.
I'm thinking of handing off the dash (removed) after a reshaping to an uphostry place to cover it perfectly.
I also can't get this material out of my mind: http://www.joann.com/upholstery-viny.../13133210.html
This is for the ones who have used the vinyl and heatgun to cover your dash. How well does the vinyl stretch while heated? Also, I was thinking of gluing the material first on the area that protrudes out around the instrument cluster, ie. the highest point if the dash were lying on a table. Then pulling it towards the top of the dash. Also, did anyone use something besides the Jo-Ann's vinyl?
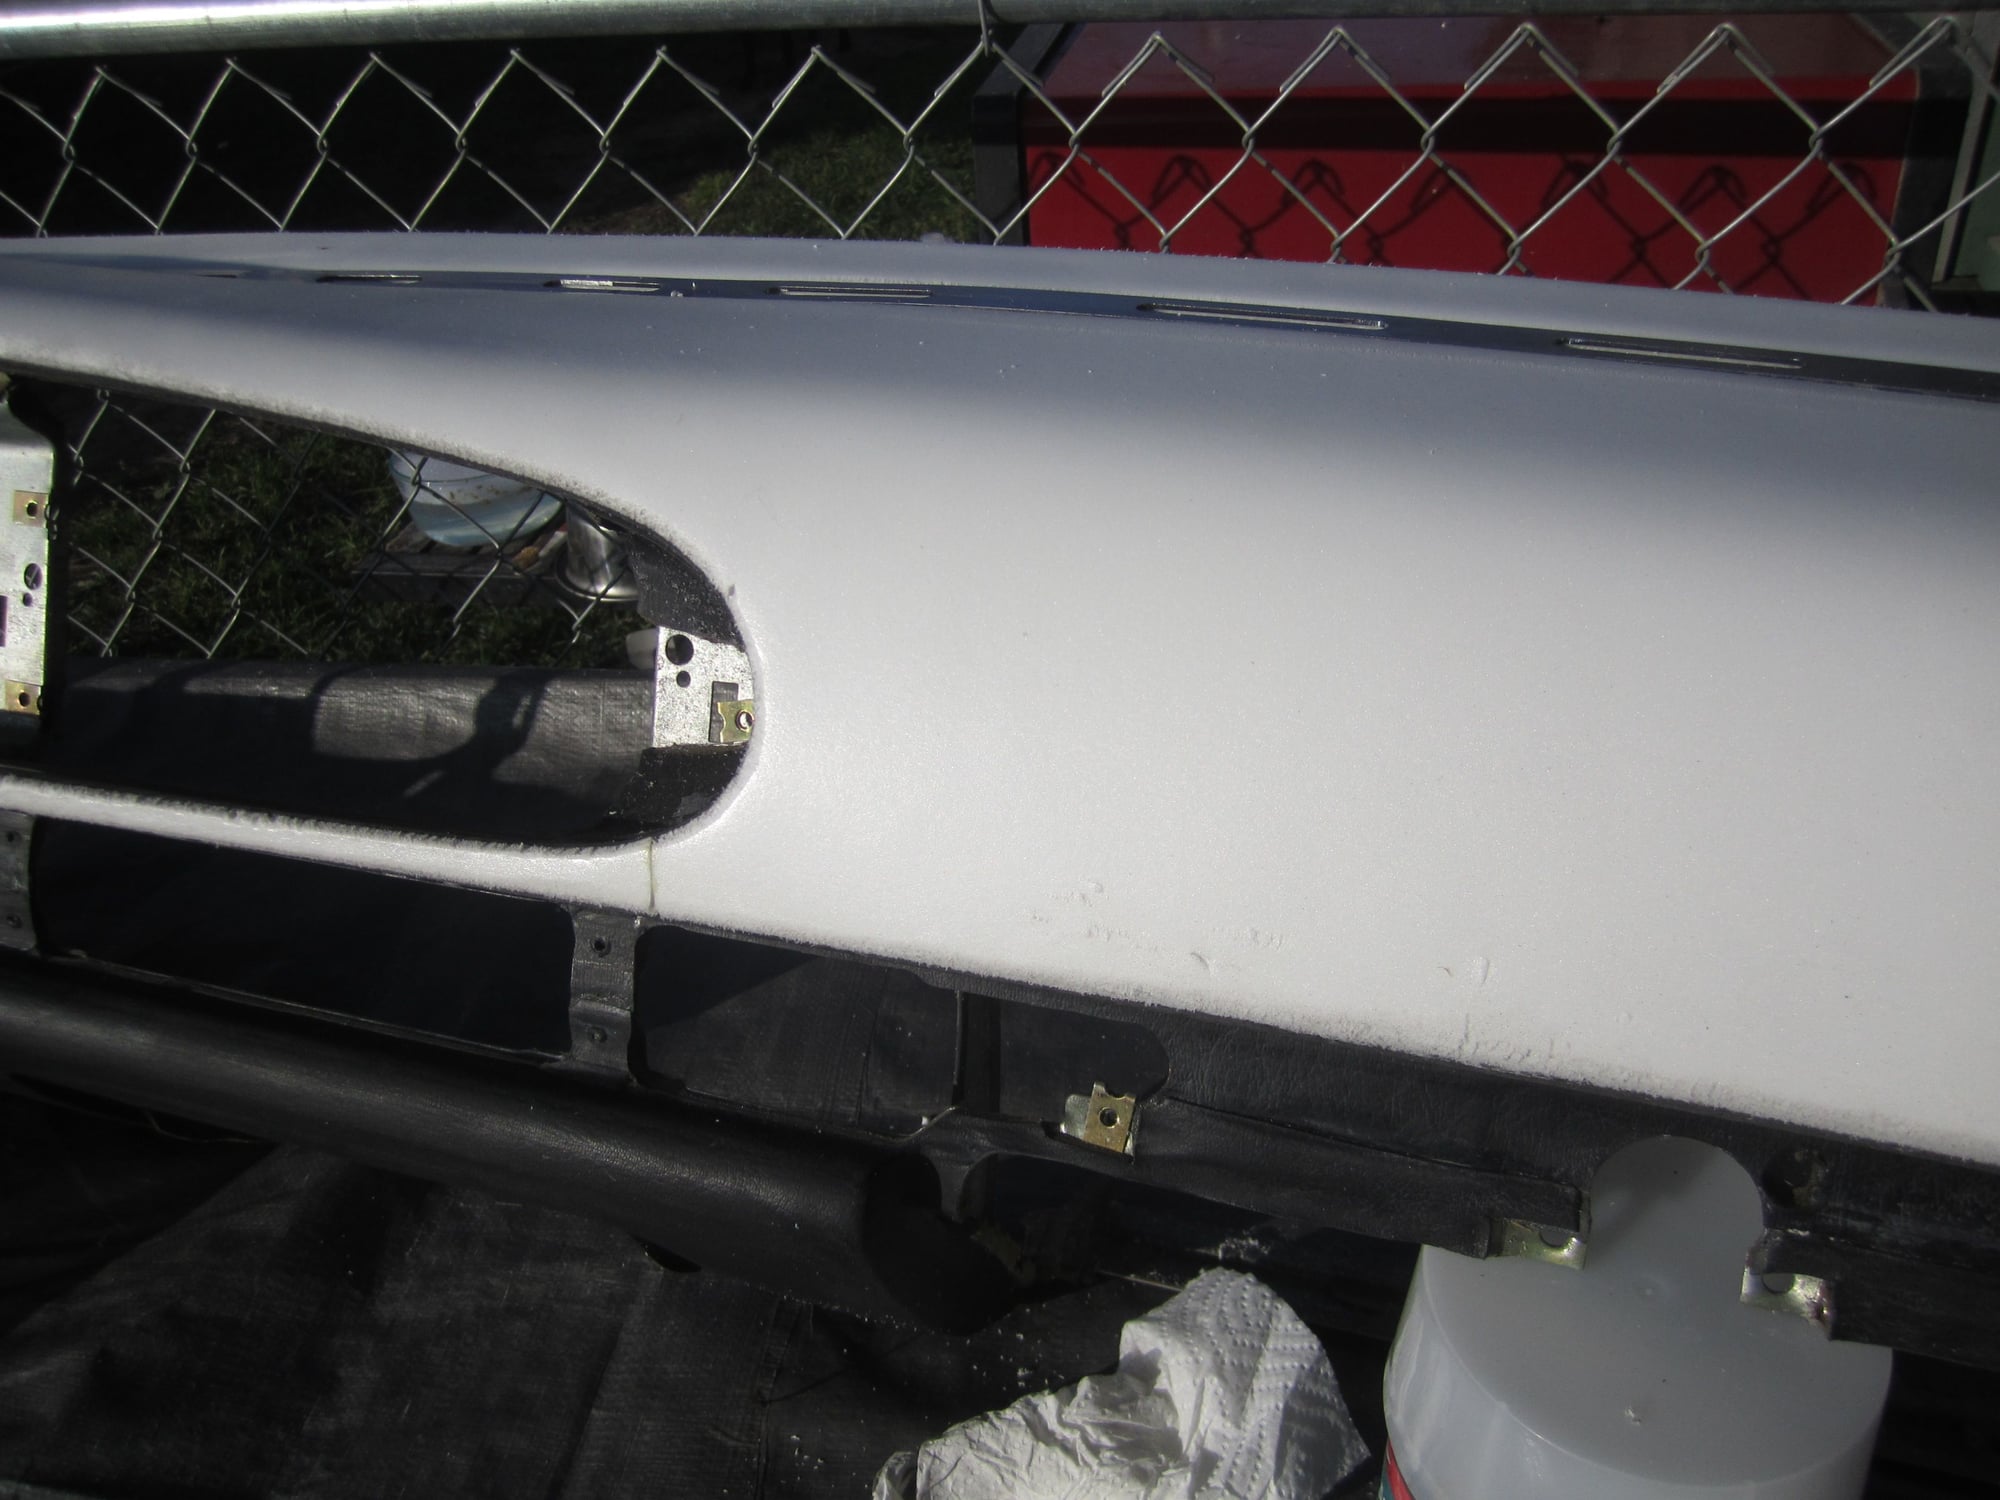
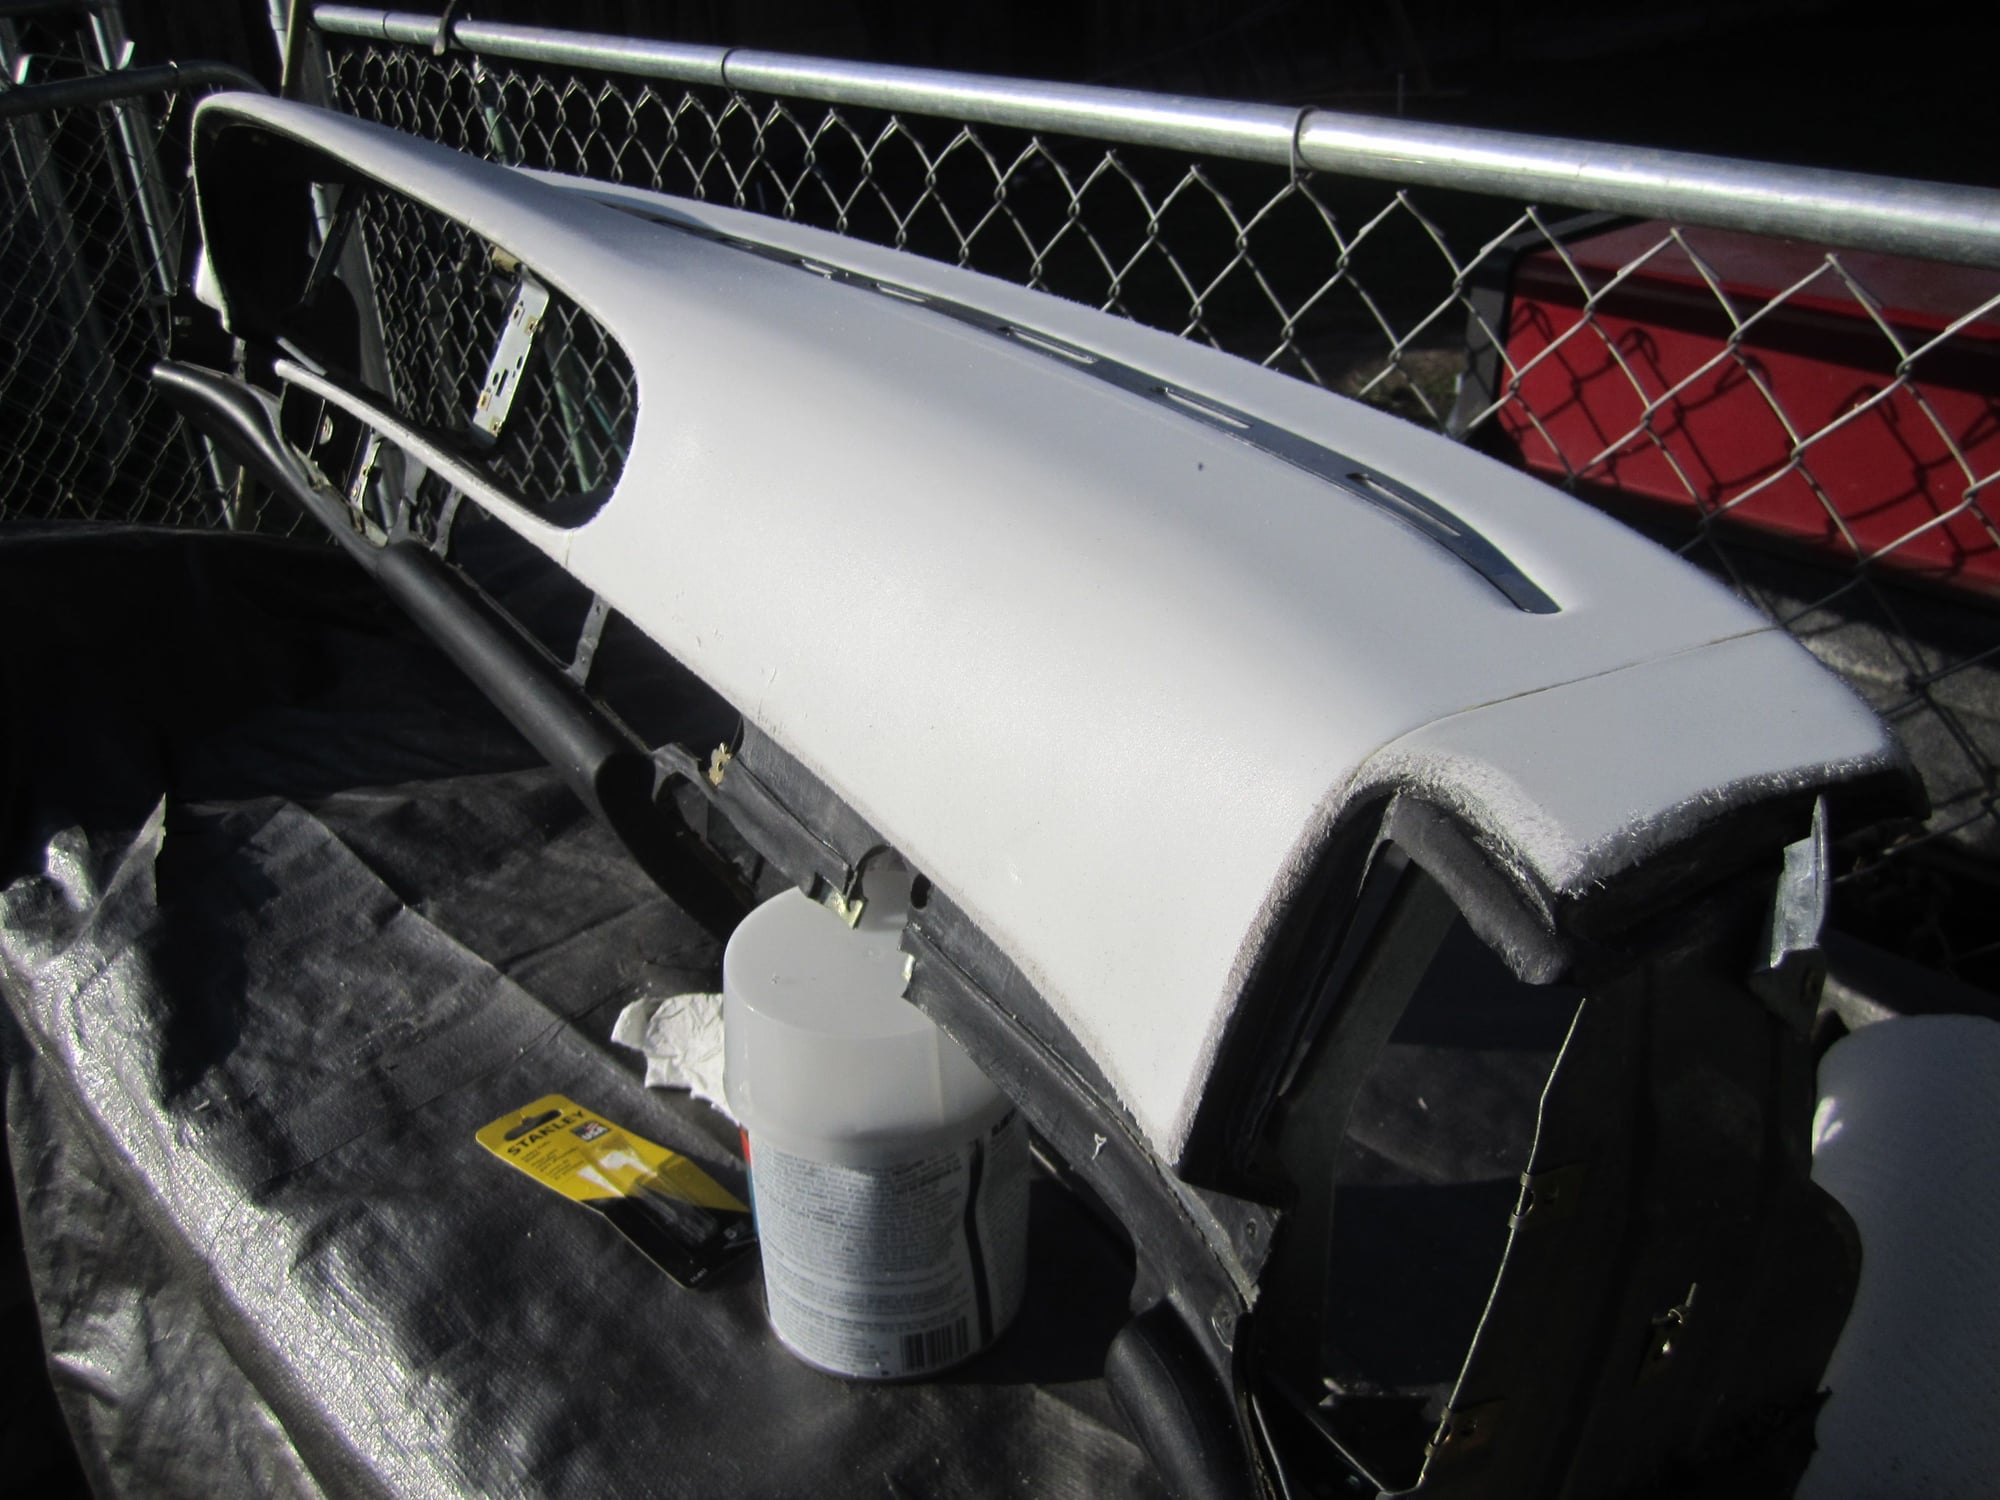
I really like it! It's similar to Bondo but of course, is flexible and adheres well to the foam. I've used it in conjunction with the expanding foam, and they go together like peanut butter and jelly (allow foam to dry, sand, and touch up with the filler). It cut out a lot of the time and effort that goes with re-apply foam many times to get areas that didn't come out perfectly. I'm going to reskin this one, and probably sell it on here at a later date.
Here are some pictures. You can see which areas I've sanded, and what I'm about to sand. There are some defects I dug into with a screwdrivers to make it easier to fill later on. The surface looks visually rough, but it's a smooth as sink in person. With some decent vinyl, I can see this coming out really nicely.
I spoke to Rob at Classic 9, and I'm going to have him refurb a normal dash, since I'm a little discontent with how the FG one looks after about a year of staring at the surface imperfections up close. It has physically held up flawlessly, but I kind of half-assed sanding it in some areas and it shows.
I got all the holes filled except the speaker hole. I need that hole open to be able to bolt it back up in the car for when I create the center console.
I smeared what bondo I had over it and then ran out. Hopefully this weekend I can grab more and get the foam I will need to sculpt the center console.
Here is where I got to:
This is the shape I'm thinking about for the console (crappy photoshop on a beautiful interior pic found on google).
I'm tall and I need all the knee room I can get. That is why on the drivers side it will cut over to align with the tunnel.
Been trying to go slow - here is an update. Foam underlayment going on and beginning to contour it:
Going to attempt recover of glove box door first as it is smallest. Gonna be interesting lining up the french seam around the cluster! Notice the new defrost trim piece - part of the kit from Classic 9 - planning on painting it satin black. More soon -
What is the name of this specific foam underlayment? I'm about to tackle a dash cracks/recover as well, need to know what is this material. It almost looks like a neoprene-like?
What is the name of this specific foam underlayment? I'm about to tackle a dash cracks/recover as well, need to know what is this material. It almost looks like a neoprene-like?
Regards,
D
Early square dash, or later dash?
If it's an early dash, just buy a new one and save yourself the headaches. The cores of the early dashes were made from paper mache', basically. The new factory dashes are injection molded PVC in the core, and won'tabsorbe moisture and continue to warp, like a "restored" dash will still do, over time.

 04-23-2015 | 08:47 PM