When you click on links to various merchants on this site and make a purchase, this can result in this site earning a commission. Affiliate programs and affiliations include, but are not limited to, the eBay Partner Network.
" I also put anti-seize on the threads after every removal."
^This^ It won't help you the first time around, but you'll sure be happy next time... as will any other unsuspecting who may have the honor of working on said car...
The idea about cutting a 17mm Allen key and using it with a 17mm socket is really clever!
After a tiny bit of research, it turns out that Assenmacher is about as German as Coors beer. It is a US manufacturer based in Boulder. http://asttool.com/
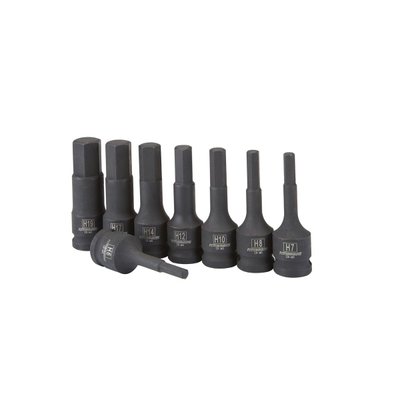
My go-to supplier for Chinese value-priced tools, Harbor Freight, has an 8-piece set for $30.
A trick you can do to help ensure a good bite on the plug, is to grind down the very top (or tip) of the socket you end up buying, so that the tapered edges are no longer there. It helps get the socket in just that little extra bit further. It really works wonders on these particular plugs because they are usually packed in with dirt/grease and a lot of times have been removed previously by someone who may have rounded them out just a bit. Having the extra depth of the ground down socket really does make a difference!
I think that's why I've had such good luck with my 17mm hex key hack job. It's cut off perfectly flat and you can feel that there is no slop or wobbling once seated in the plug. I change the gear lube every year and still have the original plugs.
I just changed my trans fluid today. I clean the exposed threads with some solvent and toothbrush, and spray some brake cleaner. Then once the plugs are out, clean all the threads thoroughly with solvent. I don't like wire wheeling hardware because it takes off coatings. 18 ft-lbs and you're done.
I use a craftsman 17mm L-key to pull mine, I always make sure the plug is cleaned out for maximum insertion and then use a 17mm socket with an extension on the L-key for some extra leverage. It works nicely.
Snap-on makes a special 3/8" drive socket for these drain plugs, very shallow which helps in getting access when the transmission is in the car. Where I need more torque, I used a regular 1/2" drive allen socket on a breaker bar. Replace the plug if there is any damage or distortion to it, they are cheap.
No need for anti-seize, teflon tape, or other goop when reassembling, avoid. What is absolutely crucial is that you respect the 24 Nm / 17 ftlb torque spec. Use a torque wrench. Before installing, use a small brush (like an old toothbrush) to clean out the threads in the case. Clean the plug threads too, make sure there's no debris. You can use a thread file to dress the case threads if necessary; for the plug I would just replace the plug if there's any question as to its threads.
I would avoid using an impact tool when removing or installing.

 11-14-2014 | 12:47 PM