My (re)build thread. [944/2]


 12-24-2015, 05:26 PM
#92
Advanced
Thread Starter

Join Date: Apr 2013
Posts: 69
Likes: 0
Received 0 Likes
on
0 Posts
Hi guys - we're still going!
I've gotta do something about this door handle situation (the vw handles stopped working) and I've got a battery killer on my hands.
Next stop, ice cold wrenches. Merry Christmas!
I've gotta do something about this door handle situation (the vw handles stopped working) and I've got a battery killer on my hands.
Next stop, ice cold wrenches. Merry Christmas!
01-09-2016, 06:23 PM
#93
Advanced
Thread Starter
Join Date: Apr 2013
Posts: 69
Likes: 0
Received 0 Likes
on
0 Posts
Just updating from my other thread @ the other place.
12/29
----------
Ok, got the doors working with the VW handles. Also re-attached the driver's side window guide which was laying at the bottom of the door.
So I began to troubleshoot my battery-drain issue.
I hit the headlight switch, cycled through the **** positions, tested the high-beam.
Then I hit the headlight switch (on) again, and the car went dead completely. Pulled the key, opened and closed the doors, manipulated the controls. Nothin'.
What did I blow up?
12/30
--------------------------
Well, it looks like coincidence and the battery went flat while I was playing with the switches. After a recharge, things are working fine.
I found that the door switch wasn't working - some cleaning has resolved that.
I inspected the foglight switch, and I find that it's brand new. (I must've replaced it and forgotten!)
With the battery freshly charged and fuses in all four (dipped and main beam) fuse holders, things seem ok. (Except my left high beam is out)
I notice an orange triangle or up-arrow on the tach that I haven't seen before. *edit: I looked it up, it's the CASIS upshift light. I hadn't seen it because the cluster illumination dimmer was all the way down.
Being rid of the window track rattle in the door makes the car feel so much nicer over bumps.")
12/31
-------------------------
We know that the door switch wasn't working now, so I'm hoping that was the fix for the drained battery.
Welcome to the board '83-Steering Guy
Hey, Beer. Thanks for coming along! The engine is in, but I'll be back underneath it soon to see how my leaks are doing so I'll check grounds while I'm there.
Next on the list is to fix the door arm (it's not attached to the door), install the rennbay window roller repair kit and then check under the dash to sort out the harness a bit.
I have some concerns..
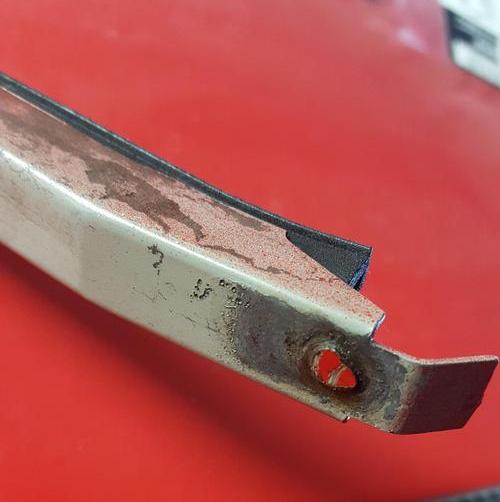
Here's a shot of the window track - drilled out the rivet or tack weld and put a machine screw through it.
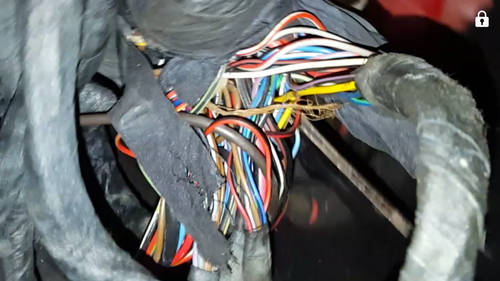
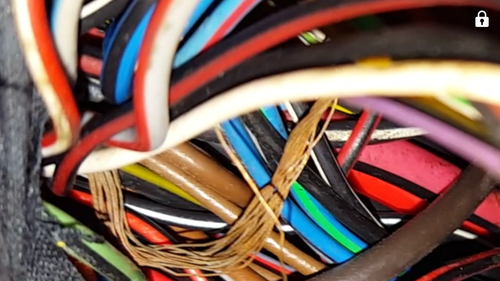
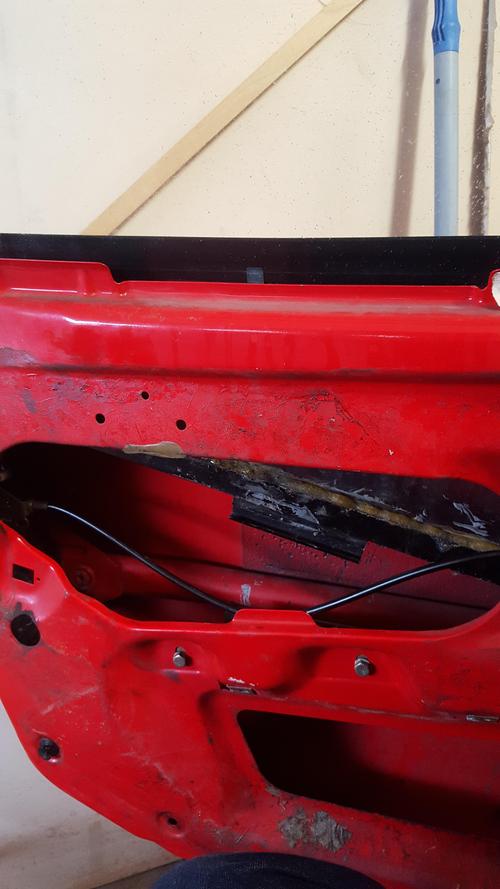
Does anybody know if the exposed wire in my harness is intentional (a ground?) or something that got fried?
Today I installed new hood shocks and tossed my old hood prop on the burn pile!
12/29
----------
Ok, got the doors working with the VW handles. Also re-attached the driver's side window guide which was laying at the bottom of the door.
So I began to troubleshoot my battery-drain issue.
I hit the headlight switch, cycled through the **** positions, tested the high-beam.
Then I hit the headlight switch (on) again, and the car went dead completely. Pulled the key, opened and closed the doors, manipulated the controls. Nothin'.
What did I blow up?
12/30
--------------------------
Well, it looks like coincidence and the battery went flat while I was playing with the switches. After a recharge, things are working fine.
I found that the door switch wasn't working - some cleaning has resolved that.
I inspected the foglight switch, and I find that it's brand new. (I must've replaced it and forgotten!)
With the battery freshly charged and fuses in all four (dipped and main beam) fuse holders, things seem ok. (Except my left high beam is out)
I notice an orange triangle or up-arrow on the tach that I haven't seen before. *edit: I looked it up, it's the CASIS upshift light. I hadn't seen it because the cluster illumination dimmer was all the way down.
Being rid of the window track rattle in the door makes the car feel so much nicer over bumps.
12/31
-------------------------
We know that the door switch wasn't working now, so I'm hoping that was the fix for the drained battery.
Welcome to the board '83-Steering Guy
Hey, Beer. Thanks for coming along! The engine is in, but I'll be back underneath it soon to see how my leaks are doing so I'll check grounds while I'm there.
Next on the list is to fix the door arm (it's not attached to the door), install the rennbay window roller repair kit and then check under the dash to sort out the harness a bit.
I have some concerns..
Here's a shot of the window track - drilled out the rivet or tack weld and put a machine screw through it.
Does anybody know if the exposed wire in my harness is intentional (a ground?) or something that got fried?
Today I installed new hood shocks and tossed my old hood prop on the burn pile!
01-09-2016, 06:26 PM
#94
Advanced
Thread Starter
Join Date: Apr 2013
Posts: 69
Likes: 0
Received 0 Likes
on
0 Posts
1/8
-----------------------
Installed the Rennbay window roller repair kit and finished re-attaching the top of the window track tonight. That wasn't bad at all, I didn't remove the motor and scissor from the door and was able to just derail the window to pop 'em on.
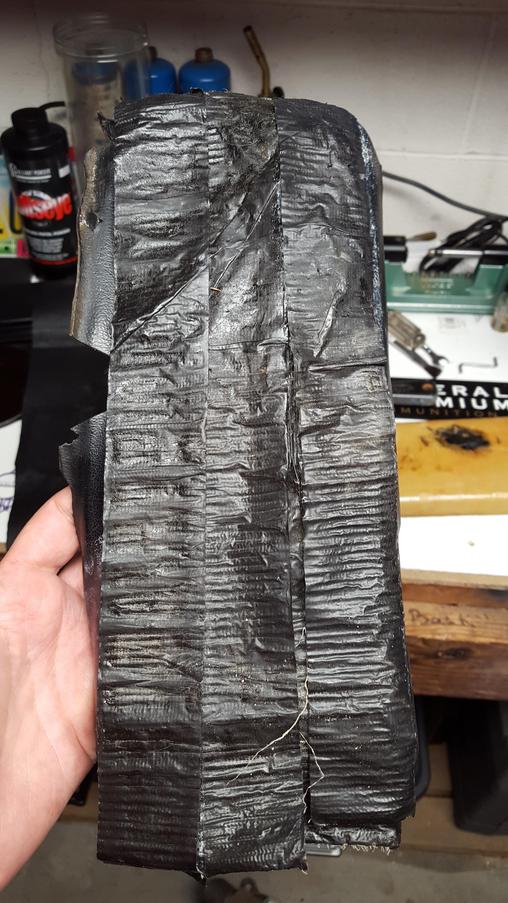
I re-covered the armrest also - get this - it was made of black duct tape!
Plyhammer delivered a replacement driver's side sunvisor and ashtray (mine were MIA) which went in without a hitch.
A few more bits still to go;
Visor retainer clips,
Radiator mounts top and bottom,
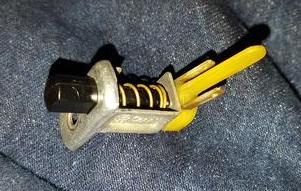
Hatch lock-cylinder grommet,
Clutch pedal pad,
Seat release **** and clip.
-----------------------
Installed the Rennbay window roller repair kit and finished re-attaching the top of the window track tonight. That wasn't bad at all, I didn't remove the motor and scissor from the door and was able to just derail the window to pop 'em on.
I re-covered the armrest also - get this - it was made of black duct tape!
Plyhammer delivered a replacement driver's side sunvisor and ashtray (mine were MIA) which went in without a hitch.
A few more bits still to go;
Visor retainer clips,
Radiator mounts top and bottom,
Hatch lock-cylinder grommet,
Clutch pedal pad,
Seat release **** and clip.
01-24-2016, 09:22 PM
#95
Advanced
Thread Starter
Join Date: Apr 2013
Posts: 69
Likes: 0
Received 0 Likes
on
0 Posts
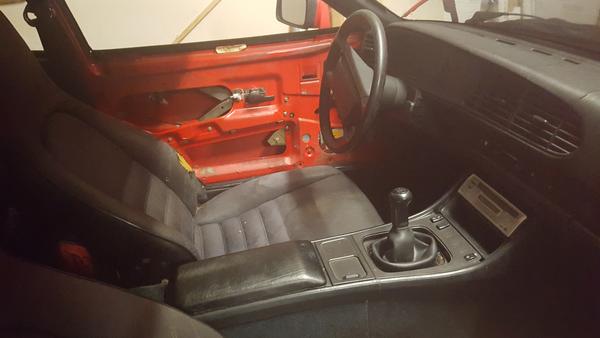
All those interior bits are installed now.* My Fuse 11 pops, so I'll have to chase that down.* I have a feeling it's the lighter.* While I was poking around I went ahead and placed a headunit.* Nice to have some sound!* PO wiring was a joke, so it was a small feat to restore the antenna.* Wiring is now otherwise tidy at the console.
Finally got the power steering leak fixed - a bit of swarf was trapped under the powdercoating causing the copper washer to deform.* I smoothed it with a medium grit stone and lightly glazed the bottom washer with Loctite 751 - it feels so much nicer to steer now.
I've been troubleshooting a problem with the clutch - the first inch or two of pedal travel have no resistance and I don't get a full return.* I verified that the piston is in contact with the pedal - I have power-bled, reverse-bled, bled at the master cylinder - lifted the back, lifted the passenger side.* Can't seem to get that bubble out!* I think it's in the hardline that travels over the booster..
To hell with it - I've got a Parker nearby, I'll have a braided flex line made up so I can elevate the slave and finally be sure it's bubble-free.
I discovered a bit of oil seepage from the front of the passenger-side balance shaft cover.* It's not enough to worry about for now, I'd rather do the suspension.
I'm gonna buy a Cayman. Is this thing on?
02-05-2016, 09:06 PM
#96
Advanced
Thread Starter
Join Date: Apr 2013
Posts: 69
Likes: 0
Received 0 Likes
on
0 Posts
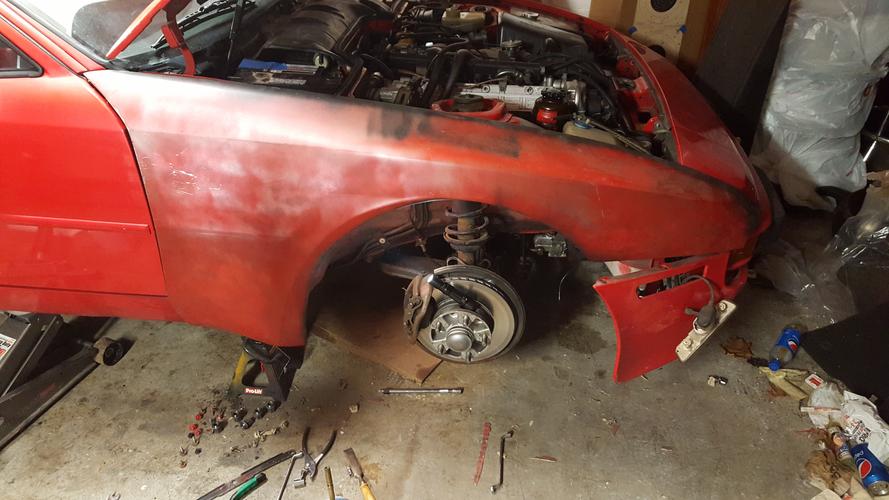
So I've got a crunchy fender, has been bothering me.
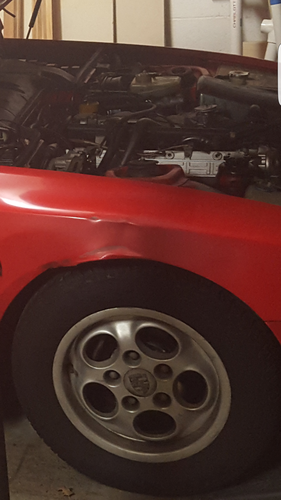
Time to fix. Gonna need a hot scraper:
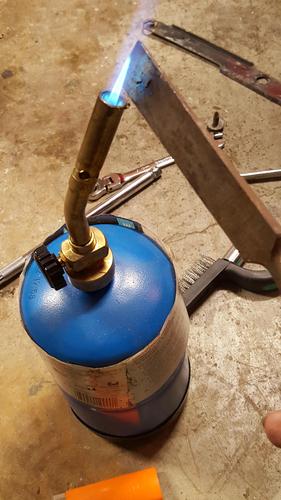
There's a ridge behind the undercoating here; scrape up to the lip to free the fender from the goop.
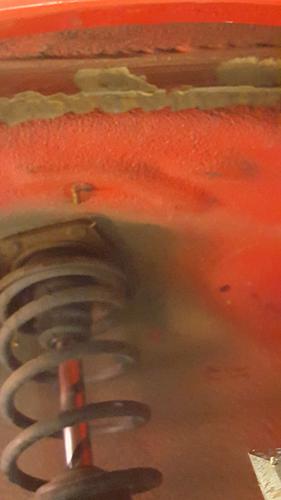
Remove some bolts, also under goop. Locations here:
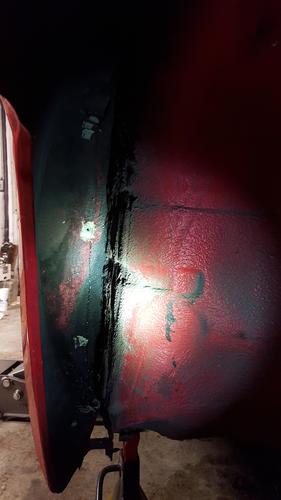
Fender comes away:
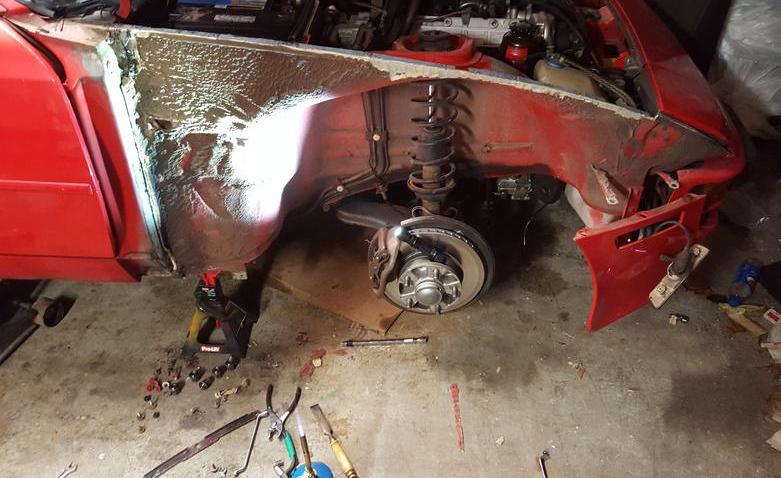
Non-crunchy fender goes on.
Time to fix. Gonna need a hot scraper:
There's a ridge behind the undercoating here; scrape up to the lip to free the fender from the goop.
Remove some bolts, also under goop. Locations here:
Fender comes away:
Non-crunchy fender goes on.