
My (re)build thread. [944/2]
 05-16-2013, 02:47 PM
#16
Instructor

I wasn't able to get the crank bolt off without the flywheel lock (engine in the car).
With the engine out, there's probably a way to hold the flywheel by bolting on a pc of angle or something?
The lock isn't expensive and it's nice to have it if you need it. Got mine from Bruce (Arnnworx).
Thanks for posting - keep it up.
With the engine out, there's probably a way to hold the flywheel by bolting on a pc of angle or something?
The lock isn't expensive and it's nice to have it if you need it. Got mine from Bruce (Arnnworx).
Thanks for posting - keep it up.
 05-16-2013, 02:57 PM
#17
Rennlist Member

 05-16-2013, 03:12 PM
#18
Former Vendor

 05-16-2013, 04:13 PM
#19
Advanced
Thread Starter

Join Date: Apr 2013
Posts: 69
Likes: 0
Received 0 Likes
on
0 Posts
Hey, ECS! Don't worry, we've already done plenty of vw/audi business to date.
We'd do more if you guys would allow local pickup again - sometimes it's painful to pay shipping when I could just swing by. I'm sure you've heard it before though, and have your reasons.
Valid point!
I sure did. Motor is in the best possible shape I could manage!
AHAHAHAHAHAAHAHHAHAHAHAHAHAHAHAhahaa! <madness>
Hey, thanks for the tip.
+800 [car]
+50 [tow]
We'd do more if you guys would allow local pickup again - sometimes it's painful to pay shipping when I could just swing by. I'm sure you've heard it before though, and have your reasons.
impact gun
did you change bearings and piston rings?
don't jinx yourself!
Hey, thanks for the tip.
+800 [car]
+50 [tow]
05-16-2013, 04:35 PM
#20
Three Wheelin'

+800 [car]
+50 [tow][/QUOTE]
Looks like great work bringing it back to life! With all that invested, you now probably have a $3000-$3500 car!
Keep everyone posted on the progress. I am impressed that you jumped that far in, I am not brave enough to even begin to attempt a full engine teardown. It would be nice if you could post pics of the exterior/interior as well to get an overall look at the project.
05-17-2013, 09:56 AM
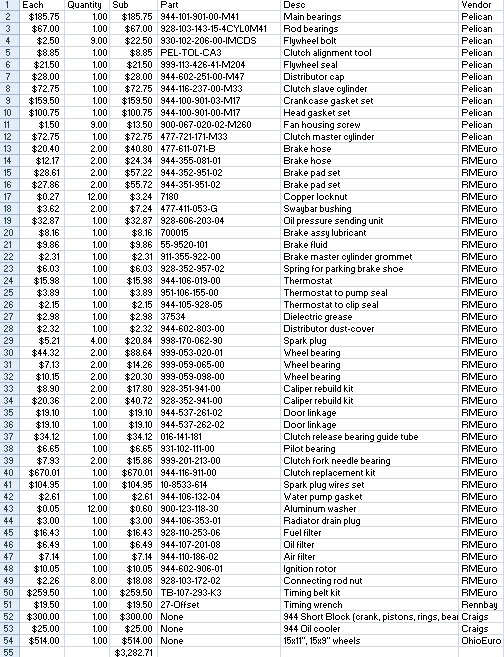
#21
Advanced
Thread Starter
Join Date: Apr 2013
Posts: 69
Likes: 0
Received 0 Likes
on
0 Posts
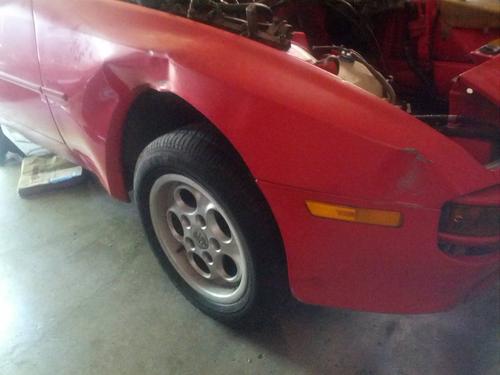
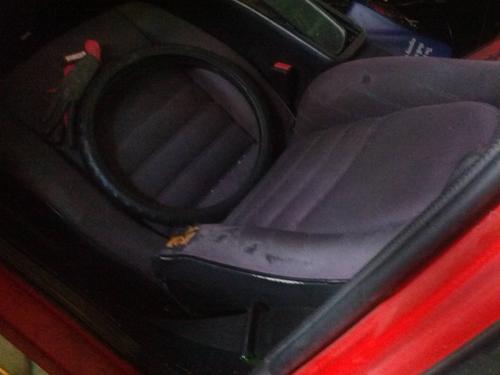
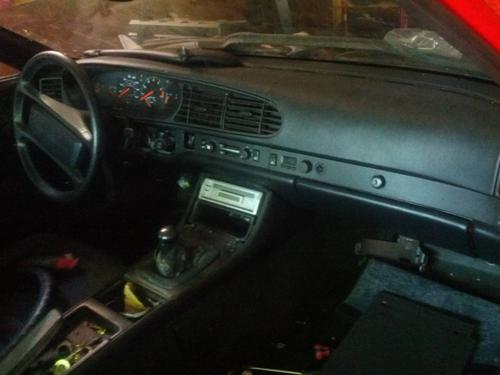
Not much to see right now, since it's in a small garage - but here are some clues as to the car's aesthetic condition:
Someobdy boinked the fender, but the guts are straight I think:
This is the access panel. (heh)
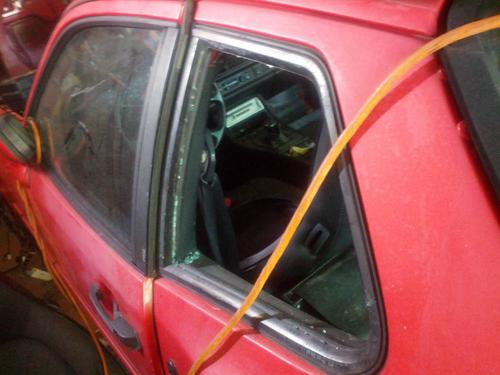
Hm.
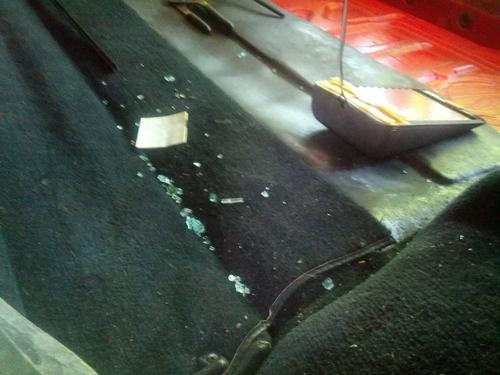
She's been around:
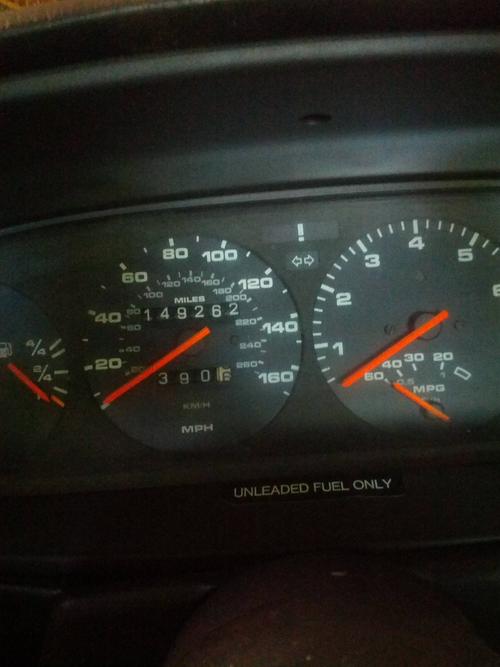
Step 1: remove steering wheel cover.. some sun fade and bolster wear.
The dash is pretty good, the 4-spoke wheel is present, and the carpet is bone dry! No weird mold or anything. I removed the factory plywood (sigh) and found the motronic unit in superb condition, with only a handprint on it. Attribute this to the still-intact battery tray, right?
I found all manner of interesting things under the seat - a raffle ticket, some black eyeliner, sunflower seeds, cigarette butts. Know what I didn't find?
A french fry.
Doesn't every car on the planet have a mint condition french-fry in it somewhere?
Wife named the car 'Vicki,' she figures it's proper for an aquanet-soaked 80s party girl with an affinity for dark eyeliner, cigarettes and sunflower seeds.
This is a departure from our other cars, Inga(a3), Helga(tdi), and Olga(allroad). Shrug.
Someobdy boinked the fender, but the guts are straight I think:
This is the access panel. (heh)
Hm.
She's been around:
Step 1: remove steering wheel cover.. some sun fade and bolster wear.
The dash is pretty good, the 4-spoke wheel is present, and the carpet is bone dry! No weird mold or anything. I removed the factory plywood (sigh) and found the motronic unit in superb condition, with only a handprint on it. Attribute this to the still-intact battery tray, right?
I found all manner of interesting things under the seat - a raffle ticket, some black eyeliner, sunflower seeds, cigarette butts. Know what I didn't find?
A french fry.
Doesn't every car on the planet have a mint condition french-fry in it somewhere?
Wife named the car 'Vicki,' she figures it's proper for an aquanet-soaked 80s party girl with an affinity for dark eyeliner, cigarettes and sunflower seeds.
This is a departure from our other cars, Inga(a3), Helga(tdi), and Olga(allroad). Shrug.
05-21-2013, 11:46 AM
#22
Advanced
Thread Starter
Join Date: Apr 2013
Posts: 69
Likes: 0
Received 0 Likes
on
0 Posts
Yesterday, I got the cam box prepped/reassembled and sealed, dropped the lifters in:


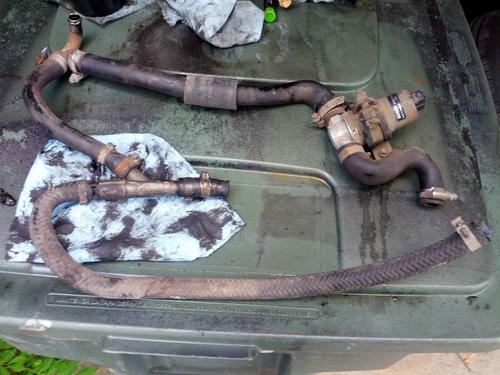
I started cleaning and inspecting some odds and ends - plastic covers, the oil separator cyclone, idle control valve.
And I got myself a little present ...
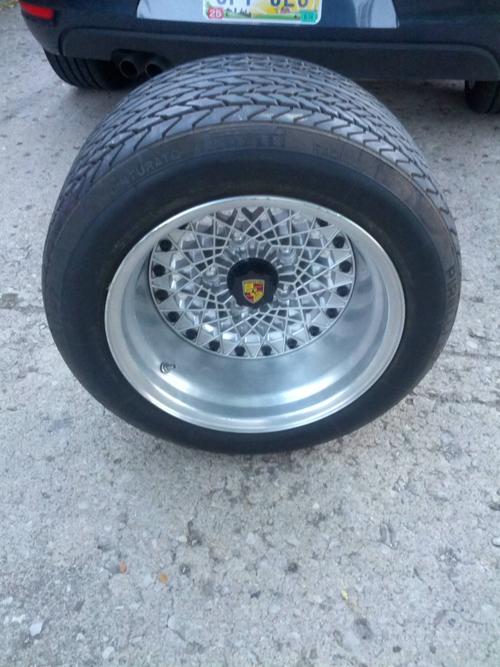
15x11, 245/40/15 Pirelli P7 (15x9 fronts not pictured)
Unfortunately .. the offset doesn't quite work. Maybe I'll be able to flip the faces or swap to the other offset rear-end?
I started cleaning and inspecting some odds and ends - plastic covers, the oil separator cyclone, idle control valve.
And I got myself a little present ...
15x11, 245/40/15 Pirelli P7 (15x9 fronts not pictured)
Unfortunately .. the offset doesn't quite work. Maybe I'll be able to flip the faces or swap to the other offset rear-end?
05-21-2013, 03:10 PM
#23
Instructor
you have guts I don't think I would have chose this car to save. offset on the wheels I had to learn the hard way on that. I was able to resell the the early offset wheels for the loss of shipping. when your all done vicki will be hard to ever leave the family.
05-21-2013, 04:33 PM
#24
Rennlist Member
So many questions. I hope you studied the FSM before starting any of this. Just cleaning parts and slapping them together won't guarantee success. Did you measure all your mains and connecting rod journals? Did you use the proper Loctite for the crank girdle? Did you use the alignment tool for the oil cooler housing? Are you sure you matched the correct tolerance pistons with you cylinders? Did you keep the balance shaft covers with the engine they came from? Are you going to use the correct DME for those pistons?
Don't worry about torquing the crank with the engine out of the car. Do it when it is in. 150ft-lb is nothing. With a 3 foot bar, it should only take 50 lbs of pull. You can do that with one hand.
Hope it works for you. I went through the same thing about six years ago, and the car is still running great. No leaks or anything.
05-21-2013, 11:13 PM
#25
Advanced
Thread Starter
Join Date: Apr 2013
Posts: 69
Likes: 0
Received 0 Likes
on
0 Posts
So many questions. I hope you studied the FSM before starting any of this. Just cleaning parts and slapping them together won't guarantee success. Did you measure all your mains and connecting rod journals? Did you use the proper Loctite for the crank girdle? Did you use the alignment tool for the oil cooler housing? Are you sure you matched the correct tolerance pistons with you cylinders? Did you keep the balance shaft covers with the engine they came from? Are you going to use the correct DME for those pistons?
I did not study the FSM before starting on this - as much as I like being prepared, I'm allowing for some errors along the way. Cleaning parts is a pretty good step, I think - makes the gasketry work well.. I'll try to keep the slapping to a minimum. I've never done this before -- did I offend?
Here are your questions answered:
Measure crank journals: no, I'm afraid I didn't have the means to.
Proper goop: Yep - Loctite 571 if memory serves. Interesting stuff. Used on Balance shaft covers as well.
OPRV tool: no - the block side had a protruding sleeve insert that locates the cover as well. The bullet-like portion of the revision 1 valve moved well.
Tolerance, matching: Yeah - they're all group 1, and the rod/cap weights are appropriately matched.
BS covers: yes, from the same block. Is that critical? They are 571'd as well.
DME: Here we go! This I didn't think of - can I chip the existing one to match, or does it not work like that? Do I need an 87 Motronic unit instead of the 85.5?
Don't worry about torquing the crank with the engine out of the car. Do it when it is in. 150ft-lb is nothing. With a 3 foot bar, it should only take 50 lbs of pull. You can do that with one hand.
Hope it works for you. I went through the same thing about six years ago, and the car is still running great. No leaks or anything.
Hope it works for you. I went through the same thing about six years ago, and the car is still running great. No leaks or anything.
 I'm glad to hear it, Moe.
Question - Did you use Loctite or the cork gasket for the rear cam housing cap?
Last edited by cybe; 05-22-2013 at 11:23 AM.
05-21-2013, 11:19 PM
#26
Advanced
Thread Starter
Join Date: Apr 2013
Posts: 69
Likes: 0
Received 0 Likes
on
0 Posts
Which (late / early) offset has the deepest inset hub placement? I searched a bunch but never found clarity or a comparison photo.
Last edited by cybe; 05-22-2013 at 11:24 AM.
05-22-2013, 04:42 PM
#27
Rennlist Member
Thanks for the questions, Moe!
I did not study the FSM before starting on this - as much as I like being prepared, I'm allowing for some errors along the way. Cleaning parts is a pretty good step, I think - makes the gasketry work well.. I'll try to keep the slapping to a minimum. I've never done this before -- did I offend?
Here are your questions answered:
Measure crank journals: no, I'm afraid I didn't have the means to.
Proper goop: Yep - Loctite 571 if memory serves. Interesting stuff. Used on Balance shaft covers as well.
OPRV tool: no - the block side had a protruding sleeve insert that locates the cover as well. The bullet-like portion of the revision 1 valve moved well.
Tolerance, matching: Yeah - they're all group 1, and the rod/cap weights are appropriately matched.
BS covers: yes, from the same block. Is that critical? They are 571'd as well.
DME: Here we go! This I didn't think of - can I chip the existing one to match, or does it not work like that? Do I need an 87 Motronic unit instead of the 85.5?
There are numbers stamped on the balance shaft covers that match the block. This is also true for the girdle. These pieces were line honed at the factory, and if you mix and match with other engines, you risk having the shafts bind.
I don't know how many threads I've seen where someone complains about lost oil pressure and it comes down to not using the alignment tool. I can't imagine trying to save $40 and risk engine damage or get stranded. You may be able to borrow one for free.
Do a search on this forum also. There are a bunch of engine rebuild threads. Some go into way more detail than was covered here. These tips could save you time and money.
05-23-2013, 05:06 PM
#29
Advanced
Thread Starter
Join Date: Apr 2013
Posts: 69
Likes: 0
Received 0 Likes
on
0 Posts
Regarding the 1985.5 DME and the 1988 Pistons (9.7 compression vs 10.2), I spoke with Wilk about it and he'll send me a chip that sorts it all properly. Awesome. Hope this helps a future rennlister searching.
05-28-2013, 11:15 AM
#30
Advanced
Thread Starter
Join Date: Apr 2013
Posts: 69
Likes: 0
Received 0 Likes
on
0 Posts
Okay, latest progress.
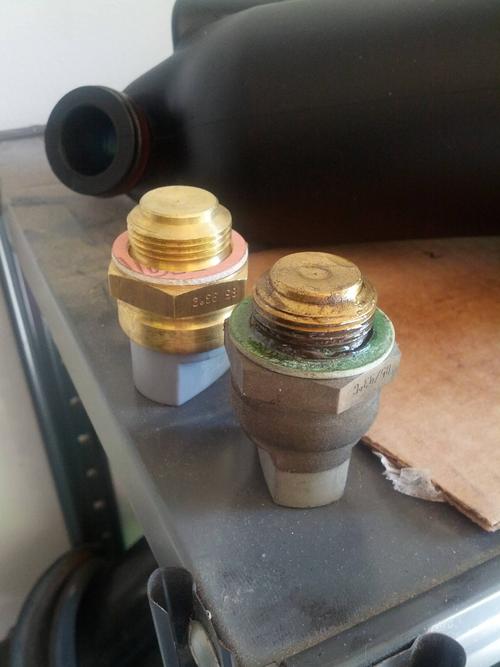
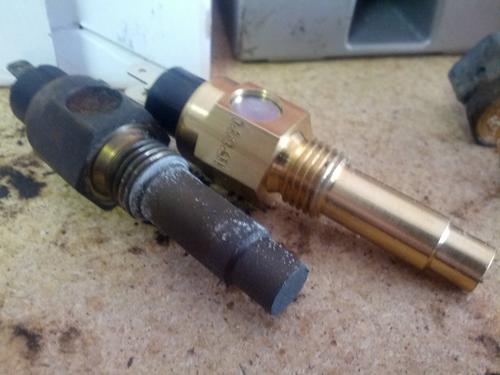
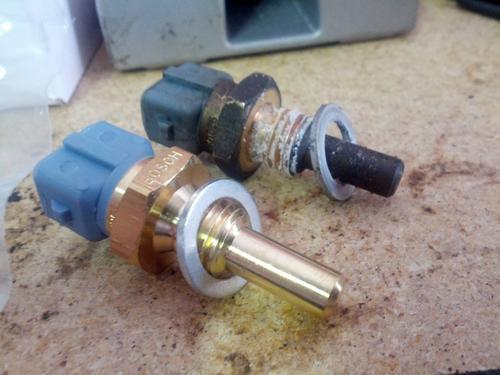
I'm using an extreme 'while you're in there' approach. I like to know everything is done instead of leaving 30 year old stuff that might still work. Replaced a few sensors:
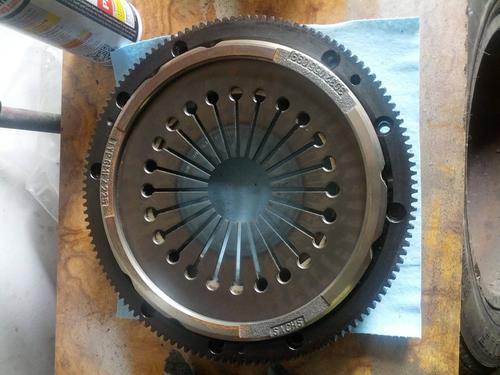
Got the starter-ring mounted on the new clutch:
* note, I did rotate it to line the holes up before banging it on there.
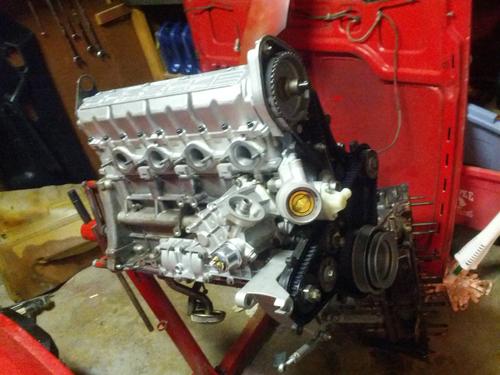
Got the cam tower on - motor is getting taller..
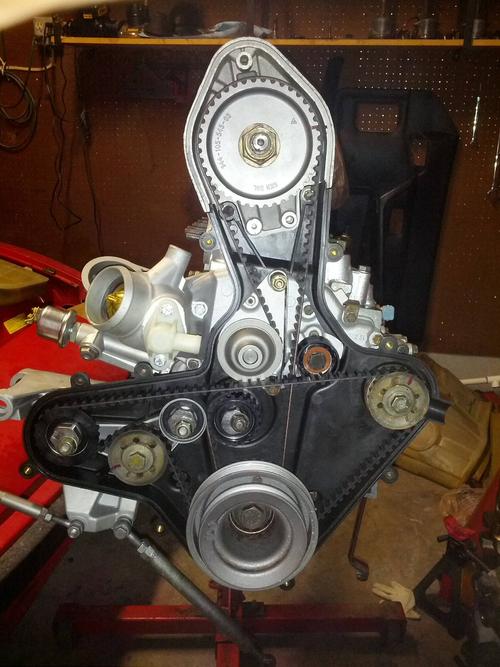
Belts are on - I haven't tensioned it yet, it's just semi-tight to make sure my timing lined up.
I'm using an extreme 'while you're in there' approach. I like to know everything is done instead of leaving 30 year old stuff that might still work. Replaced a few sensors:
Got the starter-ring mounted on the new clutch:
* note, I did rotate it to line the holes up before banging it on there.
Got the cam tower on - motor is getting taller..
Belts are on - I haven't tensioned it yet, it's just semi-tight to make sure my timing lined up.