When you click on links to various merchants on this site and make a purchase, this can result in this site earning a commission. Affiliate programs and affiliations include, but are not limited to, the eBay Partner Network.
Anyone got hatch alignment tips? The hatch pins appear to lock in with no give. I do not want this hatch popping and I do not want the glass separating. The car is my daily driver.
Take out the tail lights and then you have easy access to move the latches around while you test it.
Thanks for blazing the trail guys. I ordered the Sika P2G (2 cans yesterday) and 207 primer. Apparently, in late 2016 207 primer replaced the 206G+P product. I am thinking that I should buy a ryobi power caulker to assist in even bead. Someone earlier in the thread mentioned air power, but the battery power makes more sense for my needs. Do you guys think it will make a difference in this job? $40 isnt too much an investment for a good tool, but Im not suffering from arthritis or anything and definitely do not do this for a living. My manual caulking skills kind of suck - maybe the power version will help my bead consistency?
tj, personally I would not have wanted to lay the bead manually. I used a generic "dripless" hand caulking gun for touchup and it was very difficult to work. It was fine for filling a few gaps here and there after the glass was placed, but I would not have wanted to lay the full bead with it.
Getting the bead down consistently and with the correct "v" shape is critical. I think that would be hard to do while squeezing and actuating a manual gun. And trust me, you do not want to have to clean the uncured urethane and lay down a new bead in the event that you screw it up.
YMMV- some people have done this with a manual gun, and maybe I'm just a wimp, but I would go for an air/power gun. BTW, with my air gun I had to turn the PSI up pretty high to get a reasonably fast bead out (which was still not super fast... maybe 1.5 inches/sec). I don't know how the available power out of a battery powered gun compares.
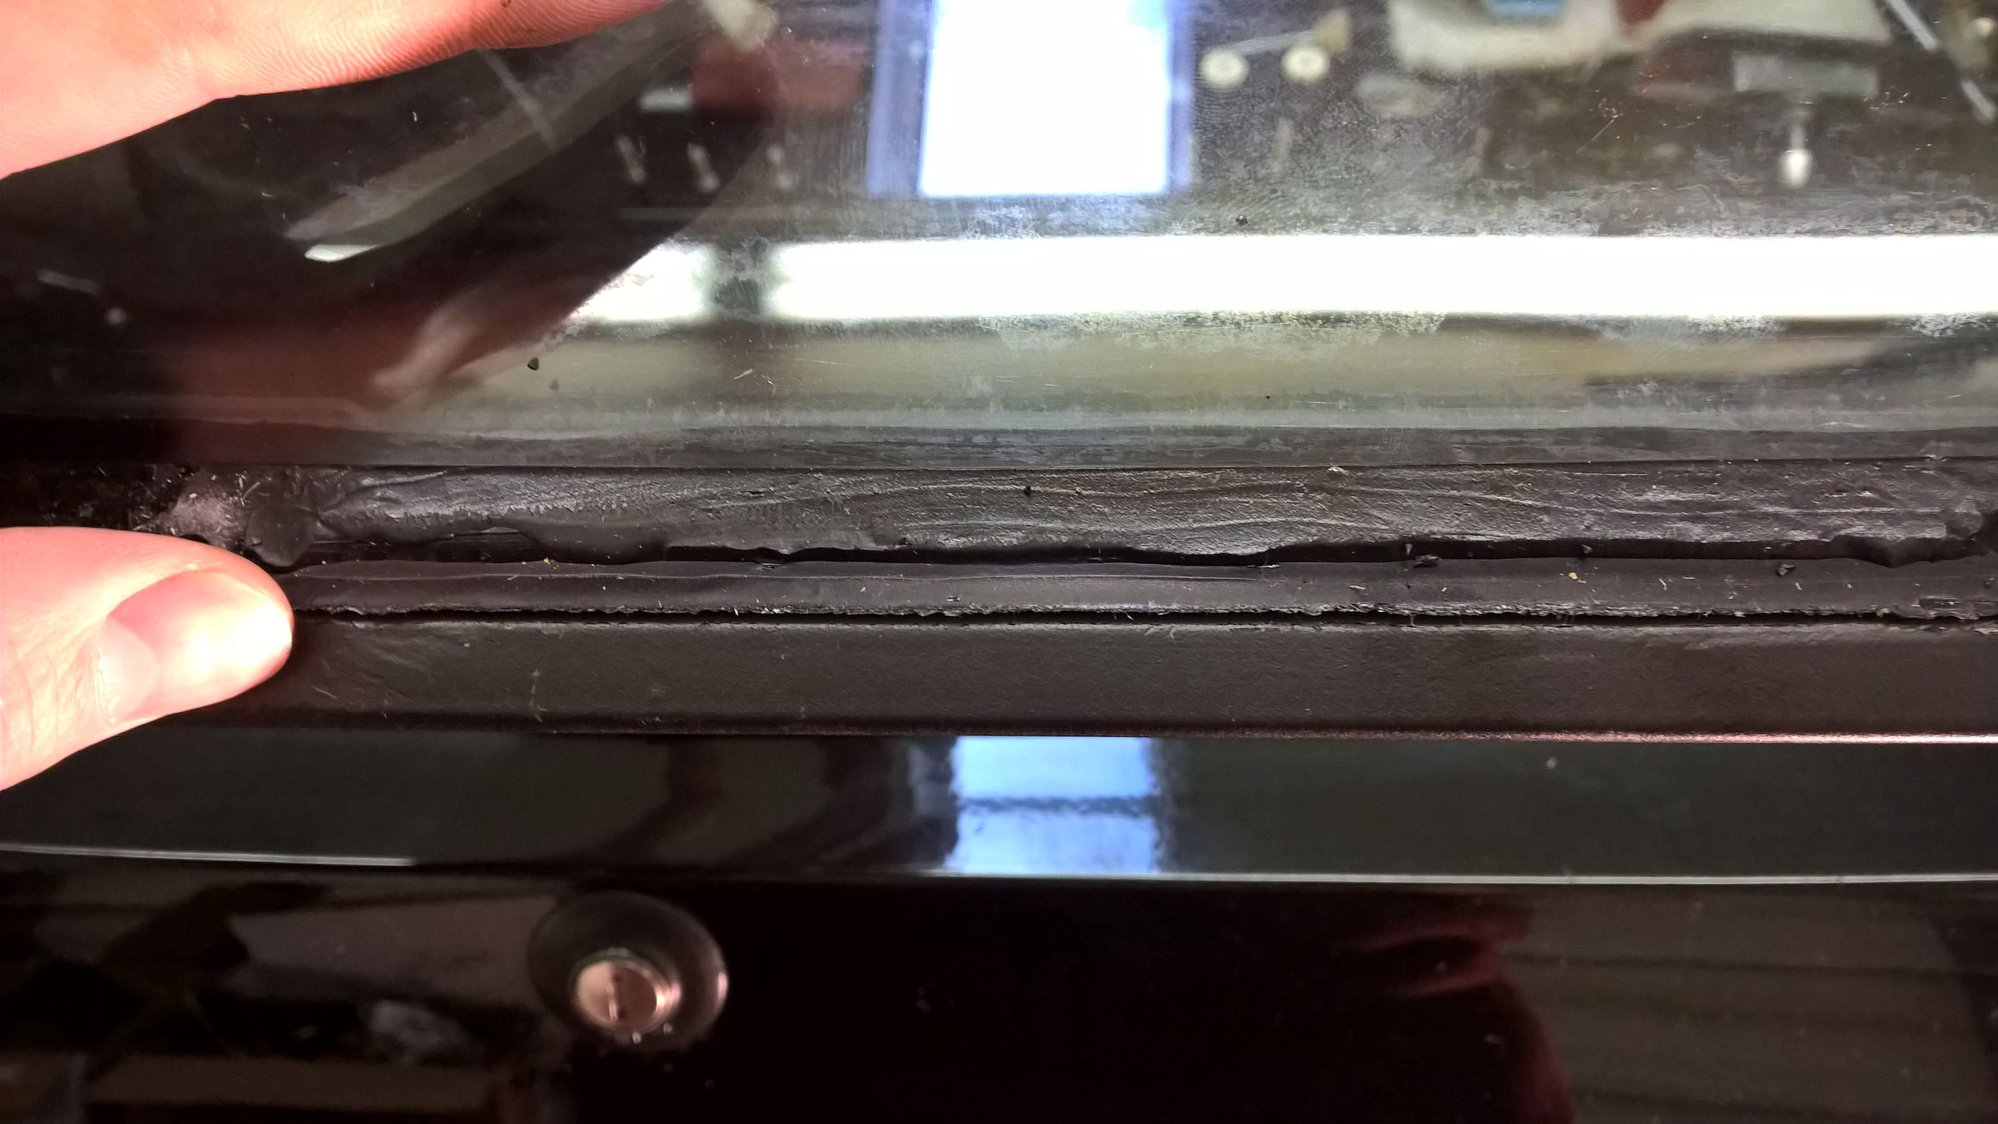
Bad news - The Sika Titan 2 P2G pulled away from the frame along the rear (latch) side.
I had the spoiler off to replace the rubber seal and pulled down on the frame against the hydraulics (weak Jeep Wrangler ones - which are the perfect strength by the way). It separated really easily.
Not too thrilled about this - Looks like the Sika and paint I used were not really compatible. I had even lightly sanded down the bonding area to increase adhesion.
I suppose it's only a matter of time before the rest of the frame pulls away from the Sika.
Hopefully you guys have better luck and used a different paint/prep.
Well, that sucks! Mine is still holding as far as I can tell, but the car's been laid up for other work for months. I've probably only driven it 3 or 4 times since the reseal. I left it "unstrutted" for a couple of months, and then installed the Wrangler struts.
I'll check mine more closely soon. You mentioned incompatibility with paint you used. Did you paint the surface of the frame that bonds to the urethane? I didn't refinish my frame- I'm going for functionality, not looks on my build . I used Dremel sanding wheels to take the frame down to bare aluminum, and then brushed on a thin coat of Sika 207 primer. No primer on the glass, only Aktivator.
I maybe drove once or twice after resealing the hatch, and I had left the struts off for months. Car has really only been sitting in the heated garage.
I had to use a wire wheel to remove the old 'goop' off the frame - I don't know what it was, but it was nothing like the Sika polyurethane. Frame needed to be repainted. I think there's a previous post of mine in this thread discussing what I used.
*luckily* the spoiler essentially clamps down and squeezes the glass to the frame, so hopefully that will allow me to get through at least once summer.
KVDR - sorry to hear about this. I am glad you posted. I actually in the middle of doing my rear hatch with the sika titan p2g repair right now. Yesterday, I separated the glass from the frame, cleaned up the glass and frame using wire wheel. I was shocked to see both the front and rear sides completely separated. I think the rear area under the tail was separated due to heavy aluminum corrosion. I cleaned up the entire frame with a wire wheel on a drill. I took everything down to bare aluminum. I prepped the frame with etching primer and planning on painting the entire frame with black paint. Now I see your post.....
I am wondering how you painted and prepped the frame - did you use a primer? Maybe the frame paint wasnt fully cured? Probably was since you said you sanded the channel. I googled "sika technician handbook passenger glass" and found a 100 page PDF that Ill look through to see if they say anything. Wondering if I should remove the paint in the bonding area now?
I think youll be able to get through the summer with the bottom separated - like you said, the spoiler is holding everything together. Based on the way mine looked, I bet my rear seal was separated for years....
So I read the manual and it seems that the Titan system can be used on a frame that is either bare metal or fresh body paint (think body shop). In both cases, Sika recommends sanding the channel and using aktivator pro first, then the primer G+P. I am wondering what type of paint KVDR used? I was going to use standard rustoleum spray paint, but I am thinking that I should use a spray paint that is closer to "body shop" chemistry. I also dont have aktivator. Maybe Ill go buy some of that too....
I am wondering how you painted and prepped the frame - did you use a primer? Maybe the frame paint wasnt fully cured? Probably was since you said you sanded the channel. I googled "sika technician handbook passenger glass" and found a 100 page PDF that Ill look through to see if they say anything. Wondering if I should remove the paint in the bonding area now?
Wonder no more - I take lots of pics when I do things!
I didn't take the entire frame to bare metal. I used etching primer first, and then used some paint I had in the garage.
Normally I wouldn't plan on mixing paint brands, but where the urethane separated, it left all the black paint attached to the frame so that doesn't seem to be the issue. I also roughed up the bonding areas after painting.
Paint was well-cured - maybe a week or more went by. I was maybe a bit quick on the etching primer to paint, but doesn't appear to have failed there.
I know this is one datapoint, but I didn't refinish my frame, took the mating surface down to bare metal, used the 207 primer on it, and then applied the aktivator and then the urethane. Perhaps if you are going to refinish the frame, mask off the sealing surface so that it remains bare metal. Then reclean it with acetone, apply 207 primer, apply aktivator and apply sealant?
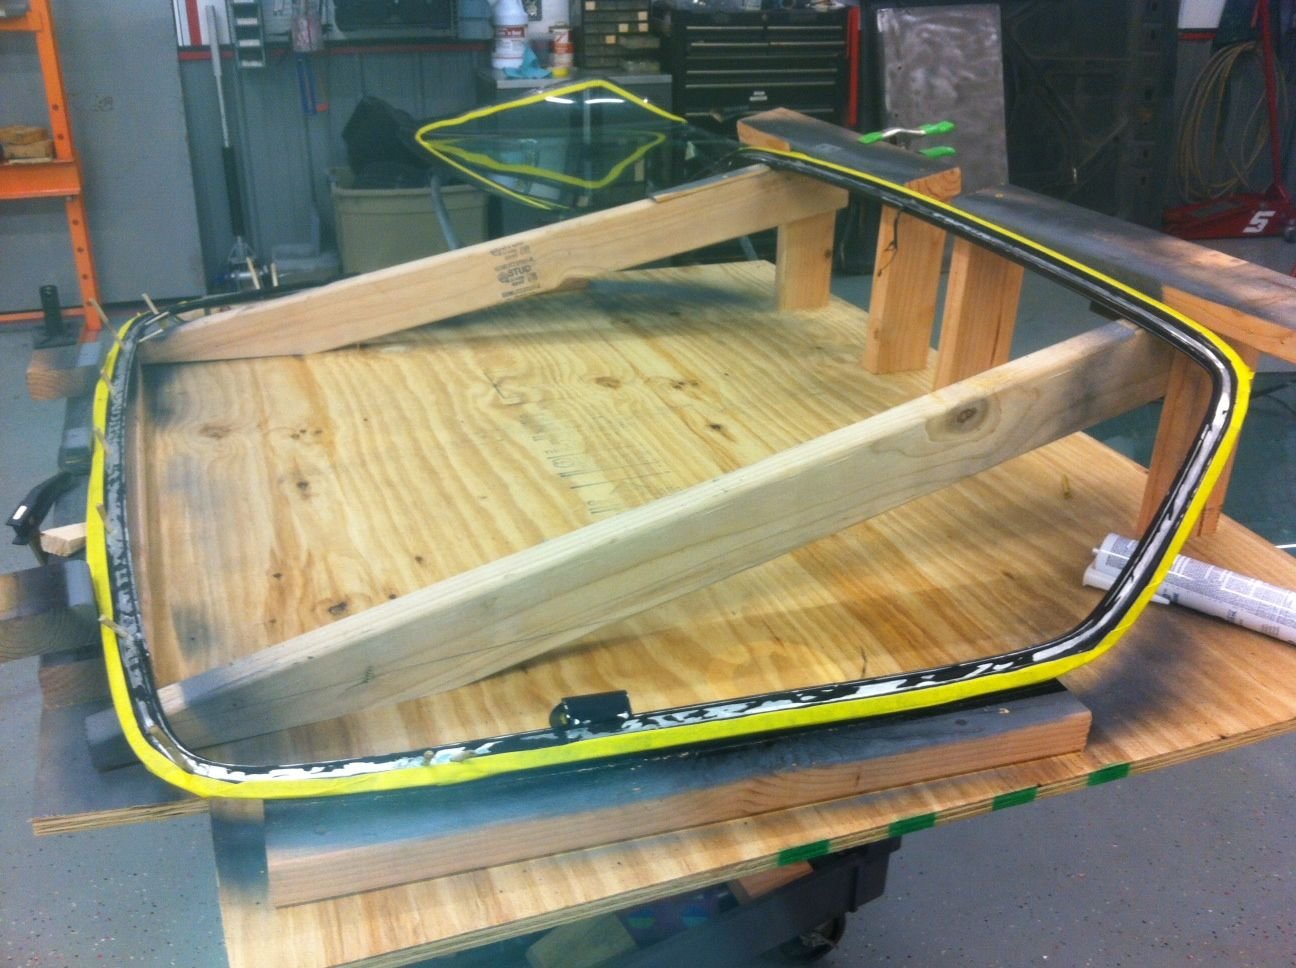
When I did mine I used a Scotch-brite Roloc disk on a die grinder and took it to bare metal as well. I build a Jig for the frame, lucky for me I had a good spare hatch to make the Jig out of. I used the Jig so I would get the proper alignment as well as being able to put clamps all the way around after I Goop-ed it up. I thought about pre-painting it but the adhesion is only as good as the paint then.
I just resealed mine last night. I sanded my freshly painted (rustoleum trim black paint) pinch weld down to the etching primer and used 207 on the glass and frame before applying p2g. I sanded the glass as well to create more surface area. I didn't go down to bare metal which may have been a mistake. I figured the prime would slow down the corrosion and pitting that was in my frame.
btw, I used the battery power ryobi caulk gun and it was fantastic. I don't regret the $40 purchase. I took the advise above and cut the v groove I the p2g nozzle a little wider. I put down a can and half of p2g and was very happy with result. The only disruption in the continuous bead was on the sides where the frame connects to gas shocks because the nozzle has that plastic guide finger that interferes with frame.
I also highly recommend those suction cups. I was able to lay down the glass on the frame by myself with little trouble.
btw, I tried tig welding extra aluminum to the frame by the hinges (to increase bonding area) but couldn't get a good puddle using 4043 rod. I must have been doing something wrong, but I abandoned my idea to modify the frame.
[EDIT]: I was able to weld the frame after adjusting the AC balance and holding the arc a bit longer in an area to puddle. It welds nicely. I tried this on the tube (mine was partially broken off the frame so I removed it entirely) but my job is done now so I didn't modify the frame. Ill do it again if or when I take it apart again.


 12-14-2016, 10:08 PM


 . I used Dremel sanding wheels to take the frame down to bare aluminum, and then brushed on a thin coat of Sika 207 primer. No primer on the glass, only Aktivator.