When you click on links to various merchants on this site and make a purchase, this can result in this site earning a commission. Affiliate programs and affiliations include, but are not limited to, the eBay Partner Network.
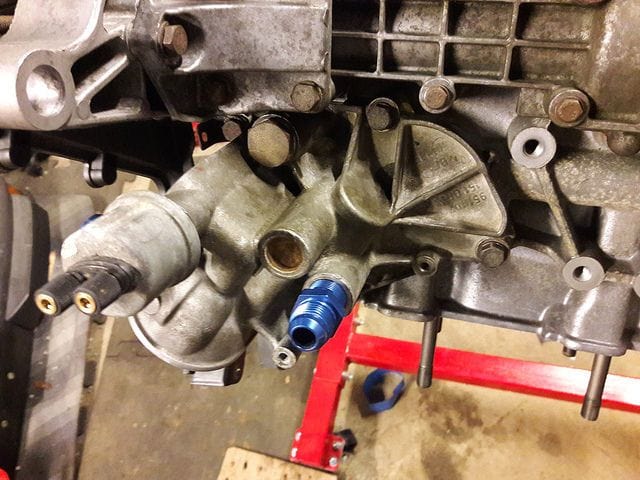
I’m trying to use the oil cooler housing from an 86 951 on a 88 951 block. The PET says there's one part number across the years, however it looks like there’s a subtle difference in the mounting hole for the OPRV. I have an 87 one-piece OPRV to go with the 88 block (since the OPRVs are clearly different). But it looks like the housing castings are slightly different, as the one-piece OPRV wont thread into the housing as far as the three-piece:
The difference is 3+mm, which can't be made up for by the sealing ring. Since I don’t have a late housing, I can’t tell what's causing the difference. But I suspect that the overall depth of the OPRV hole is different. The 86 housing measures approx. 42mm:
So, has anyone ever used an 86 housing on a late block? Can it be done, or do I need to find an 87+ housing?
well according to the PET all the turbo housings are the same -
and the as you know the 3 piece opv was changed to a retro fit for the early up to 86 cars -
the up to 86 opv valve looks like this -
and you can see that the main difference is down at the nose end -
make sure you have the 87 + type
and the aluminum seal is 1.35 mm thick
I just went to look at an egine that I have out of a car
- and the head does sit flush with the housing with the washer -
you may not have it aligned correctly - there is a tool for that -
you may not have it aligned correctly - there is a tool for that
Actually I haven't installed the housing yet. I was just test-fitting the 87 OPRV when I discovered the problem.
Originally Posted by Ians_Europarts
... and you can see that the main difference is down at the nose end
Very interesting. I hadn't noticed this until I compared your pictures side-by-side, but if you look at the threaded piece on the 86 OPRV, the threads don't extend all the way to the end of the shaft, whereas on the 87+ part they do. Looking at the way the housing is constructed, it appears that the shorter thread length would allow the OPRV to thread further into the housing.
I guess I could try turning down the threads a bit to mimic the 86 valve. The only concern I have is that this might cause the valve to extended too far into the block. Does anyone have a 87+ oil cooler housing that they could measure the size on (like I did in the picture)?
I have used an 86 with a late OPRV. I did just as Jay said. I machined off the first few threads and it worked just fine. I actually did not know why it was not working correctly, but now I can see why. Never thought that it was that it came from an 86.
This was on a NA race car that I added a turbo cooler setup to.
Thanks for the info Ed! That's exactly what I need to hear before I start machining stuff off my (ridiculously expensive) OPRV.
Just to follow up on this, I took the threaded cap from the late OPRV to my machinist and had him machine off a few of the threads. Here's the result:
Now it threads all the way into the 86 oil cooler housing. It will be a while before get to test this in a running engine, but from Ed's description I'm reasonably confident it will work.
A quick follow-up for anyone who's searching... I can confirm that the modified late OPRV I installed into my 86 oil cooler housing did not leak, and built proper oil pressure on engine start.
I just ran into this exact problem. '88 NA race engine, switching from NA oil cooler to a turbo console. Everything fits except the OPRV won't thread in all the way exactly as described here (it's not even on the block yet - there just aren't enough threads in the console to accept the OPRV).
The threads aren't even deep enough to thread the official Porsche OPRV alignment tool into the console!
My idea was to tap the threads farther into the console to make the OPRV fit, rather than alter my OPRV.
I'm thinking either way would work, and I measured the distances on both the old oil cooler and the turbo console - the resultant intrusion of the OPRV will be identical... just as soon as I get it to thread all the way in!
Like I said I might, I went the opposite way and I believe it was the best way to go for me.
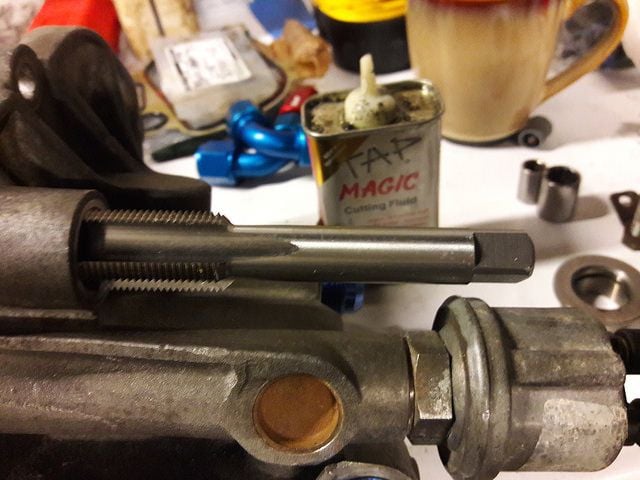
I don't have a machinist all that handy or cheap. I don't have a lathe. But I ordered a 20mm x 1.5mm pitch thread tap from Amazon Prime for a total of $23 even.
With that tap, I was able to extend the threads pretty much all the way through. I hope the pictures show enough detail, but it was super easy to turn, the alignment tool went in nicely, and then the OPRV threaded in like buttah. It took about five minutes.
It was anticlimactic, really.
The tap was the perfect size and went in smoothly. 20mm x 1.5mm pitch.
I was worried it wouldn't clear the sensor but it was fine. I turned it with an open end wrench.
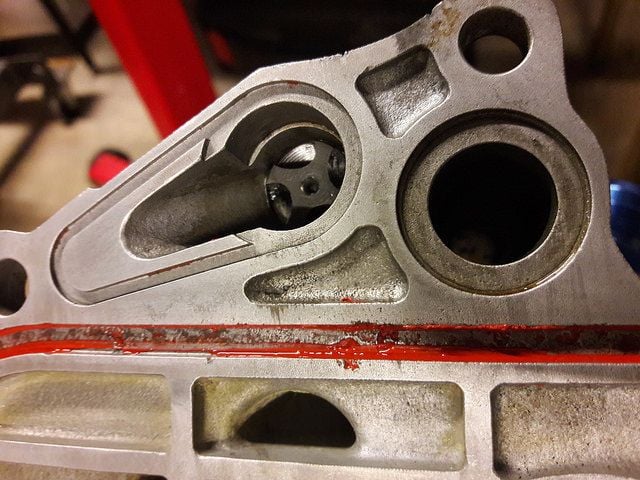
Here it is just starting to pick up new threads.
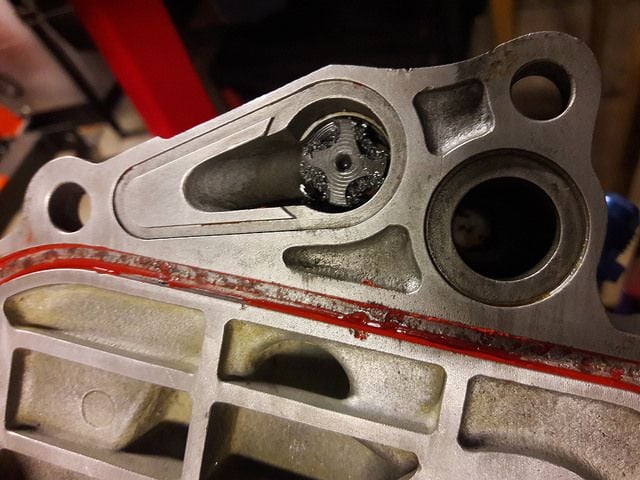
Just about through. I went pretty much all the way through.
There will be shavings to clean out.
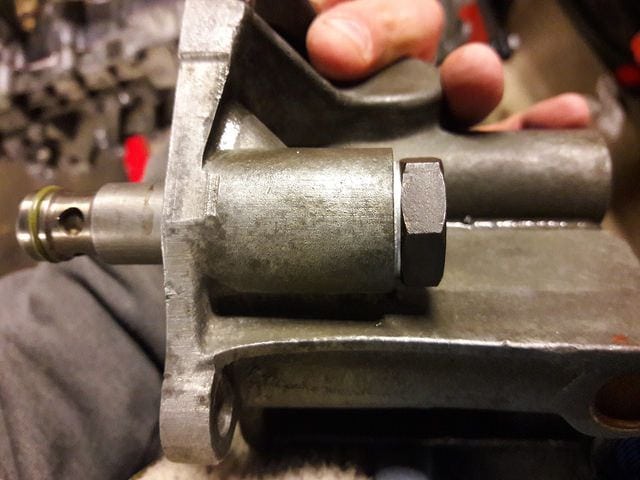
The OPRV now goes in all the way with no resistance.
 11-11-2009, 03:26 PM


 Now it threads all the way into the 86 oil cooler housing. It will be a while before get to test this in a running engine, but from Ed's description I'm reasonably confident it will work.