
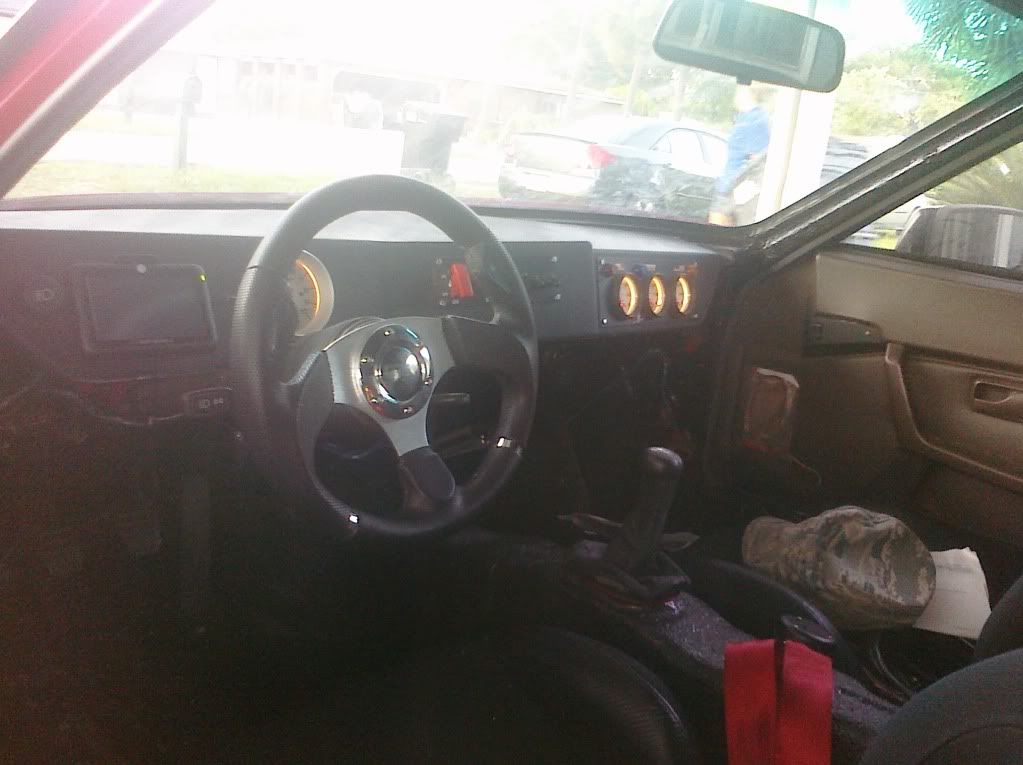
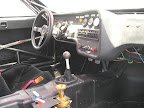
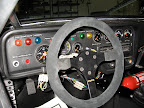
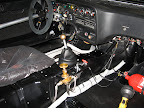
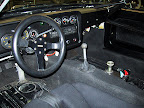
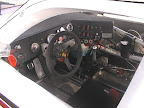
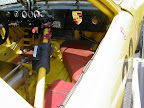
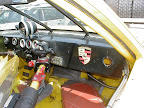
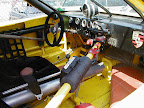
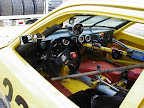
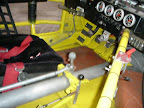
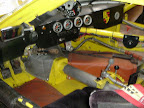
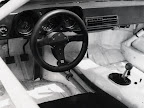
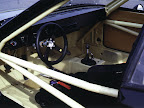
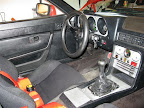
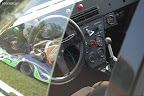
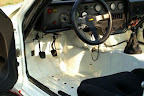
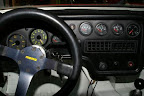
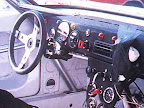
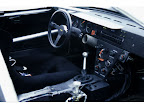
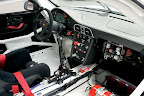
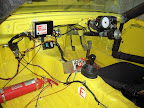
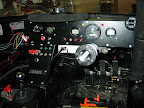
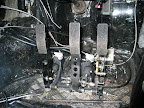
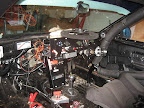
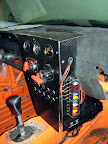
Pics of stripped interiors and race/custom dashes

 09-29-2009, 11:07 PM
#32
Nordschleife Master


 09-30-2009, 08:50 AM
#35
Instructor
Join Date: Oct 2007
Location: Oakville, ON Canada
Posts: 122
Likes: 0
Received 0 Likes
on
0 Posts
Thanks for pointing that out - I've been looking for a boot exactly like it but didn't see it in your pics.


 09-30-2009, 10:49 AM
#38
Former Vendor
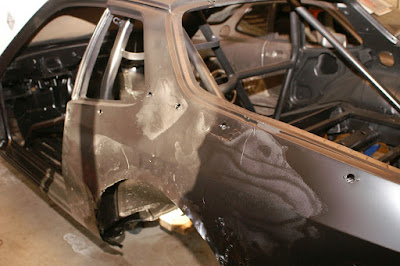
From my body work thread on 924board:
Originally Posted by ideola
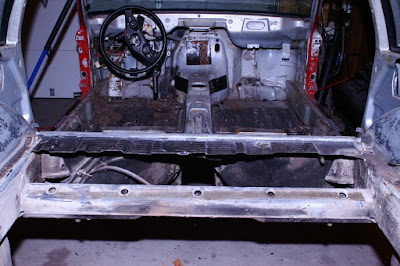
Achieved a major milestone last night! The last of the destruction is over! I'm about ready to turn the corner and start PUTTING STUFF BACK TOGETHER instead of taking it all apart :lol:
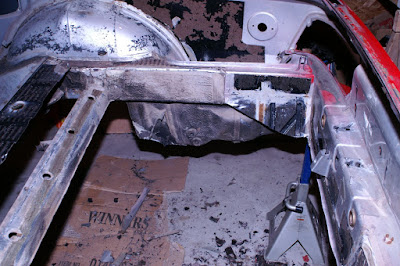
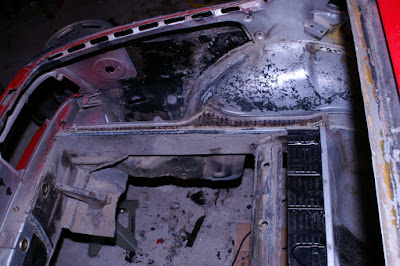
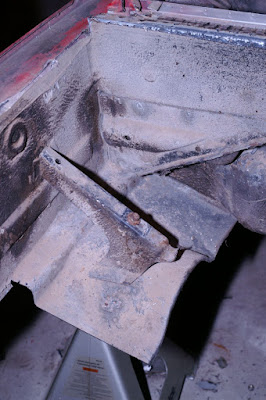
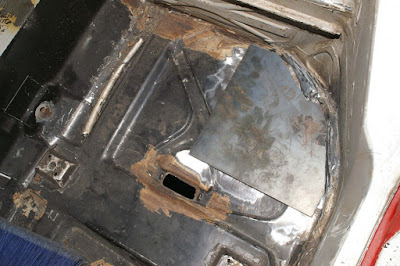
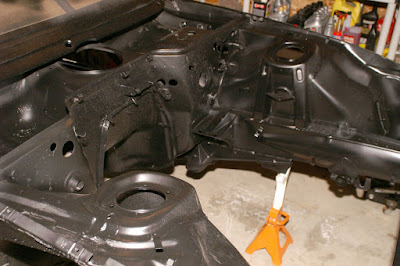
Over the weekend, I finally got around to removing the trans, torque tube, and gas tank. Progress last night was primarily in cutting out the rear deck panel and tire well. This entire area has been opened up to allow for a fuel cell cage and additional supports to be welded between the frame rails. This will also make the task of installing my axle-driven alternator much easier.
You will see in some of the pix below that I left about 4" of the original deck in place, directly behind the rear seats. This was done to preserve the mounting locations of the fuel lines and brake lines that run across there. Ultimately, the deck will be recovered with a sheet metal panel, probably aluminum, and my current thinking is to have it removable with dzus fittings.
Next on the list for the chassis: I'm going to attempt to clean it all up now with kleanz-easy solvent and scotch brite pads to remove the adhesive and other miscellaneous crap on the interior. I am still mulling over the idea of having the whole thing media-blasted, but not sure I want to spend the $700 or so on this chassis.
09-30-2009, 10:50 AM
#39
Former Vendor
Continued:
Originally Posted by ideola
Update: photo shoot from this weekend's efforts. Many thanks to Mr. Todd Quenneville, fabricator extraordinaire, courtesy of the Pub Racing team :-)
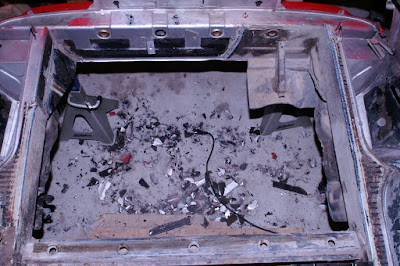
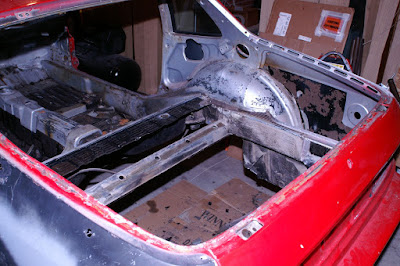
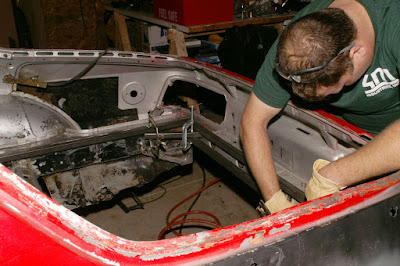
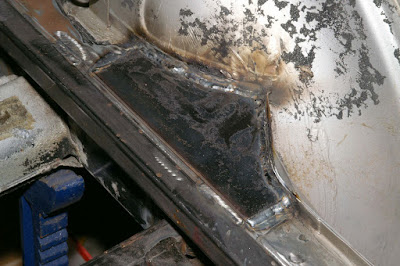
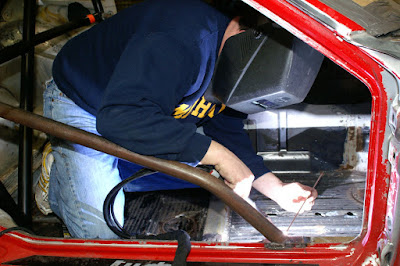
First we decided to complete remove ALL of the material in the rear hatch area. I was originally thinking about retaining the stock muffler mounting location and shield (rear LHS of the car), as well as the lip of the original deck sheet metal which is where all of the stock fuel and brake lines mount. Also, I had cut the main decking out with a recipricating saw, and Todd being the perfectionist he is, wasn't satisfied with leaving all the stock welds and stuff in place. So we got out the sawzall and the spot weld remover and had at it.
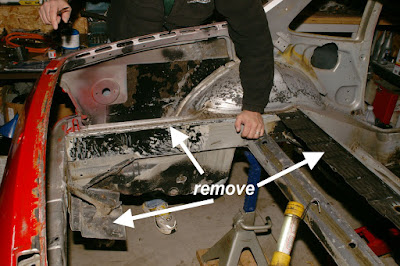
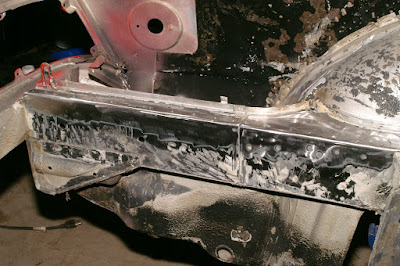
The next task was to clean up all the metal to prep for the welding. Todd in action with the flap wheel:

All clean and ready for fabrication to begin:

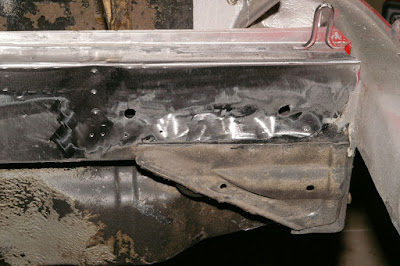

First we decided to complete remove ALL of the material in the rear hatch area. I was originally thinking about retaining the stock muffler mounting location and shield (rear LHS of the car), as well as the lip of the original deck sheet metal which is where all of the stock fuel and brake lines mount. Also, I had cut the main decking out with a recipricating saw, and Todd being the perfectionist he is, wasn't satisfied with leaving all the stock welds and stuff in place. So we got out the sawzall and the spot weld remover and had at it.
The next task was to clean up all the metal to prep for the welding. Todd in action with the flap wheel:
All clean and ready for fabrication to begin:
09-30-2009, 10:50 AM
#40
Former Vendor
VERY IMPORTANT NOTE: This fuel cell orientation will NOT work with a standard 944 Audi-based gearbox. My car will be running an LSD-equipped G31 (a.k.a. snail shell) which is oriented a bit differently. The Audi-based gearbox is situated several inches further back and will not allow the fuel cell to be oriented like this. In any event, here's how we constructed the fuel cell cage::
Originally Posted by ideola
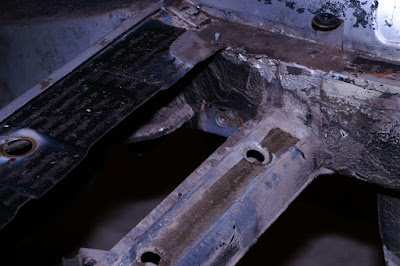
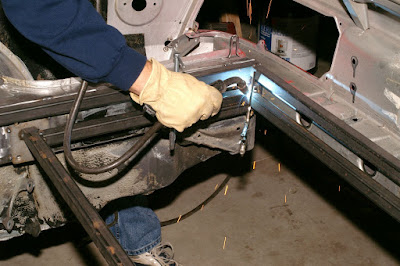
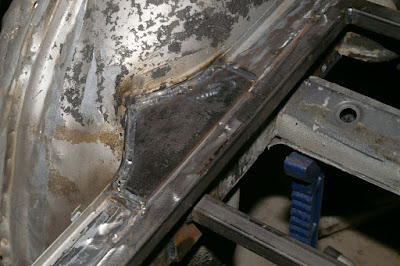
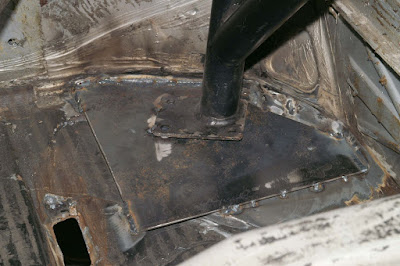
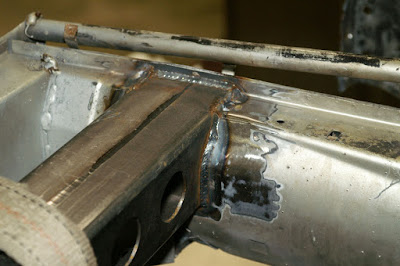
The sheet metal in the rear frame rails is actually surprisingly thin and flimsy. Since we had plenty of material (48 feet of 1" square tube stock), Todd suggested that we reinforce the frame rails all the way 'round, welding the tube flush with the surface. This will later provide mounting points for Dzus fittings which will be used to secure the aluminum bulkhead that will be installed upon completion. Also, we used some small metal plates, about 3" x 4" x 1/8" steel, as reinforcements on the framerail itself. These were mounted under the lateral reinforcements, and we used these to weld the main fuel cell cage supports.

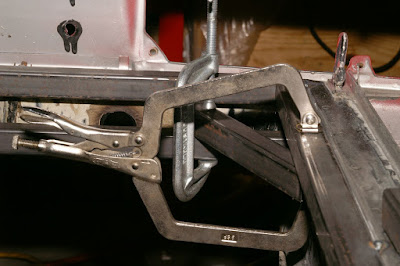

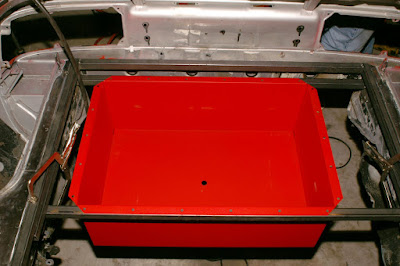
After the upper reinforcements were tacked in, the plates mounted to the frame rails, and the two lateral main supports were tacked in, we test fit the fuel cell box:

Time to make it permanent. Pull down your welding visor 8)
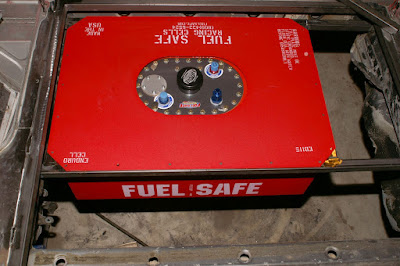
Next, the cross braces were added in, and time for another test fit of the cell:

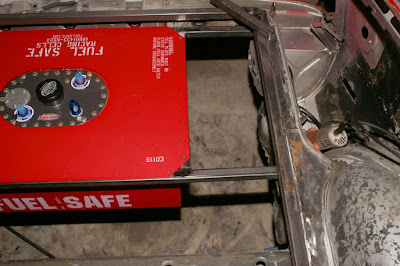
We decided not to mount the fuel cell exactly centered, which was my first inclination. However, after conferring with Todd, we decided to mount it as far to the RHS as possible. This accomplishes two primary goals: it will counter balance the driver's weight, and it leaves a perfect space on the LHS for mounting heat shields and a muffler for street use (if desired):
After the upper reinforcements were tacked in, the plates mounted to the frame rails, and the two lateral main supports were tacked in, we test fit the fuel cell box:
Time to make it permanent. Pull down your welding visor 8)
Next, the cross braces were added in, and time for another test fit of the cell:
We decided not to mount the fuel cell exactly centered, which was my first inclination. However, after conferring with Todd, we decided to mount it as far to the RHS as possible. This accomplishes two primary goals: it will counter balance the driver's weight, and it leaves a perfect space on the LHS for mounting heat shields and a muffler for street use (if desired):
09-30-2009, 10:51 AM
#41
Former Vendor
Continued:
Originally Posted by ideola
Day two: time to finish the under side of the cage. Visors down! 8)


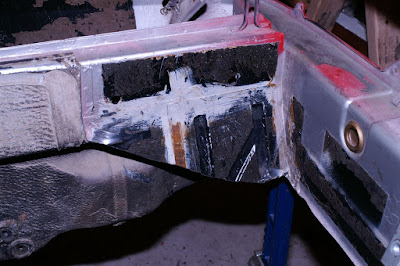
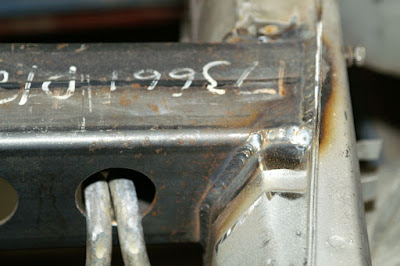
Closeups of the reinforcing plates on the frame rails:


Closeups of the reinforcing bars stitched onto the frame rails:


Finished Cage:


Closeups of the reinforcing plates on the frame rails:
Closeups of the reinforcing bars stitched onto the frame rails:
Finished Cage:
09-30-2009, 10:51 AM
#42
Former Vendor
Continued:
Originally Posted by ideola
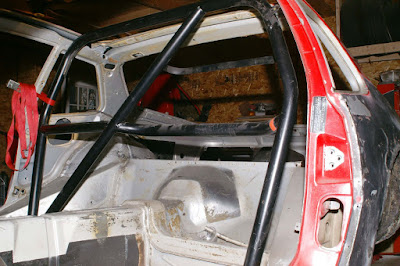
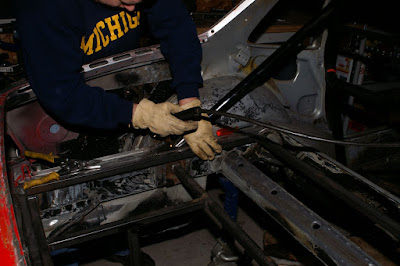
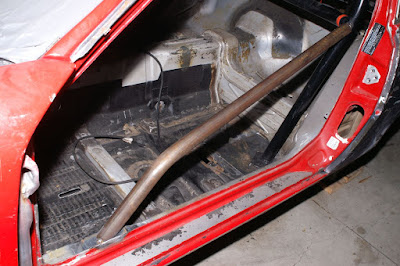
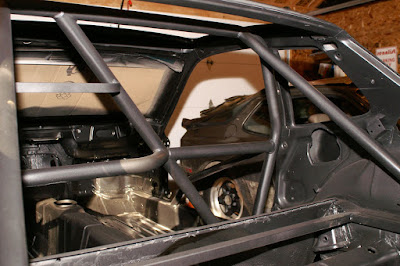
This weekend saw some progress on installing the roll bar and cage. For starters, we've decided NOT to use the barely adequate bolt-in approach intended by Autopower for this bar. In particular, the rear angular braces are intended to be bolted through the wheel well, which is not a very structurally sound area. So the first task was to remove the angled tubes from the main hoop:


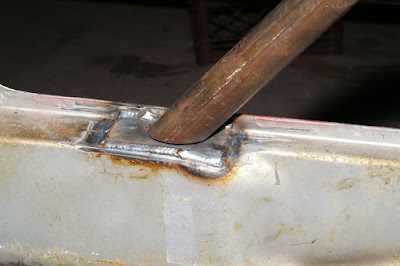
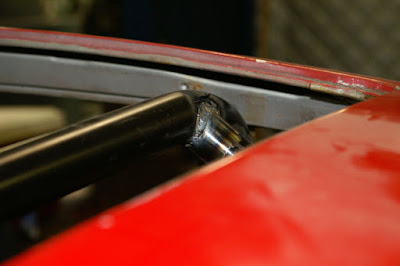
Next, we cut out and installed pads for the main feet of the roll bar. The material is 1/8" mild steel sheet metal, and I started with a 10"x10" square so as not to exceed the maximum size allowed by SCCA. Then, I had my buddy down the street cut them using a plasma cutter to match a cardboard template in order to snug down into the corners of the floor. For best fit, the driver side pad required us to remove the tube for the handbrake cable. The following sequence shows the final shape of the pad with the removed tube, the driver side set in place, and the passenger side tacked in place:


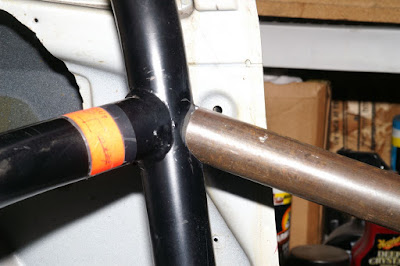
For the rear angular braces, which will be installed using extra tube stock, coming off the TOP of the roll bar (instead of the sides), we wanted to bring the back to the rear frame rails. The tubing I had wasn't quite long enough to reach to the complete rear of the car (a la the factory GTR style cages). However, we liked the flared area of the frame rail just behind the wheel wells because it is a bit wider and will allow the rear braces to sit flush on the rails without impeding the removable metal bulkhead that will be installed later. Using the same sheet metal stock, we cut and trimmed some pieces to fit in those locations and stitched them in:


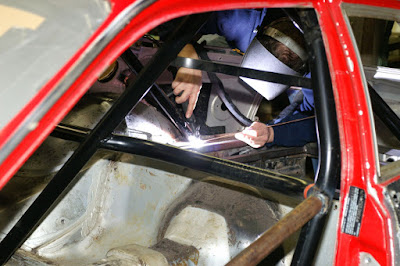
Next, we tacked in the bar itself:


The red ratchet strap is there to hold the bar steady for the next step, which will be to install the rear angle braces and the door bars. We ran into a slight equipment challenge re: coping the tubes, but hope to have that resolved tonight, and should be able to finish the installation this week. More photos to follow!
Next, we cut out and installed pads for the main feet of the roll bar. The material is 1/8" mild steel sheet metal, and I started with a 10"x10" square so as not to exceed the maximum size allowed by SCCA. Then, I had my buddy down the street cut them using a plasma cutter to match a cardboard template in order to snug down into the corners of the floor. For best fit, the driver side pad required us to remove the tube for the handbrake cable. The following sequence shows the final shape of the pad with the removed tube, the driver side set in place, and the passenger side tacked in place:
For the rear angular braces, which will be installed using extra tube stock, coming off the TOP of the roll bar (instead of the sides), we wanted to bring the back to the rear frame rails. The tubing I had wasn't quite long enough to reach to the complete rear of the car (a la the factory GTR style cages). However, we liked the flared area of the frame rail just behind the wheel wells because it is a bit wider and will allow the rear braces to sit flush on the rails without impeding the removable metal bulkhead that will be installed later. Using the same sheet metal stock, we cut and trimmed some pieces to fit in those locations and stitched them in:
Next, we tacked in the bar itself:
The red ratchet strap is there to hold the bar steady for the next step, which will be to install the rear angle braces and the door bars. We ran into a slight equipment challenge re: coping the tubes, but hope to have that resolved tonight, and should be able to finish the installation this week. More photos to follow!
09-30-2009, 10:52 AM
#43
Former Vendor
Continued:
Originally Posted by ideola
Last night, we finished tacking in the rear angle braces:


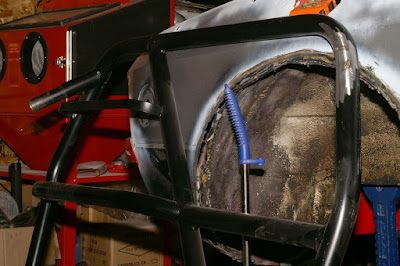
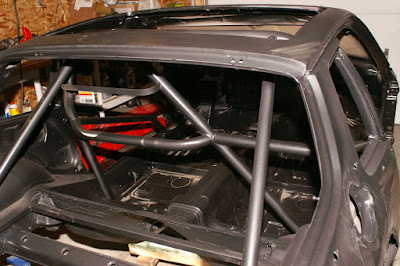
Now, it's time to tackle the rest of the "cage". Since this car will be seeing double duty on the track and the road, we had much conversation about whether or not to install the full halo and cage. Ultimately, we decided that it would be too risky to put a full cage into a car that will be seeing 60-70% street duty. Also, because my intent is not to race competitively, but primarily to do HPDE events, a bit more protection than just the roll bar was desired, but a full cage was not an absolute necessity. I also wanted to avoid doing anything that would require too much rework should the car ever need to be converted to a full cage.
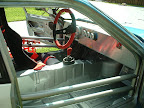
The compromise we settled on was to install door bars. Using the 1/8th inch steel plate, we cut out two pads that were 1-5/8th x 4 inches, which sit on the frame rail, inside the door, just forward of where the rails flare out to about 1-3/4". Using one pair of the door bars that came with the Autopower u-weld-it kit, we tacked in the door bars as depicted in the photos below. These will provide some side impact protection for track use, but will minimize the risk to unhelmeted occupants while driving on the street. The orientation of the bars also provides minimal obstruction for ingress and egress, and with proper padding will actually provide nice arm rests (since the doors will be completed gutted). This approach will allow a full cage to be added with a minimum of throw-away cost by simply cutting out the door bars and putting in a proper cage, should the need or desire ever arise.

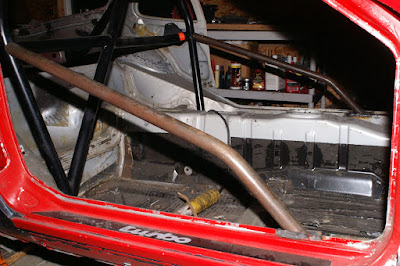

So, all the tack welding is completed. I'm pretty pleased with the results: simple, elegant, cost-effective, functional. Last step will be to put the finish welds on the "cage" and then it's off to the blaster :-)
Now, it's time to tackle the rest of the "cage". Since this car will be seeing double duty on the track and the road, we had much conversation about whether or not to install the full halo and cage. Ultimately, we decided that it would be too risky to put a full cage into a car that will be seeing 60-70% street duty. Also, because my intent is not to race competitively, but primarily to do HPDE events, a bit more protection than just the roll bar was desired, but a full cage was not an absolute necessity. I also wanted to avoid doing anything that would require too much rework should the car ever need to be converted to a full cage.
The compromise we settled on was to install door bars. Using the 1/8th inch steel plate, we cut out two pads that were 1-5/8th x 4 inches, which sit on the frame rail, inside the door, just forward of where the rails flare out to about 1-3/4". Using one pair of the door bars that came with the Autopower u-weld-it kit, we tacked in the door bars as depicted in the photos below. These will provide some side impact protection for track use, but will minimize the risk to unhelmeted occupants while driving on the street. The orientation of the bars also provides minimal obstruction for ingress and egress, and with proper padding will actually provide nice arm rests (since the doors will be completed gutted). This approach will allow a full cage to be added with a minimum of throw-away cost by simply cutting out the door bars and putting in a proper cage, should the need or desire ever arise.
So, all the tack welding is completed. I'm pretty pleased with the results: simple, elegant, cost-effective, functional. Last step will be to put the finish welds on the "cage" and then it's off to the blaster :-)
09-30-2009, 10:52 AM
#44
Former Vendor
Continued:
Originally Posted by ideola
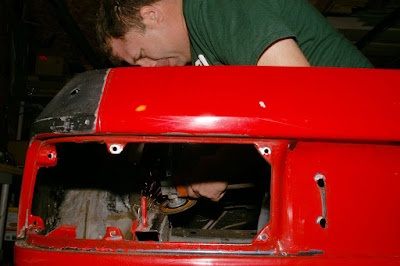
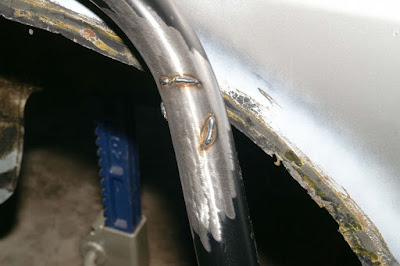
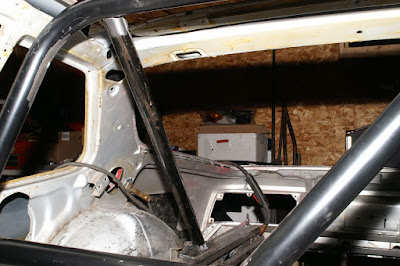
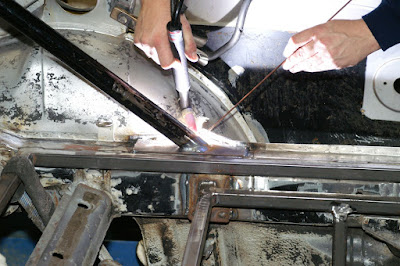
Here are closeups of Todd's fine work on the custom front upper cross member:


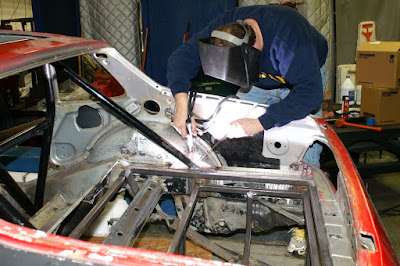
On Saturday, Chris let us borrow his tig welder at 4M Industries to finish stitching in the cage.
Loaded up and ready to go...
Arrived safely at 4M Industries' welding bay...

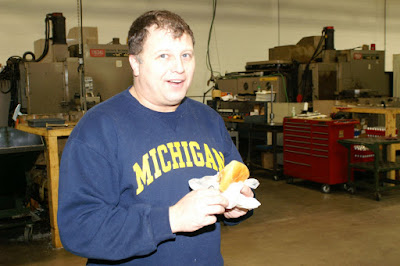
Enjoying the west side's best sliders from Bates for lunch
Passenger side door bar completed

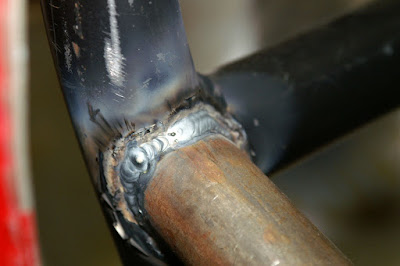
Driver side door bar completed
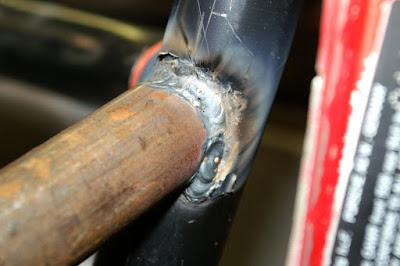
Stitching in the passenger side rear angle brace
Lower end of the driver side rear angle brace


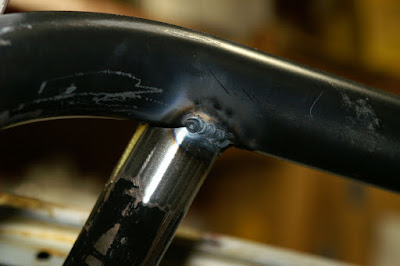
Upper ends of the rear angle braces

Todd at work


Hoping to get the blasters scheduled later this week or early next 8)
On Saturday, Chris let us borrow his tig welder at 4M Industries to finish stitching in the cage.
Loaded up and ready to go...
Arrived safely at 4M Industries' welding bay...
Enjoying the west side's best sliders from Bates for lunch
Passenger side door bar completed
Driver side door bar completed
Stitching in the passenger side rear angle brace
Lower end of the driver side rear angle brace
Upper ends of the rear angle braces
Todd at work
Hoping to get the blasters scheduled later this week or early next 8)
09-30-2009, 10:53 AM
#45
Former Vendor
Continued:
Originally Posted by ideola
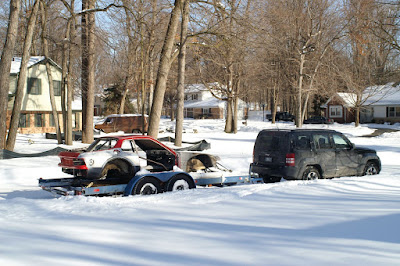
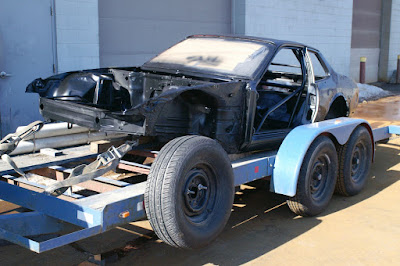
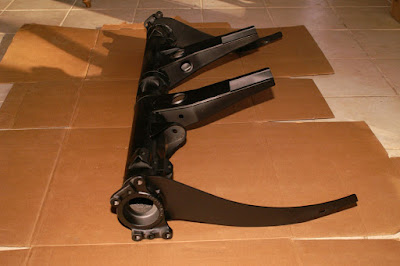
Picked up the car today from Richard Brothers Painting in Ann Arbor. They blasted the chassis, torsion carrier, and front cross member for me. Then shot the chassis with Sherwin Williams acid-etching primer, and zapped the torsion carrier and cross member with a zinc spray followed by some primer.
Loaded up and ready to haul 'er home:


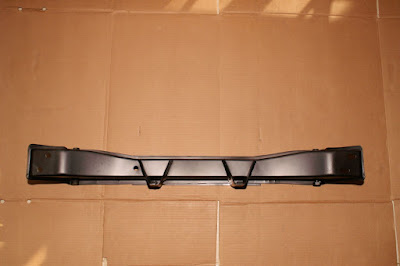
Front lower cross member:

Torsion carrier:

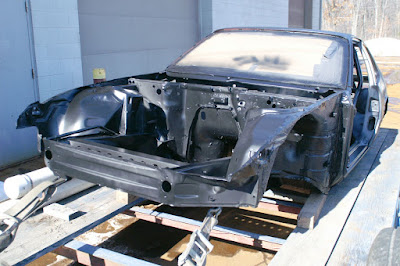
Roll cage:


Oooooh! Look at that engine bay!
Next step is going to be to rebuild the rear inner wheel wells...

...once those are done, it'll be time to start bolting the suspension bits back on.
Loaded up and ready to haul 'er home:
Front lower cross member:
Torsion carrier:
Roll cage:
Oooooh! Look at that engine bay!
Next step is going to be to rebuild the rear inner wheel wells...
...once those are done, it'll be time to start bolting the suspension bits back on.