944 Spec Race Car Build
 03-14-2008, 06:14 PM
#1
Rennlist Member
Thread Starter
Join Date: Dec 2007
Location: Dallas, TX
Posts: 69
Likes: 0
Received 0 Likes
on
0 Posts
So I've posted about this project on a couple other boards, but thought you guys might be interested in our little project. First Let me introduce myself, I'm BJ Meyer and my cohort in crime is Robert Phelan. The two of us make up Clown Shoe Motorsports based in St. Louis, MO. CSM's current project is a 944 Spec race car. The car will primarily be raced with NASA but is also being kept legal for ITS with the SCCA.
All the juicy details are below.
Enjoy,
-bj meyer
All the juicy details are below.
Enjoy,
-bj meyer
Last edited by loftygoals; 03-14-2008 at 06:32 PM.
 03-14-2008, 06:14 PM
#2
Rennlist Member
Thread Starter
Join Date: Dec 2007
Location: Dallas, TX
Posts: 69
Likes: 0
Received 0 Likes
on
0 Posts
In the winter/spring of 2007 we stripped the car, had the cage built, and did a few maintance things. The gallery for last years work can be found here:
http://www.clownshoemotorsports.com/...ies/944_Build/
http://www.clownshoemotorsports.com/...ies/944_Build/
03-14-2008, 06:14 PM
#3
Rennlist Member
Thread Starter
Join Date: Dec 2007
Location: Dallas, TX
Posts: 69
Likes: 0
Received 0 Likes
on
0 Posts
This year we wanted to really build out the car.
2008 To Do List
It has become quite a list. We are refreshing almost every single bushing, mount, and hose. The only things we aren't doing right now are motor mounts and transaxle mounts. The motor mounts are $300 and the ones that are there look good, so that is going to wait. We are going to need to replace the transaxle before the end of the season, so we'll do the mounts then.
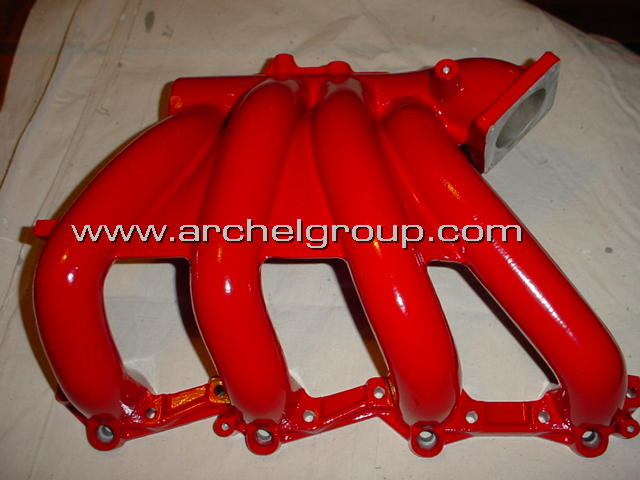
We are also making the car really nice. I know it's a race car, but why can't they look good? Besides the intake manifold, fuel rail, and throttle cam we are also have the strut housings, calipers, and tow hooks powder coated. I'll probably have a set of wheels powder coated as well. Fresh paint for the body will have to wait until next season, but I think I'll have some nice racing stripes cut for this year.
2008 To Do List
- Timing Belts
- Front Engine Seals
- Vacuum Hoses
- Plugs
- Ignition Wires
- 3 Wheel Bearings
- Mount Fire Extinguisher
- Install 17" Mirror
- Install Strut Brace
- Install Front Coil-overs
- Install Rear shocks
- Install Torsion Bars :evil:
- Install Front Tow Hook
- Install Rear Tow Hook
- Water Pump
- Air Filter
- Oil Cooler
- Gauges
- Reinstall Dash
- Reinstall Alternator
- Reinstall Intake Manifold
- Reinstall Fuel Rail
- Install Right Side Net
- Install Momo wheel and NRG Quick Release
- All Sorts of Derlin Bushings
- R888 tires
- Install headers
- Custom Exhaust
- Buy extra wheels
- Repair bent wheel
- Remount street tires
- Install Transponder
- Rebuild Calipers
- Install Stainless Steel Brake Line
- Coolant Flush
- Transaxle Fluids
- Oil Change
- New O2 Sensor
- Rebuild throttle body
- Replace driver's side rear trailing arm
- Replace Torsion Tube Mounts
- Refresh Battery Box
- Wire Cutoff Switch
- Rewire Accessory Plug
- Build New Gauge Cluster
- Apply Decals
- Install new Tie Rod Ends
- Install new control arms
- Install new ball Joints
- Install SFI roll bar padding
- Remove A/C Compressor
- Remove rotor baking plates
- Remove parking brakes
- Replace Oil Pump Drive Gear
- Rebuld Brake Calipers
- Install Stainless Steel Brake Lines
- Rod Bearings
- Oil Pan Gasket
- Oil Pan Baffle
It has become quite a list. We are refreshing almost every single bushing, mount, and hose. The only things we aren't doing right now are motor mounts and transaxle mounts. The motor mounts are $300 and the ones that are there look good, so that is going to wait. We are going to need to replace the transaxle before the end of the season, so we'll do the mounts then.
We are also making the car really nice. I know it's a race car, but why can't they look good? Besides the intake manifold, fuel rail, and throttle cam we are also have the strut housings, calipers, and tow hooks powder coated. I'll probably have a set of wheels powder coated as well. Fresh paint for the body will have to wait until next season, but I think I'll have some nice racing stripes cut for this year.
03-14-2008, 06:15 PM
#4
Rennlist Member
Thread Starter
Join Date: Dec 2007
Location: Dallas, TX
Posts: 69
Likes: 0
Received 0 Likes
on
0 Posts
Now the good stuff--pics. With the help of some friends, we've made some big strides. The original 25 year old suspension has been yanked out, awaiting replacement, and the interior is looking a lot more racy these days:
Ever wondered what $3000 in new Porsche parts look like spread around BJ's office floor? Wonder no more:
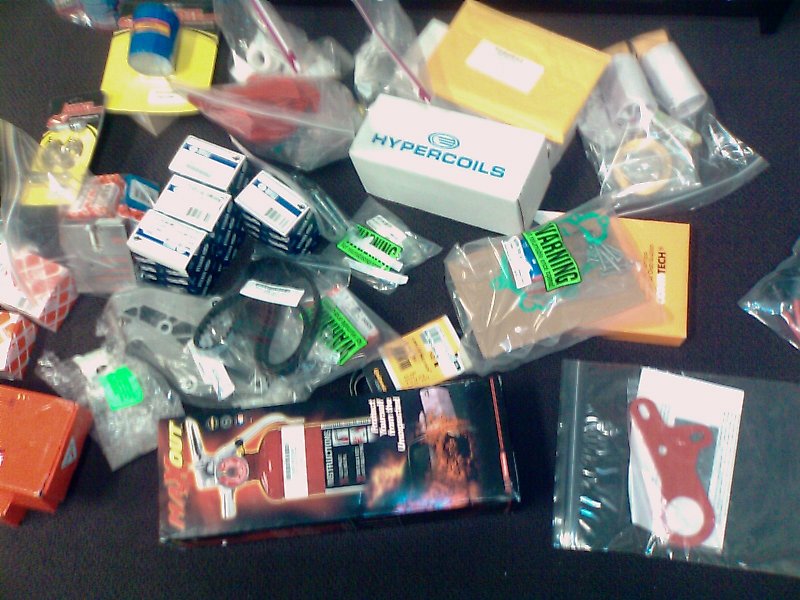
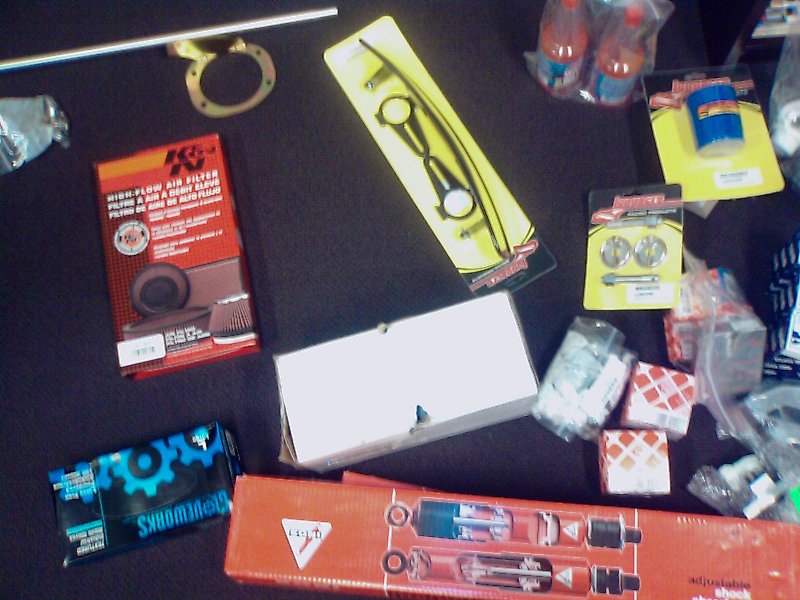
Sorry for the blurry cell phone pics
The front corner laid bare thanks to the efforts of John Hoffner, Bob Mondschein, and the beotch barr.

What the heck do we do with all this stuff?

I have some ideas...

Time to start on the rear.

One well-bent trailing arm? CHECK!

Nope, we're not done yet!

This still had to come out:

The giant bar (torsion tube) in the last picture is what we usually use to hold the car with jack stands. In its absence some creativity had to be applied to reach the factory lift points.

Ever wondered what $3000 in new Porsche parts look like spread around BJ's office floor? Wonder no more:
Sorry for the blurry cell phone pics
The front corner laid bare thanks to the efforts of John Hoffner, Bob Mondschein, and the beotch barr.
What the heck do we do with all this stuff?
I have some ideas...
Time to start on the rear.
One well-bent trailing arm? CHECK!
Nope, we're not done yet!
This still had to come out:
The giant bar (torsion tube) in the last picture is what we usually use to hold the car with jack stands. In its absence some creativity had to be applied to reach the factory lift points.
03-14-2008, 06:15 PM
#5
Rennlist Member
Thread Starter
Join Date: Dec 2007
Location: Dallas, TX
Posts: 69
Likes: 0
Received 0 Likes
on
0 Posts
Right, onto the interior.
Ok, let's start from scratch.

New wires run from the cut-off switch to the battery.

I follow the light

The original cluster with its funky down-swinging tach and yellow indicators

IT'S ALIVE! Frankencluster, made up of 924 and 924S gauges (the tach may be from something else too), in all its easy to see, UP-swinging-tach glory.

Lookin' mighty race-car like in here

Ok, let's start from scratch.
New wires run from the cut-off switch to the battery.
I follow the light
The original cluster with its funky down-swinging tach and yellow indicators
IT'S ALIVE! Frankencluster, made up of 924 and 924S gauges (the tach may be from something else too), in all its easy to see, UP-swinging-tach glory.
Lookin' mighty race-car like in here
03-14-2008, 06:16 PM
#6
Rennlist Member
Thread Starter
Join Date: Dec 2007
Location: Dallas, TX
Posts: 69
Likes: 0
Received 0 Likes
on
0 Posts
More wrenching fun:
Disassembling the front timing gear was a bit more troublesome than expected.
For example, below is a very very specialized kind of spring. It's a spring cast of pure Porsche engine block. Prior to its life as a spring, this this little chunk of metal masqueraded as the in-block threads securing a water-pump bolt. Unfortunately the threads came out with the bolt, leaving a nice smooth hole in the block

Much drilling, grinding and tapping later all the bolts were sorted, but the poor old flex-shaft rotary tool that had been handed down from Rob's grandfather was a little worse for wear. Anyone know where to find a flex-shaft for a rotary tool made in the 60? It's got a foot pedal and everything:

After the stress of drilling and tapping threads into an engine block, it was time for Rob to do a little horsing around:

Right, back to the important stuff
After much seized bolt pulling, thread cutting, and grime cleaning, we finally had the front of the engine uncovered, exposing the crank and both balance shaft seals. Too bad the cam pulley won't be coming off anytime soon:

These seals and the water pump gasket were the cause of a significant leak last season, and since we were there, we decided to drop in a new water pump and t-stat. These things are massive! During disassembly we were wondering how we'd get the rotating bit out to be replaced, only to discover that the whole housing WAS the water pump!

With new seals and races for all the rotating bits (except the cam, I curse the guy who put that cheese-head bolt there!) the 944 turbo water pump was put in place. This time with liberal gasket sealer to make sure we didn't have any more leaks.

A good rattle-can will do wonders for your old plastic engine components, especially if you want to be able to easily spot new leaks!

After many a tense moment removing 25 year old lock-tighted nuts from the block and cutting new holes, all the new covers, rollers, and idler pulleys are now happily in their proper place
And just look how nice and shiny it all is (except the cam pulley... F*#$%^ cheese-heads!!)

It may be a race car, but we thought we pretty up some stuff with some powdercoating:

Disassembling the front timing gear was a bit more troublesome than expected.
For example, below is a very very specialized kind of spring. It's a spring cast of pure Porsche engine block. Prior to its life as a spring, this this little chunk of metal masqueraded as the in-block threads securing a water-pump bolt. Unfortunately the threads came out with the bolt, leaving a nice smooth hole in the block
Much drilling, grinding and tapping later all the bolts were sorted, but the poor old flex-shaft rotary tool that had been handed down from Rob's grandfather was a little worse for wear. Anyone know where to find a flex-shaft for a rotary tool made in the 60? It's got a foot pedal and everything:
After the stress of drilling and tapping threads into an engine block, it was time for Rob to do a little horsing around:
Right, back to the important stuff
After much seized bolt pulling, thread cutting, and grime cleaning, we finally had the front of the engine uncovered, exposing the crank and both balance shaft seals. Too bad the cam pulley won't be coming off anytime soon:
These seals and the water pump gasket were the cause of a significant leak last season, and since we were there, we decided to drop in a new water pump and t-stat. These things are massive! During disassembly we were wondering how we'd get the rotating bit out to be replaced, only to discover that the whole housing WAS the water pump!
With new seals and races for all the rotating bits (except the cam, I curse the guy who put that cheese-head bolt there!) the 944 turbo water pump was put in place. This time with liberal gasket sealer to make sure we didn't have any more leaks.
A good rattle-can will do wonders for your old plastic engine components, especially if you want to be able to easily spot new leaks!
After many a tense moment removing 25 year old lock-tighted nuts from the block and cutting new holes, all the new covers, rollers, and idler pulleys are now happily in their proper place
And just look how nice and shiny it all is (except the cam pulley... F*#$%^ cheese-heads!!)
It may be a race car, but we thought we pretty up some stuff with some powdercoating:
03-14-2008, 06:16 PM
#7
Rennlist Member
Thread Starter
Join Date: Dec 2007
Location: Dallas, TX
Posts: 69
Likes: 0
Received 0 Likes
on
0 Posts
Next up?
Intake manifold, throttle body, fuel rail, etc all get to go back on, and then it's on to putting the suspension and brakes back together!
-bj
Intake manifold, throttle body, fuel rail, etc all get to go back on, and then it's on to putting the suspension and brakes back together!
-bj
Trending Topics
 03-15-2008, 03:12 PM
#11
Rennlist Member
Thread Starter
Join Date: Dec 2007
Location: Dallas, TX
Posts: 69
Likes: 0
Received 0 Likes
on
0 Posts
03-15-2008, 04:02 PM
#12
Three Wheelin'
Join Date: Sep 2005
Location: Tulsa Oklahoma
Posts: 1,965
Likes: 0
Received 0 Likes
on
0 Posts