Aigbag wheel gauge pod
 01-22-2008, 06:54 PM
#1
Nordschleife Master
Thread Starter
I mocked up a template for a bracket similar to what 2bridges made but for an airbag wheel. You can see his original post with plenty of pictures here..
https://rennlist.com/forums/944-turbo-and-turbo-s-forum/360796-gauge-mount-steel.html
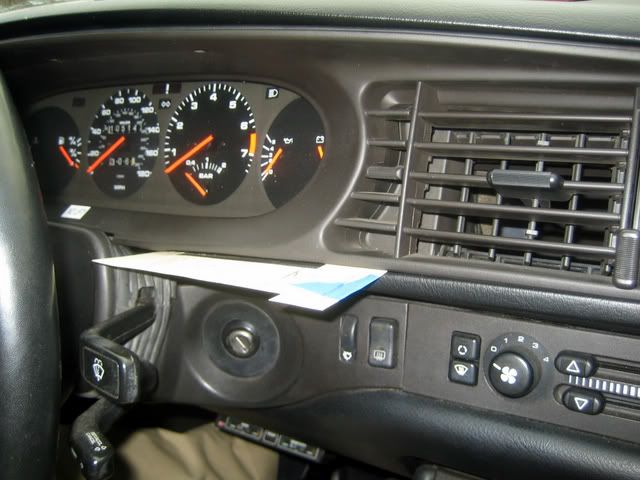
After playing around with positioning of a VDO boost and Innovate XD-16 AFR gauge, there is no real way to get the gauges mounted above the column without completley covering the lower half of the water, fuel, oil, volt gauge. I was going to go with it anyway, but it also completley covers the low oil warning light..etc. And after some thought decided to try a different solution. The backside of the airbag wheel i would just guesstimate is almost twice the width of the non airbag wheel and it really hinders the ability to tuck the gauges in close to the column as 2bridges did. It sucks as i love the way it looks!
Anyhow i just made up a quick template for a mount which will allow two gauges to be mounted on the right side of the main gauge pod. One will sit just slightly to the left of the trip odometer reset button and the other will partially cover the bottom half of the voltmeter (Which i can live with). The bracket mounts behind the oval plastic trim and slips inbetween that and the lower edge of the dashboard.
This should give you a very rough idea of what i mean. This template was my original mock up so its very rough and not even or perfectly to size. I just traced out a more finalized version which ill test fit when its not 15 degrees outside . Im going to cut the mount out of a sheet of 10ga steel. The bends are really very simple and can be done with a vice. My only concern right now is vibration, but i dont think it will be a problem.
I bought two standalone pods made by Autometer which will mount directly to the sheet metal. Routing of the wiring shouldnt be a problem. I made the template so there is a slight gap inbetween the dash and the mount, so i can route the wiring behind the bracket and inbetween the trim pieces.
Any suggestions or comments are welcome as this is still work in progress. I hope to have a completed metal mount cut to size and fitted this weekend.
And yes i know, i could just do an a-pillar pod. But i hate the way those look and do not like the obstruction.
https://rennlist.com/forums/944-turbo-and-turbo-s-forum/360796-gauge-mount-steel.html
After playing around with positioning of a VDO boost and Innovate XD-16 AFR gauge, there is no real way to get the gauges mounted above the column without completley covering the lower half of the water, fuel, oil, volt gauge. I was going to go with it anyway, but it also completley covers the low oil warning light..etc. And after some thought decided to try a different solution. The backside of the airbag wheel i would just guesstimate is almost twice the width of the non airbag wheel and it really hinders the ability to tuck the gauges in close to the column as 2bridges did. It sucks as i love the way it looks!
Anyhow i just made up a quick template for a mount which will allow two gauges to be mounted on the right side of the main gauge pod. One will sit just slightly to the left of the trip odometer reset button and the other will partially cover the bottom half of the voltmeter (Which i can live with). The bracket mounts behind the oval plastic trim and slips inbetween that and the lower edge of the dashboard.
This should give you a very rough idea of what i mean. This template was my original mock up so its very rough and not even or perfectly to size. I just traced out a more finalized version which ill test fit when its not 15 degrees outside
. Im going to cut the mount out of a sheet of 10ga steel. The bends are really very simple and can be done with a vice. My only concern right now is vibration, but i dont think it will be a problem.I bought two standalone pods made by Autometer which will mount directly to the sheet metal. Routing of the wiring shouldnt be a problem. I made the template so there is a slight gap inbetween the dash and the mount, so i can route the wiring behind the bracket and inbetween the trim pieces.
Any suggestions or comments are welcome as this is still work in progress. I hope to have a completed metal mount cut to size and fitted this weekend.
And yes i know, i could just do an a-pillar pod. But i hate the way those look and do not like the obstruction.
Last edited by Techno Duck; 02-17-2008 at 08:59 PM.
 01-22-2008, 07:31 PM
#2
Drifting
Jon, if you want I can hook you up.
I'm not so sure steel would look good (to me), but if you were wanting a nicely done, nicely cut piece I have access to a laser engraver at school and can cut through up to 1/4" plexiglass or lexan. I think it would be much nicer, and I can do rounded corners perfectly and other neat tid bits (basically anything you can imagine). All I would need is a 1:1 copy of the piece you need cut out, and I could get it cut asap and sent to you.
Let me know.
01-22-2008, 08:02 PM
#3
Nordschleife Master
Thread Starter
Cory, i was originally going to use a sheet of lexan but i feel like any piece that would be thin enough to slip inbetween the trim parts will be to flimsy to support the weight from the gauges. I was going to powder coat the bracket flat black so it blends in.
 01-22-2008, 08:38 PM
#5
Nordschleife Master
Thread Starter
Darwin, plenty of clearance between the gauge face and the wheel. A good 2+ inches of space. Its well behind the wiper stalk.
Was holding out on changing the avatar when i get a good shot of the 951 on the track..but i guess ill just change it now.
Was holding out on changing the avatar when i get a good shot of the 951 on the track..but i guess ill just change it now
.
01-22-2008, 10:04 PM
#7
Nordschleife Master
Thread Starter
It attaches to two of the speed nuts that secure the gauge bezel to the dashboard.
I thought about ditching the airbag wheel, but decided to keep it for insurance purposes. I know, its a 20 year old explosive in my face..but the last thing i need is my insurance company to drop me in the event something does happen.
I thought about ditching the airbag wheel, but decided to keep it for insurance purposes. I know, its a 20 year old explosive in my face..but the last thing i need is my insurance company to drop me in the event something does happen.
Trending Topics
01-22-2008, 10:15 PM
#9
Rennlist Member
Join Date: May 2001
Location: North Of Chicago
Posts: 1,992
Likes: 0
Received 0 Likes
on
0 Posts
Understood. Have you given thought to getting a replacment bezel and plex, then creating a mounting that recessed the guages into the bezel to compensate for the thicker airbag wheel? If you really love that look, why not adapt it to your car? Probably too much work...
Whatever you decide post pix when you are done!
Cheers,
Whatever you decide post pix when you are done!
Cheers,
02-04-2008, 01:28 AM
#10
Nordschleife Master
Thread Starter
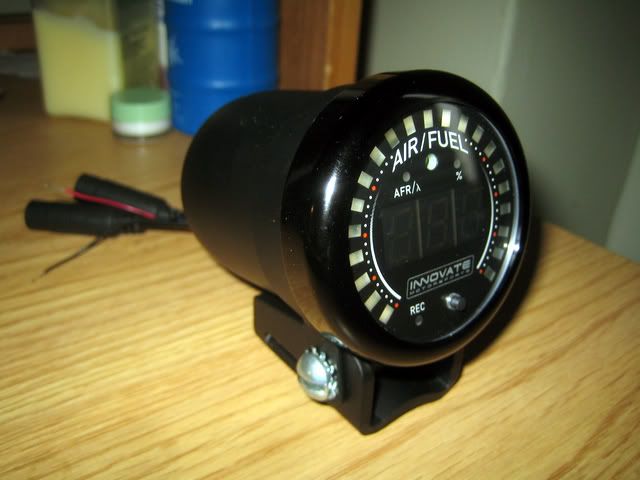
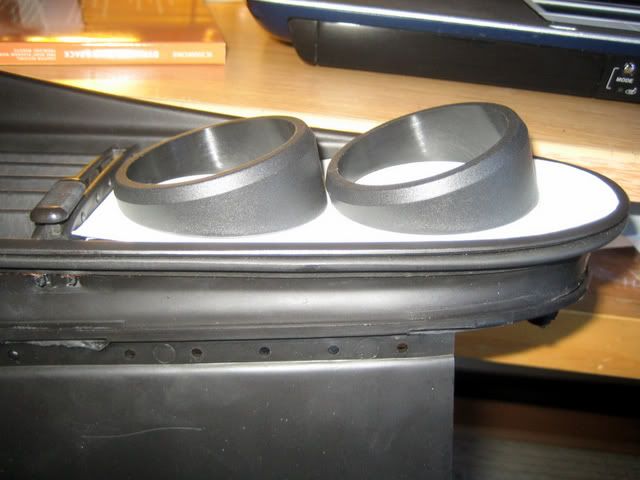
I decided on a different approach for a gauge mount. My friend was trying to convince me to take out the center vents in favor of a gauge pod. I didnt want to do this because the car is my daily driver and im sure id freeze to death with only two of the dash vents. I did like the idea of this and after thinking long and hard, i decided to remove the right most vent and retain the left side. After some sizing up with an old oil pressure gauge, i found i would have plenty of space to mount the boost gauge and AFR i had wanted to do. This will only work if you use a very shallow depth gauge for the right most position, such as the XD-16 from Innovate. You can see what i mean in the following pictures.
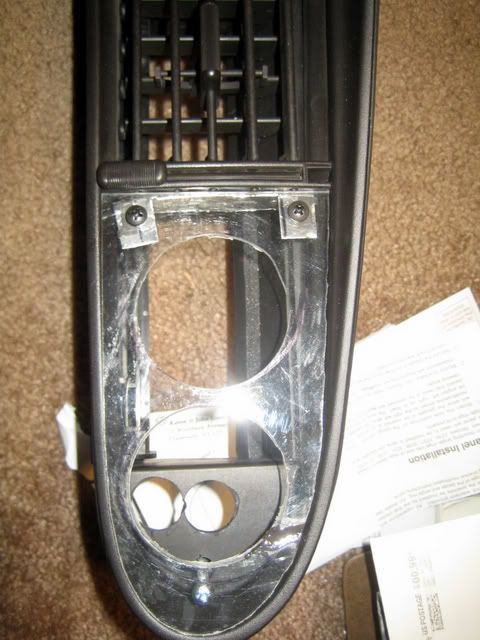
Anyhow i had a spare bezel so i had no problem diving right in with cutting and experimenting on. I removed the right most vent and cut out / grinded down the faux vents to the right of that.
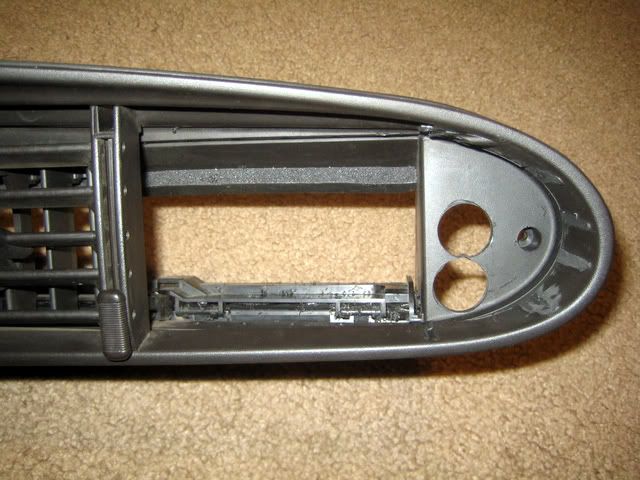
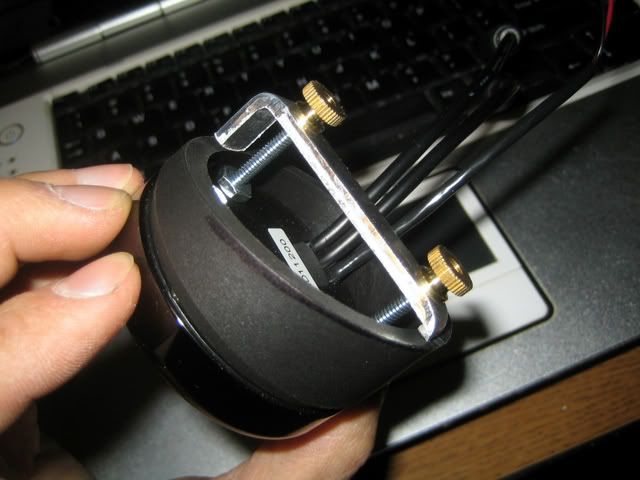
Using a hole saw, i cut a hole in the back to make it possible to route the wiring for the XD16 gauge. I made the first hole way too high up so had to make a 2nd one a bit lower. Measure twice, cut once..... As you can see the right most spot is very shallow, so a typical gauge will not fit in this spot. However the XD16 is less than an inch thick and fits perfectly. Below you can see the XD16 gauge with the angle rings from Autometer. You have to trim down the included brackets, which is very simple to do.
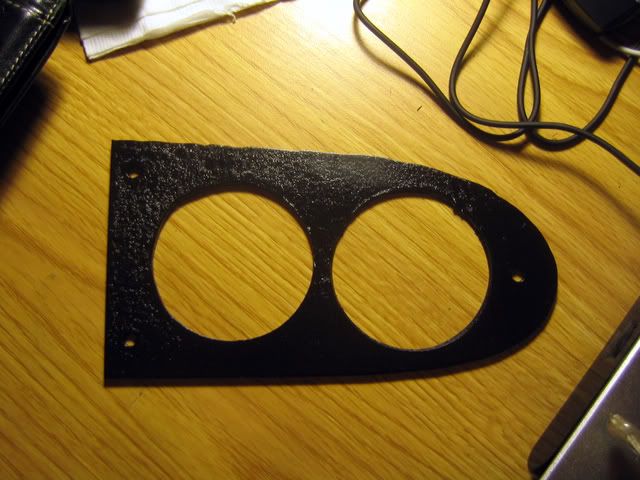
Here you can see the basic idea of what i wanted to do. This is the original template i made out of some heavy duty paper.
I transfered the template to a sheet of lexan and cut it out with a router bit on my dremel. The edges are a little rough, but are not noticeable once mounted. A scroll saw would probably be better, but i didnt have one available. I used a 2 and 1/8 hole saw to cut the holes for the gauge rings aswell. I made a very simple bracket out of a sheet of aluminum and epoxied it to the center section of the vents. I used speed nuts on the tabs so the plate will have something to screw into. The other end screws into the original mounting hole and sandwiches the gauge plate against the surround.
Using a Krylon wrinkle coat i painted the panel to try and get a similar to stock finish. Its a little bit to glossy, so i am going to hit it with some flat black..
I havent had time to mount everything up yet. Its still work in progress. I need to extend all of the wiring for the boost gauge and AFR so i can hook it up at my when i have more time to dig under the dash. I also need to figure out the best way to route the vacuum line for the boost gauge. I am thinking simply drilling a hole in the side of the shroud will work fine. Depending on the weather i hope to have the gauges mounted and the wiring figured out by mid week..and hopefully by the weekend have everything working as it should.
The only downside i really saw about having gauges here is heat. I was going to put in a block off plate for the right most section only, but there is not enough space with the boost gauge's fittings. I decided to just leave it as is. I dont think the heater will cause any problems with the gauge's operation, and the wideband is far enough away from direct heat exposure i dont think it will be effected. This is just a one of prototype right now. I may go back and fix all of my little mistakes..and maybe find a scroll saw i can use to cut out the lexan plates. To simplify things also, i will probably goto the local stereo place and buy a sheet of textured black plastic.
Anyhow i had a spare bezel so i had no problem diving right in with cutting and experimenting on. I removed the right most vent and cut out / grinded down the faux vents to the right of that.
Using a hole saw, i cut a hole in the back to make it possible to route the wiring for the XD16 gauge. I made the first hole way too high up so had to make a 2nd one a bit lower. Measure twice, cut once....
. As you can see the right most spot is very shallow, so a typical gauge will not fit in this spot. However the XD16 is less than an inch thick and fits perfectly. Below you can see the XD16 gauge with the angle rings from Autometer. You have to trim down the included brackets, which is very simple to do.Here you can see the basic idea of what i wanted to do. This is the original template i made out of some heavy duty paper.
I transfered the template to a sheet of lexan and cut it out with a router bit on my dremel. The edges are a little rough, but are not noticeable once mounted. A scroll saw would probably be better, but i didnt have one available. I used a 2 and 1/8 hole saw to cut the holes for the gauge rings aswell. I made a very simple bracket out of a sheet of aluminum and epoxied it to the center section of the vents. I used speed nuts on the tabs so the plate will have something to screw into. The other end screws into the original mounting hole and sandwiches the gauge plate against the surround.
Using a Krylon wrinkle coat i painted the panel to try and get a similar to stock finish. Its a little bit to glossy, so i am going to hit it with some flat black..
I havent had time to mount everything up yet. Its still work in progress. I need to extend all of the wiring for the boost gauge and AFR so i can hook it up at my when i have more time to dig under the dash. I also need to figure out the best way to route the vacuum line for the boost gauge. I am thinking simply drilling a hole in the side of the shroud will work fine. Depending on the weather i hope to have the gauges mounted and the wiring figured out by mid week..and hopefully by the weekend have everything working as it should.
The only downside i really saw about having gauges here is heat. I was going to put in a block off plate for the right most section only, but there is not enough space with the boost gauge's fittings. I decided to just leave it as is. I dont think the heater will cause any problems with the gauge's operation, and the wideband is far enough away from direct heat exposure i dont think it will be effected. This is just a one of prototype right now. I may go back and fix all of my little mistakes..and maybe find a scroll saw i can use to cut out the lexan plates. To simplify things also, i will probably goto the local stereo place and buy a sheet of textured black plastic.
02-04-2008, 12:10 PM
#13
Race Director

Hey Jon, that looks awesome. Would you mind keeping a copy of the template or making another at some point? Did you add new french fogs or ? It looks good!
02-04-2008, 04:04 PM
#14
Nordschleife Master
Great idea! Those angle rings will make it look much better. My xd-16 is in a gauge pod but I like this idea much better.
Btw, nice satellite! I have what I think is the same one and hate it. One broken speaker, one key, and two motherboards ($1,000ea thanks warranty) since it was new.
Btw, nice satellite! I have what I think is the same one and hate it. One broken speaker, one key, and two motherboards ($1,000ea thanks warranty) since it was new.
02-04-2008, 04:57 PM
#15
I used an Auto Meter AFR gauge mounted in a pillar pod originally made for a Mustang. Had to do a LOT of trial and error cutting on the bottom and back edges of the pod to get it to fit around the dash snugly. Two screws into the pillar hold it in place. I'd post pics but I'm out of town without my ride.